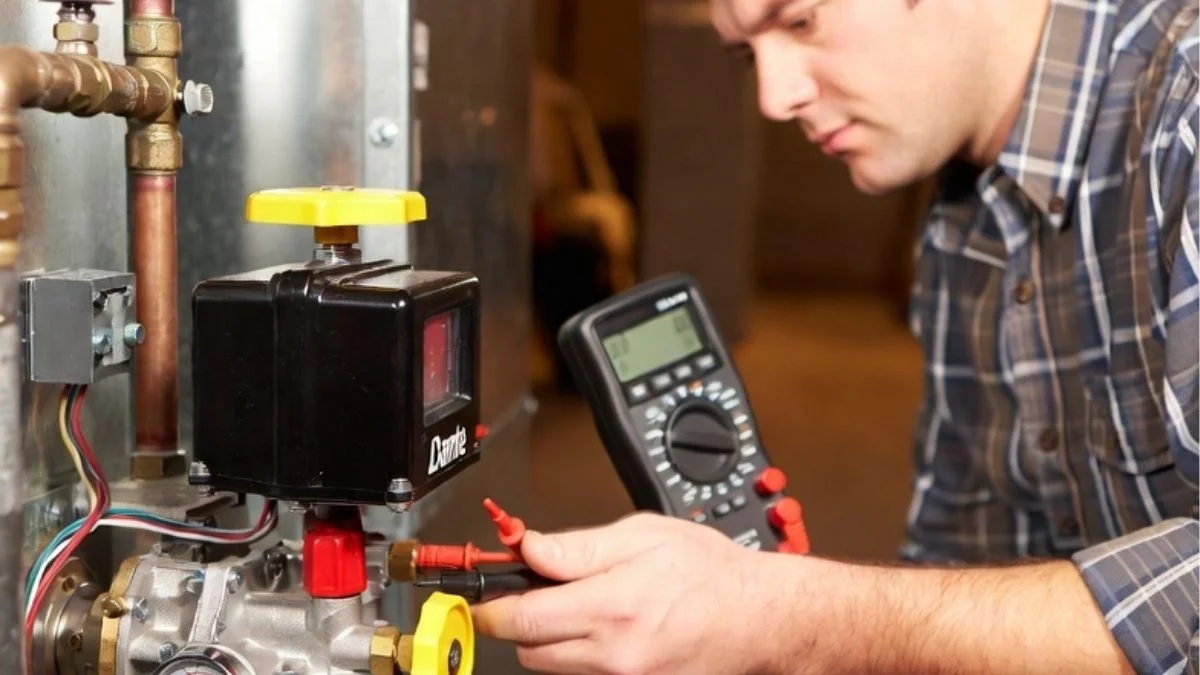
If your furnace, boiler, or water heater has suddenly stopped working, a faulty Dante gas valve could be the culprit. A malfunctioning gas valve means no heat, no hot water, and — if left unchecked — a potential safety hazard for your entire household.
The good news? Not every gas valve problem requires an expensive service call. With the right tools, a clear understanding of how the valve works, and a firm commitment to safety, many homeowners can diagnose and repair a Dante gas valve on their own.
This step-by-step guide covers everything you need to know — from spotting the early warning signs to safely completing the repair and testing the appliance afterward.
Common Signs Your Dante Gas Valve Needs Repair
Catching a gas valve problem early makes the repair far simpler and safer. Here are the most common symptoms homeowners report before their heating system gives out completely.
Your Appliance Won’t Ignite or Stay Lit
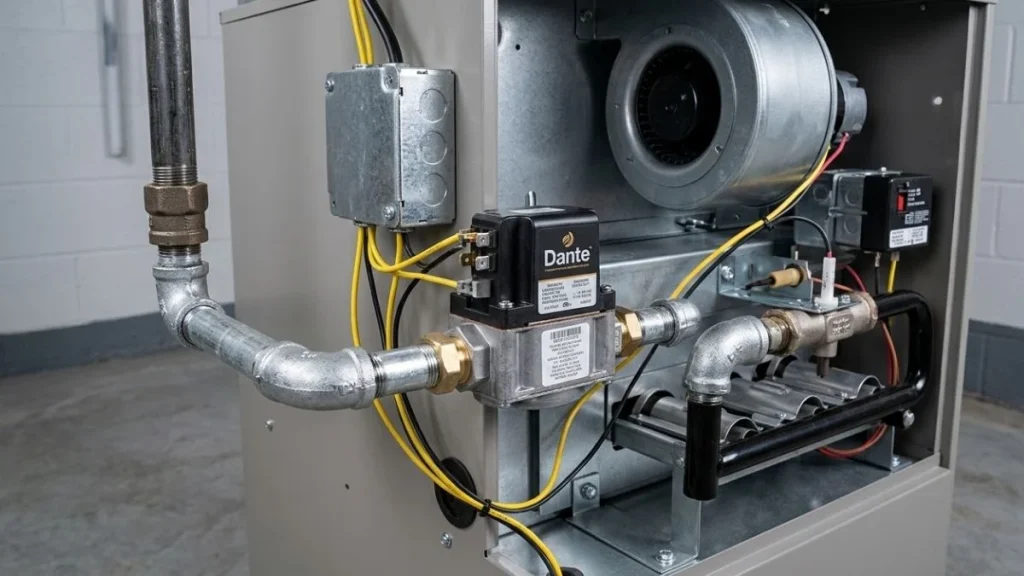
This is the most obvious sign. If your furnace or boiler clicks through its ignition sequence but the burner never lights — or it lights briefly and then shuts off — the gas valve is one of the first things to suspect. A pilot light that keeps going out is another strong indicator, especially if the thermocouple tests fine.
Unusual Smells or Sounds Near the Valve
A faint smell of gas near the appliance should never be ignored. While a slight odor during startup can be normal in small amounts, a persistent smell points to a leak at or near the valve. You may also hear humming, buzzing, or clicking sounds coming directly from the valve body — these suggest the solenoid coils are struggling to energize properly.
Safety Warning: If you smell strong gas at any point, do not attempt any repairs. Leave the home immediately, avoid switching any lights or electronics on or off, and call your gas utility company from outside.
Error Codes or No Response from the Thermostat
Modern heating systems display error codes when a component fails. Codes related to “valve fault,” “ignition failure,” or “gas pressure” often trace back to the valve. If your thermostat is clearly calling for heat but the appliance isn’t responding at all, the valve may not be receiving or acting on the voltage signal it needs.
Visible Physical Damage
Inspect the valve body for rust, corrosion, cracked housing, or burnt wiring terminals. These are signs of age and wear that often can’t be repaired — they typically mean it’s time for a full valve replacement.
What You Must Do Before Any Gas Valve Repair

Working on a gas valve is not the same as fixing a leaky faucet. Gas is flammable and, in an enclosed space, potentially explosive. Following these safety steps is non-negotiable before you touch anything.
- Shut off the gas supply at the inline shutoff valve closest to the appliance
- Disconnect power to the appliance at the circuit breaker
- Ventilate the work area by opening windows and doors
- Wait at least 5 minutes after shutting off gas before opening any connections
- Keep a fire extinguisher nearby rated for gas/chemical fires
- Never use an open flame to check for leaks — always use leak detection solution
Tools and Materials You’ll Need
| Tool / Material | Purpose |
| Multimeter | Test voltage and coil resistance |
| Pipe wrench | Disconnect gas line fittings |
| Gas leak detector spray | Check for leaks after reassembly |
| Teflon tape (gas-rated) | Seal threaded gas fittings |
| Flathead & Phillips screwdrivers | Access panels and terminal connections |
| Needle-nose pliers | Handle wiring connectors |
| Replacement coil kit or valve | The actual repair part |
When to Call a Licensed Professional
Some repairs are genuinely beyond DIY territory. Call a licensed HVAC technician if:
- The valve body itself is cracked or internally damaged
- You detect an active gas leak that doesn’t stop after tightening fittings
- Your local code requires licensed gas work (many states do)
- You’re uncomfortable working around gas lines at any point
There’s no shame in calling a pro. Gas is one area where being cautious is always the right call.
How to Diagnose a Faulty Dante Gas Valve

Before you buy any parts, proper diagnosis will confirm that the valve is actually the problem — not the thermocouple, control board, or wiring.
Verify the Gas Supply
Check that the shutoff valve feeding your appliance is fully open (handle parallel to the pipe). Then check if other gas appliances in your home — stove, dryer — are working normally. If they aren’t, the problem is with your supply line, not your Dante valve.
Test the Thermocouple or Thermopile
A bad thermocouple is one of the most common reasons a gas valve appears to fail. The thermocouple generates a small millivolt signal that keeps the valve open during operation. If it’s weak or dead, the valve closes as a safety measure. Test it with your multimeter — a healthy thermocouple should produce 25–30 millivolts. Anything below 20mV means the thermocouple needs replacing before you do anything else.
Test the Solenoid Coils
Set your multimeter to resistance (ohms) mode and probe the two terminals on each solenoid coil of the Dante valve. A functioning coil typically reads between 20–100 ohms depending on the model. An open circuit (infinite resistance) or a short circuit (zero ohms) confirms a failed coil. This is the most common repairable fault on a Dante gas valve.
Check for Voltage at the Valve
With the system calling for heat, use your multimeter to check whether the correct voltage (typically 24V AC) is reaching the valve terminals. If voltage is present but the valve still won’t open and the coils test fine, the valve body itself has failed internally and needs full replacement.
Perform a Gas Leak Test
Apply leak detection solution (or soapy water) around all fittings connected to the valve. Bubbles forming at any point means there’s an active leak. Do not proceed with any repair until all leaks are identified and addressed.
Dante Gas Valve Repair — Step-by-Step Guide
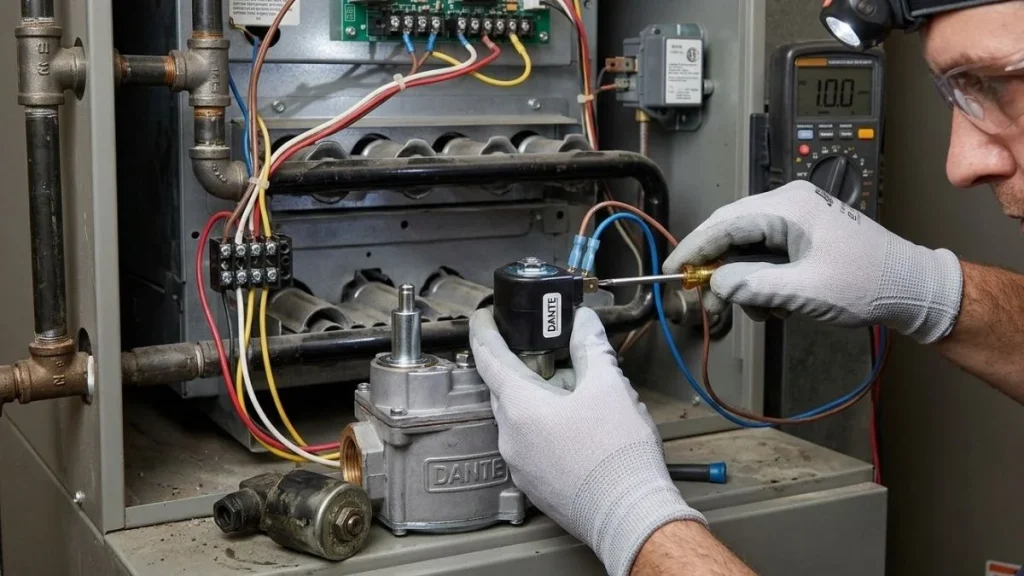
Once you’ve confirmed the fault, here’s how to carry out the repair correctly.
Shut Off Gas and Power Completely
Close the inline gas shutoff valve and flip the circuit breaker for the appliance to the OFF position. Give it five full minutes before opening any connections to allow residual gas to dissipate.
Access and Document the Valve
Remove the appliance access panel to expose the valve. Before touching anything, take clear photos of all wiring connections, wire colors, and how the gas lines connect. These photos are your reference map during reassembly — don’t skip this step.
Replace the Solenoid Coil
If your diagnosis points to a bad coil, this is the simpler fix and doesn’t require disconnecting any gas lines.
Removing the old coil:
- Locate the coil assembly on the valve body (it slides over a central stem)
- Remove the retaining clip or screw holding it in place
- Slide the coil straight off the stem
- Disconnect the two wiring terminals
Installing the new coil:
- Confirm the replacement coil matches your exact Dante valve model number
- Slide the new coil onto the stem in the same orientation
- Secure the retaining clip and reconnect wiring terminals firmly
- A loose terminal connection here will cause the exact same symptom all over again
Replace the Full Valve Body (If Required)
If the entire valve has failed, you’ll need to disconnect the gas lines — which requires more care.
Removing the old valve:
- Use a pipe wrench to carefully loosen and disconnect the gas inlet and outlet fittings
- Unplug all electrical connectors (refer to your photos)
- Remove any mounting screws holding the valve to the appliance chassis
Installing the replacement valve:
- Wrap all threaded gas fittings with gas-rated Teflon tape (2–3 wraps, in the direction of the threads)
- Mount the new valve in exactly the same orientation as the old one
- Hand-tighten fittings first, then snug them with a wrench — firm, not overtightened
- Reconnect all electrical wiring exactly as photographed
Test for Leaks Before Powering Up
Slowly open the gas supply valve. Apply leak detection solution to every fitting you touched. Watch for 60 seconds. No bubbles means you’re clear to proceed. If you see bubbles anywhere, close the gas supply immediately and re-tighten or re-tape that fitting.
Restore Power and Test the Appliance
Turn the circuit breaker back on and set the thermostat to call for heat. Watch the full ignition sequence — the burner should light and stay on steadily. Monitor it through one complete heating cycle. Check for error codes and listen for any unusual sounds from the valve area.
Recommended: Replace Toilet Water Supply Valve
Dante Gas Valve Repair vs. Replacement — Which Makes More Sense?
| Situation | Best Action |
| Failed solenoid coil, valve body intact | Repair — replace coil only |
| Valve under 5 years old, minor fault | Repair |
| Cracked or corroded valve body | Replace full valve |
| Valve over 10–12 years old | Replace — don’t patch old equipment |
| Multiple repairs have already failed | Replace |
As a rough cost guide: a replacement coil kit runs $20–$60, while a complete Dante valve replacement costs $80–$250 in parts. Add $100–$300 for professional labor if you hire a technician. For a coil-only fix, DIY repair delivers the best value by far.
How to Maintain Your Dante Gas Valve and Prevent Future Problems
The best repair is the one you never need to make. A little preventive maintenance goes a long way in extending the life of your gas valve and your entire heating system.
Schedule an annual HVAC inspection before the heating season begins — a technician will check gas pressure, test valve operation, and catch small issues before they become expensive ones. Between visits, keep the area around your appliance clean and dry. Moisture and dust buildup accelerate corrosion on valve components and wiring terminals.
Check your appliance’s air filter regularly. A clogged filter forces the system to work harder, which increases thermal stress on every component, including the gas valve. Replace filters every 1–3 months depending on your household’s dust levels.
A Dante gas valve that’s properly maintained typically lasts 10–15 years. If yours is approaching that age range and starting to show problems, proactive replacement before a mid-winter failure is a smart investment.
Conclusion
A malfunctioning Dante gas valve doesn’t have to mean a cold house and a huge repair bill. With a methodical approach to diagnosis, a firm commitment to safety, and the right replacement parts, many of these repairs are completely manageable for a careful and prepared homeowner. The key is to test before you replace, stay safe throughout the process, and know when a problem has gone beyond DIY territory.
Whether you end up replacing a $30 coil or deciding to call in a licensed tech, understanding how your Dante gas valve works puts you in a far better position to make smart decisions about your home’s heating system. Bookmark this guide for heating season, and don’t wait for a complete breakdown before you start paying attention to the warning signs.