


Is your toilet water supply valve leaking or not working properly? Replacing it might seem tricky, but you can do it yourself with the right steps.
Imagine saving money on a plumber and fixing the problem quickly, without waiting for help. In this guide, you’ll learn exactly how to replace your toilet water supply valve safely and easily. Keep reading, and you’ll have your toilet running smoothly again in no time!
Tools And Materials Needed
Replacing a toilet water supply valve is a simple task with the right tools and materials. Having everything ready before starting makes the job faster and easier. This section lists all essentials needed for a smooth valve replacement.
Tools Required
- Adjustable Wrench: To loosen and tighten nuts and bolts.
- Bucket or Small Container: To catch water drips during removal.
- Pipe Wrench: Useful if the valve is tight or stuck.
- Teflon Tape (Plumber’s Tape): To seal threaded connections and prevent leaks.
- Screwdriver: Sometimes needed to remove clamps or brackets.
- Towels or Rags: For cleaning up water spills.
Materials Needed
| Material | Description | Purpose |
| Replacement Water Supply Valve | New valve compatible with your toilet’s water line. | Replaces old or faulty valve to control water flow. |
| Flexible Supply Line (optional) | New hose connecting valve to toilet tank. | Use if old line is damaged or worn out. |
| Teflon Tape | Plumber’s tape for sealing pipe threads. | Prevents leaks at connection points. |
Safety And Preparation Items
- Gloves: Protect hands from dirt and sharp edges.
- Flashlight: Helps see in dark or tight spaces behind the toilet.
- Shut-off Valve: Ensure main water supply is off before starting.
Shutting Off Water Supply
Before replacing a toilet water supply valve, shutting off the water supply is a crucial first step. This prevents water from flowing and causing leaks or flooding during the repair. Taking this step ensures safety and keeps your bathroom dry while you work.
Locate The Shut-off Valve
Find the shut-off valve near the toilet base. It is usually a small knob or lever on the water pipe. The valve connects the water supply line to the toilet tank.
- Look behind or beside the toilet.
- Check for a round knob or a small lever.
- The valve is often made of brass or chrome.
Turn Off The Valve
Turn the valve clockwise to close it. This stops water flow to the toilet.
- Use your hand to gently turn the valve.
- Do not force it if it is hard to turn.
- Turn until it stops completely.
Note: If the valve is stuck, try using a cloth for a better grip.
Test The Water Supply
Flush the toilet to check if water stops flowing into the tank.
- Flush once after closing the valve.
- Watch the tank fill up.
- If no water flows, the valve is closed properly.
If the tank refills, the valve may not be fully shut or could be faulty.
Removing The Old Valve
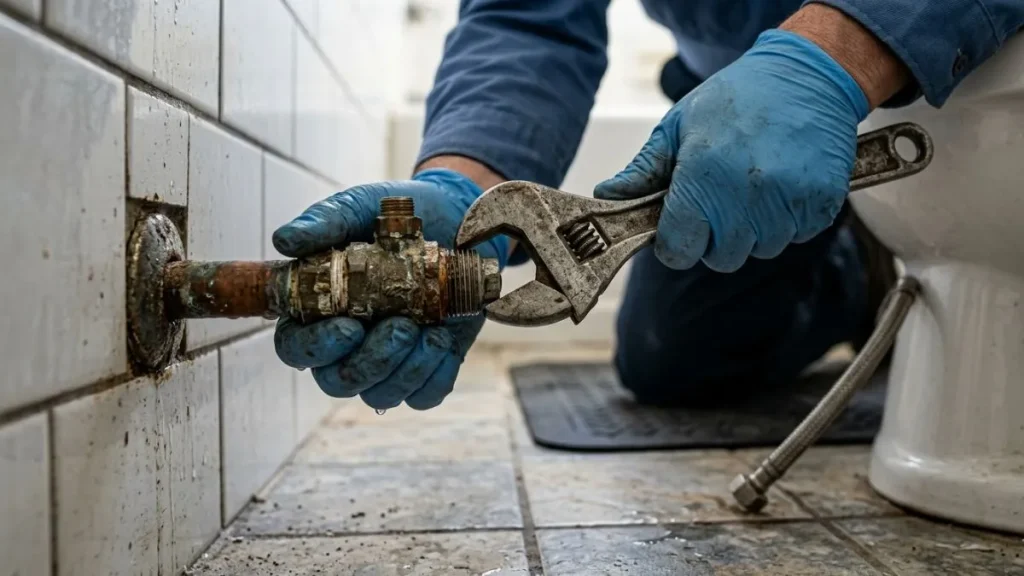
Removing the old toilet water supply valve is the first important step before installing a new one. This task requires care to avoid water spills and damage to the pipes. The process includes shutting off the water, draining the line, and carefully unscrewing the valve. Proper removal makes the replacement easier and ensures no leaks later.
Turn Off The Water Supply
Start by turning off the main water valve to stop water flow. This prevents any water from leaking during valve removal. Check if the water is off by flushing the toilet. The tank should not refill after flushing.
Drain The Water Line
Flush the toilet again to empty the tank and pipes. Use a towel or small container to catch any leftover water near the valve. This step helps keep the area dry and clean while working.
Loosen The Compression Nut
Use an adjustable wrench to loosen the compression nut connecting the valve to the water pipe. Turn the wrench counterclockwise carefully. Hold the valve steady with another wrench to avoid damaging the pipe.
Remove The Old Valve
Once the compression nut is loose, gently pull the valve away from the pipe. If it is stuck, wiggle it slightly without forcing. Check the pipe end for any damage or buildup before installing the new valve.
Check For Pipe Damage
| Signs of Damage | What to Do |
| Rust or corrosion | Clean with a wire brush or replace pipe if severe |
| Cracks or dents | Replace the damaged pipe section |
| Old thread or worn surface | Use pipe tape or replace pipe end |
Installing The New Valve
Installing the new toilet water supply valve is a key step to ensure proper water flow and prevent leaks. This process requires careful handling to position the valve correctly, secure all connections tightly, and apply thread seal tape properly. Each step plays a vital role in the valve’s performance and longevity. Taking time to do this right will save future trouble and water waste.

Positioning The New Valve
Start by placing the new valve in the right spot on the water supply pipe. The valve must be easy to reach for future maintenance. Positioning affects water flow and prevents stress on pipes. Follow these points for correct placement:
- Align the valve so the handle is accessible and faces outward.
- Make sure the valve inlet fits snugly on the supply pipe.
- Keep the valve vertical or as recommended by the manufacturer.
- Allow enough space between the valve and the wall for the supply line.
Use a cloth to clean the pipe end before fitting the valve. Dirt or rust can cause leaks. Gently slide the valve onto the pipe. Avoid forcing it, as this can damage threads or fittings. If the valve feels tight, check alignment and try again.
| Position Factor | Reason |
| Handle Orientation | Easy access for turning valve on/off |
| Valve Alignment | Prevents leaks and pipe stress |
| Clearance Space | Allows connection to supply line without strain |
Securing Connections
After positioning, tighten the valve to the supply pipe. Proper securing stops water leaks and keeps the valve stable. Use a wrench or pliers, but do not overtighten. Excess force can crack fittings or strip threads.
Follow these steps to secure connections safely:
- Hold the valve steady with one hand.
- Use a wrench to turn the valve nut clockwise.
- Tighten until snug, then give a slight extra turn.
- Check for any movement; the valve should feel firm.
- Attach the supply line to the valve outlet and tighten the compression nut.
Use two wrenches if needed—one to hold the valve, one to tighten the nut. This prevents twisting the valve out of place. Avoid using excessive force to prevent damage.
Applying Thread Seal Tape
Thread seal tape, also called plumber’s tape, creates a watertight seal on threaded connections. It fills gaps and stops leaks. Proper application is critical for valve performance. Use high-quality tape made for water supply lines.
Steps for applying thread seal tape:
- Clean threads on the valve and pipe with a cloth.
- Wrap tape clockwise around the male threads 3 to 5 times.
- Keep tape tight and smooth without wrinkles.
- Start wrapping at the end of the threads but avoid covering the first thread.
- Press tape into threads with your fingers for a good fit.
Clockwise wrapping matches the direction of tightening. This prevents tape from unraveling when the valve is screwed in. Use just enough tape to cover threads but not so much it builds up and prevents proper fitting.
After applying tape, screw the valve onto the pipe by hand first. Then tighten with a wrench. The tape will compress and seal the connection.
Testing For Leaks
Testing for leaks is a key step after replacing a toilet water supply valve. It helps ensure the new valve works correctly and prevents water damage. Leaks can cause stains, mold, and higher water bills. Checking carefully saves time and money later.
How To Check For Visible Leaks
Start by looking closely at the valve and connections. Use a bright light to spot any water drops or wet spots.
- Look around the valve handle and fittings.
- Check the pipe where it meets the valve.
- Inspect the floor near the toilet base.
Wet areas or water droplets mean a leak is present. Tighten connections slightly, then check again.
Using Paper Towel Or Tissue
Wrap dry paper towel or tissue around the valve and joints. Wait for a few minutes, then check if the paper is wet.
- Turn the water supply on fully.
- Wrap paper towel snugly around all connections.
- Wait 5 to 10 minutes without using the toilet.
- Remove the paper and check for dampness or water spots.
This method shows small leaks that are hard to see with the naked eye.
Listening For Water Sounds
Sometimes leaks make a soft dripping or hissing sound. Pay attention near the valve.
- Turn off all other water sources in the house.
- Listen carefully for any dripping or running water noises.
- Use a stethoscope or a long screwdriver to amplify sounds by placing it on the valve and your ear.
Pressure Test For Leaks
A pressure test checks if the valve holds water pressure without leaks.
| Step | Action | Purpose |
| 1 | Turn off water supply and disconnect the valve | Prepare for pressure test |
| 2 | Attach a pressure gauge or test pump | Measure pressure in the valve |
| 3 | Pressurize valve to recommended PSI | Simulate normal water pressure |
| 4 | Observe gauge for pressure drop | Detect leaks if pressure falls |
| 5 | Release pressure and reconnect valve | Finish test and restore plumbing |
Troubleshooting Common Issues
Replacing a toilet water supply valve can solve many plumbing problems. Sometimes, the valve has issues that stop water flow or cause leaks. Troubleshooting common problems helps find the cause and fix it fast. Understanding these issues saves time and prevents bigger damage.
Identifying A Leaking Supply Valve
A leaking valve can waste water and cause damage. Look for:
- Water pooling under the valve or on the floor.
- Rust or corrosion on the valve body.
- Dripping sounds near the valve.
Check the valve connections. Tighten nuts gently with a wrench but avoid over-tightening. Replace washers or seals if leaks continue.
Valve Does Not Shut Off Water Completely
Sometimes the valve won’t fully stop water flow. This causes running water and higher bills.
- Turn off the main water supply first.
- Remove the valve handle and inspect the internal parts.
- Look for mineral buildup or damage blocking closure.
- Clean or replace the valve cartridge or washer as needed.
Valve Handle Is Hard To Turn
A stiff valve handle makes repairs difficult. Causes include rust or mineral deposits.
- Use a lubricant like WD-40 on the handle stem.
- Turn the handle back and forth gently.
- If still stiff, consider replacing the valve.
Common Causes Of Valve Failure
| Cause | Effect | Solution |
| Mineral Buildup | Valve sticks or leaks | Clean valve internals or replace parts |
| Worn Washers | Water drips continuously | Replace washers |
| Corrosion | Valve weakens and leaks | Replace valve |
| Incorrect Installation | Leaks or poor function | Reinstall valve properly |
Read Also: Air Volume Control Valve Leaking Water?
Conclusion
Replacing a toilet water supply valve can save you from leaks and water waste. The process is simple and does not need special tools. Take your time and follow safety steps carefully. A new valve helps your toilet work better and lasts longer.
Regular checks can stop small problems from growing. Now, you can fix this common issue yourself and avoid costly repairs. A little effort brings peace of mind and a smoothly running bathroom.


