

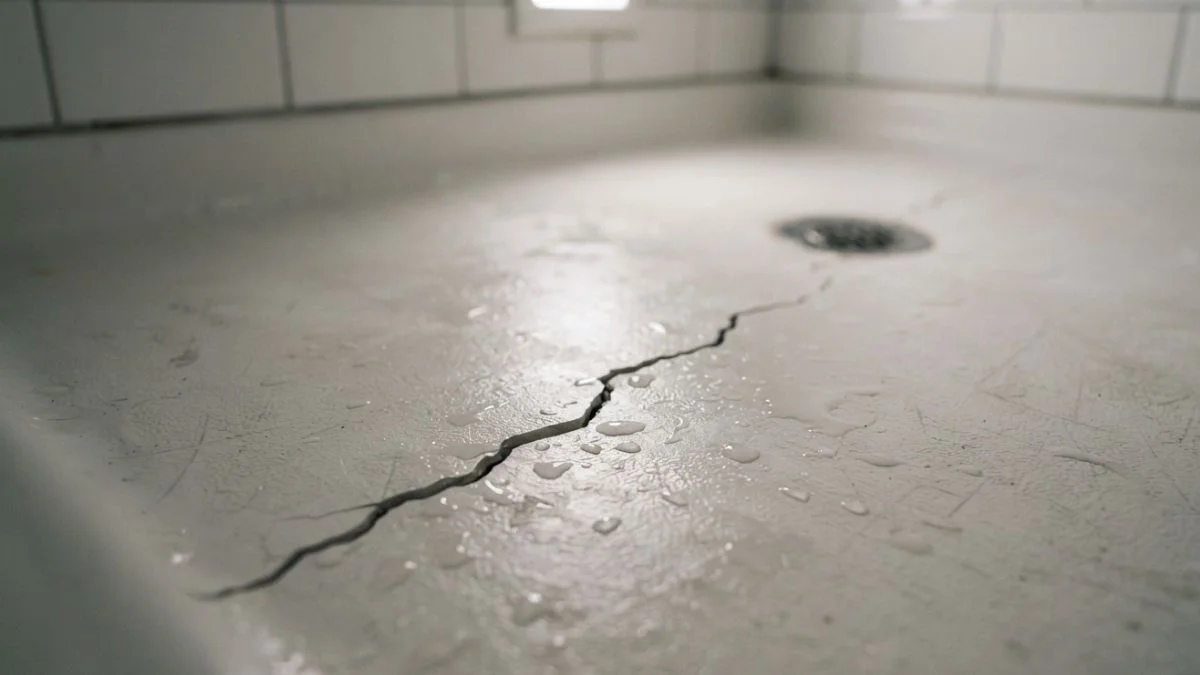
A crack in fiberglass shower floor surfaces does not automatically mean a costly full replacement — most hairline and small-to-medium cracks are fully repairable with materials costing under $50.
The real danger is waiting: even a hairline crack lets water seep through the fiberglass shell into the subfloor beneath, where it silently causes rot, mold, and structural damage that can turn a $40 repair into a $3,000 renovation.
This article walks you through 5 proven repair methods — with honest cost estimates, realistic timelines, and clear signs that tell you when DIY is enough and when a professional needs to step in.
Crack Severity: What You Can Actually Repair
Not every crack needs the same response. Identifying the type before buying a fiberglass shower repair kit saves you time, money, and the frustration of a failed patch.

Hairline vs. Structural Damage
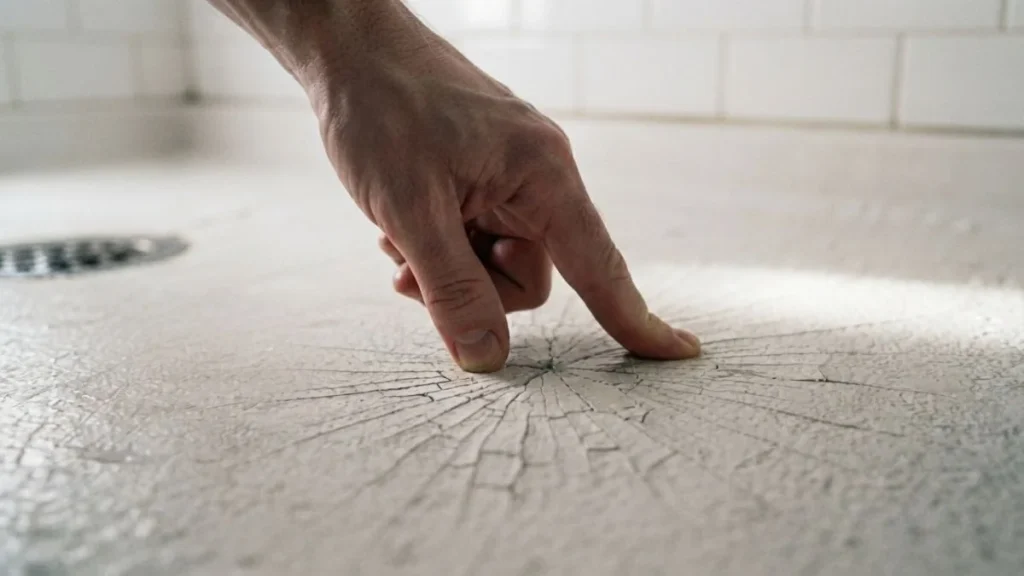
A hairline crack in a fiberglass shower pan is typically less than 1mm wide, barely visible without crouching down, and stays dry between showers. Spider web cracks — thin radiating lines across the shower base — are also surface-level and safe for DIY repair. Both types affect only the gel coat and outer fiberglass layer, leaving the structural support underneath intact.
Deep cracks are different. If you press firmly on either side of the crack and feel flex or movement, the fiberglass shell has separated from its foam backing. Check from below if you have basement or crawl space access — a visible shadow or waterline stain directly under the crack confirms moisture has already penetrated. That is a structural problem, not a cosmetic one.
When Repair Fails: 4 Red Flags
Stop and assess before attempting a patch if you notice any of these:
- Soft or spongy floor around the crack — this signals foam saturation from chronic water leakage, meaning the shower base support has degraded
- Cracks that returned after a previous repair attempt, indicating ongoing flex or movement underneath
- Multiple cracks in the same pan section, which points to systemic subfloor failure rather than isolated surface damage
- Shower age of 15 or more years, where fiberglass brittleness makes any patch a temporary fix at best
A shower base showing two or more of these signs warrants a professional assessment before any moisture damage prevention measures will hold.
Five DIY Repair Methods: Ranked by Durability
The right repair depends on crack type, depth, and how long you need the fix to last. Here are all 5 options, ordered from shortest to longest lifespan.
1. Silicone Caulk Sealant (Temporary, 2-4 Months)
Waterproof silicone caulk is a stopgap, not a solution. It seals the surface of a hairline crack in a fiberglass shower long enough to prevent immediate water leakage detection failures, but it does not bond to the crack walls or restore structural integrity. Use it only to protect the subfloor while you gather materials for a proper repair.
2. Fiberglass Repair Kit (2-5 Years)
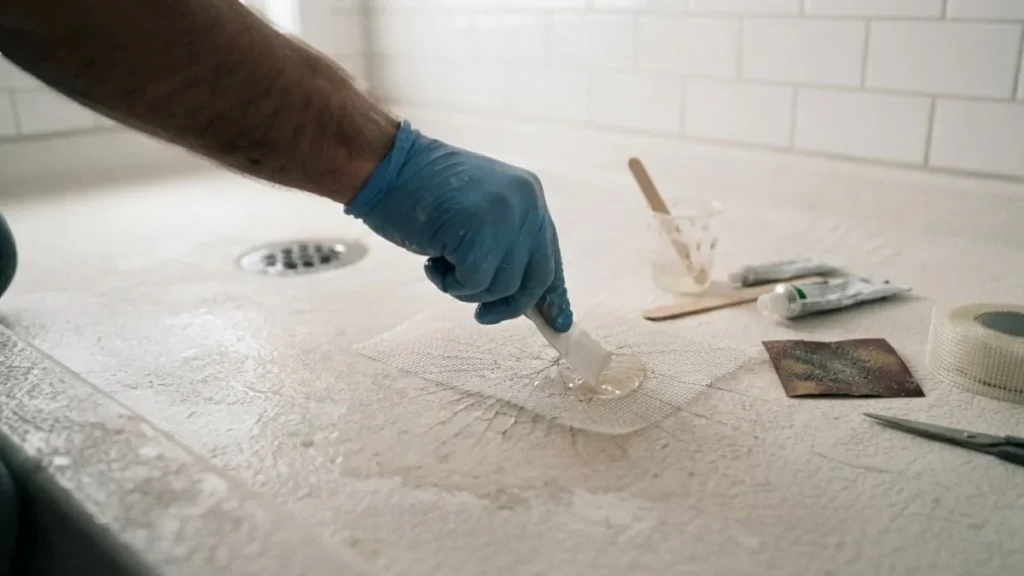
This is the standard DIY method for small-to-medium surface cracks. Kits from Bondo, Evercoat, or 3M typically include two-part resin, fiberglass mesh cloth, hardener, and sandpaper — running $20-$45 at most hardware stores.
The process:
- Clean and fully dry the crack (use a heat gun if needed)
- Sand 2 inches around the crack with 80-grit paper
- Mix resin and hardener per kit ratios — wrong ratios cause soft, uncured patches
- Lay fiberglass mesh over the crack and saturate with resin
- Allow 24-48 hours cure time before any shower use
- Sand smooth, then color-match with gel coat paint
3. Two-Part Epoxy Injection (3-6 Years)
Two-part epoxy penetrates hairline cracks better than surface-applied resin because its low viscosity pulls it into the crack by capillary action. Products like PC-Clear Epoxy or Loctite EA E-20HP work well for stable cracks where water is seeping through but no flex exists. Apply with a syringe directly into the crack, wipe excess immediately, and allow 24 hours to cure fully.
4. Expanding Foam Base Support Repair (5+ Years)
This method fixes the root cause — a collapsed or saturated foam base beneath the fiberglass shower pan. Without addressing base support, any surface patch will crack again within months.
If you have crawl space access, locate the soft spot directly below the crack and inject two-part expanding foam (Great Stuff Pro or similar) into the void. Without crawl space access, cut a small access panel beside the shower curb from above. Allow 24 hours for foam to fully expand and harden before walking on the floor again.
5. Marine-Grade Epoxy Topcoat (5-8 Years)
Apply this after completing Method 2 or 3 as a redundant waterproof barrier. Marine-grade epoxy — designed for fiberglass boat hulls — bonds harder and resists water absorption better than standard repair resins. TotalBoat TableTop Epoxy and System Three Mirror Coat are two reliable options, adding $30-$60 to total repair cost but effectively doubling the repair lifespan.
Root Causes: Why Your Shower Cracked
Patching a crack without understanding its cause is how homeowners end up re-patching the same spot every 18 months. These are the 5 most common reasons a fiberglass shower pan fails.
Failed Foam Bedding
Most fiberglass shower pans sit on a layer of expanding foam or mortar that distributes weight evenly across the subfloor. When that foam compresses, dries out, or was never applied correctly during installation, the pan flexes under foot load. That repeated flex is the single most common cause of spider web cracks in a shower base — the fiberglass is essentially bending with every step.
Thermal Expansion and Contraction
Fiberglass expands and contracts with temperature changes at a rate of roughly 12-14 parts per million per degree Celsius. Over years of hot showers followed by cooling periods, that movement creates micro-stress points — particularly at corners and drain edges — that eventually become hairline cracks.
Installation Defects
Improper shimming, missing support blocks, or an uneven subfloor at installation forces the pan to carry load on high points rather than evenly. This concentrates stress in specific zones, which is why some showers crack near the drain or along one edge rather than uniformly.
Water Infiltration and Age-Related Brittleness
Once water breaches the gel coat, it degrades the fiberglass layers beneath through a process called osmotic blistering — the resin absorbs moisture, weakens, and separates. Showers older than 15 years face compounding brittleness as the resin matrix loses plasticizers over time, making the material far less tolerant of the same flex loads it handled when new.
Cost and Timeline: DIY vs. Professional
The cost difference between a DIY patch and full shower replacement can exceed $4,000. Here is exactly what each option costs and how long it takes.
| Repair Option | Material Cost | Labor Time | Shower Downtime |
|---|---|---|---|
| Silicone caulk (temporary) | $15–$30 | 1–2 hours | 4–6 hours |
| Fiberglass repair kit | $40–$100 | 3–6 hours | 24–48 hours |
| Professional repair | $0 materials | 1–3 days turnaround | 1–3 days |
| Full replacement | $2,000–$5,000+ | Contractor-dependent | 3–7 days |
DIY Material Costs Broken Down
A basic silicone caulk repair — using products like GE Supreme Silicone or DAP Kwik Seal Plus — runs $15–$30 for materials alone and takes under 2 hours including drying time. Stepping up to a full fiberglass repair kit method with foam base support repair adds expanding foam ($12–$18), a Bondo or Evercoat kit ($25–$45), and gel coat touch-up paint ($15–$25), bringing the realistic total to $52–$88 for a complete, durable repair.
Professional Repair: When It’s Worth the Cost
Professional fiberglass repair technicians charge $300–$800 depending on crack severity, access difficulty, and regional labor rates. That cost is justified when structural support failure is confirmed, when multiple cracks suggest systemic shower base problems, or when color-matching a non-standard gel coat is beyond DIY capability.
Full Replacement Reality
A full fiberglass shower pan replacement — including removal, subfloor inspection, new unit, and reinstallation — runs $2,000–$5,000 for a standard shower. Tiled surrounds, custom sizes, or discovered subfloor rot push costs well beyond that ceiling. For any crack that passes the flex test and shows no red flags from Section 2, DIY repair is almost always the financially rational first step.
Honest Repair Lifespan and Replacement Reality
No fiberglass shower repair kit restores a pan to factory condition. Understanding what each method actually delivers helps you plan maintenance cycles and avoid being blindsided by a repair that fails sooner than expected.
How Long Repairs Actually Last
A properly applied fiberglass repair kit on a stable, surface-level crack realistically holds 2–5 years before the crack reappears or the patch edge begins lifting. Adding a marine-grade epoxy topcoat after the base repair pushes that range toward the 5–8 year ceiling. Silicone caulk alone rarely lasts beyond 3–4 months under daily shower use before cracking or peeling.
Resealing annually with a waterproof silicone product extends moisture damage prevention between full repairs, but it does not compensate for degraded foam bedding beneath the pan. If the base support has failed, no surface treatment changes the underlying flex — the crack will return.
When Replacement Becomes Inevitable
Structural cracks — those showing flex, shadow lines from below, or recurring after two repair attempts — signal that the fiberglass shower pan has reached end of service life. In practice, most fiberglass shower enclosures last 10–20 years depending on installation quality and maintenance. A pan showing structural failure before 15 years often reflects an installation defect rather than normal wear.
Insurance: What Policies Typically Cover
Homeowner’s insurance generally excludes crack repairs caused by age, wear, or gradual deterioration. However, sudden and accidental damage — a heavy object dropped on the shower base, for example — may qualify under a standard HO-3 policy. Contact your insurer before starting any repair if the damage origin is unclear, since prior repair attempts can complicate a later claim.
Also Read: Can You Replace Shower Floor Only?
Know Your Repair Limits Before You Start
A DIY repair on a stable, surface-level crack in a fiberglass shower floor buys you 2–8 years of reliable service and prevents the subfloor damage that turns a $50 fix into a $5,000 problem — but it does not restore the pan to original structural condition. Start today by pressing firmly on both sides of your crack: if the floor flexes, call a professional for an assessment; if it holds firm, pick up a Bondo or Evercoat fiberglass repair kit and follow the Method 2 steps in this article this weekend.


