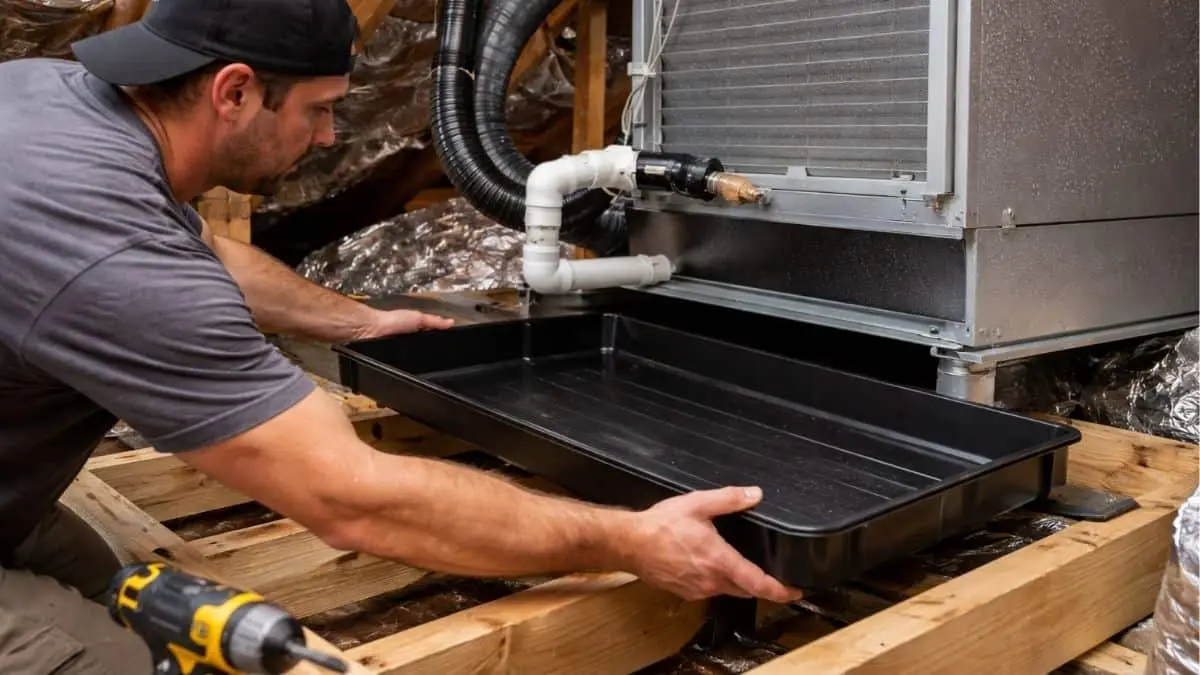
Is your attic air conditioner keeping your home cool without causing water damage? If not, installing a drip pan might be the simple solution you need.
A properly installed drip pan catches excess water before it harms your ceiling or walls. You’ll discover easy steps to install an attic air conditioner drip pan yourself. By the end, you’ll know how to protect your home and avoid costly repairs.
Choosing The Right Drip Pan

Choosing the right drip pan for your attic air conditioner is essential to protect your home from water damage. The drip pan catches condensation and prevents leaks that can ruin ceilings and walls.
Material Options
Drip pans come in different materials, each with its own benefits and drawbacks. The most common materials include:
- Plastic: Lightweight and affordable. Resistant to rust and corrosion. Easy to install but less durable under heavy use.
- Galvanized Steel: Strong and long-lasting. Offers good rust resistance due to zinc coating. Heavier and may need extra support.
- Aluminum: Corrosion-resistant and lightweight. More expensive than plastic but lasts longer in moist environments.
- Stainless Steel: Very durable and rust-proof. Ideal for heavy-duty use but costs more upfront.
Choosing the right material depends on your attic conditions and budget. For example, a humid attic benefits from corrosion-resistant materials like aluminum or stainless steel. Plastic pans suit dry areas but may crack over time. Galvanized steel offers a balance between cost and durability.
| Material | Pros | Cons |
| Plastic | Light, cheap, rust-resistant | Less durable, can crack |
| Galvanized Steel | Strong, rust-resistant | Heavy, may need support |
| Aluminum | Light, corrosion-resistant | More expensive |
| Stainless Steel | Very durable, rust-proof | High cost |
Size Considerations
The drip pan must be the right size to catch all condensation and prevent overflow. A pan too small causes leaks and damage. Too large can be hard to fit and waste space.
Key points for size:
- Measure the AC Unit: Check the base dimensions of your air conditioner.
- Allow Extra Space: Add at least 2 to 3 inches around the unit for water flow.
- Check Depth: A deeper pan holds more water, reducing overflow risk.
Use this simple size guide:
| AC Unit Size (WxD) | Recommended Pan Size (WxD) | Recommended Depth |
| 24″ x 24″ | 28″ x 28″ | 2-3 inches |
| 30″ x 30″ | 34″ x 34″ | 3-4 inches |
| 36″ x 36″ | 40″ x 40″ | 4-5 inches |
Measure carefully and choose a pan that fits your attic space and AC unit. A good fit helps water drain properly and avoids damage.
Compatibility With Ac Units
Not all drip pans fit every air conditioner. Check compatibility to avoid leaks and installation problems. Key factors include:
- Shape and Design: Some AC units have rounded edges or special bases. Match the pan shape to the unit.
- Drain Location: Confirm the pan’s drain hole lines up with your home’s drainage system.
- Weight Support: Ensure the pan can hold the AC unit’s weight plus water.
- Installation Method: Look for pans designed for your unit type (window, split, or central AC).
Many manufacturers list compatible drip pans for each AC model. Use these guides or consult with a professional.
Compatibility checklist:
- Correct pan shape and size for the AC base
- Drain hole position matches plumbing
- Material supports unit weight
- Easy installation with your AC type
Choosing the right drip pan for your AC unit protects your attic from water damage. Proper fit and material keep your system working well and your home safe.
Preparing The Attic Space
Installing a drip pan for your attic air conditioner requires proper preparation of the attic space. Preparing the attic ensures the drip pan fits well and works effectively to catch any water leaks. This step helps prevent water damage and keeps your home safe. Taking time to prepare the space makes installation easier and the system more reliable.
Clearing The Area
Start by clearing the attic area around the air conditioner. Remove any stored items, debris, or insulation that may block access or cause problems during installation. A clean workspace helps you see potential issues and gives enough room to place the drip pan correctly.
Use these steps to clear the attic:
- Remove boxes, tools, or other objects near the AC unit.
- Vacuum dust and dirt to improve visibility and air quality.
- Push aside loose insulation carefully without damaging it.
- Check for any nails or sharp objects that could cause injury.
Keeping the attic space open helps you work safely and prevents accidental damage to the drip pan or air conditioner. It also allows for better airflow, which is important for the AC’s efficiency.
Inspecting For Leaks And Damage
Before installing the drip pan, inspect the attic for leaks and damage. Look closely around the AC unit and the roof area above it. Water stains, mold, or damp spots signal existing leaks that need fixing. Installing a drip pan over a damaged area won’t stop water problems.
Follow this checklist to inspect properly:
| Inspection Area | What to Look For | Action Needed |
| Ceiling and Roof | Water stains, mold, cracks | Repair leaks before installation |
| Air Conditioner Drain Lines | Blockages, cracks, loose fittings | Clear blockages and fix leaks |
| Surrounding Wood and Insulation | Rot, dampness, mold growth | Replace damaged materials |
Checking these areas helps avoid future water damage and ensures the drip pan works as intended. Fixing leaks first protects your attic and home from costly repairs later.
Step-by-step Installation Process
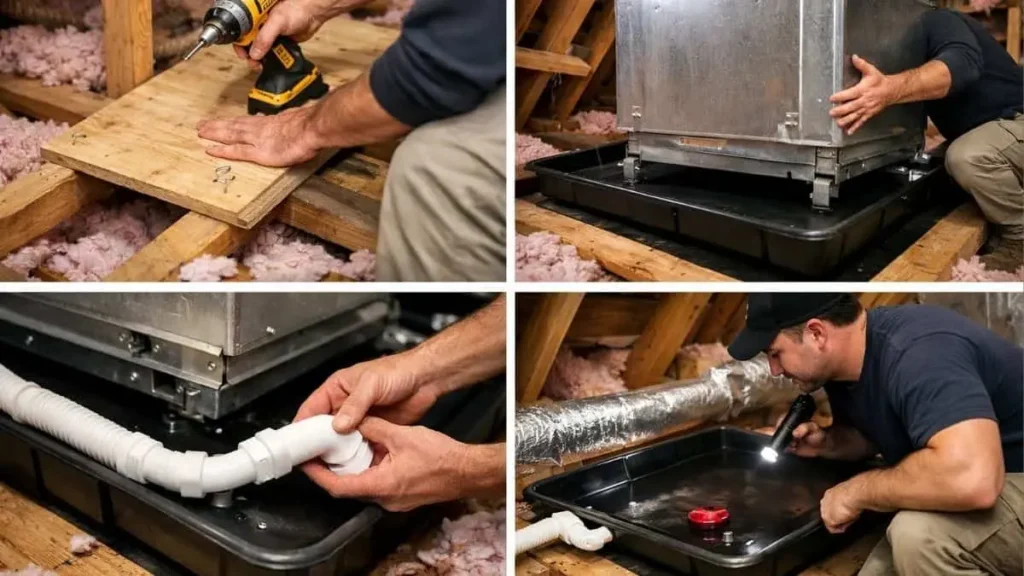
Installing a drip pan for your attic air conditioner is essential to prevent water damage and mold growth. The process involves careful steps to ensure the pan fits properly and drains correctly.
Positioning The Drip Pan
Start by choosing the right spot under the air conditioner unit. The drip pan must catch all condensation and fit snugly beneath the cooling coils. Measure the area to confirm the pan covers the entire bottom surface of the unit. Check for any obstructions like wiring or insulation that might block water flow.
- Measure the unit’s base to find the correct pan size.
- Clear the area to avoid interference with installation.
- Ensure the surface is level to help water drain properly.
Using a level tool can help verify the drip pan sits flat. An uneven pan may cause water to spill over the edges. Place the pan so the drain outlet aligns with the planned drain line location. This alignment simplifies connecting the drain line later.
Securing The Pan In Place
After positioning, securing the drip pan is crucial. The pan should stay stable and not shift during operation. Use screws or brackets to attach the pan firmly to the unit or attic framing. Avoid damaging the pan or the air conditioner while fastening.
Follow these steps to secure the pan:
- Use corrosion-resistant screws or brackets.
- Attach the pan edges to the support beams or unit frame.
- Check for tightness but do not overtighten to avoid cracks.
- Seal any gaps between the pan and unit with waterproof caulk.
Properly securing the pan prevents leaks and keeps it in place during vibrations. A loose pan can cause water to drip inside the attic, leading to damage. After securing, inspect the pan for any movement by gently pressing on its sides.
Connecting The Drain Line
The final step is connecting the drain line to carry water safely out of the attic. The drain line should slope downward to allow gravity to move water freely. Use flexible tubing or PVC pipe depending on your setup. Attach the drain line to the pan’s outlet securely to avoid leaks.
| Step | Action | Tip |
| 1 | Cut the drain line to the correct length. | Measure from the pan outlet to the discharge point. |
| 2 | Attach the line to the pan outlet using a tight clamp. | Use waterproof sealant around the connection. |
| 3 | Secure the drain line along the attic structure. | Maintain a downward slope of at least 1/4 inch per foot. |
| 4 | Direct the line to a safe drainage area. | Check local codes for approved discharge locations. |
Test the drain line by pouring water into the pan. Watch for leaks or slow drainage. Fix any problems before finishing the installation. A well-connected drain line keeps the attic dry and prevents costly repairs.
Testing And Maintenance Tips
Installing a drip pan under your attic air conditioner protects your home from water damage caused by leaks and condensation. Proper testing and maintenance of the drip pan ensures it works effectively over time. Regular checks help catch issues early, avoiding costly repairs. Simple steps like inspecting for leaks, cleaning debris, and preventing mold keep your attic safe and your AC running smoothly.
Leak Checks
Leaks in the drip pan can cause serious water damage to your attic and ceiling. Regular leak checks are essential to catch problems early. Perform these steps every few months or after heavy use of your AC:
- Visual inspection: Look for cracks, rust, or holes in the drip pan surface.
- Water test: Pour a small amount of water into the pan. Watch closely for any leaks or seepage.
- Drain line check: Ensure the drain line connected to the pan is clear and not blocked.
- Seal inspection: Check the seal around the pan edges. Replace worn or damaged seals promptly.
Regular Cleaning
Keeping the drip pan clean prevents clogs and water buildup. Dirt, dust, and debris can block the drain and cause overflow. Follow these simple cleaning tips:
- Turn off the air conditioner before starting.
- Remove any visible debris from the pan using a soft cloth or brush.
- Use a mild soap solution and warm water to wipe the pan clean.
- Rinse thoroughly with clean water to remove soap residue.
- Dry the pan with a clean towel before turning the AC back on.
Cleaning frequency depends on your environment. In dusty areas, clean the pan every month. In cleaner environments, every 3 months may be enough.
Preventing Mold And Mildew
Mold and mildew thrive in damp, dirty drip pans. They can cause health problems and damage your attic structure. Prevent mold growth with these easy steps:
- Keep the pan dry: Fix leaks and ensure proper drainage to avoid standing water.
- Use mold inhibitors: Add a small amount of bleach or vinegar to the cleaning solution to kill mold spores.
- Improve attic ventilation: Good airflow reduces moisture buildup.
- Inspect regularly: Check the pan and surrounding areas for any signs of mold growth.
- Remove mold promptly: Clean affected areas immediately with a mold-removal cleaner.
You May Like Also: Washing Machine Drain Pan No Floor Drain
Conclusion
Installing an attic air conditioner drip pan protects your home from water damage. It catches leaks before they cause big problems. Regularly check the pan to keep it clean and working well. A good drip pan helps your air conditioner run safely and smoothly.
Taking this small step saves time and money later. Stay safe and keep your attic dry with a proper drip pan. Simple care makes a big difference in your home’s comfort and safety.