If your floor feels shaky or uneven, adding an extra layer of plywood over your subfloor could be the simple fix you need. This quick step can strengthen your floor, reduce noise, and prepare your space for new flooring.
But how do you do it right? You’ll discover easy-to-follow tips that make the process smooth and effective. Keep reading to learn how this small upgrade can make a big difference in your home’s comfort and durability.
Benefits Of Adding Plywood Over Subfloor
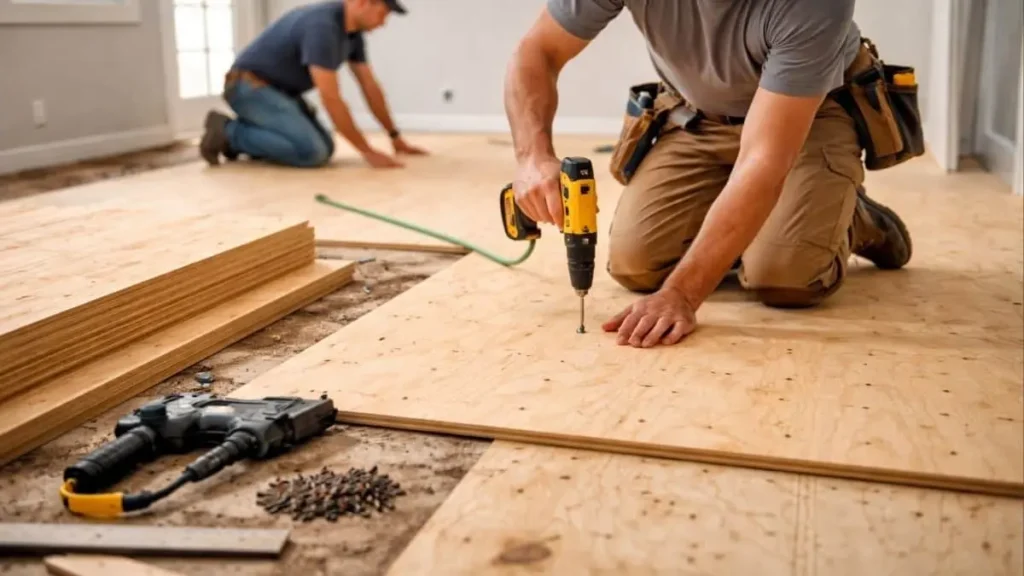
Adding an extra layer of plywood over the subfloor offers several important benefits for any flooring project. It strengthens the overall floor structure, reduces noise transmission, and creates a better base for the final flooring material. This simple step helps extend the life of your floors and improves comfort.
Improved Floor Stability
One major benefit of adding plywood over the subfloor is improved floor stability. The extra plywood layer acts like a strong shield, spreading weight more evenly. This reduces floor movement and flexing that can cause squeaks and damage.
- Stronger base: The additional plywood layer increases floor rigidity.
- Reduces bounce: Less springy feeling underfoot means better comfort.
- Prevents damage: Limits cracks or breaks in the subfloor below.
Floors with improved stability last longer and support heavy furniture or appliances without issues. This also lowers repair costs over time. The plywood layer locks together joints and seams, creating a unified surface that resists twisting and warping.
Enhanced Soundproofing
Adding plywood over the subfloor also improves soundproofing. The extra layer helps block noise from below and reduces echo within the room. This creates a quieter and more peaceful living space.
- Noise reduction: Less footstep and impact sounds travel through floors.
- Minimizes hollow sounds: Floors feel solid and less empty.
- Improves insulation: Helps keep heat and sound from escaping.
Rooms with added plywood over the subfloor often feel calmer. This benefit is especially helpful in multi-story homes, apartments, or offices where noise can disturb others. The plywood acts as a buffer, absorbing vibrations and muffling sounds.
Smoother Surface For Flooring
Installing plywood over the subfloor creates a smoother and more even surface for the final floor covering. This step is critical for achieving a professional look and long-lasting results.
Many flooring materials require a flat and stable base. Uneven or damaged subfloors cause problems such as:
- Visible bumps or dips in the finished floor
- Cracking or loosening of tiles, vinyl, or hardwood
- Difficulty installing flooring properly
Adding a plywood layer evens out imperfections and fills gaps. It provides a consistent surface that supports adhesives and nails better. This leads to floors that look better and hold up over time.
- Reduces installation issues: Easier to lay flooring straight and tight.
- Protects flooring: Prevents damage from subfloor irregularities.
- Improves durability: Final floor resists wear and tear longer.
Installation Process

The installation process is straightforward but requires careful steps to ensure durability and stability. Each phase, from measuring to securing the plywood, must be done precisely for the best results.
Measuring And Cutting Plywood
Accurate measuring is the first step in the installation process. Start by measuring the length and width of the room carefully. Use a tape measure and write down the dimensions. Remember to allow a small gap (about 1/8 inch) around the edges for expansion.
Next, transfer these measurements onto your plywood sheets. Use a pencil and straight edge to mark the cut lines clearly. Double-check your measurements before cutting to avoid mistakes.
- Use a circular saw or table saw for clean, straight cuts.
- Cut slowly and steadily to prevent splintering.
- Wear safety glasses and hearing protection.
Laying And Aligning Sheets
Place the plywood sheets on the subfloor without fastening first. This step helps ensure proper fit and alignment. Start from one corner of the room and work outward.
Keep these points in mind:
- Lay sheets with the grain running perpendicular to the subfloor joists.
- Maintain a 1/8-inch gap between sheets for expansion.
- Stagger seams so they do not line up with subfloor seams.
Check for any uneven spots or gaps. Use a level or straight edge to confirm the surface is flat. If needed, sand high spots or add a thin layer of leveling compound. Aligning sheets properly improves stability and prevents future issues like floor squeaks or warping.
Securing Plywood To Subfloor
Once the sheets are aligned, secure them to the subfloor using screws or nails. Screws are preferred for stronger hold and less chance of squeaking.
Follow these guidelines for fastening:
- Use 1 ½ to 2-inch wood screws or ring-shank nails.
- Place screws every 6 to 8 inches along edges and every 8 to 10 inches in the field.
- Drive screws flush or slightly below the plywood surface.
Use a drill with a countersink bit to avoid splitting the plywood. Avoid over-tightening screws, which can damage the plywood.
After securing all sheets, walk across the floor and listen for any squeaks. Tighten loose screws if needed.
Proper fastening ensures a solid, long-lasting subfloor base. It also reduces noise and supports the final flooring layer effectively.
Tips For Best Results
Below are important practices that help ensure a durable and long-lasting plywood layer.
Allowing For Expansion Gaps
Plywood expands and contracts with changes in temperature and humidity. Leaving small gaps around the edges gives the wood space to move without buckling or cracking. These expansion gaps are critical for maintaining the floor’s integrity.
Key points for expansion gaps:
- Leave a gap of about 1/8 inch between the plywood edges and the wall or other fixed objects.
- Use spacers or shims during installation to keep the gaps consistent.
- Make sure gaps are present between sheets of plywood to allow movement.
Without proper gaps, plywood can press against walls or other sheets, causing buckling. This pressure can lead to cracking of the plywood or damage to the floor covering above.
| Location | Recommended Gap |
| Between plywood sheets | 1/8 inch |
| Between plywood and walls | 1/8 inch |
| At doorways or thresholds | 1/8 inch |
Allowing these gaps reduces stress on the plywood and helps maintain a flat, solid floor surface over time.
Using Adhesive For Extra Bonding
Applying adhesive between the new plywood layer and the subfloor adds strength and reduces movement. This extra bond helps minimize floor squeaks and increases overall stability.
Why use adhesive?
- Prevents plywood from shifting or flexing underfoot.
- Seals gaps to reduce noise caused by friction.
- Distributes weight evenly across the floor structure.
Choose a construction adhesive designed for wood flooring. Spread it evenly on the subfloor using a notched trowel or caulking gun. Avoid applying too much adhesive, which can cause lumps or uneven areas.
Steps to apply adhesive:
- Clean the subfloor surface from dust and debris.
- Apply adhesive in a zigzag pattern covering all areas.
- Lay the plywood sheet carefully onto the adhesive.
- Press down firmly to ensure full contact.
The combination of adhesive and mechanical fasteners creates a strong, quiet floor that lasts for years.
Proper Fastener Spacing
Using the right fasteners and spacing them correctly is crucial to secure the plywood layer tightly to the subfloor. Proper fastener placement prevents shifting, squeaking, and damage over time.
Fastener types:
- Nails or screws designed for subfloor use
- Ring-shank nails or coated screws for better grip
Recommended spacing:
| Fastener Location | Spacing |
| Edges of plywood sheets | 6 inches apart |
| Field (center areas) of plywood | 8 inches apart |
Drive fasteners flush with the plywood surface without overdriving to avoid weakening the wood. Keeping fasteners evenly spaced ensures the plywood stays flat and securely attached.
Tips for nailing/screwing:
- Start fastening at one corner and work across the sheet.
- Check for any raised edges or gaps after fastening.
- Use a nail punch to countersink nails if needed.
Following these spacing guidelines helps maintain a smooth surface and prevents future squeaks or loose panels.
You May Read Also: Bad Hardwood Floor Refinishing
Conclusion
Adding an extra layer of plywood over your subfloor strengthens your floor’s base. It reduces squeaks and creates a smooth surface for flooring. This simple step helps prevent damage and extends floor life. Choose the right plywood thickness and secure it well for best results.
Taking time now saves you repairs later. Your floor will feel solid and last longer. A small effort makes a big difference in home comfort.