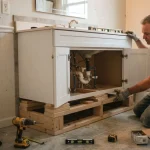
A stuck faucet mounting nut is the single most common reason a simple 30-minute faucet swap turns into a two-hour ordeal under the sink.
The problem is almost always the same: years of mineral buildup, rust, or corrosion have fused the nut to the faucet shank, and the cramped space under the cabinet makes it nearly impossible to get real leverage with standard tools.
This guide gives you a clear, step-by-step process for how to remove a kitchen faucet nut — including the right tools for tight spaces, proven methods for breaking loose rusted or corroded nuts, and safety steps to protect your plumbing throughout the job.
Tools You Need: A Quick Decision Tree

Basin Wrench vs. Adjustable Wrench vs. Alternatives
A basin wrench is the purpose-built tool for this job. Its long handle — typically 11 to 17 inches — combined with a pivoting, spring-loaded jaw lets you reach the mounting nut from below without contorting your arm into an impossible angle. Ridgid and Husky both make reliable models for under $30.
An adjustable wrench works as a substitute when you have decent access — roughly 14 inches or more of vertical clearance below the sink basin. It handles metal faucet base nuts well but gives you less reach and no jaw pivot, so expect more frustration in cramped cabinets.
Tongue-and-groove pliers (like Channellock 430s) and a pipe wrench are viable basin wrench alternatives for stuck faucet nut removal, but use them as a last resort. They grip hard enough to crack a plastic faucet nut if you over-torque.
Choosing Your Tool by Nut Type and Access
The right faucet nut wrench tool depends on two things: what the retaining nut is made of and how much room you have to work.
| Nut Material | Clearance Under Sink | Best Tool |
|---|---|---|
| Plastic faucet nut | Any | Basin wrench (low torque) |
| Metal faucet nut | Under 12 inches | Basin wrench only |
| Metal faucet nut | 12+ inches | Adjustable wrench or basin wrench |
| Rusted kitchen faucet nut | Any | Basin wrench + penetrating oil |
All faucet nuts thread off counterclockwise — righty-tighty, lefty-loosey applies here without exception. Confirm the nut material before applying force. A cracked plastic mounting nut means a harder repair job than the one you started with.
Removing a Stuck or Rusted Faucet Nut
Diagnosis: Is It Stuck, Rusted, or Cross-Threaded?
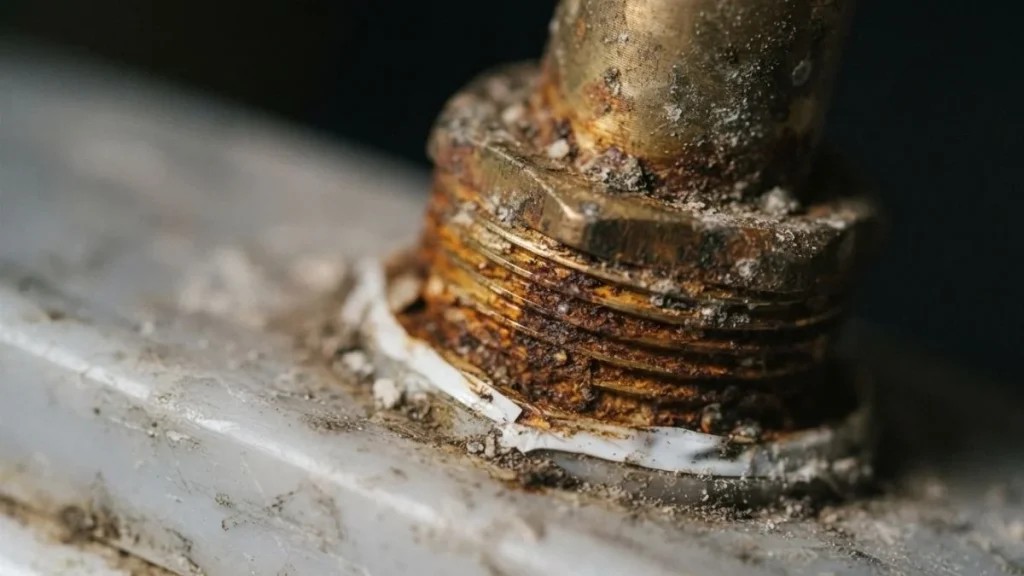
Before applying force, spend 60 seconds on a visual inspection. A stuck faucet nut shows general resistance but clean threads — it moved into place fine, it just hasn’t moved since. A rusted kitchen faucet nut shows orange-brown staining around the faucet base nut and feels gritty when you attempt the first counterclockwise turn. A cross-threaded nut is the most serious: it will turn slightly then bind hard in both directions, and forcing it causes permanent thread damage.
Try one firm counterclockwise turn first. The resistance level tells you which problem you have and which fix to reach for.
Penetrating Oil Strategy: Timeline and Comparison
| Method | Product | Wait Time | Best For |
|---|---|---|---|
| Light penetrant | WD-40 | 15–30 minutes | Mildly stuck nuts |
| Heavy penetrant | PB Blaster | 4–8 hours | Heavily corroded metal nuts |
| Vinegar soak | White vinegar | Overnight | Light-to-moderate rust buildup |
| Heat expansion | Heat gun | 2–3 minutes | Seized metal retaining nuts |
Apply penetrating oil directly to the threads where the mounting nut meets the faucet shank. For a rusted faucet nut, PB Blaster consistently outperforms WD-40 on metal-to-metal corrosion. After soaking, use quarter-turn increments — turn, pause, turn again — rather than one aggressive pull. That cycling motion breaks the corrosion seal gradually without stripping threads.
Breaking the Seal Without Damage
Tap the wrench handle sharply with a rubber mallet two or three times before turning. The shock vibration disrupts the corrosion bond without the sustained stress that strips threads.
Once you start moving the nut, apply steady increasing pressure — never a sudden jerk. If the plastic faucet nut cracks or you feel metal threads grinding, stop immediately. Stripped threads on the faucet shank mean the faucet body itself needs replacing, which moves this job past DIY territory.
Removing Faucet Nuts in Tight Spaces Under the Sink
Sink basin access is where most DIY faucet jobs stall. Cabinet interiors typically offer 8 to 14 inches of vertical clearance between the cabinet floor and the underside of the sink deck — not enough room for a standard adjustable wrench to swing freely. In spaces under 12 inches, a basin wrench is the only realistic plumbing tool for the job.

Setting Up for Visibility and Body Position
Bring a headlamp and a small telescoping inspection mirror. The mounting nut sits directly above the basin wrench jaw, flush against the underside of the sink deck, and you cannot position the tool correctly if you cannot see it clearly. A headlamp keeps both hands free. The mirror lets you confirm jaw engagement on the retaining nut before you apply any torque.
Body position matters more than most guides admit. Lying flat on your back with your head inside the cabinet gives you the straightest arm angle for driving the basin wrench upward. Sitting cross-legged inside the cabinet works for deeper sink bases but reduces your leverage on a stuck faucet nut.
The Vertical Insertion Technique
Insert the basin wrench vertically along the faucet supply line, slide the jaw up around the faucet base nut, then pivot the jaw to engage the nut flats. This approach works in gaps as tight as 8 inches — a space where every basin wrench alternative fails.
Before applying penetrating oil, do one dry run. Confirm the jaw seats cleanly on the nut, confirm your counterclockwise removal direction, and confirm you have enough handle clearance to complete a quarter-turn stroke. Finding a clearance problem after lubricating everything wastes time and makes the cabinet floor slippery.
Related Read: How to Remove Moen Kitchen Faucet
Common Mistakes to Avoid
Turning the Wrong Direction
Counterclockwise removal is universal for faucet nuts, but it is easy to lose your bearings when you are lying on your back staring up at the underside of the sink deck. What feels like a leftward push from that position is actually clockwise rotation — which tightens the mounting nut further. Mark the “loosen” direction on your wrench handle with a piece of tape before you get under the sink. One minute of preparation prevents 20 minutes of confusion.
Using the Wrong Tool or Wrong Fit
A faucet nut wrench tool that is even slightly too large will round off the nut flats on the first hard turn. Rounded nut flats turn a straightforward stuck faucet nut removal into a extraction job requiring locking pliers or a nut splitter. Always confirm jaw width matches the nut before applying force. For plastic faucet nuts specifically, an oversized jaw concentrates pressure on two flats instead of distributing it evenly, and cracking follows quickly.
Skipping the Water Shutoff
Turn off the water supply valves under the sink before touching anything. The retaining nut sits directly adjacent to the supply line connection point. Any lateral force on the faucet base nut during removal can disturb a corroded supply line fitting and trigger a leak. The shutoff valves are typically located on the hot and cold supply lines directly below the sink basin — turn both clockwise until firm.
Over-Torquing on Reinstall
Hand-tighten the new mounting nut first, then add no more than a quarter-turn with the wrench. Plastic faucet nut threads strip at surprisingly low torque — roughly 3 to 5 foot-pounds — and a warped or cracked nut means pulling the faucet again before you have even used it.
You’re Ready to Remove Your Kitchen Faucet Nut
The right tool for the space — almost always a basin wrench — solves 80% of stuck faucet nut problems before penetrating oil or extra force ever enters the equation. Pick up a basin wrench at any hardware store for under $30, shut off your supply valves, and run one dry-fit test under the sink to confirm jaw clearance before you commit to the job. Do those three things first, and the rest of the process follows exactly as described above.