

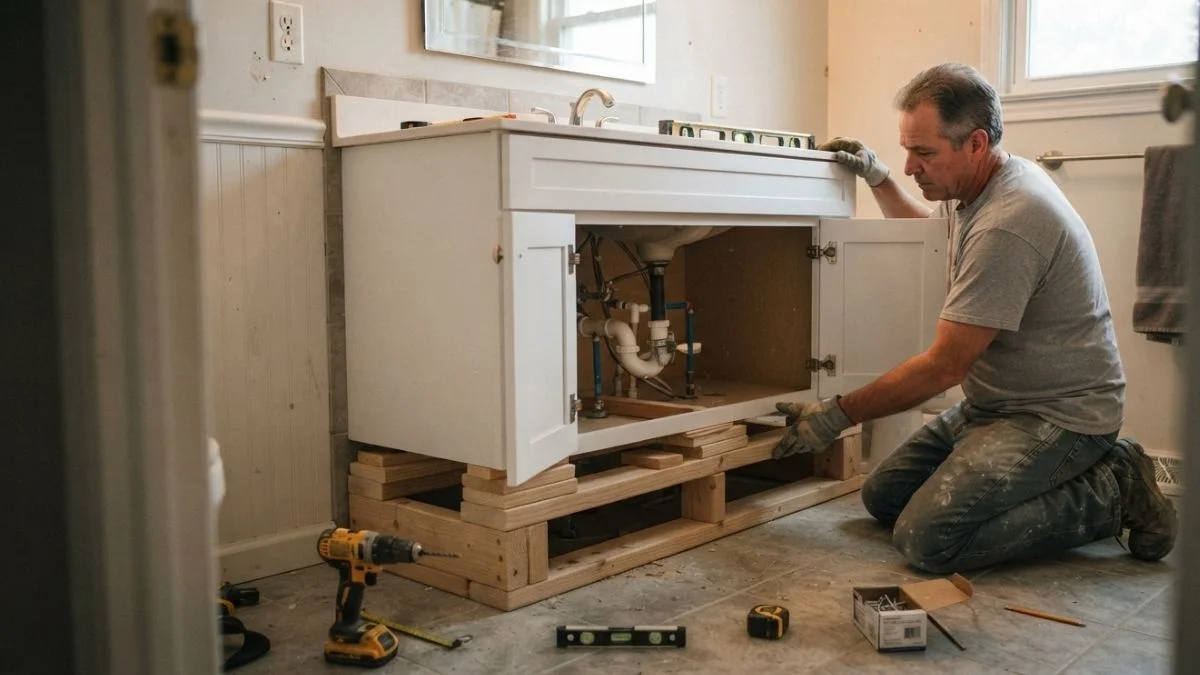
The standard bathroom vanity sits 32 inches high — well below the 36-inch height most taller homeowners need to avoid chronic back strain, and knowing how to raise bathroom cabinets can fix that without a full replacement.
If you’re over 6 feet tall, a low vanity forces you to hunch dozens of times a day, and most online guides skip the plumbing and code details that make or break the project.
This guide covers 3 tested methods — toe kick risers, support frames, and leg extensions — including tools, costs, and exactly what to do with your plumbing connections.
Why Your Bathroom Vanity Feels Too Low
Most bathroom vanities installed before 2000 sit at 32 inches — a height based on outdated kitchen cabinet standards, not actual human ergonomics.
The Gap Between Old Installations and Modern Standards
Today’s “comfort height” vanities measure 36 inches, matching the countertop height adjustment used in modern kitchen design. Builders now default to 34–36 inches for new bathroom remodeling projects, but millions of older homes still have the shorter version. If your bathroom was built or last renovated before 2005, your vanity countertop is almost certainly too low by current standards.
What a Low Vanity Does to Your Body
For anyone 6 feet or taller, a 32-inch sink height creates a 4-inch deficit that forces your spine to flex forward with every hand wash, tooth brushing, and face wash. Do that 20–30 times a day and you accumulate real, repetitive strain on your lower back and neck. This is not a minor inconvenience — it is a documented ergonomic problem that physical therapists flag regularly.
Accessibility and Aging-in-Place Needs
The ADA (Americans with Disabilities Act) recommends a maximum vanity height of 34 inches for wheelchair accessibility, while taller or standing users need the opposite adjustment. For aging-in-place bathroom remodeling, raising the cabinet base to 36 inches lets homeowners stand comfortably at the sink longer without fatigue. A higher toe kick clearance also makes it easier to stand closer to the countertop, which improves stability and balance — a real safety factor for older adults.
Method 1: Raising the Toe Kick
The toe kick is the recessed panel at the base of your vanity cabinet — typically 3.5 inches tall and set back 3 inches from the cabinet face. Replacing or building up this section is the most common vanity too low solution because it requires no changes to the cabinet box itself.
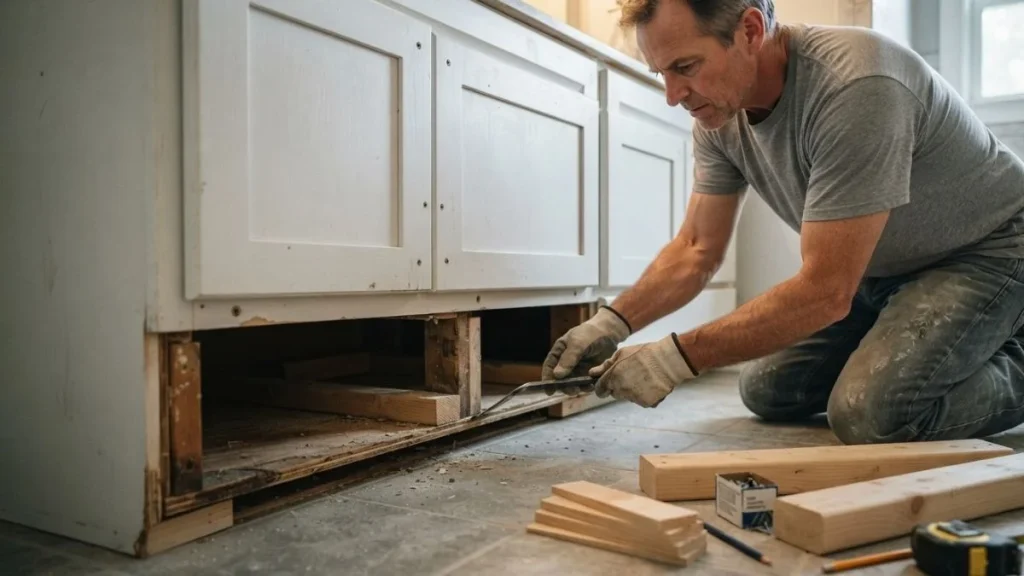
How the Toe Kick Works and How to Remove It
Most toe kicks are either stapled or glued to a small wooden cleat (a horizontal strip of wood fastened to the floor). Use a flat pry bar to pop the panel free — work slowly from one end to avoid splitting the material. Once removed, you’ll see the open cavity beneath the cabinet base where the new riser will sit.
How Much Height You Can Gain
This method delivers a realistic increase vanity cabinet height range of 2–6 inches. A standard 2×4 laid flat adds 1.5 inches. Stacked framing lumber or a built-up platform frame can reach 5–6 inches before the proportions look awkward relative to the countertop and mirror above.
Materials and When This Method Works Best
You need:
- 2×4 or 2×6 framing lumber (cut to cabinet width)
- Construction adhesive and 3-inch structural screws
- Wood shims for leveling on uneven floors
- A matching toe kick panel to refinish the front face
This approach works best when your cabinet box is structurally sound, the floor is relatively level, and you want a bathroom countertop height adjustment of 4 inches or less without touching any plumbing connections.
Method 2: Support Frame or Riser Blocks
Building a support frame beneath your existing cabinet base is the most structurally reliable way to raise bathroom vanity height, and it keeps your countertop, sink, and plumbing connections completely intact during installation.
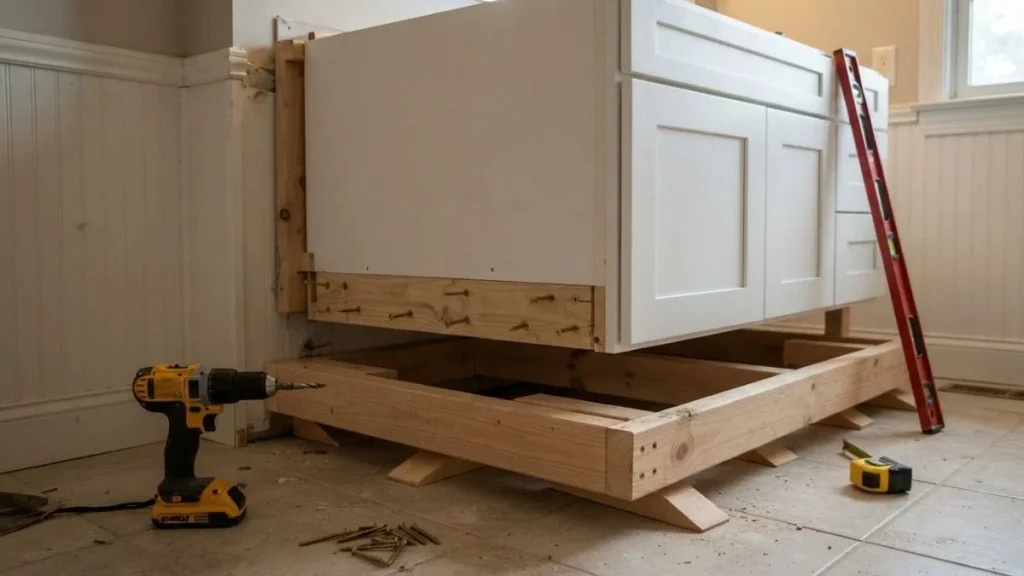
Building a Support Frame
A support frame is a rectangular box built from 2×4 lumber that sits between your floor and the bottom of the cabinet. Cut four pieces to form a perimeter matching your vanity’s footprint, then add one or two interior cross-members for rigidity. Fasten the frame to the floor with 3-inch structural screws, set the cabinet on top, and secure it through the cabinet base into the frame. This method can increase vanity cabinet height by 3–8 inches cleanly.
Stackable Riser Blocks as a Faster Alternative
Commercial riser blocks — such as those made by Waddell or similar hardware manufacturers — are pre-cut hardwood or composite blocks designed to stack under cabinet legs or bases. They typically come in 1-inch, 2-inch, and 4-inch increments, letting you dial in an exact bathroom countertop height adjustment without any cutting or framing. Home Depot and Lowe’s both carry furniture riser sets that work for lighter vanity cabinets.
Weight-Bearing and Stability Checks
Before installation, confirm your vanity’s total weight — cabinet, countertop, and sink combined often exceeds 150 pounds. Your frame or riser blocks must sit on solid subfloor, not just vinyl or tile. Check for:
- No flex or soft spots in the floor beneath the cabinet
- Plumb (perfectly vertical) cabinet sides after lifting
- Secure fastening at every corner to prevent lateral movement
Method 3: Full Vanity Replacement
Sometimes raising the existing cabinet base isn’t the right call — and replacing the entire vanity is actually the cleaner, more cost-effective path when structural or aesthetic constraints make the other methods impractical.
When Replacement Makes More Sense Than Raising
If your cabinet box shows water damage, warping, or rot at the base, building on top of a compromised structure creates new problems. Replacement also makes sense when you need more than 6 inches of height gain, want a completely different vanity style, or when the existing toe kick and frame are embedded in tile that would crack during removal. In these cases, a purpose-built 36-inch comfort height vanity from brands like Kohler, IKEA’s GODMORGON line, or James Martin Furniture solves the sink height problem permanently.
Cost Comparison: Raising vs. Replacing
| Approach | Typical DIY Cost | Typical Pro Cost |
|---|---|---|
| Toe kick raise | $20–$60 | $150–$300 |
| Support frame | $40–$80 | $200–$400 |
| Full replacement | $200–$1,200+ | $500–$2,500+ |
Raising methods win on cost every time, but a full bathroom remodeling refresh that includes a new vanity, faucet, and countertop can add measurable resale value that offsets the expense.
Removing the Old Vanity and Installing the New One
Disconnect the supply lines first — turn off the shut-off valves under the sink, then unscrew the supply line nuts with an adjustable wrench. Disconnect the P-trap (the curved drain pipe) by loosening its slip-joint nuts by hand. Once plumbing is clear, unscrew the vanity from the wall studs, slide it out, and install the new comfort height unit by reversing the steps.
Recommended: P Trap Too Low For Vanity
Tools and Materials Shopping List
Having the right tools before you start saves two extra trips to the hardware store and prevents mid-project stops that let moisture into exposed cabinet bases.
Essential Tools
Every method for raising a bathroom vanity requires the same core toolkit:
- 4-foot level — confirms the cabinet base is plumb and even after lifting; a cheap torpedo level is not accurate enough for this job
- Circular saw or miter saw — cuts framing lumber cleanly to exact cabinet width dimensions
- Cordless drill with driver bits — drives structural screws into framing and cabinet base
- Adjustable wrench and channel-lock pliers — loosens supply line nuts and P-trap connections for any plumbing considerations
- Flat pry bar — removes the existing toe kick without splitting the panel or damaging the cabinet face
Framing Materials
For support frame or toe kick builds, use:
- 2×4 or 2×6 pressure-treated lumber — moisture resistance matters in a bathroom environment
- Wood shims — corrects uneven floors before fastening; cedar shims from Lowe’s or Home Depot cost under $5 per bundle
- Construction adhesive (Liquid Nails or Loctite PL Premium) — bonds framing to floor as a secondary hold
Hardware and Sealants
Use 3-inch structural screws (GRK Fasteners R4 series are well-rated for this application) rather than standard drywall screws, which lack the shear strength for a cabinet base carrying 150+ pounds. Add L-brackets at cabinet-to-wall connection points for lateral stability.
Finish every exposed seam where the cabinet meets the floor or wall with DAP silicone caulk — it blocks water infiltration that causes the rot and warping that makes future bathroom remodeling far more expensive.
Plumbing Adjustments You Need to Know
Raising your vanity moves the sink height up, which means every pipe connected to it needs to be checked — and in some cases, repositioned — before you call the project done.
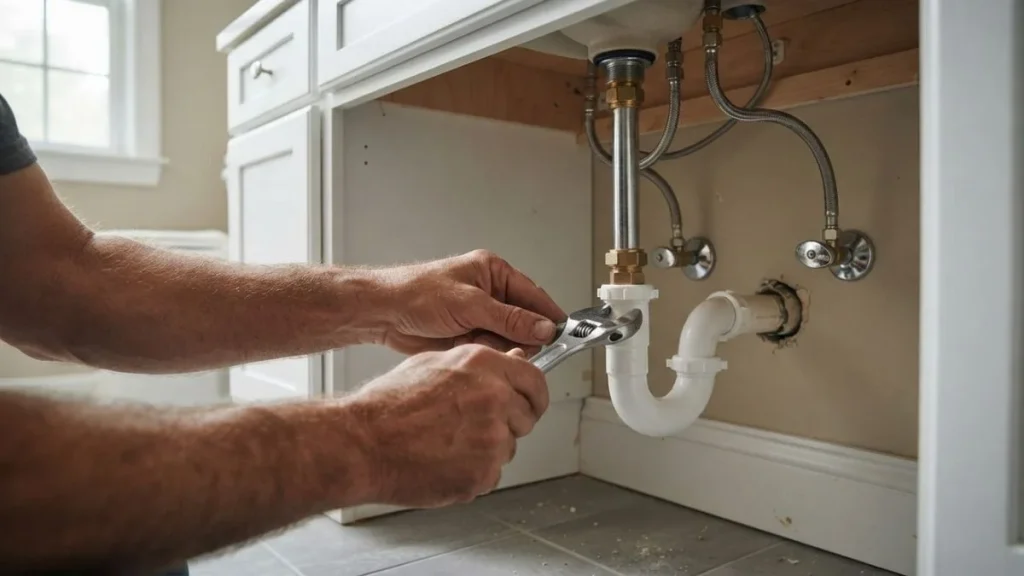
P-Trap and Drain Line Requirements
The P-trap is the curved pipe beneath your sink that holds water to block sewer gas. It must maintain a drain slope of 1/4 inch per foot toward the wall connection — too flat and water pools, too steep and it drains too fast to maintain the water seal. When you raise a cabinet base by 2–4 inches, the existing P-trap often needs to be replaced with an adjustable P-trap (available at any hardware store for $8–$15) to restore the correct angle without cutting into the wall drain.
Water Supply Line Modifications
Standard rigid supply lines will not reach the shut-off valves after raising the cabinet. Replace them with braided stainless steel flexible connectors — 20-inch lines give enough slack to accommodate most bathroom countertop height adjustments without re-routing the valve itself. SharkBite and BrassCraft both make reliable options rated for residential use.
Code Compliance and ADA Standards
Most municipalities follow the International Residential Code (IRC), which does not specify a required vanity height for standard residential bathrooms — but ADA guidelines cap accessible sink height at 34 inches from floor to countertop rim. If your bathroom remodeling project involves a permit, confirm local requirements with your building department before installation.
When to Call a Professional Plumber
Hire a licensed plumber if you encounter any of these:
- Drain line runs through a concrete slab (cutting concrete requires permits and specialized tools)
- Shut-off valves are corroded and won’t close fully
- Supply lines connect to galvanized steel pipe (a sign of aging plumbing that needs broader evaluation)
- Any visible mold or water damage inside the cabinet base cavity
Cost Breakdown: Which Method Saves Money
The difference between the cheapest and most expensive approach to raise bathroom vanity height can exceed $2,000 — so matching the method to your actual needs matters as much as the technique itself.
Toe Kick Method: Lowest Cost Entry Point
This is the most budget-friendly vanity too low solution available. Total material costs run $20–$60 for lumber, shims, construction adhesive, and a replacement toe kick panel. If your existing cabinet base is solid and you need 4 inches or less of height gain, there is no cheaper path to a functional bathroom countertop height adjustment.
Support Frame: Mid-Range with Maximum Stability
A built support frame costs $40–$100 in materials — framing lumber, structural screws, L-brackets, and silicone caulk. The higher cost reflects the additional lumber and hardware needed to build a full perimeter frame. DIY labor runs 3–5 hours for most intermediate-level homeowners, making the total investment still well under $150 out of pocket.
Full Replacement: Highest Cost, Longest Timeline
| Cost Factor | DIY Range | Professional Range |
|---|---|---|
| Vanity cabinet only | $200–$800 | $200–$800 |
| Installation labor | $0 | $300–$800 |
| Plumbing reconnection | $0–$50 | $150–$400 |
| Countertop (if separate) | $100–$600 | $100–$600 |
ROI and Resale Value
According to Remodeling Magazine’s Cost vs. Value report, a midrange bathroom remodel recoups approximately 67% of its cost at resale. A comfort height vanity is a visible, functional upgrade that buyers notice — making full replacement the stronger investment if you plan to sell within 5 years.
Next Steps: Plan Your Project
The right method comes down to three factors: how much height you need, the condition of your existing cabinet base, and whether your drain line runs through the floor or the wall. Start by measuring your current vanity height, marking your target height on the wall, and opening the cabinet doors to inspect the base for any water damage or rot before committing to a method.
If the base is solid and you need 6 inches or less, the toe kick or support frame method gets the job done this weekend without a plumber.


