A leak under kitchen sink when water is turned off can cause up to $10,000 in structural water damage if left undetected for even a few weeks, according to the Insurance Information Institute.
The real problem is not the leak itself — it is not knowing whether you are facing a $12 drain gasket or a $400 plumber visit, while water silently warps your cabinet floor.
In the next five minutes, you will know exactly where your leak is coming from, what caused it, and whether you can fix it yourself today or need a licensed plumber on-site.
Where Is the Leak Coming From?
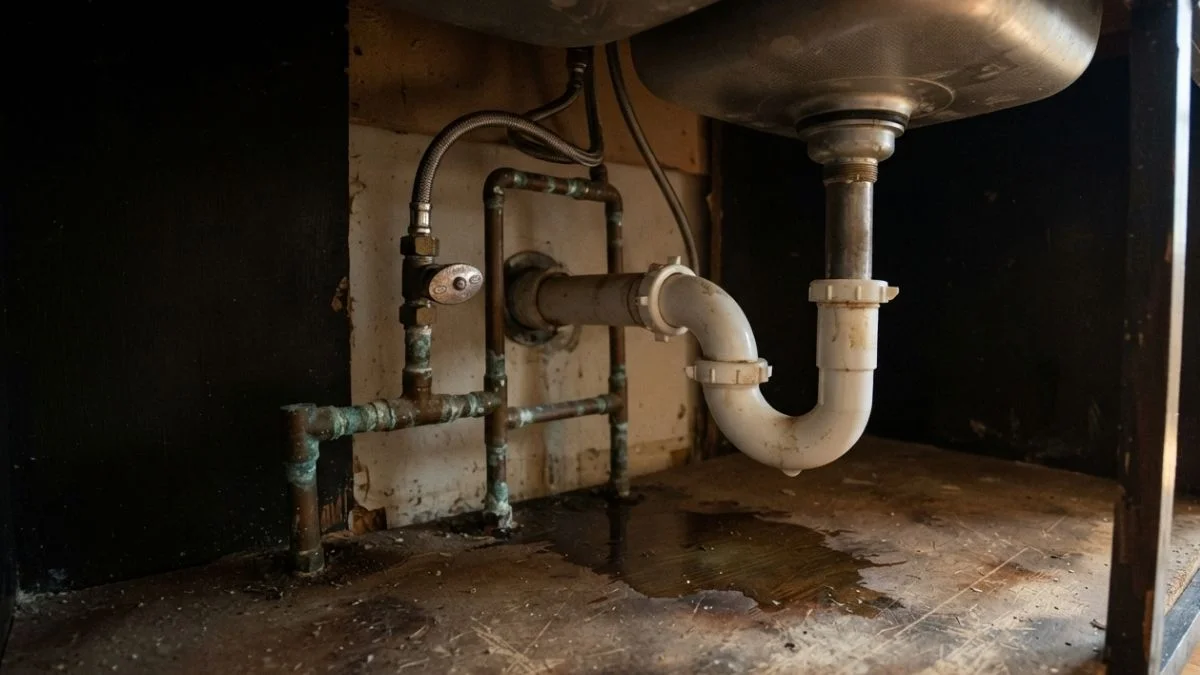
A leak under the sink when the water is off almost always traces back to one of three zones: the shut-off valve, the water supply line, or the P-trap. Pinpointing which zone is leaking before touching anything saves you from misdiagnosing the problem and buying the wrong parts.

Identifying the Exact Leak Location
The shut-off valve — the oval-handled valve on the wall behind your pipes — can drip from the handle stem or from the compression fitting where the supply line connects to it. These are two different failure points requiring two different fixes.
The water supply line runs from the shut-off valve up to the faucet. Leaks here typically appear at either connection end, not along the middle of the line. A slow persistent drip at a compression fitting usually means a worn washer or loose nut. An active water stream means the fitting has failed completely.
The P-trap is the curved pipe section directly below the drain. Leaks below the P-trap are gravity-fed and appear even when the water supply is fully off — because water sitting in the trap drains slowly through a bad seal or cracked joint.
Testing Methods Without Tools
Start by drying the entire cabinet interior completely with paper towels. Turn the water off at the shut-off valve, then wait 15 minutes without running anything.
Then:
- Shine a flashlight at each connection point individually
- Press a dry white paper towel against each joint for 10 seconds and check for moisture transfer
- Check above and below the P-trap separately — the leak source is almost always higher than where the drip lands
- Mark any wet spot with a small strip of tape before you start any repair
This systematic approach eliminates guesswork and is standard practice in water damage mitigation assessments.
Common Causes: Why Leaks Happen When Water Is Off
A leak under the kitchen sink when the water is turned off is not random — each cause has a specific failure mechanism you can identify by location and leak behavior.
Worn Washers and O-Rings
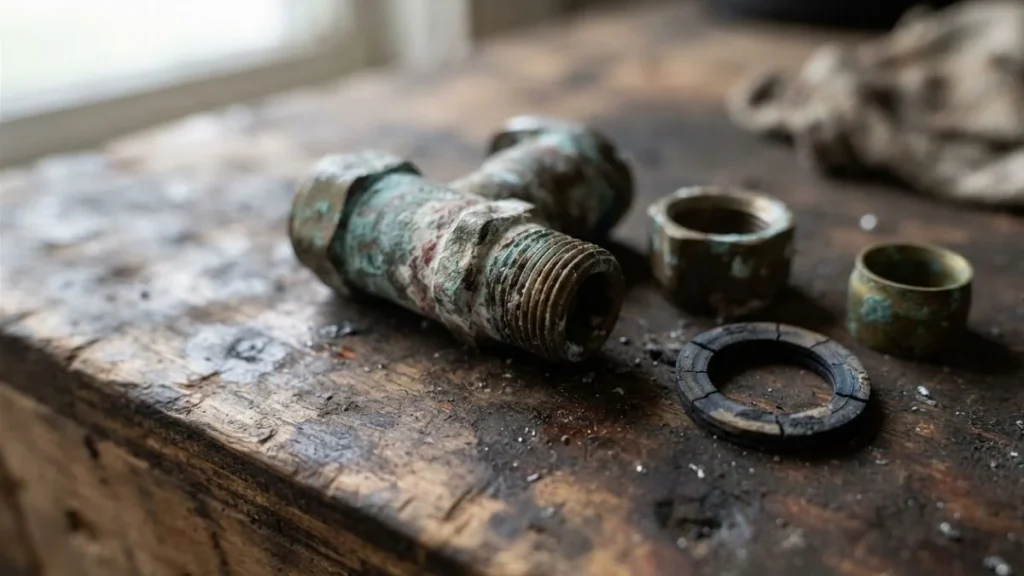
The shut-off valve under your sink contains rubber washers and O-rings that create a watertight seal around the valve stem. These components harden and crack over time, typically after 7-10 years of use. When they fail, water seeps past the stem even when the valve is in the closed position. Moen and Delta both sell brand-specific repair kits with correctly sized O-rings for under $8 at any hardware store.
Corroded or Loose Compression Fittings
A compression fitting works by pressing a small brass ring called a ferrule against the pipe to create a seal. Corrosion eats into the ferrule surface, breaking that seal permanently. A loose compression fitting — one that was never tightened fully during installation — produces the same result: a slow, steady drip at the valve connection point or at the supply line inlet on the faucet body.
Debris Under the Valve Seat
Mineral deposits and sediment from hard water can lodge under the valve seat — the surface the washer presses against to stop flow. Even a small particle of debris holds the washer slightly open, allowing a persistent drip through a technically “closed” valve. This is one of the most overlooked causes of a kitchen sink dripping when water is turned off.
Failed Valve Internals
Ball valves and gate valves — the two most common shut-off valve types — have internal mechanisms that wear out independently of the external fittings. A gate valve with a corroded gate or a ball valve with a cracked ball will leak internally even when fully closed, making this a plumbing emergency that requires complete valve replacement rather than a simple washer swap.
DIY Fixes That Actually Work
Three repairs resolve the majority of under-sink leaks without a plumber: tightening compression fittings, replacing washers and O-rings, and sealing threaded connections with plumber’s tape. Each takes under 30 minutes with basic tools.

Tightening Compression Fittings
Position an adjustable wrench on the compression nut — the hexagonal nut where the supply line meets the shut-off valve. Hold the valve body steady with a second wrench to prevent it from rotating, which can crack older copper pipe connections.
Apply exactly one-quarter turn clockwise, then stop. Over-tightening crushes the brass ferrule permanently, making the leak worse and forcing a full fitting replacement. After tightening, turn the water supply back on and watch the connection for 10 minutes. A remaining drip means the ferrule is already damaged and needs replacement, not more torque.
Washer and O-Ring Replacement
Identify your valve brand before buying parts — Moen, Delta, and Kohler each use different cartridge dimensions, and a universal kit often fits poorly. Check the valve body for a stamped brand name or match the model using a photo at your hardware store.
The replacement sequence:
- Turn off water at the main supply line, not just the under-sink valve
- Unscrew the valve handle using a Phillips screwdriver
- Pull the cartridge straight out — note its orientation before removing
- Swap the O-rings and washer, reassemble in reverse order
- Restore water supply and check for leaks within 10 minutes
Plumber’s Tape on Threaded Connections
Wrap PTFE plumber’s tape clockwise around male threads only — the tape must wind in the same direction the fitting tightens, or it unravels during assembly. Apply 3-4 overlapping wraps for a reliable seal.
This fix works well for slow leaks at threaded supply line connections but does nothing for internal valve failure or cracked ferrules. Treat it as a reliable short-term measure while you source replacement parts, not a permanent solution.
Preventing Recurrence and Protecting Your Cabinet
Fixing the active leak is step one. Preventing the next one — and catching it before it destroys your cabinet floor — requires three specific habits and one scheduled replacement.
Quarterly Connection Checks
Every three months, open the cabinet and hand-tighten every accessible connection: the compression nuts on the shut-off valve, both ends of the water supply line, and the P-trap slip joints. If a connection tightens more than a half-turn by hand, it was already working loose and would have leaked within weeks.
Use a flashlight to check for the chalky white mineral crust that forms around slow micro-leaks at compression fittings — this residue appears before visible dripping begins and is one of the earliest signs of a water supply line connection losing its seal.
Cabinet Floor Protection
Place a waterproof cabinet liner — products like the Con-Tact Brand shelf liner or a cut section of vinyl flooring — directly on the cabinet floor beneath all plumbing connections. This does not stop leaks, but it prevents water from contacting raw particleboard, which absorbs moisture and begins delaminating within 24-48 hours of exposure.
Press firmly on the cabinet floor with your hand during each quarterly check. Soft spots, sponginess, or visible swelling indicate water damage already in progress — a condition that escalates from a cosmetic issue to a structural one requiring cabinet replacement if ignored beyond 2-3 months.
Scheduled Valve Replacement
A shut-off valve installed more than 20 years ago should be replaced proactively every 7-10 years regardless of visible condition. Older gate valves especially develop internal corrosion that is invisible from outside but causes catastrophic failure when the valve is operated during an emergency. Replacing a Moen or BrassCraft quarter-turn ball valve costs $15-$25 in parts and eliminates one of the most common sources of a plumbing emergency under the kitchen sink.
Related Read: Kitchen Sink Leaking into Basement
FAQ
Why does my kitchen sink leak even when water is turned off?
A leak under the kitchen sink when water is turned off typically means the shut-off valve itself is failing — worn O-rings, a corroded compression fitting, or debris under the valve seat prevent a complete seal. Water in the P-trap can also drain slowly through a cracked joint, producing drips with no active supply pressure.
What is the difference between a P-trap leak and a shut-off valve leak?
A P-trap leak appears below the curved drain pipe and drips even with the water supply fully off, because residual water in the trap escapes through a failed slip joint or cracked section. A shut-off valve leak appears at the valve body or supply line connection points and indicates a pressure-side seal failure requiring washer replacement or valve replacement.
How much does a DIY fix typically cost versus calling a plumber?
DIY repairs for common under-sink leaks cost $5-$25 in parts — O-ring kits, PTFE tape, and replacement compression fittings are all available at Home Depot or Lowe’s. A licensed plumber typically charges $150-$350 for the same repairs, depending on local labor rates and valve condition.
Stop the Leak Before Water Damage Spreads
The difference between a $15 O-ring fix and a $2,000 cabinet replacement is almost always how fast you locate and address the source. Right now, dry the cabinet interior completely, wait 15 minutes, and use a flashlight with a white paper towel to press against each connection point — that single test will tell you exactly where to focus your repair before you spend a dollar on parts or a minute on the phone with a plumber.