


Tiling over radiant floor heating is one of the most rewarding upgrades a homeowner can make — but it accounts for a significant share of premature tile failures when done without the right adhesives, movement joints, or substrate prep.
The real problem is compatibility: most homeowners don’t know which thinset, membrane, or tile format actually handles the daily thermal cycling of a heated slab, and a single wrong product choice can crack grout lines or delaminate an entire floor within one heating season.
This guide gives you the exact material specs, step-by-step process, and professional standards — drawn from Ceramic Tile Foundation guidelines and manufacturer data from WarmlyYours — so you leave knowing precisely how to install tile over a radiant system without failure.
Why Modified Thinset Is Non-Negotiable for Radiant Floor Systems
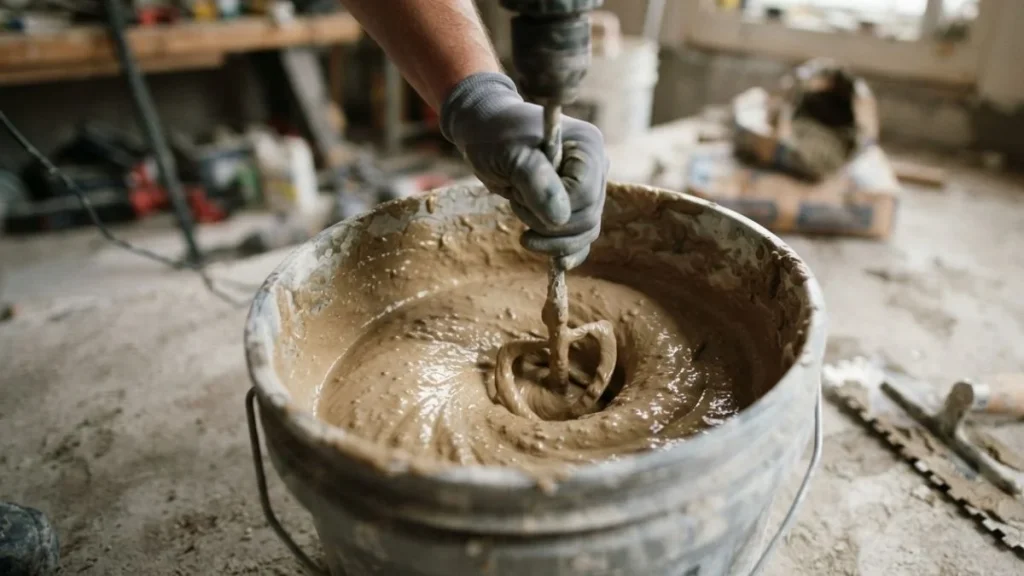
Standard thinset is rigid once cured. Radiant floor systems — whether hydronic or electric — heat and cool the slab every single day. That repeated thermal cycling creates micro-movement at the bond line, and rigid mortar cracks under that stress. Modified thinset mortar contains polymer additives that let the cured bond flex slightly with each expansion-contraction cycle, which is why it’s the only appropriate adhesive for radiant heating systems.
What “Modified” Actually Means
A polymer-modified thinset blends Portland cement with latex or acrylic polymers. Those polymers increase the adhesive’s tensile strength and — critically — its flexibility rating. For radiant applications, look for a thinset rated to at least 1,000 psi tensile strength with a deflection tolerance clearly stated on the data sheet. Mapei Ultraflex 2 and Laticrete 254 Platinum are two widely used options that meet this threshold and carry explicit radiant-heat approval from the manufacturer.
How Thermal Stress Breaks Standard Bonds
Hydronic radiant heating tile installation puts the floor through the most aggressive thermal cycling of any radiant format. Water-based systems can shift slab surface temperature by 20–30°F between off and peak cycles. Standard thinset — particularly unmixed bag mortar applied too dry — cannot accommodate that movement. The result is debonding at the tile back, hairline grout cracks, or full tile delamination within the first heating season.
Coverage Rate and Application Rules
Back-butter every tile and achieve a minimum 95% mortar coverage on heated floors — the Ceramic Tile Foundation’s standard for wet areas and radiant installations alike. Standard floors only require 80% coverage, so this is a firm upgrade in technique. Use a 1/2-inch square-notch trowel for most ceramic and porcelain formats to reach that coverage threshold consistently.
Preparing Your Radiant System Before Tile Work
Never start floor preparation until you’ve confirmed the radiant system underneath is fully functional. Tiling over a hidden leak or a failed heating element means tearing up a finished floor — an expensive mistake that proper pre-inspection eliminates entirely.

Inspecting and Testing Existing Systems
For hydronic radiant heating tile installation, pressure-test the tubing before any surface work. Standard practice is to pressurize the lines to 100 psi and hold for 24 hours — any pressure drop indicates a leak requiring repair. Thermal imaging cameras, available as smartphone attachments from companies like Flir, can map exactly where pipes run so you avoid puncturing them with fasteners later.
Electric radiant floor heating tile systems need a different check: use a digital ohmmeter to verify the heating cable’s resistance matches the manufacturer’s specified range. WarmlyYours recommends recording this reading before, during, and after installation as proof of system integrity.
Creating a Level, Tile-Ready Surface
In-floor heating tile preparation demands a flat substrate — the Tile Council of North America specifies no more than 3/16-inch variation over a 10-foot span. Pipe layouts and cable channels often create ridges and low spots that require self-leveling compound to correct. Products like Ardex K-15 are specifically formulated for use over radiant systems and can be poured directly over tubing without trapping damaging heat.
Concrete slabs must also pass a moisture test before tiling. Use a calcium chloride test kit and confirm readings below 5 lbs per 1,000 square feet per 72 hours. High moisture beneath tile on a heated slab accelerates adhesive breakdown significantly faster than on unheated floors.
Uncoupling Membranes: Why They Matter on Radiant Floors
An uncoupling membrane is a thin polyethylene mat installed between the substrate and tile layer. On radiant floors, it serves one critical function: it lets the slab and tile move independently during thermal cycling, eliminating the shear stress that cracks grout and breaks adhesive bonds.

How Thermal Stress Makes Membranes Essential
Tile and concrete expand at different rates when heated. A ceramic tile floor bonded directly to a concrete slab — with no buffer layer — builds up lateral stress every time the system reaches operating temperature. Over dozens of heating cycles, that stress concentrates at the weakest point: the thinset bond line or the grout joint. An uncoupling membrane radiant floor system interrupts that stress transfer entirely.
Schluter DITRA vs. Generic Options
Schluter DITRA is the most specified uncoupling membrane in North America, and it carries explicit compatibility ratings for radiant heat systems up to 82°F surface temperature. Its square-cut mortar pockets provide mechanical bonding for tile above while the fleece backing bonds to the substrate below. Generic uncoupling mats can work, but verify the manufacturer’s maximum continuous operating temperature before committing — some cheaper options soften or compress under sustained heat, reducing their uncoupling effectiveness.
Installing the Membrane Correctly
Embed DITRA into a solid bed of unmodified thinset — Schluter specifically requires unmodified mortar at this layer to allow proper wetting of the fleece. Butt seams tightly with no overlap. Once set, apply modified thinset mortar for radiant heat over the membrane surface to bond the tile. This two-mortar approach is not optional: it follows Schluter’s published installation requirements and directly affects warranty coverage and long-term heat distribution performance.
Step-by-Step Installation Sequence
The order of operations on a radiant floor is not flexible — skipping or reordering steps is the single most common cause of premature failure in DIY radiant tile projects.
Surface to Adhesive to Grout
Start with the membrane. Bond the uncoupling membrane to the prepared slab using unmodified thinset, combed with a 3/16-inch V-notch trowel, and press the fleece side firmly into the mortar. Let it cure fully — minimum 24 hours at 70°F — before tiling over it.
For the tile layer, switch to modified thinset mortar rated for radiant heat. Comb the membrane surface with a 1/2-inch square-notch trowel, then back-butter each tile individually. Press tiles with a slight twisting motion to collapse trowel ridges and eliminate air pockets — air gaps act as insulation, disrupting even heat distribution across the floor. Check coverage by pulling a tile every 15 minutes: you need 95% contact across the full back face.
Maintain consistent spacing with calibrated tile spacers. Uneven joints trap stress at grout lines, which thermal cycling then exploits.
Curing and System Activation
Allow modified thinset to cure for a minimum of 28 days before activating the radiant system — polymer-modified mortars need the full cure window to reach rated flexibility and bond strength. Activating heat early drives out moisture too fast and weakens the bond permanently.
Choose a sanded, polymer-modified grout like Laticrete PermaColor for radiant environments — its flexibility rating handles thermal stress better than standard Portland-based grout. When activating the system, ramp temperature gradually: increase by no more than 5°F per day over the first two weeks. This controlled thermal cycling verification protects both the grout joints and the adhesive bond during the critical break-in period.
Common Pitfalls and How to Avoid Them
Most radiant floor tile failures trace back to 4 specific mistakes — all of them preventable with the right material knowledge before the project starts.
Using Standard Thinset
This is the most frequent failure mode in DIY hydronic radiant heating tile installation. Standard thinset has no polymer modification, meaning it cures into a brittle bond that cannot flex with thermal cycling. Tiles installed this way often sound hollow within one heating season and delaminate fully within two. The fix costs far more than the price difference between standard and modified thinset mortar — which is typically less than $10 per bag.
Skipping the Uncoupling Membrane on Concrete Slabs
Concrete slabs are the most thermally active substrate in any radiant system. Without an uncoupling membrane, the differential expansion between slab and tile generates shear stress that no thinset — not even premium modified formulas — can absorb indefinitely. Some installers substitute cement board underlayment here, but cement board is a rigidity layer, not an uncoupling layer. It does not solve the thermal stress problem and adds unnecessary height.
Poor Surface Preparation
Dust, curing compounds, paint residue, and old adhesive all prevent thinset from bonding to the substrate. Grind or shot-blast concrete surfaces until you reach clean, open pore structure — a process called surface profiling. Skipping this step is invisible at installation but guarantees early bond failure.
Activating Heat Too Early
Turning on the radiant system before thinset and grout reach full cure drives moisture out of the mortar too aggressively. The result is a weakened, porous bond that cannot handle subsequent thermal stress. Mark the activation date on your calendar: 28 days minimum, no exceptions.
Hydronic vs. Electric Systems: Installation Differences
Hydronic and electric radiant systems both require modified thinset and proper surface prep, but they differ in substrate depth, thermal mass, and how you physically install tile over them. Treating them identically is a reliable path to failure.
Hydronic Systems: Thick Slabs and Long Timelines
Hydronic radiant heating tile installation typically involves tubing embedded in a concrete topping slab 1.5 to 2 inches thick. That thermal mass takes longer to heat and cool, which means slower but more sustained thermal cycling stress on the tile assembly. New concrete topping slabs need a minimum 28-day cure before any floor preparation begins — and moisture testing is mandatory, since freshly poured concrete over hydronic tubing retains moisture far longer than standard slabs. Self-leveling compound applied over pipe layouts adds additional cure time before membrane installation can start.
Electric Systems: Thin Mats, Tighter Tolerances
Electric radiant floor heating tile installations use resistance cable mats — typically 3/16-inch thick — laid directly on the substrate before tiling. Because the heat source sits just below the tile, thermal conductivity of the tile and thinset layer directly affects system efficiency. Porcelain and ceramic tile conduct heat well; thick natural stone slows heat transfer noticeably. Keep thinset bed depth consistent across the mat to avoid hot spots where coverage is thin.
Coverage and Efficiency Considerations
Both system types lose efficiency when air pockets form in the thinset layer. Air is an insulator — voids beneath tiles force the system to run longer to reach set temperature, increasing energy consumption. The 95% coverage standard is an energy efficiency requirement as much as a structural one. For electric mats specifically, uneven thinset depth creates localized overheating at thin spots, which can damage cable insulation over time.
Read Also: How to Bleed Radiant Floor Heating System
Your Radiant Floor Tile Project Starts with Materials, Not Speed
Every radiant floor tile failure traced back in this guide — delamination, cracked grout, hollow tiles — comes from rushing material selection or skipping cure windows, not from any inherent incompatibility between tile and radiant heat. Before purchasing a single bag of thinset, download the technical data sheets for Mapei Ultraflex 2 or Laticrete 254 Platinum, confirm the radiant-heat approval language, and cross-reference your chosen membrane’s maximum operating temperature against your system’s output specs. Get those three documents in hand first, and the rest of the installation sequence falls into place.


