Water damage is the second most common homeowner insurance claim in the U.S., and water leaking under sink cabinet spaces is one of its most overlooked starting points.
The problem is that most homeowners can’t identify the exact source fast enough — and every hour of delay means swelling wood, mold risk, and repair bills that climb quickly.
This guide gives you a clear, step-by-step method to find the leak, fix the most common causes yourself, and know exactly when to call a plumber.
Most Common Causes of Water Under Sink Cabinets
Before you can fix a wet cabinet floor, you need to know exactly what failed. These are the 4 most likely culprits.
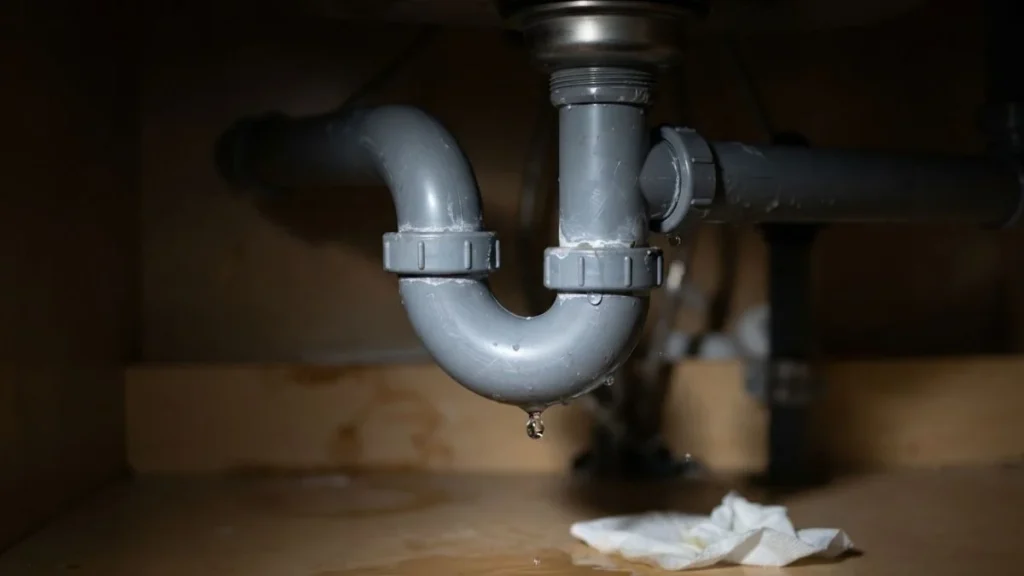
Leaking Drain Pipes and Connections
Drain pipe connections rely on slip nuts — threaded plastic or metal rings that hold pipe sections together. Over years of use, these nuts loosen from vibration and thermal expansion. Mineral buildup from hard water accelerates corrosion on metal slip nuts, eating away at the seal. The clearest sign is water pooling directly around the P-trap area after running the faucet.
Loose or Worn Supply Line Connections
Supply lines carry pressurized water to your faucet, so even a small failure creates a steady drip. Rubber washers inside compression fittings dry out and crack over time, especially in cabinets with poor ventilation. Slip nuts on braided stainless lines can also vibrate loose from normal water pressure cycling. Check the connections at both ends — the shutoff valve and the faucet inlet — since either point can fail independently.
P-Trap Seal Failure and Debris Blockage
The P-trap is the curved pipe section under your drain that holds a small water seal to block sewer gases. Hair, soap residue, and grease accumulate inside it, creating partial blockages that force water back toward connection points. When the trap arm connection separates under that pressure, water leaks onto the cabinet floor. Standing water in this area also accelerates cabinet material degradation and mold growth within 24 to 48 hours.
Hidden Leaks: Slab and Wall-Run Supply Lines
A hidden water leak is the hardest to diagnose because the source isn’t inside the cabinet at all. If you see moisture at the cabinet base but all visible pipes are dry, the leak may be in a supply line running through the wall or under a concrete slab. Pinhole leaks in copper tubing — caused by pitting corrosion — are a common culprit in homes built before 1980. This scenario requires professional moisture detection equipment and goes beyond DIY repair.
How to Locate and Diagnose the Leak Source
Guessing wastes time and money. This methodical approach pinpoints the leak source in under 10 minutes using nothing more than paper towels and observation.
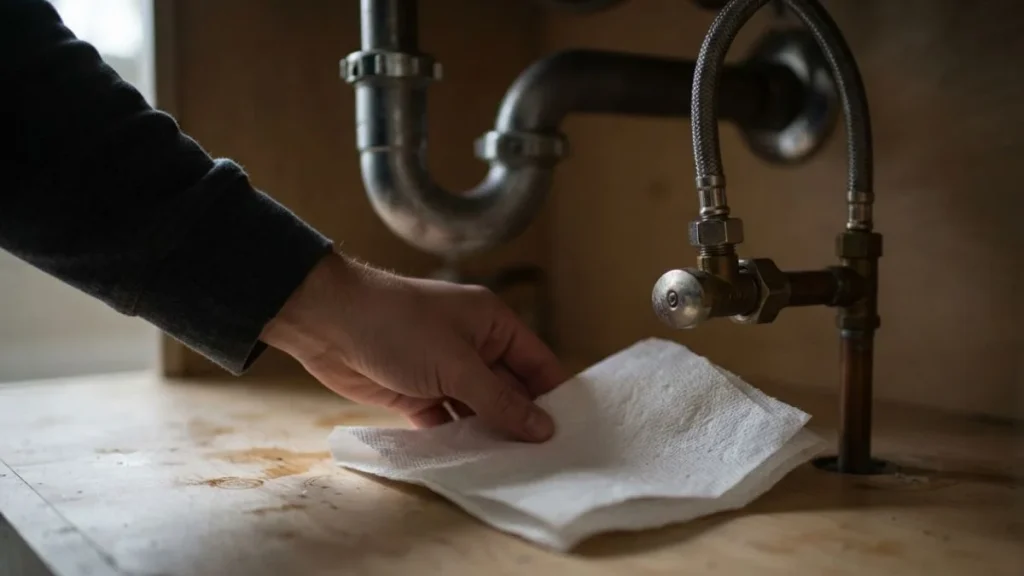
Step-by-Step Inspection Methodology
Follow these steps in order:
- Clear and dry the cabinet completely. Remove everything stored inside, then wipe all surfaces dry with a towel. Any existing moisture will contaminate your diagnosis.
- Place white paper towels flat under every pipe connection. White paper shows moisture immediately and helps you pinpoint exactly which joint is failing.
- Run the faucet for a full 5 minutes at normal pressure. Check the paper towels while water is still running — some drips only appear under active flow.
- Observe where moisture first appears. Wet paper near the P-trap or drain connections points to a drain pipe leak. Wet paper near the shutoff valve or faucet inlet points to a supply line issue.
- Isolate supply from drain. Turn off the shutoff valve completely, then run the faucet until flow stops. Now fill the sink and let it drain. If the leak only appears during draining, the supply line is not the problem.
When DIY Inspection Isn’t Safe or Clear
Some situations signal that standard plumbing inspection won’t be enough. Stop and call a licensed plumber if you find any of these conditions:
- Water pooling on the cabinet floor with no visible drip source anywhere on exposed pipes
- Soft, spongy, or discolored cabinet wood, which indicates prolonged moisture exposure and possible structural damage
- More than 2 separate leak points visible at once, which suggests a broader pressure or installation failure
- Any sign of slab leak — including warm spots on the floor near the cabinet, higher-than-normal water bills, or the sound of running water when all fixtures are off
Cabinet material degradation from long-term moisture is not a plumbing fix alone. It requires carpentry repair or full cabinet replacement alongside leak mitigation.
Quick Fixes Before Calling a Plumber
Most under-sink leaks fall into one of two categories: loose connections or failed washers. Both are fixable in under 30 minutes with basic tools and parts that cost less than $30.
Tightening Connections (Zero-Cost First Step)
Start here before buying anything. Slip nuts on drain connections and supply lines frequently loosen over time from vibration and temperature changes.
Hand-tighten every slip nut clockwise until snug. If the drip continues after running water, add no more than a quarter turn with a pair of channel-lock pliers. That’s the limit — overtightening chrome or plastic fittings cracks them instantly, turning a $0 fix into a $40 replacement. If a nut won’t hold at hand-tight plus a quarter turn, the fitting itself is the problem and needs replacing.
Replacing Washers and Gaskets ($10–30)
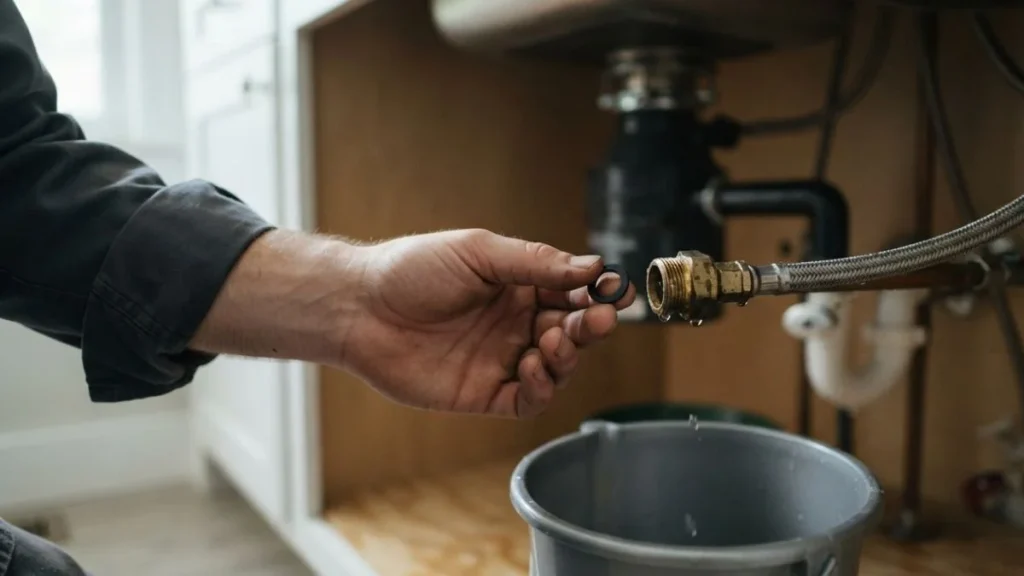
A failed rubber washer is the most common cause of a dripping supply line under sink. Washers dry out, compress permanently, and lose their seal — especially in older homes with original plumbing.
Here’s the repair process:
- Turn off the shutoff valve fully and place a bucket under the connection.
- Remove the slip nut by hand or with pliers and pull the fitting apart.
- Inspect the rubber washer — cracks, flattening, or brittleness mean it needs replacement.
- Take the old washer to a hardware store like Home Depot or Ace Hardware to match the size exactly.
- Install the new washer, reassemble the fitting, hand-tighten the slip nut, and run water for 3 minutes to confirm the seal holds.
When to Stop and Call a Professional
Some leaks signal problems that no washer or wrench will solve.
Call a licensed plumber immediately if:
- The leak returns within 48 to 72 hours of a repair attempt
- Supply lines run through walls or a concrete slab, requiring wall access or slab leak detection equipment
- You notice slab leak signs: warm floor spots near the cabinet, unexplained spikes in your water bill, or mold appearing at baseboard level
Attempting further DIY repairs in these situations risks accelerating cabinet material degradation and structural water damage that costs far more to remediate than a single plumber visit.
Water Damage Assessment and Prevention
Fixing the leak is step one. Addressing the water damage under sink surfaces is equally urgent — cabinet material degradation accelerates fast once moisture penetrates.
Cabinet Material Recovery Timeline
Not all cabinet materials respond to water the same way. Knowing what you have determines how quickly you need to act.
| Cabinet Material | Water Tolerance | Damage Timeline | Recovery Potential |
|---|---|---|---|
| Solid wood | Moderate | Warping begins after 72+ hours | High if dried within 24 hours |
| Particle board / MDF | Very low | Swelling begins within 24–48 hours | Low — usually requires replacement |
| Plywood | Moderate-high | Delamination after 48–72 hours | Moderate if dried quickly |
| Laminate over MDF | Very low | Peeling and bubbling within 24 hours | Low — surface damage is permanent |
Most modern kitchen and bathroom cabinets use particle board or MDF as the base material, which means a wet cabinet floor that sits overnight is often a replacement situation, not a repair.
Mold Prevention and Drying Strategy
Mold can begin colonizing wet surfaces in as little as 24 to 48 hours, making immediate drying a critical part of water damage mitigation.
Take these steps as soon as the leak is stopped:
- Open cabinet doors fully and remove all stored items to maximize airflow.
- Soak up standing water with dry towels, then place a portable dehumidifier or box fan directed into the cabinet interior.
- Leave doors open for a minimum of 48 hours and check surfaces daily for soft spots or discoloration.
- If you see visible mold growth — fuzzy or discolored patches — do not scrub it dry. According to EPA mold remediation guidelines, areas larger than 10 square feet require professional remediation to avoid spreading spores.
For smaller mold spots under 10 square feet, the EPA recommends cleaning with detergent and water, allowing the area to dry completely, and wearing gloves and an N95 mask during cleanup.
Read Also: Toilet Water Supply Line Through Floor
Stop the Leak, Save the Cabinet
The faster you identify water leaking under sink cabinet spaces, the less it costs — most repairs that catch a loose slip nut or failed washer within hours stay under $30, while the same leak left overnight can mean cabinet replacement and mold remediation. Right now, clear everything out of your cabinet, place white paper towels under every pipe connection, and run the faucet for 5 minutes to find your exact leak source before calling anyone.