A cracked or peeling foundation skim coat — the thin mortar layer applied over concrete or block walls — is one of the most common basement problems in homes built before 1980, and foundation skim coat repair is well within reach for a confident DIYer.
The real frustration is not knowing whether those hairline cracks signal a simple surface fix or a deeper structural failure, and most homeowners waste money calling contractors before understanding what they actually have.
This guide gives you a clear visual diagnosis method, a proven step-by-step repair process, and an honest assessment of difficulty so you can decide with confidence whether to grab a trowel or pick up the phone.
Diagnosing Your Foundation: When DIY Works
Most foundation skim coat problems — also called parging or mortar skim coat failures — fall into one of two categories: cosmetic surface damage or structural compromise. Telling them apart before you buy a bag of mortar mix saves you real money.
What to Look For During Visual Inspection
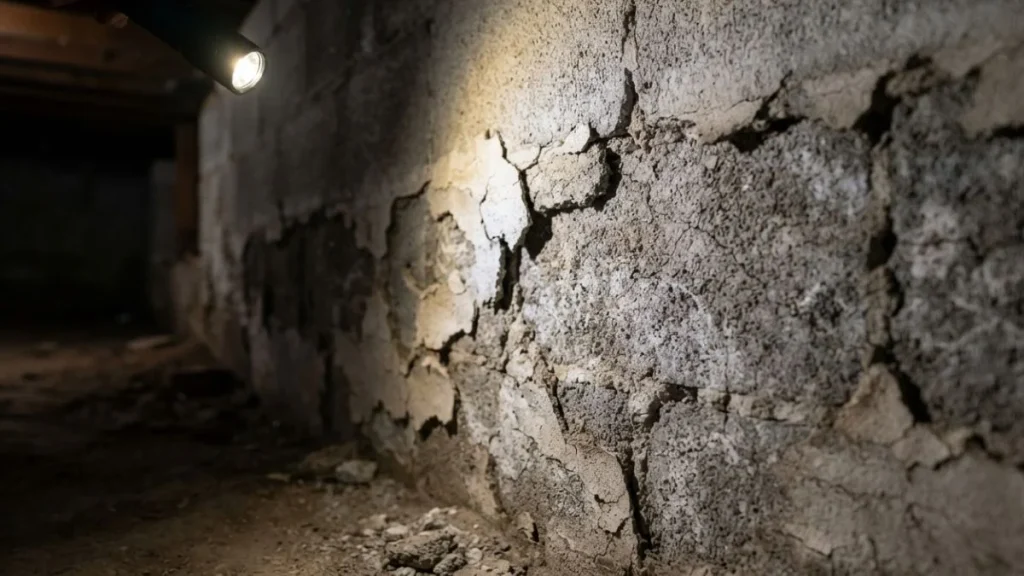
Walk the full perimeter of your foundation wall in good light. Look for these specific signs:
- Hairline cracks (under 1/16 inch wide): Surface shrinkage, almost always a DIY repair
- Spalling concrete or parging: Chunks or layers peeling away from cinder block or poured concrete — repairable with proper prep
- Soft spots: Press firmly; if the skim coat coming off foundation feels hollow or crumbles, the bonding coat beneath has failed
- Staining or efflorescence: White mineral deposits signal active moisture moving through the wall
The Crack Severity Scale
Hairline cracks in the mortar skim coat are cosmetic. Cracks wider than 1/4 inch, horizontal cracks in block walls, or stair-step cracks in mortar joints can indicate structural movement — stop and call a structural engineer before any stucco foundation repair or parging work begins.
Testing for Moisture
Press plastic sheeting against the wall with tape and leave it 24 hours. Moisture on the wall side means water is migrating through the foundation; moisture on the room side means interior humidity. Active water infiltration requires foundation waterproofing solutions before you repair cracked foundation coating — patching over a wet wall guarantees the new parging fails within one season.
DIY Skim Coat Repair: Process and Materials
Proper foundation wall prep determines whether your repair lasts 20 years or peels off by spring. Rushing this stage is the single most common reason skim coat coming off foundation happens again after a DIY attempt.
Step 1: Surface Preparation
Remove all loose material first. Use a cold chisel and hammer to knock away spalling concrete, failing parging, and any hollow-sounding sections. Follow with a stiff wire brush to clear dust, efflorescence, and debris from the cinder block or concrete surface. Vacuum or blow out the wall cavity completely — bonding agents and mortar mix will not adhere to dusty or contaminated surfaces.
Step 2: Bonding Agent Application
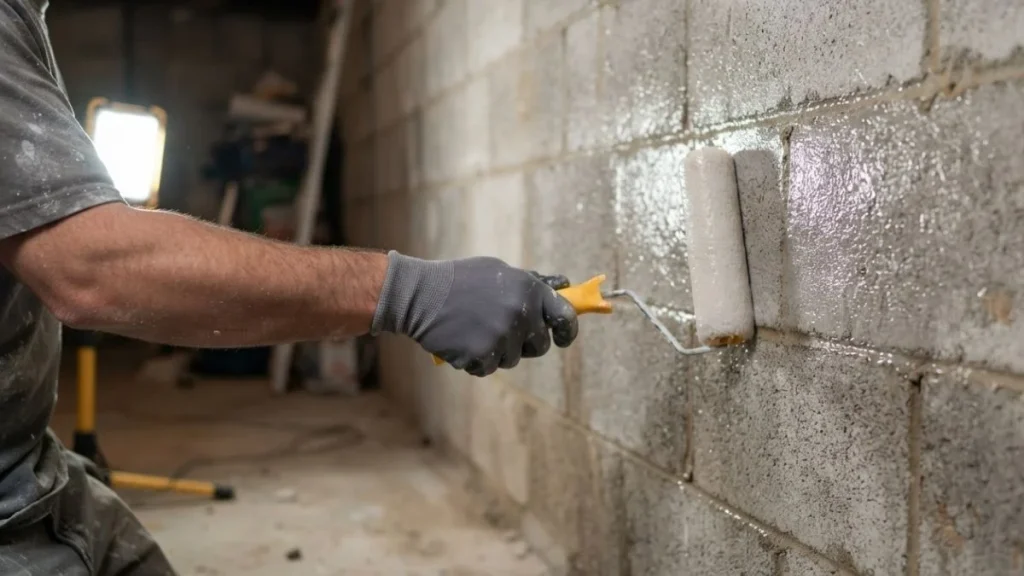
Apply a concrete bonding agent — Quikrete Concrete Bonding Adhesive and Larsen Weld-Crete are two reliable products — directly to the prepared wall with a brush or roller. This bonding coat application creates the chemical bridge between old masonry and new mortar. Let it become tacky, roughly 30-60 minutes, before applying any material on top.
Step 3: Mixing and Applying the Mortar
For most foundation parging repair, a Type S mortar mix or a pre-blended parging mix works well. Mix to a peanut butter consistency — thick enough to hold on a vertical wall without slumping. Apply with a steel trowel at a 30-45 degree angle, working in 1/4-inch layers. Feather edges into surrounding sound material so there is no raised lip for water to enter.
Curing and Weather
Keep new parging damp for 48 hours and protect it from direct sun or freezing temperatures. Do not apply foundation parging repair when temperatures drop below 40°F or exceed 90°F — thermal stress will crack fresh mortar before it bonds.
Tools Checklist
- Cold chisel and hammer
- Stiff wire brush
- Margin trowel and steel finishing trowel
- Mixing bucket and paddle drill attachment
- Safety glasses, dust mask, and work gloves
Signs You Need Professional Help Instead
A failing mortar skim coat is not always just a surface problem. Knowing when to stop a DIY repair and call a professional mason or structural engineer protects both your wallet and your home’s structural integrity.
Cracks That Go Deeper Than the Coating
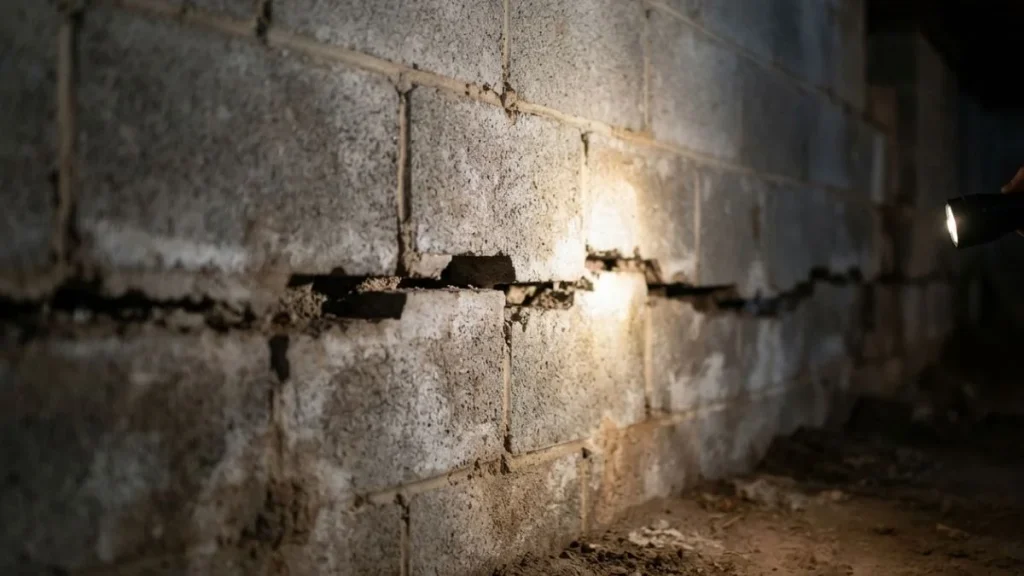
If a crack runs through the parging and continues into the concrete or block beneath, it is no longer a stucco foundation repair job — it is a structural issue. Horizontal cracks in cinder block foundation walls are especially serious; they often indicate lateral soil pressure bowing the wall inward. Stair-step cracking through mortar joints in block foundations signals differential settlement. Both conditions require a licensed structural engineer’s assessment before any masonry repair work begins.
Widespread Deterioration and Repointing Needs
When spalling concrete covers more than 25-30% of a wall, or when mortar joints between blocks are visibly eroded more than 3/4 inch deep, the scope exceeds a standard parging foundation repair. Repointing — removing and replacing deteriorated mortar joints — requires professional technique and tools to avoid damaging the surrounding block.
Active Water Infiltration
Here’s the problem. Patching a mortar skim coat over a wall with active water infiltration is cosmetic at best. If your basement shows water pooling after rain, persistent efflorescence, or damp wall faces regardless of interior humidity, the foundation drainage system has failed. A waterproofing contractor needs to address the source — exterior drainage, weeping tile, or a French drain — before any coating work makes sense.
The Honest Skill and Time Assessment
A single-wall patch of 10-20 square feet takes an experienced DIYer 4-6 hours including prep. A full cinder block foundation coating on a 1,200 square foot basement perimeter is realistically a 2-3 day project requiring consistent trowel technique. If you have never worked with mortar mix on a vertical masonry surface, practice on a small inconspicuous section first — bad parging is harder to remove than it looks.
Read Also: How to Repair Cracked Shower Grout
Frequently Asked Questions
What Causes Foundation Skim Coat to Crack or Peel Off?
The 3 most common causes are water infiltration behind the coating, freeze-thaw cycles expanding trapped moisture, and poor original bonding coat application that never fully adhered to the masonry substrate. Homes built before 1980 often used lower-grade mortar mix formulations that degrade faster under these conditions.
Can You Skim Coat a Foundation Yourself or Do You Need a Professional?
Surface-level parging repair on isolated sections — hairline cracks, small spalling areas under 10 square feet — is a realistic DIY project for a homeowner comfortable with masonry tools and mortar mixing. Widespread deterioration, structural cracking, or active moisture infiltration requires a professional mason or structural engineer.
How Long Does a Foundation Skim Coat Last Before Needing Repair?
A properly applied parging coat over a prepared, dry foundation wall typically lasts 20-30 years. Shortcuts in surface prep or bonding agent application can cut that lifespan to under 5 years.
What Time of Year Is Best for Foundation Skim Coat Repair?
Late spring through early fall is the ideal window — air and wall temperatures between 50°F and 80°F allow mortar to cure without thermal stress. Avoid any masonry repair when overnight temperatures are forecast to drop below 40°F within 48 hours of application.
Start Your Foundation Repair Today
The difference between a $50 DIY parging repair and a $5,000 contractor bill almost always comes down to catching the problem early and correctly identifying whether the damage is cosmetic or structural. This weekend, take a flashlight into your basement, run the plastic sheet moisture test, and use the crack severity scale in this guide to grade every damaged section before you buy a single bag of mortar mix. If everything points to surface-level damage, pick up a cold chisel, a bonding agent, and a pre-blended parging mix — and get to work.