Removing baseboards adds $200–$500 to most professional installation quotes — a cost many homeowners never see coming when budgeting for vinyl plank flooring.
The real confusion is whether that cost is unavoidable, or whether a contractor is padding the bill. Most LVP manufacturers, including guidance from retailers like Lowe’s, require a 1/4-inch expansion gap around the room’s perimeter, and how you handle that gap determines everything about the baseboard decision.
This article gives you a clear framework to decide what’s right for your specific floor, budget, and finish expectations.
The Direct Answer: When Removal Is Optional vs. Necessary
Baseboard removal is not mandatory for vinyl plank flooring installation. Most LVP manufacturers require only a 1/4-inch expansion gap around the room’s perimeter, and that gap can be achieved whether the baseboards stay or come off.
When You Can Skip Removal
Leaving baseboards in place works well when:
- The existing baseboards are in good condition with no rot, warping, or damage
- There is enough clearance under the baseboard to slide planks beneath it, or you plan to cover the gap with shoe molding
- The room has low moisture exposure — living rooms, bedrooms, and hallways are good candidates
- Your priority is keeping installation costs and labor time low
In this scenario, installers slide LVP planks to within 1/4 inch of the wall, then nail shoe molding — a small, rounded trim piece — along the base of the existing baseboard to cover the gap. The result looks clean and costs significantly less.
When Removal Becomes Necessary
Baseboard removal is the right call in 4 specific situations:
- Damaged or rotted baseboards that need replacement anyway
- High-moisture rooms like bathrooms or laundry rooms, where baseboards may need to be sealed or replaced with moisture-resistant material
- Thick LVP planks (6mm or above) that raise the floor height enough to create an awkward visual gap under existing trim
- Full remodel projects where a seamless, professional finish is the goal and shoe molding is not acceptable
The decision comes down to three factors: your baseboards’ current condition, the room’s moisture profile, and the finish quality you want.
Installing Vinyl Without Removing Baseboards: The Gap Method
The 1/4-inch expansion gap is an industry standard, not a suggestion. Vinyl plank flooring expands and contracts with temperature and humidity changes, and without that gap, planks can buckle or warp — regardless of how well they were installed.
How the Gap Method Works
Installers measure 1/4 inch from the existing baseboard and lay planks up to that point. A spacer tool holds the gap consistent along every wall. Once the floor is complete, shoe molding is nailed to the base of the baseboard — not to the floor itself — to cover the gap while still allowing the LVP to move freely underneath.
This approach has real advantages:
- Faster installation with less labor, which reduces contractor costs
- No risk of damaging existing baseboards during removal
- Minimal disruption to the room — walls, paint, and trim stay intact
The Trade-Offs Worth Knowing
Here’s the problem. The gap method only looks polished if the shoe molding is installed carefully and the baseboard is in good shape. Tall, wide baseboards tend to hide the transition better. Low-profile or damaged baseboards make the added shoe molding look visually cluttered.
Dust and debris can also collect in the gap over time, which is a minor but real maintenance consideration.
Old or moisture-damaged baseboards present a bigger issue. Installing new LVP next to rotting or swollen trim traps moisture against the wall, which can compromise both the flooring and the subfloor preparation over time.
Baseboard Removal and Reinstallation: Labor vs. Reusability
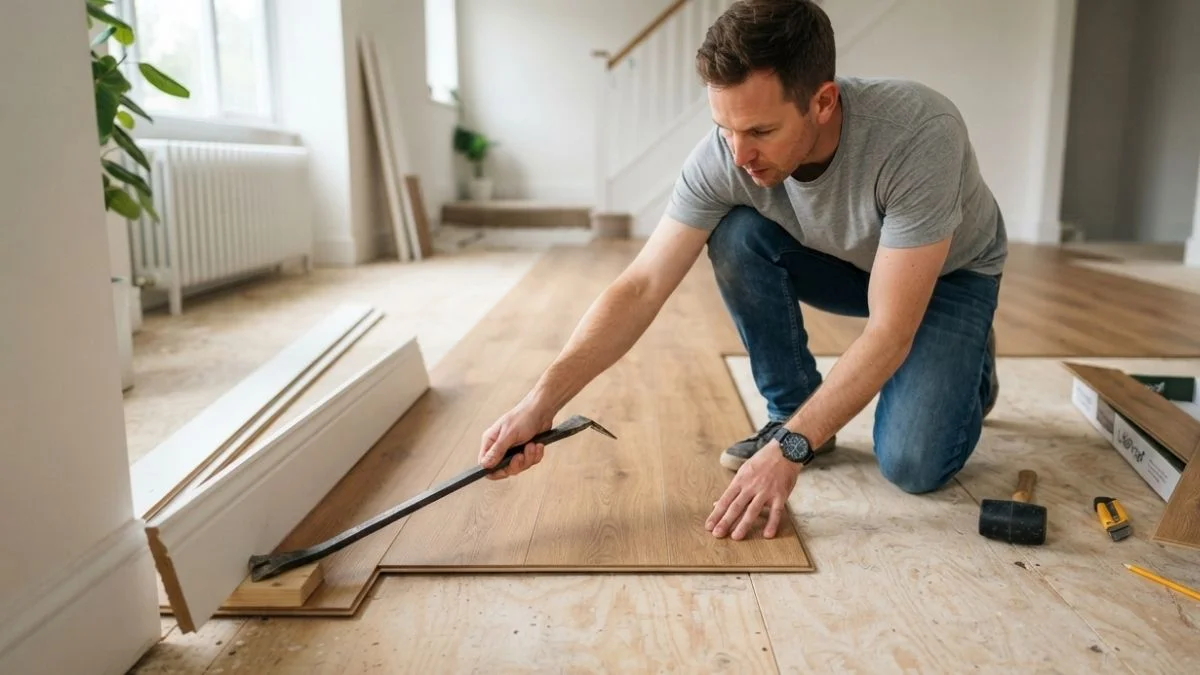
Removing baseboards for LVP installation is straightforward, but doing it wrong means cracked trim, gouged drywall, and a paint job that needs redoing. The right technique takes an extra 30 minutes and saves hours of repair work.
Tools and Removal Technique
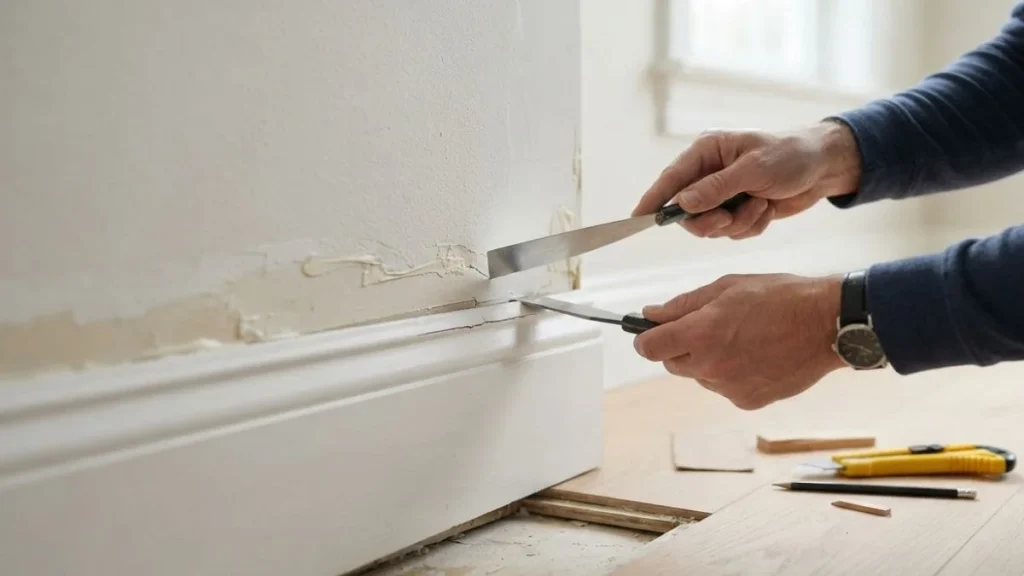
You need 4 tools: a utility knife, a stiff putty knife, a flat pry bar, and a stud finder.
Start by scoring the caulk line where the baseboard meets the wall with the utility knife. Skipping this step tears the drywall paper when you pry. Slide the putty knife behind the baseboard first to protect the wall surface, then work the pry bar in gradually — never force it. Move along the board in 6-inch increments rather than levering from one point.
Labeling for Reuse
Baseboard reusability depends entirely on organization. Number each piece with painter’s tape on the back and note which wall it came from. This matters most in multi-room projects where trim lengths vary. Boards that come off cleanly can go straight back up after LVP installation with minimal touch-up.
Labor, Cost, and Safety
A typical room takes a skilled DIYer 4–6 hours for removal, flooring installation, and reinstallation combined. Contractors typically charge $1–$3 per linear foot for baseboard removal and reinstallation separately from flooring labor.
Budget an additional $50–$150 for drywall patching and paint touch-ups — wall damage is common even with careful removal.
One critical safety note: homes built before 1980 may have lead paint on baseboards. Test with a lead paint test kit (available at hardware stores for under $15) before sanding or disturbing any trim.
Cost-Benefit Breakdown: Remove, Reuse, or Replace?

The real question isn’t whether to remove baseboards — it’s whether the cost of removal justifies the result you get. Three paths exist: leave them in place, remove and reuse them, or remove and replace them entirely.
Option 1: Leave Baseboards in Place (Gap Method)
This is the lowest upfront cost. Shoe molding runs $0.50–$1.50 per linear foot for basic pine profiles, plus the labor to install it. For a 200-square-foot room with roughly 60 linear feet of wall, expect to spend $30–$90 on materials alone. It looks acceptable in most residential settings, but it adds a visible layer of trim that not everyone wants.
Option 2: Remove and Reuse
Removal and reinstallation runs $1–$3 per linear foot professionally, or 4–6 hours of DIY labor. Add $50–$150 for wall repairs and paint touch-ups. The result is a cleaner finish with no added shoe molding, and the total cost stays well below replacement.
This is the break-even sweet spot for most homeowners — especially when existing baseboards are in good condition.
Option 3: Remove and Replace
New finger-jointed pine baseboard costs $0.80–$2.00 per linear foot unfinished. Primed MDF runs slightly higher. Factor in professional installation at $2–$5 per linear foot, and a 60-linear-foot room costs $170–$420 in new trim alone.
Replacement makes financial sense only when existing baseboards are damaged, outdated in style, or too short to cover the height increase from thick LVP planks. Otherwise, reuse wins on cost every time.
Read Also: How to Install Vinyl Plank Flooring on Stairs
FAQ
What happens if you leave baseboards but don’t use shoe molding?
The 1/4-inch expansion gap remains visible along every wall — a raw, unfinished line between the flooring and the baseboard. Beyond aesthetics, the open gap collects dust and debris and can allow drafts in poorly sealed rooms. Shoe molding exists specifically to solve this problem at minimal cost.
How much gap is acceptable between vinyl flooring and baseboards?
The industry standard is exactly 1/4 inch. Most LVP manufacturers, including Shaw and Armstrong, specify this measurement in their installation guidelines to allow for thermal expansion and contraction. Going tighter risks buckling; going wider creates a gap that shoe molding may not fully cover.
Can moisture get trapped under baseboards with vinyl flooring?
Yes, and it is a genuine risk in bathrooms, laundry rooms, and kitchens. When moisture penetrates behind LVP and sits against an unsealed wood baseboard, it accelerates rot and can compromise the subfloor beneath. In high-moisture rooms, remove baseboards, seal the bottom edge with silicone caulk after flooring installation, and consider replacing wood trim with PVC or moisture-resistant MDF baseboard profiles.
Make Your Decision: Installation Timeline and Final Steps
Baseboard removal is never mandatory for vinyl plank flooring, but skipping it without a plan produces a finish that looks unfinished. Before your installation date, walk each room and assess three things: baseboard condition, room moisture level, and whether shoe molding fits your aesthetic expectations — those three answers will tell you exactly which path to take and what to budget for it.