If you’ve noticed your second floor feeling bouncy, sloping to one side, or just not feeling as solid as it used to — you’re not alone. A sagging second floor is one of the most common structural concerns homeowners face, especially in older homes. And while it can feel alarming, the good news is that most cases are fixable.
The tricky part is knowing what’s causing it and how serious it really is. Some sagging floors are a simple repair you can tackle over a weekend. Others point to deeper structural issues that need a licensed contractor. Either way, ignoring the problem is never the right move — a sagging floor only gets worse over time, and the longer you wait, the more expensive the repair becomes.
This guide walks you through everything you need to know about how to fix a sagging second floor — from identifying the root cause to completing the repair step by step. Whether you’re a confident DIYer or trying to understand what a contractor will do, this article covers it all.
What Causes a Sagging Second Floor?
Before you pick up a single tool, you need to understand why your floor is sagging. The fix depends entirely on the cause, and getting this wrong can lead to wasted money or — worse — an unsafe repair.
Damaged or Weakened Floor Joists
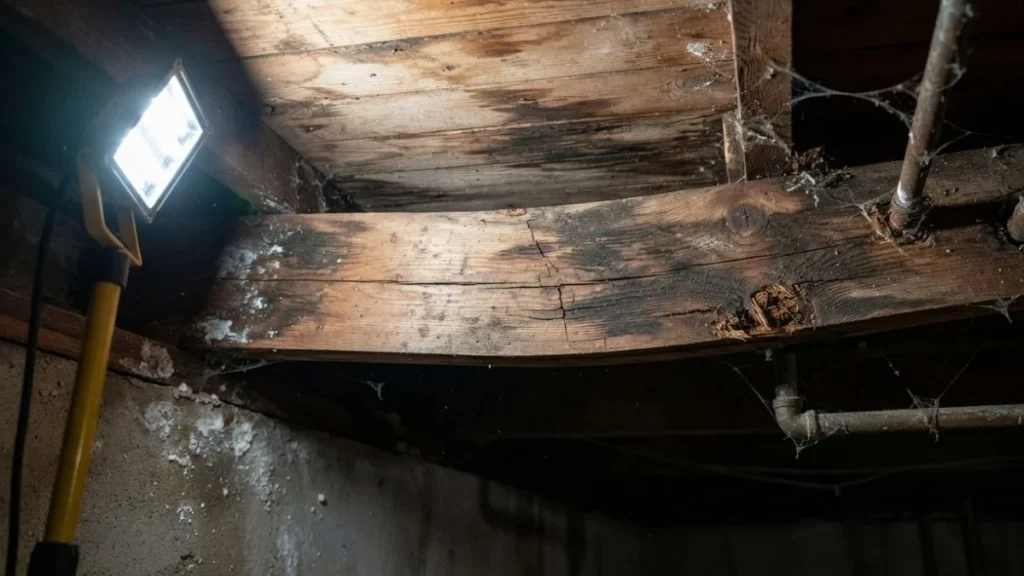
Floor joists are the horizontal framing members that support your second floor from below. When they weaken, the floor above them begins to sag. The most common culprits are wood rot from moisture, termite or carpenter ant damage, and simple age-related deterioration. A joist that’s been slowly rotting for years may look fine on the surface but crumble when you press a screwdriver into it.
Undersized or Improperly Spaced Joists
In older homes built before modern building codes, floor joists were sometimes undersized for the span they were covering. A 2×8 joist spanning 14 feet, for example, will eventually sag under the weight it carries — even without any damage. This is a design problem, not a damage problem, and it requires adding support rather than just replacing the existing joists.
Failed Support Beams or Settling Columns
The main support beam running beneath your floor carries the load of everything above it. If that beam starts to sag, crack, or shift — or if the lally columns (steel posts) supporting it settle into the ground — the entire floor above will follow. This is one of the more serious causes and almost always requires professional involvement.
Moisture and Water Damage
Plumbing leaks, poor crawl space ventilation, and long-term humidity buildup are silent destroyers of floor systems. Water weakens wood gradually, and by the time you notice a sag, the damage has often been happening for years. If moisture is the cause, you need to fix the moisture source before you repair the floor — otherwise, you’ll be back to square one within a few years.
How to Tell If Your Second Floor Is Sagging
Not every uneven floor is a structural emergency, but there are clear warning signs that tell you when to take action.
- Visible dip or slope in the floor surface, especially noticeable when you place a level on it
- Bouncy or spongy feeling when walking across the room
- Doors or windows sticking or failing to close properly — this often signals that the floor shift has affected the wall framing
- Gaps between the floor and baseboards along one or more walls
- Cracks in the ceiling below the affected area, particularly long horizontal cracks in the drywall
- Creaking or cracking sounds that have gotten louder or more frequent over time
- Furniture visibly leaning toward a low spot in the room
If you notice several of these signs at once, or if the sag seems to be getting worse quickly, treat it as urgent. A rapidly worsening sag can signal an active structural failure.
Safety First — Before You Start Any Repairs
No matter how minor the sag looks, take these precautions before doing anything else.
Measure the sag accurately. Use a 4-foot or longer level placed on the floor to identify the low point. Mark it with tape. Knowing the exact location and depth of the sag helps you target the repair correctly and track progress as you work.
Reduce the load on the floor. Move heavy furniture, appliances, or anything bulky away from the sagging area. Don’t store heavy items there while repairs are underway.
Consider a professional structural assessment. If the sag covers a large area, involves cracked beams, or you suspect foundation movement, get a structural engineer to evaluate it before you touch anything. A structural inspection typically costs between $300 and $700 — a small price compared to fixing a repair gone wrong. For smaller, clearly joist-related issues, a licensed general contractor can usually assess and handle the job.
How to Fix a Sagging Second Floor — Step by Step
Access the Floor Joists
To fix the problem, you need to get underneath it. If you have an unfinished basement directly below the sagging area, you’re in luck — the joists are already exposed. If the ceiling below is finished with drywall, you’ll need to remove a section of it to access the joists. It’s extra work, but there’s no way around it.
In homes with a crawl space, you’ll need to work from below in a confined space. Make sure the crawl space is dry, well-ventilated, and free of obvious hazards before you spend time working in it.
Identify the Damaged Joists
Walk the length of the joist bay and inspect every joist carefully. Look for visible cracks, dark discoloration (a sign of rot or moisture), or areas where the wood looks compressed or crushed. Use a flathead screwdriver and press firmly into suspicious areas — healthy wood will resist, but rotted wood will give way or crumble under light pressure.
Also check the joist hangers (the metal brackets connecting joists to beams) for rust, bending, or detachment. A failed joist hanger can cause a sag without any damage to the wood itself.
Jack Up the Floor — Carefully
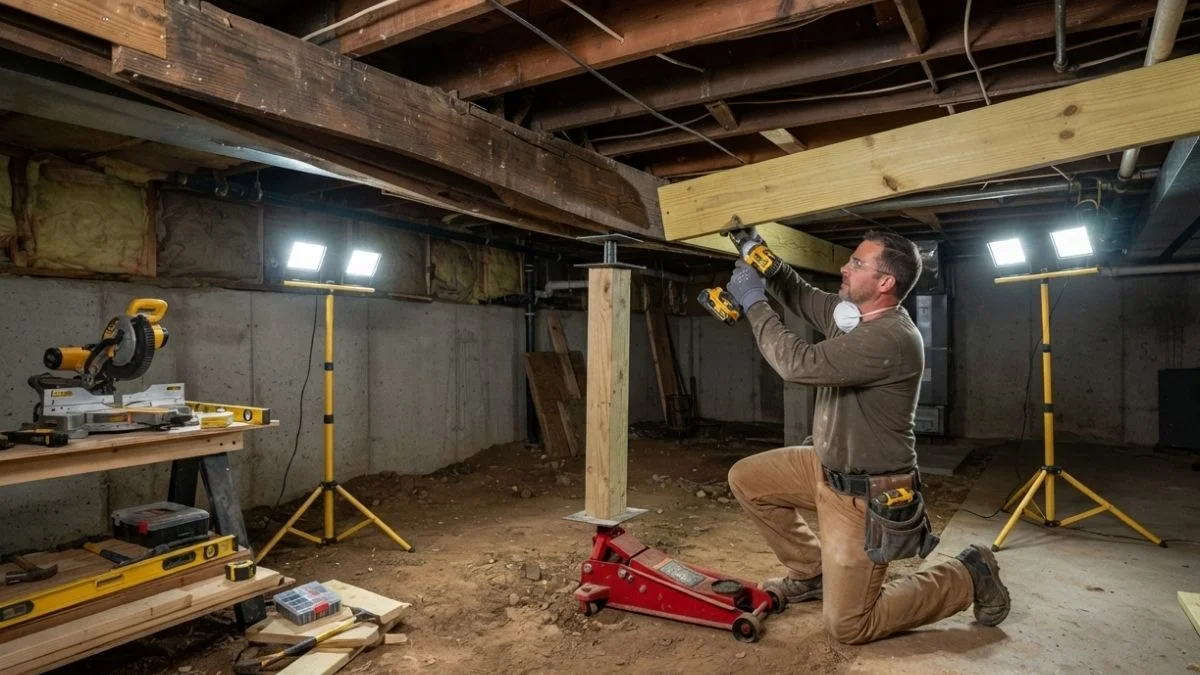
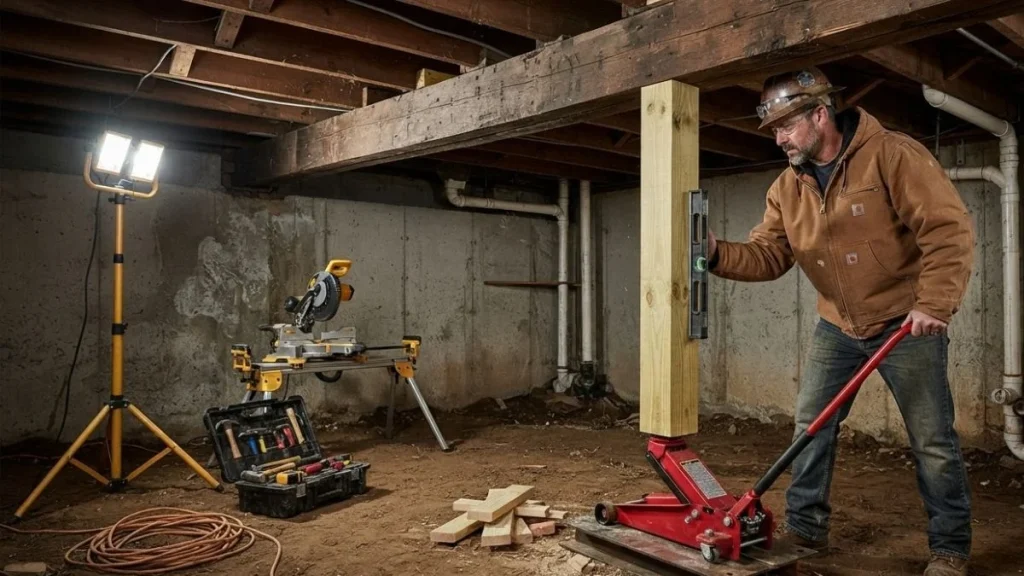
This step requires patience. Place a hydraulic jack on a solid footing — either a concrete block or a piece of thick lumber spread across the floor to distribute the load. Position a horizontal beam (a 4×6 or 6×6 works well) across several joists so the jack lifts an area rather than a single point.
The most important rule here: never raise the floor more than 1/8 inch per day. Raising it faster than that creates sudden stress on walls, door frames, and ceilings — causing new cracks and potentially making things worse. Mark the starting height, raise it slowly, and check the walls and ceiling above for new cracks every single day.
Sister the Damaged Joists
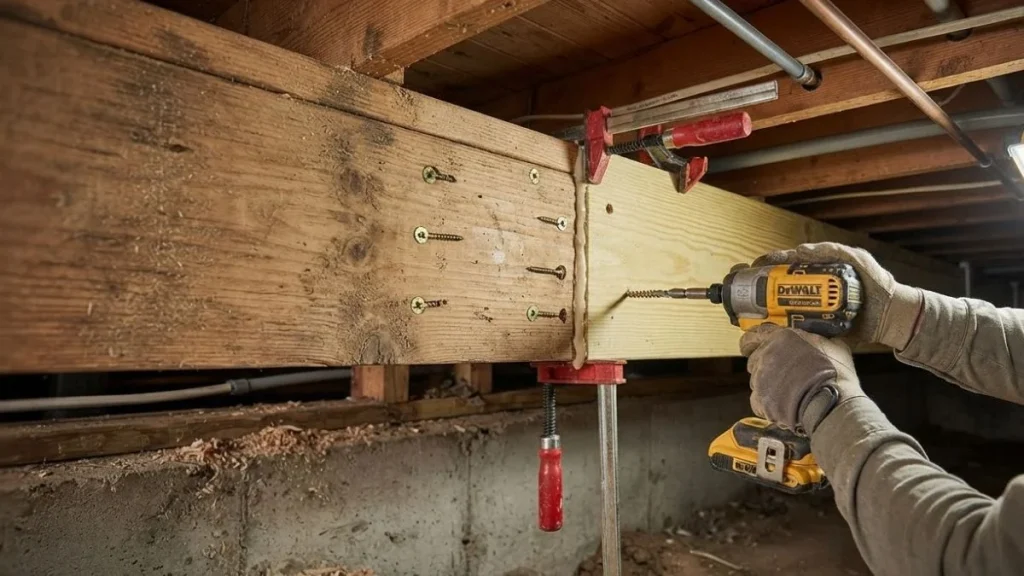
Sistering is the most common and effective way to repair damaged floor joists, and it’s DIY-friendly for most homeowners with basic carpentry skills.
What it means: You cut a new joist to the same length and dimensions as the damaged one and fasten it tightly alongside it. The new joist carries the load the damaged one can no longer handle.
How to do it correctly:
- Cut the new joist (same dimensions as the existing one — 2×8, 2×10, etc.) to the full length of the span
- Apply a generous bead of construction adhesive along the full length of the new joist
- Press it firmly against the damaged joist
- Clamp it in place and fasten with structural screws every 12 inches, alternating top and bottom
- Secure both ends with joist hangers nailed into the beam
For best results, sister both sides of the damaged joist when possible, especially for spans over 10 feet.
Replace Severely Damaged Joists When Needed
If a joist is completely rotted through, sistering may not be enough — you’ll need a full replacement. This is more involved because you need temporary support while the old joist is removed.
Install temporary support walls or posts on either side of the joist before removing it. Once the old joist is out, slide in the new one, secure the ends in joist hangers, and fasten it to any cross-bracing or blocking in the bay. Remove the temporary supports only after the new joist is fully secured.
Add Mid-Span Support If Needed
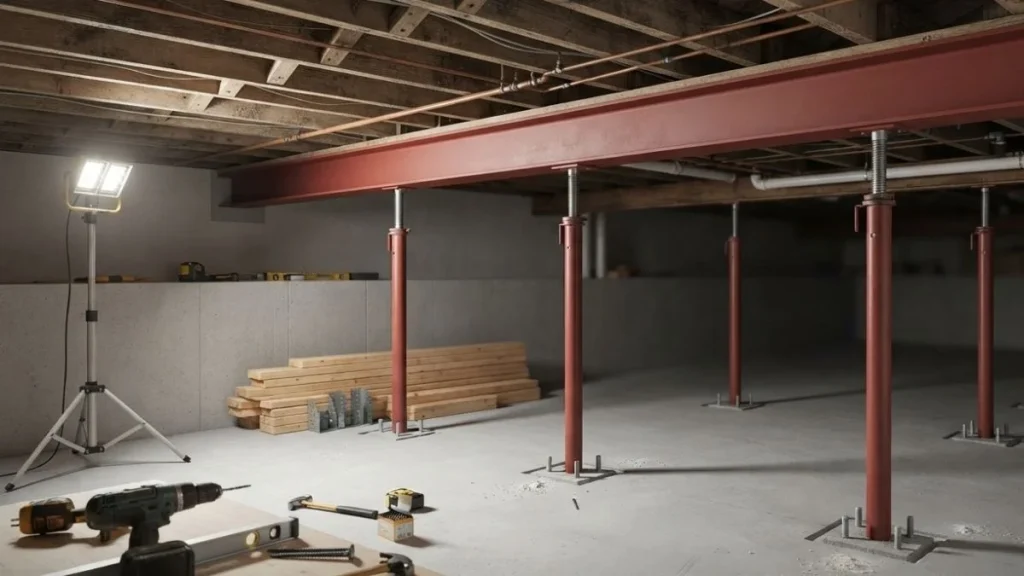
If the sag is caused by an undersized joist spanning too great a distance, sistering alone may not solve the problem long-term. The real fix is reducing the effective span by adding a support beam or post in the middle.
A new steel or engineered wood beam installed below the joists, supported by adjustable steel columns (lally columns) anchored to the foundation, can dramatically increase the floor’s load-carrying capacity. This is the go-to fix for homes where the original framing just wasn’t built for the load it’s carrying.
This step often requires a permit and should be designed by a structural engineer to ensure the beam size and column placement are correct.
Repair or Replace the Subfloor
Once the joists are repaired and the floor has been carefully raised to level, check the subfloor — the layer of plywood or OSB directly beneath your flooring material.
For small damaged areas, cut out the compromised section with a circular saw, making your cuts at the center of a joist so the new patch has something solid to fasten to. Cut a piece of matching-thickness plywood, apply construction adhesive to the joists, and screw it down every 6 to 8 inches. This method eliminates squeaks and creates a solid bond.
For widespread subfloor damage, a full replacement may be necessary. It’s more labor-intensive, but a compromised subfloor left in place will continue to cause bouncing, squeaking, and soft spots no matter how well the joists underneath are repaired.
Release the Jack and Inspect
Once all repairs are complete, begin releasing the jack — slowly. Lower it at the same pace you raised it: no more than 1/8 inch per day. Let the floor settle naturally onto the repaired structure rather than dropping it back down suddenly.
After a full release, re-check the floor with your level. Walk the entire area to feel for remaining bounce or soft spots. Inspect the walls and ceiling below for any new cracks that appeared during the lifting or lowering process. Minor hairline cracks in drywall are common and easy to patch — larger structural cracks are a red flag that something needs another look.
DIY vs. Hiring a Professional
| Situation | DIY or Pro? |
| 1–3 damaged joists, accessible from below | DIY is reasonable |
| Subfloor patching only | DIY |
| Sagging affects multiple rooms | Hire a pro |
| Main beam or support column involved | Always hire a pro |
| Foundation movement suspected | Structural engineer required |
| Permits required in your area | Hire a licensed contractor |
How Much Does It Cost to Fix a Sagging Second Floor?
Repair costs vary significantly depending on the cause, the extent of the damage, and whether you’re doing it yourself or hiring out.
- Sistering floor joists (DIY): $100–$300 per joist in materials
- Sistering floor joists (professional): $200–$500 per joist
- Full joist replacement: $400–$800 per joist
- Subfloor repair or replacement: $500–$3,000 depending on square footage
- New support beam and column installation: $1,500–$5,000
- Major structural repair (beam, foundation, multiple areas): $5,000–$20,000+
The biggest cost driver is accessibility. An open, unfinished basement makes the job straightforward. A tight crawl space or a finished ceiling that needs to be demolished and rebuilt adds significant labor cost.
One important point worth making: an unrepaired sagging floor will fail a home inspection if you ever try to sell the house. Addressing it now protects both your safety and your home’s resale value.
Read Also: How to Fix Soft Spot in Subfloor
How to Prevent Your Second Floor From Sagging Again
Fixing the sag is only half the job. Here’s how to make sure it doesn’t come back.
Control moisture aggressively. Fix any plumbing leaks immediately. Install a vapor barrier in your crawl space if you don’t already have one. Run a dehumidifier in damp basements. Moisture is the number one enemy of wood floor framing, and keeping it in check is the single best thing you can do for the long-term health of your floors.
Manage floor loads wisely. Know your floor’s load-bearing limits. Heavy items like pianos, large safes, waterbeds, and wall-to-wall bookshelves create concentrated loads that standard residential framing isn’t always designed to handle. Spread heavy items out and avoid stacking too much weight in one spot.
Inspect annually. Once a year, take a look at your floor joists from below if you can access them. Early signs of moisture, pest damage, or cracking wood are much cheaper to address than a full sag repair. Treat exposed wood with a borate-based product to deter insects and slow moisture absorption.
Conclusion
A sagging second floor is serious — but it’s not a death sentence for your home. Most cases come down to damaged joists, moisture problems, or undersized framing, and all of those are fixable with the right approach. The key is catching it early, identifying the real cause, and making the repair the right way the first time.
If the damage is minor and accessible, grab your tools and tackle it yourself using the steps above. If you’re dealing with beams, columns, or anything that touches the foundation, bring in a licensed professional. Either way, don’t wait. The longer a sagging floor goes unaddressed, the more it costs — and the more risk it creates for everyone in the home.