If you’ve been researching waterproofing options for your bathroom or shower floor, you’ve probably come across the Schluter Kerdi membrane. It’s one of the most trusted names in tile waterproofing — but a lot of homeowners aren’t sure whether it’s actually meant for floors or just walls and shower surrounds.
The short answer is yes, you absolutely can use Kerdi membrane on floors. But like most things in home renovation, the details matter. Using it the wrong way — wrong thinset, wrong prep, wrong product — can lead to leaks, cracked tiles, and an expensive redo.
This guide covers everything you need to know before you start: what Kerdi membrane actually is, where it works best on floors, how to install it correctly, common mistakes to avoid, and how it compares to other waterproofing options. Whether you’re tackling a DIY bathroom renovation or just want to understand what your contractor is doing, you’re in the right place.
What Is Kerdi Membrane and How Does It Work?
The Basics of Schluter Kerdi Membrane
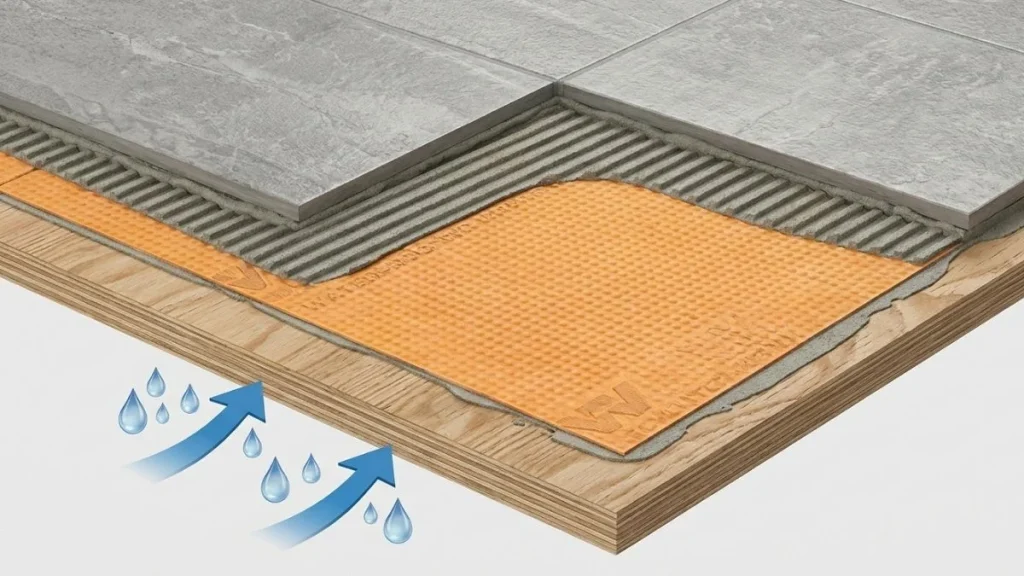
Kerdi membrane is a waterproofing sheet membrane made by Schluter Systems. It’s constructed from polyethylene with a bonded fleece webbing on both sides. That fleece layer is what allows thinset mortar to grip the membrane securely — both to the substrate below and to the tile adhesive above.
The membrane itself is completely waterproof. Water cannot pass through the polyethylene core. The fleece webbing acts as a mechanical bond point, not a water pathway. When properly installed with thinset and sealed at seams and penetrations, the entire surface becomes a continuous waterproof barrier that protects the subfloor and structure beneath it.
Kerdi was originally developed for shower wall and floor applications in wet areas. Over time, Schluter expanded the product line to include variants specifically designed for different use cases — including floor-specific products like Kerdi-DS. The system works together with Schluter drains, corner pieces (Kerdi-Kereck), and seam tape (Kerdi-Band) to create a fully integrated waterproofing assembly.
How the Kerdi Waterproofing System Works
The way Kerdi works is elegantly simple. You apply a layer of unmodified thinset mortar to your substrate, press the Kerdi membrane into it, smooth it out to eliminate air pockets, and let it cure. Then you apply another layer of thinset on top of the membrane and set your tile directly onto that.
The key word here is unmodified thinset. This isn’t a minor detail — it’s one of the most critical requirements of the entire system. Modified thinsets contain latex or polymer additives that need to release moisture as they cure. When those additives are trapped between the waterproof Kerdi membrane and the substrate, they can’t breathe properly, which leads to bond failure. Unmodified thinset cures through a different chemical process that doesn’t require moisture release, making it fully compatible with the membrane.
Can You Use Kerdi Membrane on Floor?
Is Kerdi Membrane Approved for Floor Use?
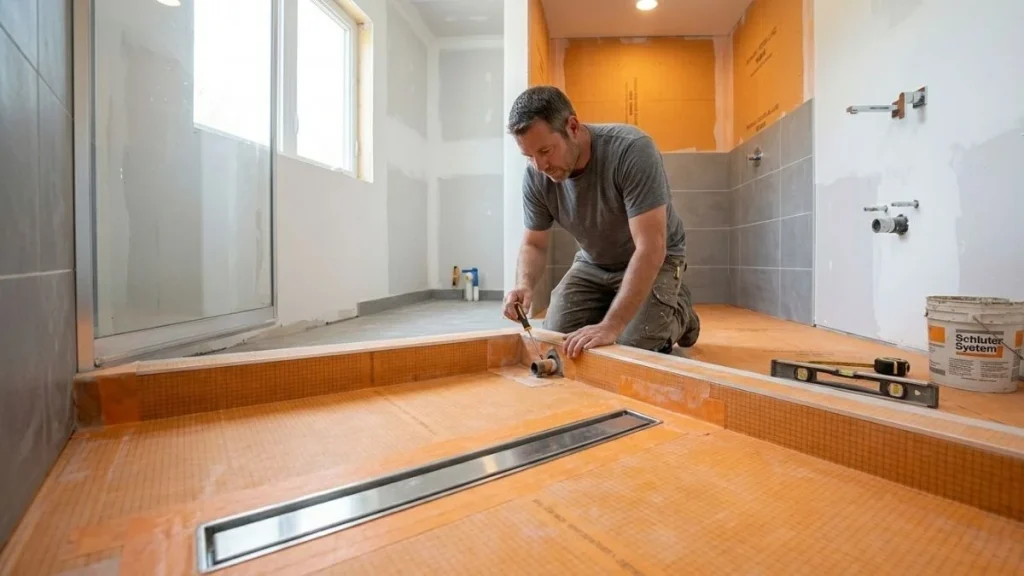
Yes — Schluter Systems officially approves and recommends Kerdi membrane for floor applications. This includes shower floors, bathroom floors, and other areas where waterproofing is needed. Schluter’s installation guidelines specifically address floor use, and the product is engineered to handle foot traffic loads when properly installed over a structurally adequate subfloor.
That said, not every Kerdi product is the same. The standard Kerdi membrane (available in different thicknesses) works well for general floor waterproofing. For shower floors that incorporate a Schluter drain, Kerdi-DS — the drain sheet — is the recommended product. It’s designed to slope toward the drain and integrates directly with Schluter’s line of floor drains for a complete, watertight assembly.
Where Kerdi Membrane Works Best on Floors
Kerdi membrane performs exceptionally well in the following floor situations:
- Shower floors — This is its primary use case. Combined with a Schluter drain and Kerdi-Band at the wall-floor joint, it creates a fully waterproof shower pan without the need for a traditional mortar bed.
- Bathroom floors — Even non-shower bathroom floors benefit from Kerdi waterproofing, especially in homes with children, elderly residents, or high-humidity environments.
- Basement floors over concrete — Concrete slabs can transmit moisture vapor upward. Kerdi acts as a vapor barrier that protects tile and grout from moisture-related damage.
- Floors with in-floor radiant heating — Kerdi membrane is compatible with electric radiant heating cables and mats. The membrane goes down first, and the heating element is embedded in the thinset layer above it.
Where Kerdi Membrane May Not Be the Best Choice
Kerdi membrane isn’t always the right call. If your subfloor has too much flex — meaning it doesn’t meet the L/360 deflection standard — no waterproofing membrane will save your tile from cracking. The structural issue has to be fixed first.
For large commercial spaces with very heavy foot traffic, Kerdi’s standard residential specifications may not be sufficient. And in situations where you need significant height buildup or load-bearing capacity, Kerdi-Board panels are a better choice than the sheet membrane.
Types of Kerdi Membranes Suitable for Floor Use
| Product | Best Use | Key Feature |
| Kerdi Standard | General bathroom floors | Affordable, versatile |
| Kerdi-DS | Shower floors with drains | Pre-sloped, drain integration |
| Kerdi-Board | Floors needing rigid substrate | Rigid panel, high compressive strength |
Kerdi Standard Membrane is the go-to for most bathroom floor waterproofing projects. It comes in rolls of varying widths and is easy to cut and fit around floor obstacles.
Kerdi-DS (Drain Sheet) is specifically engineered for shower floor use. It pre-slopes toward the drain and connects directly to Schluter’s Kerdi-Drain line, eliminating the guesswork of creating a sloped mortar bed. If you’re building a curbless or linear drain shower floor, this is the product you want.
Kerdi-Board is a rigid foam panel with Kerdi membrane laminated to both faces. On floors, it’s used when you need a combination of waterproofing and a stable, buildable substrate — for example, over a subfloor that needs leveling, or when you want to raise the floor height to match an adjacent surface.
Step-by-Step: How to Install Kerdi Membrane on a Floor
Tools and Materials You’ll Need
Before you start, gather everything so you’re not stopping mid-installation:
- Schluter Kerdi membrane (sized to your floor area with extra for overlaps)
- Unmodified thinset mortar (such as Laticrete 317 or Mapei Kerabond)
- Kerdi-Band (for seams and wall-floor transitions)
- Kerdi-Fix sealant (for penetrations and drains)
- Notched trowel (6mm V-notch recommended)
- Margin trowel and mixing paddle
- Utility knife and straightedge
- Grout float or hard rubber roller for embedding
- Measuring tape, pencil, and chalk line
Preparing the Subfloor
Subfloor preparation is where many DIY installations go wrong. Start by checking for deflection. The standard for tile installations is L/360, which means a floor span should deflect no more than the span length divided by 360 under load. For a 10-foot span, that’s no more than 1/3 inch of flex. If your floor bounces or feels soft underfoot, you need to address that before applying any membrane.
Clean the subfloor thoroughly. Remove any dust, grease, paint, or loose material. Fill low spots with floor leveling compound and let it cure fully. The surface doesn’t need to be perfectly smooth, but it needs to be flat enough for consistent thinset coverage. On plywood subfloors, make sure all screws are countersunk and the seams between panels are tight. On concrete, grind down any high spots and patch any cracks.
Applying Thinset and Embedding the Membrane
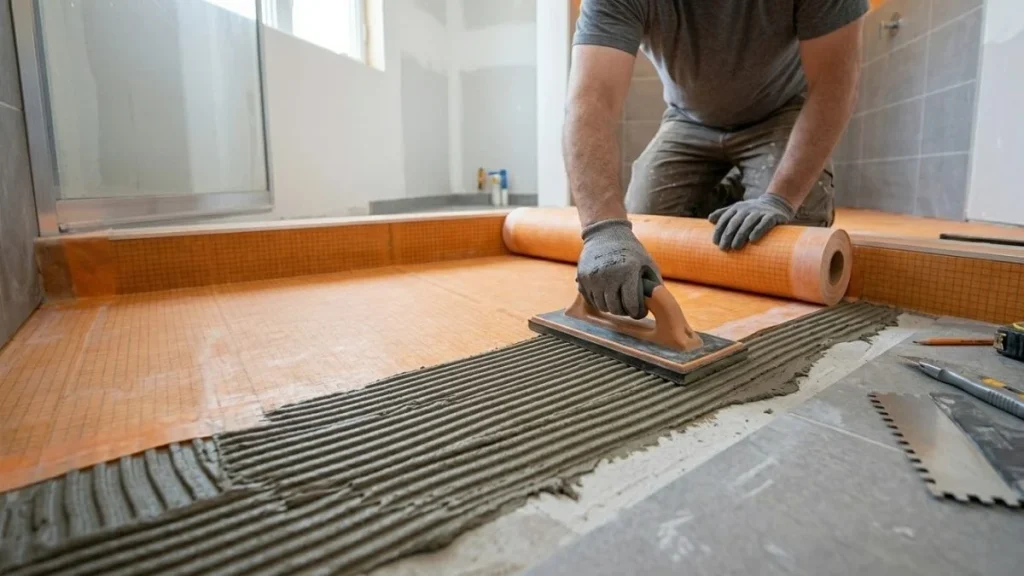
Mix your unmodified thinset to a peanut butter consistency — not too wet, not too stiff. Using your notched trowel, apply it to the floor in manageable sections of about 10–15 square feet at a time. This prevents the thinset from skinning over before you get the membrane down.
Cut your Kerdi membrane to size with a utility knife and straightedge. Lay it into the wet thinset and press it down firmly. Work from the center outward using a grout float or your hand, pushing out any air pockets. The goal is full, continuous contact between the membrane and the thinset. Lift a corner after pressing to confirm the fleece is fully embedded — you should see thinset transfer across the entire surface.
Overlap seams by at least 2 inches and embed Kerdi-Band over all seams using the same thinset. At the wall-floor transition, run Kerdi-Band up the wall at least 2 inches to create a continuous waterproof connection between the floor and wall membranes.
Sealing Penetrations and Drains
Any pipe penetrations or drain connections are potential leak points and need special attention. Apply Kerdi-Fix sealant around all penetrations before pressing the membrane down. At drain locations, follow Schluter’s drain-specific installation instructions, which involve cutting the membrane to fit the drain flange and sealing the connection with Kerdi-Fix. This is non-negotiable — unsealed drain connections are the number one cause of Kerdi system failures on shower floors.
Tiling Over the Membrane
Allow the thinset to cure for a minimum of 24 hours before walking on the membrane or applying tile. In humid conditions or with thicker thinset applications, 48 hours is safer. Once cured, you can tile directly over the Kerdi membrane using unmodified thinset. For floor tiles, use a larger notched trowel to ensure adequate coverage — at least 95% contact is recommended for wet areas. Back-butter large format tiles (anything over 15 inches) for best results.
Common Mistakes Homeowners Make When Using Kerdi on Floors
Using modified thinset is the single most common and damaging mistake. Modified thinset under the membrane traps moisture and prevents proper bonding. Always check the bag — it should say “unmodified” or “non-modified.” Portland cement-based thinsets without polymer additives are what you want.
Skipping the deflection check is equally costly. A floor that flexes will crack your tile and eventually break the waterproof seal at seams and corners, defeating the entire purpose of the membrane installation.
Poor seam and corner work is where many installations develop leaks over time. Corners and seams need full Kerdi-Band coverage embedded in thinset, not just pressed on dry. Inside corners especially need careful attention — cut the Kerdi-Band and fold it neatly rather than stretching it, which can create gaps.
Not back-buttering large tiles leads to hollow spots and cracked tiles. On a waterproof membrane, you have very little room for error — tiles need solid, complete support underneath.
Kerdi Membrane vs. Other Floor Waterproofing Options
| Feature | Kerdi Membrane | RedGard | Cement Board |
| Waterproofing | Excellent | Good | Not waterproof |
| Installation | Sheet, thinset | Liquid, rolled/brushed | Screwed to subfloor |
| Cost | Moderate-High | Low-Moderate | Low |
| DIY Friendly | Moderate | High | High |
| Lifespan | 25+ years | 10–15 years | Varies |
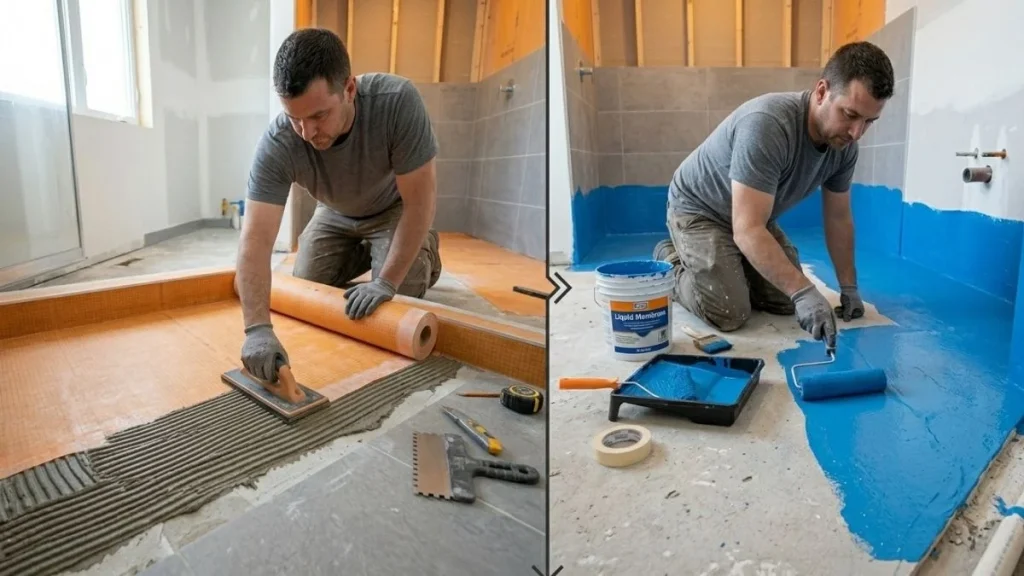
Kerdi vs. RedGard: RedGard is a liquid-applied membrane that’s easier for beginners to apply. However, it requires multiple coats, can be inconsistent in coverage, and is generally considered less durable than Kerdi for full shower floor applications. Professionals in wet areas almost always prefer Kerdi for its reliability and warranty support.
Kerdi vs. Cement Board: Cement board (like Hardiebacker or Durock) is not a waterproofing product — it’s a water-resistant substrate. Moisture can still pass through it and damage your framing over time. Kerdi membrane is a true waterproof barrier, making it the superior choice for wet areas.
Cost of Using Kerdi Membrane on Floors

Kerdi membrane typically runs $2.50 to $4.50 per square foot for materials, depending on the product type and where you buy it. Add Kerdi-Band, Kerdi-Fix, and unmodified thinset, and you’re looking at roughly $4–$7 per square foot in materials for a standard bathroom floor.
If you hire a professional, labor adds another $8–$15 per square foot, bringing the total installed cost to $12–$22 per square foot depending on your region and the complexity of the project.
For a standard 50-square-foot bathroom floor, expect to spend $600–$1,100 for DIY material costs, or $900–$1,600+ with professional installation. That may sound steep compared to a $30 tube of RedGard, but consider what you’re protecting. A single water intrusion event under a tile floor can cause thousands of dollars in subfloor, framing, and mold remediation costs. Kerdi membrane pays for itself the first time it does its job.
Conclusion
Kerdi membrane is one of the best waterproofing solutions available for tile floors, and yes — it’s absolutely designed for floor use. The key is using it correctly: the right product for your application (standard Kerdi or Kerdi-DS for shower floors), the right thinset (always unmodified), proper subfloor prep, and careful sealing at every seam, corner, and penetration.
Whether you’re renovating a shower floor, waterproofing a full bathroom, or protecting a basement tile installation from moisture, Kerdi gives you a long-lasting, professionally reliable result. It costs more upfront than a liquid membrane or cement board, but the performance and peace of mind it provides are well worth it.
If you’re still deciding whether to DIY or hire a pro, consider your comfort level with thinset work and the size of your project. Small bathroom floors are very manageable for a skilled DIYer. Shower floors with custom drains and multiple seams are better left to an experienced tile setter. Either way, now you know exactly what’s involved — and that’s the best place to start.