If your detached garage is only running on basic 120V power, you already know the frustration. The breaker trips when you fire up your table saw. Your EV charger trickles along at a snail’s pace. And forget about running a space heater and power tools at the same time. The fix? Running 240V to your detached garage — and doing it right the first time.
This guide covers everything you need: the real costs, the right materials, permit requirements, wiring methods, and a clear step-by-step overview so you know exactly what’s involved before a single shovel hits the ground.
Why Most Detached Garages Need a 240V Upgrade
The Limitations of Standard 120V Garage Power
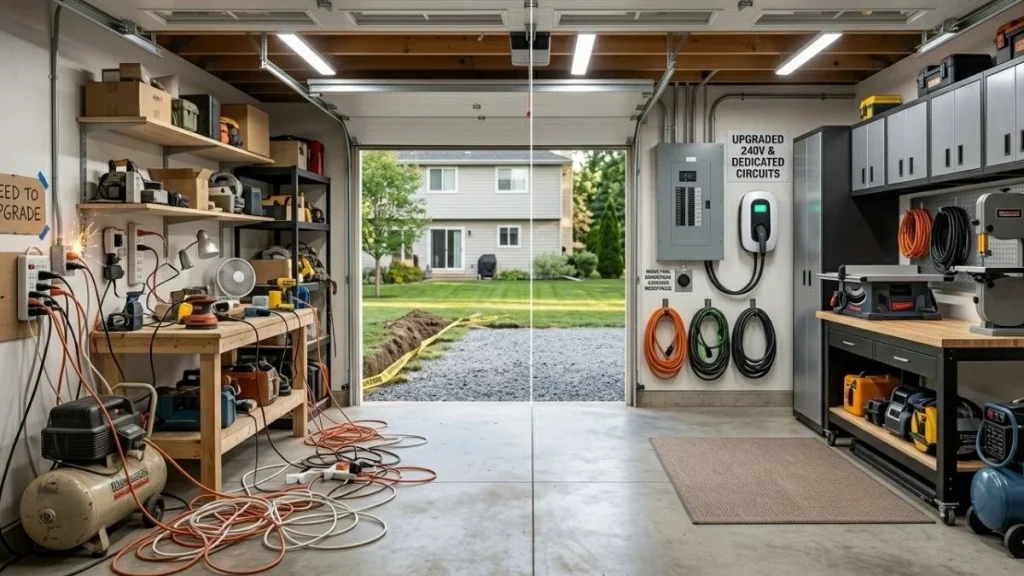
Most detached garages were built with a basic 120V, 20-amp circuit — enough for a shop light and maybe a radio. But modern garages are doing a lot more work. A standard 120V circuit maxes out at around 2,400 watts of continuous draw. That’s not enough for a serious workshop, an EV charger, or even a mid-size air compressor running at full capacity.
Here’s what happens when you push a 120V circuit past its limit:
- Breakers trip constantly, interrupting your work
- Voltage drops cause tools to run hotter and wear out faster
- You’re limited to one major appliance at a time
- Level 2 EV charging is impossible — it requires 240V
If any of these sound familiar, a 240V upgrade isn’t a luxury. It’s a practical necessity.
What You Can Power With 240V in Your Garage
Once you have 240V running to your garage, the difference is immediate. Here’s what becomes possible:
- Level 2 EV Charger — charge your electric vehicle 5x faster than a standard 120V outlet
- Table saws, band saws, jointers — most serious woodworking tools are 240V
- Air compressors — larger models (3HP+) require 240V for proper performance
- Welders — MIG and TIG welders almost always need 240V circuits
- Electric heaters and mini-splits — keep your garage comfortable year-round
- Dust collection systems — larger units run more efficiently on 240V
Is Running 240V to a Detached Garage Worth It?
For most homeowners, the answer is yes — especially if you plan to use the garage regularly. A properly wired detached garage with a subpanel adds measurable value to your property. Real estate appraisers consider upgraded electrical as a functional improvement. Beyond resale, the day-to-day convenience of having reliable, high-capacity power in your workspace is hard to put a price on.
That said, if your garage only needs a plug-in lamp and a phone charger, 120V is probably fine. But if you’re running tools, charging an EV, or building out a serious workshop — 240V is the right move.
What You Need Before You Start — Planning and Permits

Do You Need a Permit to Run 240V to a Detached Garage?
Yes — in virtually every jurisdiction in the United States, running new electrical service to a detached structure requires a permit. This isn’t optional, and skipping it creates real problems:
- Your homeowner’s insurance may deny claims related to unpermitted electrical work
- You’ll likely have to rip it out and redo it when you sell the house
- You’re personally liable if something goes wrong with unpermitted wiring
The permit process is straightforward. You (or your electrician) submit a plan to your local building department, pay a fee (usually $50–$150), and schedule an inspection after the work is done. The inspector checks your work against the National Electrical Code (NEC) before giving approval.
Assessing Your Main Electrical Panel
Before you run anything to the garage, check whether your main panel has the capacity to support the new load. Here’s what to look at:
- Available breaker slots — you need at least one double-pole breaker slot (takes up two slots)
- Panel amperage — a 100A or 200A main panel can typically support a garage subpanel; a 60A panel may not
- Current load — add up what you’re already running to estimate headroom
If your main panel is full or undersized, you’ll need a panel upgrade before this project can move forward. That adds $1,500–$3,500 to the total cost, but it’s a necessary step.
Hiring an Electrician vs. DIY
| Factor | Hire an Electrician | DIY |
| Safety | Lower risk if licensed | Higher risk without experience |
| Permit & Inspection | Usually handled for you | You apply and schedule |
| Cost | $800–$2,500+ labor | Mainly material costs |
| Code Compliance | Guaranteed by license | Depends on your knowledge |
| Time | Days to schedule | Flexible |
When to absolutely hire a pro:
- If you’ve never done electrical work before
- If your main panel needs to be touched
- If your local code requires licensed electrician sign-off (many do)
Confident DIYers can legally do their own electrical work in most states, but you still need a permit and inspection. Doing the work without the permit is the mistake — not the DIY itself.
How Much Does It Cost to Run 240V to a Detached Garage?
This is one of the most searched questions on this topic, so let’s be direct about it.
Average Cost Breakdown
| Item | Estimated Cost |
| Electrical permit | $50 – $150 |
| Trenching (if underground) | $300 – $800 |
| Wire and conduit | $150 – $500 |
| Subpanel (60A–100A) | $200 – $500 |
| Breakers and outlets | $100 – $250 |
| Electrician labor | $800 – $2,000 |
| Total (typical range) | $1,000 – $4,000+ |
Shorter distances and overhead wiring can bring costs down to the $1,000–$1,500 range. Longer runs with underground wiring and a panel upgrade can push costs above $5,000.
Key Factors That Affect Your Total
Distance from panel to garage is the biggest variable. Every additional foot of wire adds material and labor cost. A garage 30 feet from the main panel is far cheaper to wire than one 150 feet away.
Underground vs. overhead wiring also affects the total significantly. Underground requires trenching, which adds labor. Overhead runs are cheaper to install but require proper height clearance.
Panel upgrade adds $1,500–$3,500 if your main panel can’t handle the additional load.
Local labor rates vary widely. Electricians in major metro areas charge $100–$150/hour; rural areas may be $60–$90/hour.
Ways to Save Without Cutting Corners
- Dig your own trench — most electricians will allow this; confirm before hiring
- Get 3+ quotes — prices vary significantly between contractors
- Run extra conduit while the trench is open — future-proofing costs almost nothing extra at this stage
- Schedule during off-peak seasons — winter is typically slower for electricians in most regions
What Materials and Wire Size Do You Need?
Choosing the Right Wire Gauge
Wire gauge determines how much current can safely flow through the circuit. The heavier the load you want to run, the larger (lower AWG number) the wire needs to be.
| Amperage | Wire Gauge | Common Use |
| 60A | #6 AWG | Small workshop, basic tools |
| 80A | #4 AWG | Mid-size workshop, EV charger |
| 100A | #2 AWG | Full workshop, heavy equipment |
For most homeowners building a workshop and adding EV charging, a 60A subpanel with #6 AWG wire is the starting point. If you plan to add more equipment down the road, consider sizing up to 100A now — the extra wire cost is minimal compared to re-running it later.
Conduit vs. Direct Burial Cable
Direct Burial Cable (UF-B): This cable is rated for burial without conduit. It’s simpler to install but harder to replace if something goes wrong. Once it’s in the ground, it’s in the ground.
PVC Conduit: Requires more installation work upfront, but if you ever need to pull new wire (for an upgrade or after damage), you just pull it through the conduit — no digging required. This is the preferred method for most professional installations.
Minimum Burial Depths (Per NEC Code)
| Wiring Method | Minimum Burial Depth |
| Direct burial cable (UF-B) | 24 inches |
| PVC conduit | 18 inches |
| Rigid metal conduit (RMC) | 6 inches |
Going deeper than the minimum is always acceptable and often a good idea in areas with heavy foot traffic or where digging might occur later.
Other Essential Materials
- Subpanel box with main breaker (60A or 100A)
- Double-pole circuit breakers for 240V circuits
- GFCI breakers or outlets — required by code in garage locations
- Weatherproof outlet covers for any outdoor-facing receptacles
- Conduit fittings and connectors — LB bodies, couplings, bushings
- Wire lugs and terminal blocks for subpanel connections
Underground vs. Overhead Wiring — Which Should You Choose?
Running Underground Wire to a Detached Garage
Underground wiring is the most common method for detached garages and the one most electricians recommend. Here’s why:
Pros:
- Completely hidden once installed — no visible wires on the exterior
- Protected from weather, UV damage, and physical impact
- Longer lifespan than overhead wiring
- Cleaner aesthetic for the property
Cons:
- Requires trenching, which adds labor and cost
- More work upfront to install
- Driveway crossings require extra consideration (deeper burial or conduit through a sleeve)
Best for: Most residential properties, especially where the route between house and garage is under lawn or landscaping.
Overhead Aerial Wiring to a Detached Garage
Overhead wiring uses a service entrance cable (SEC) strung between the house and garage on a messenger wire or as a self-supporting cable.
Pros:
- Lower installation cost — no trenching required
- Faster to install
- Easier to inspect visually
Cons:
- Must meet minimum height clearances per NEC
- Exposed to weather, ice, and wind damage
- May not be permitted by some local codes
- Less visually appealing
NEC minimum height requirements for overhead conductors:
- Above pedestrian areas: 10 feet minimum
- Above driveways and vehicle access areas: 12 feet minimum
- Above public roads: 18 feet minimum
Best for: Properties where underground installation is impractical (rocky soil, existing concrete driveway blocking the route, or very short distances).
How to Run 240V to a Detached Garage — Step-by-Step Overview

This is an educational overview, not a substitute for a licensed electrician where required. Always pull a permit before beginning work.
Plan Your Route and Pull Your Permit
Map the physical path from your main panel to the garage. Identify obstacles: driveways, tree roots, landscaping, and slopes. Decide whether underground or overhead is more practical for your property. Submit your permit application to the local building department with a basic wiring plan before any work begins.
Install the Subpanel in the Garage
Choose a location inside the garage that’s easily accessible and away from moisture. Mount the subpanel box on an interior wall stud. The NEC requires detached garages to have their own grounding electrode system — this means driving ground rods at the garage, separate from the main house ground. This is one of the most commonly missed requirements for DIYers.
Run the Wire From Main Panel to Garage
Connect a double-pole breaker in your main panel sized to the subpanel’s amperage (60A, 80A, or 100A). Run the wire through conduit underground (or overhead) following burial depth and height requirements. At driveway crossings, use rigid conduit sleeved through the pavement or bore underneath.
Connect and Test the Circuit
Wire the incoming conductors to the subpanel’s main lugs — hot, hot, neutral, and ground each to their correct terminals. Install branch circuit breakers for your individual 120V and 240V circuits. Test all connections with a multimeter before energizing. Schedule your final inspection with the building department before closing up any walls or backfilling the trench.
Related Read: How to Run 220 to Detached Garage
Safety Tips and Common Mistakes to Avoid
Most Common Wiring Mistakes Homeowners Make
Wrong wire gauge — undersized wire overheats and is a fire hazard; always match gauge to amperage
- Skipping the separate ground system — detached structures require their own ground rods by code
- Not accounting for voltage drop — long runs need a wire size bump to compensate for resistance
- Improper burial depth — going too shallow risks physical damage to underground wiring
- Skipping GFCI protection — required in all garage circuits per NEC 210.8
Electrical Safety Non-Negotiables
- Always shut off the main breaker before touching any panel wiring
- Use a non-contact voltage tester to verify circuits are de-energized
- Never work alone on main panel connections
- Don’t bury wire without first calling 811 (Dig Safe) to locate underground utilities
- Never skip the permit and inspection — the inspector is your safety net
Conclusion
Running 240V to a detached garage is one of the best electrical upgrades you can make as a homeowner. Whether you’re building a serious workshop, adding a Level 2 EV charger, or just want reliable power without tripped breakers — this project delivers real, lasting value. Most homeowners spend between $1,000 and $4,000, and when you factor in what you get in return, it’s money well spent.
The most important things to get right are the ones that are easy to skip — pulling your permit, sizing your wire correctly, and installing a proper subpanel with its own grounding system at the garage. These aren’t optional extras. They’re what separates a safe, code-compliant installation from one that causes problems down the road.
Before you start, check your main panel capacity, call your local building department about permit requirements, and get at least two or three quotes if you’re hiring an electrician. Do it right the first time, and your garage will have the power it needs for decades to come.