Looking to brighten up your kitchen or workspace without cluttering your countertops? Under cabinet lighting is the secret weapon that can transform your space with a warm, inviting glow.
But before you rush to buy fixtures, there’s one crucial step you can’t skip: the under cabinet lighting rough-in. This essential phase sets the foundation for a clean, professional-looking installation that will save you time and frustration later. If you want your lighting to look seamless and work perfectly for years, understanding the rough-in process is a must.
Planning Under Cabinet Lighting
Planning under cabinet lighting is a key step before installation. It ensures the lights fit perfectly and work efficiently. Proper planning helps avoid mistakes and extra costs. This stage focuses on the rough-in phase, where you prepare wiring and placement for the lights. Clear planning improves both the look and function of your kitchen or workspace.
Choosing The Right Lighting Type
Choosing the right lighting type affects brightness, energy use, and style. Under cabinet lights come in several types, each with pros and cons. It is important to pick lights that meet your needs and fit your space.
- LED strip lights: Thin, flexible, and energy-efficient. They provide even light and last long.
- Puck lights: Small, round lights that create focused spots. Good for task lighting.
- Fluorescent lights: Bright and cost-effective but bulkier than LEDs.
- Halogen lights: Bright, warm light but use more power and generate heat.
LEDs are the best choice for most homes. They save energy and need less maintenance. Decide based on your lighting goals and budget.
Measuring And Marking Placement
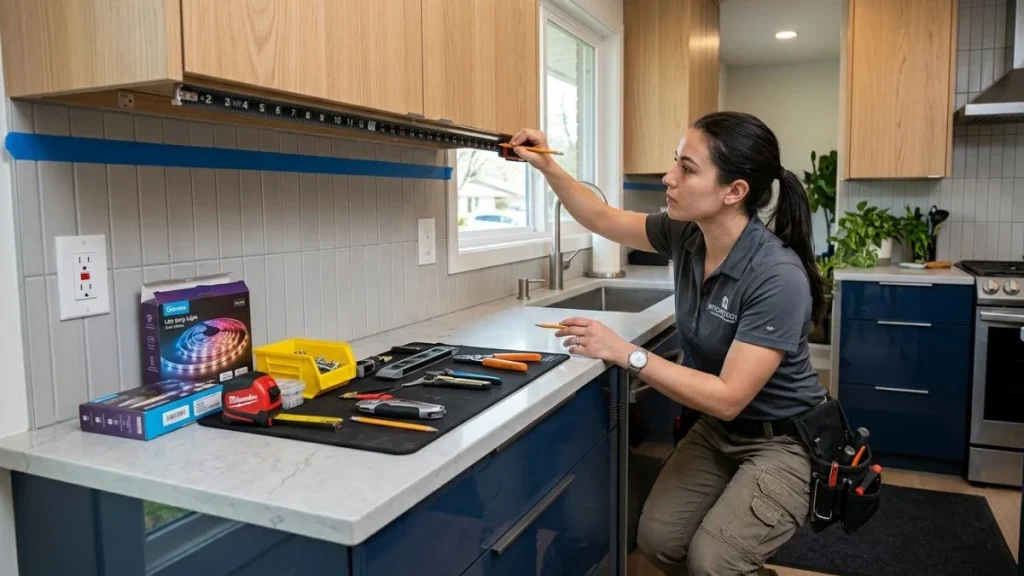
Measuring and marking placement is crucial for even lighting. Start by measuring the length of your cabinets. Use a tape measure and note down the total length.
Next, plan how many lights you need. Space them evenly for balanced light. Mark spots where each light will go using a pencil or painter’s tape.
Steps for marking placement:
- Measure cabinet length and write it down.
- Decide light type and size.
- Calculate spacing between lights (usually 12 to 18 inches).
- Mark each position lightly on the cabinet underside.
- Double-check all marks before drilling or installing.
Keep these tips in mind:
- Avoid placing lights too close to cabinet edges.
- Leave room near corners for wiring.
- Consider light direction for best coverage.
- Test light placement with a temporary setup if possible.
Considering Electrical Requirements
Electrical planning is important for safe, efficient lighting. Check your home’s electrical capacity before starting. Under cabinet lighting usually runs on low voltage, but power sources vary.
Key points to consider:
- Power source: Identify a nearby outlet or junction box.
- Voltage: Most under cabinet lights use 12V or 24V low voltage.
- Wiring: Use proper gauge wire for the length and load.
- Switch location: Plan where to place switches or dimmers.
- Transformers: Required for low voltage lights. Choose one with enough wattage.
Follow these steps:
- Calculate total wattage of all lights.
- Choose a transformer that supports this wattage.
- Plan wiring routes behind cabinets or inside walls.
- Install switches in easy-to-reach spots.
- Check local codes and safety standards.
Consult a licensed electrician if unsure about wiring or power. Proper electrical planning prevents hazards and ensures your lighting works well.
Preparing For Rough-in
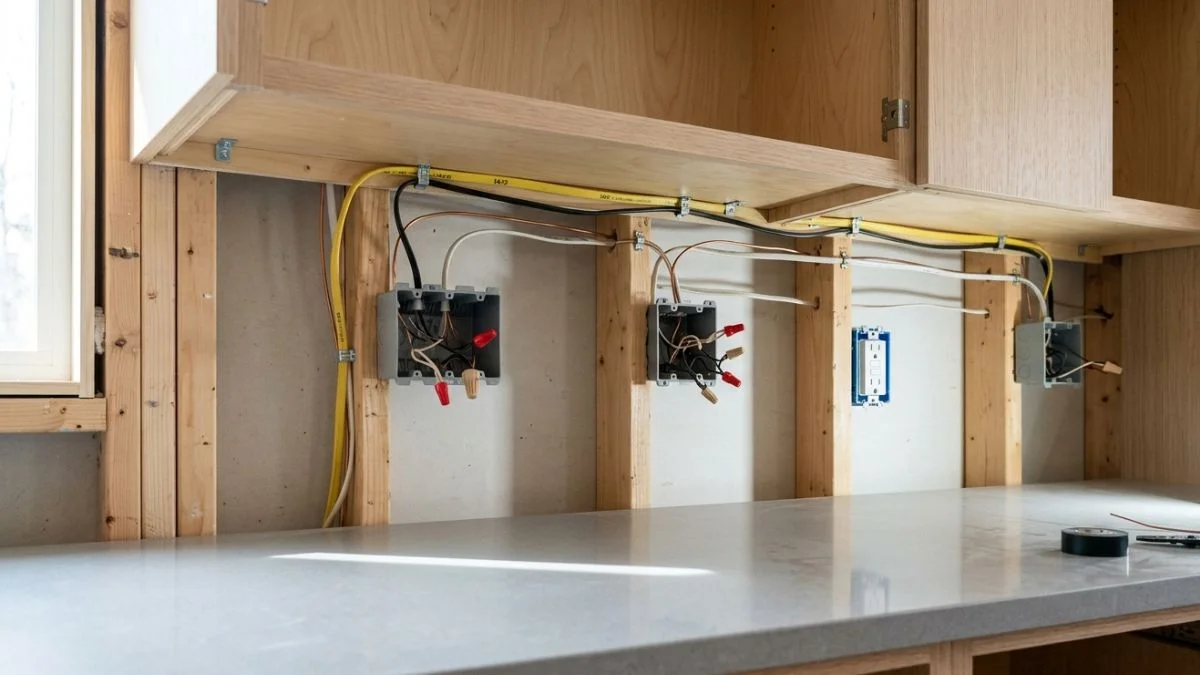
Preparing for rough-in is a key step in installing under cabinet lighting. This phase sets the foundation for a safe and effective electrical setup. Careful planning and precise work ensure the lighting will operate smoothly and look great. Rough-in involves placing wires, power sources, and junction boxes before finishing the walls or cabinets. This preparation saves time and cost later. It also helps avoid electrical problems. The following sections explain important tasks during this stage.
Locating Power Sources
Finding the right power source is the first task. The power source supplies electricity to the under cabinet lights. Choose a source that can handle the extra load without overloading the circuit. Most kitchens have existing circuits near counters. Look for these options:
- Existing outlets: Use a nearby outlet on the same circuit.
- Dedicated circuit: Install a new circuit for the lights if needed.
- Switch boxes: Power can come from a wall switch controlling the lights.
Check the circuit breaker panel to identify which circuits serve the kitchen area. Use a voltage tester to confirm power availability. Keep these points in mind:
| Power Source | Advantages | Considerations |
| Existing Outlet | No extra wiring needed | Must not overload circuit |
| Dedicated Circuit | Safe and reliable | Higher installation cost |
| Switch Box | Easy on/off control | Requires wiring to switch |
Tip: Always turn off the main power before testing or working on circuits.
Running Electrical Wiring
After locating power, run wiring to the under cabinet area. Use the correct wire type and size for safety and code compliance. Most under cabinet lights use low-voltage or 120V wiring. Follow these steps:
- Plan the wire path behind walls or inside cabinets.
- Measure distances to avoid excess wire.
- Use fish tape to pull wires through tight spaces.
- Secure wires with staples or clips to prevent movement.
Keep wires away from heat sources and sharp edges. Label wires clearly for future maintenance. Here is a simple wiring guideline:
| Wire Type | Usage | Common Size |
| NM Cable (Romex) | Standard residential wiring | 14/2 or 12/2 |
| Low-Voltage Wire | LED under cabinet lights | 18-22 gauge |
Safety note: Follow local electrical codes. Use a licensed electrician if unsure.
Installing Junction Boxes
Junction boxes connect wires safely and keep connections accessible. Install boxes at key points along the wiring path. Use boxes that fit the wall thickness and space available. Follow these tips:
- Place junction boxes near power sources and light locations.
- Mount boxes securely to studs or framing.
- Use boxes rated for the type of wiring and environment.
- Leave enough space inside the box for wire connections.
After placing boxes, strip wire ends and twist wires together inside. Use wire nuts to secure connections. Cover junction boxes with proper covers for safety. Here is a checklist for junction box installation:
- Box type matches wiring (plastic or metal)
- Box mounted flush with wall or cabinet surface
- Wires properly stripped and connected
- Box cover installed and secured
Important: Junction boxes must remain accessible for inspection or repair. Do not bury them behind drywall or cabinets.
Installing Mounting Hardware
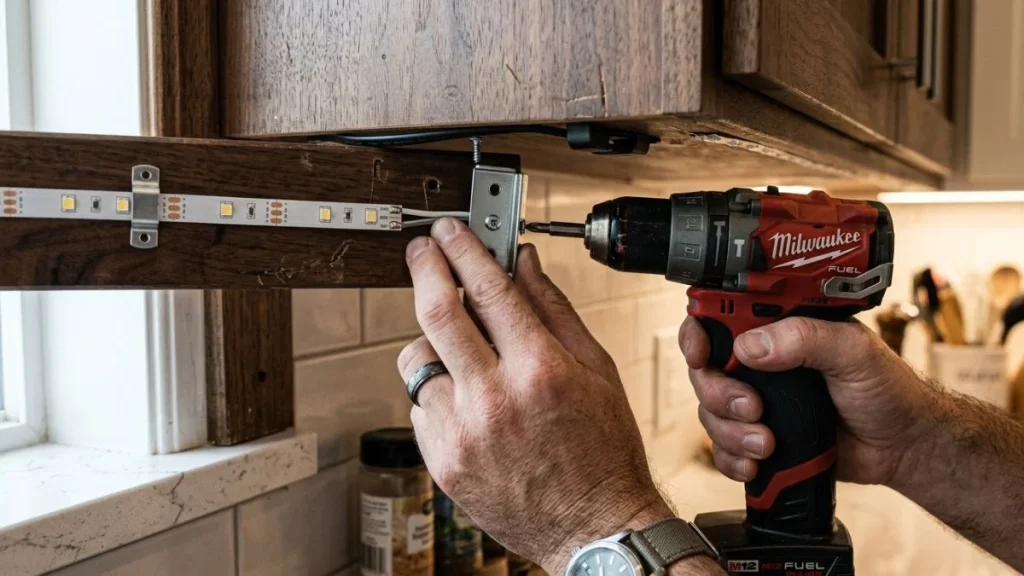
Installing mounting hardware is a key step in the under cabinet lighting rough-in process. Proper mounting ensures the lights stay fixed and work safely. This step sets the foundation for a clean, professional look and reliable lighting. Careful attention to hardware selection and attachment improves the lifespan and performance of your lighting setup.
Selecting Mounting Brackets
Choosing the right mounting brackets is essential for a strong installation. Brackets hold the light fixtures under the cabinet, so they must fit the space and light type perfectly. Consider these factors when selecting brackets:
- Material: Metal brackets are durable and provide firm support. Plastic brackets are lighter but less sturdy.
- Size: Match the bracket size to your light fixture dimensions. Too small or too large brackets can cause instability.
- Mounting Style: Some brackets screw directly into the cabinet, while others use adhesive pads. Choose based on cabinet material and weight of the lights.
- Adjustability: Adjustable brackets allow you to change the light angle for better illumination.
| Bracket Type | Best For | Pros | Cons |
| Metal Screw-in | Heavy lights, wooden cabinets | Strong hold, long-lasting | Requires drilling, permanent |
| Plastic Clip-on | Lightweight fixtures | Easy to install, removable | Less durable, may loosen |
| Adhesive Pad | Non-invasive, temporary setup | No drilling needed | Less secure, not for heavy lights |
Tip: Always check the weight limit of the bracket before purchase. Buy a few extras in case of mistakes during installation.
Attaching Supports Securely
Secure attachment of mounting brackets is crucial for safe and durable lighting. Loose brackets can cause lights to fall or flicker. Follow these steps for a firm installation:
- Mark the placement: Use a pencil to mark where each bracket will go under the cabinet.
- Pre-drill holes: Drill small pilot holes to prevent wood from splitting when inserting screws.
- Use the right screws: Select screws that fit the bracket holes and cabinet material.
- Check alignment: Before tightening, ensure brackets line up straight for uniform lighting.
- Tighten firmly: Screw brackets in securely but avoid over-tightening, which can damage the cabinet.
Additional tips to ensure support stability:
- Use a level to keep brackets even.
- For drywall cabinets, use anchors or toggle bolts to hold weight.
- Test each bracket by gently pulling it after installation.
Safety Note: Wear safety glasses during drilling to protect your eyes from debris. Keep the work area clean to avoid accidents.
Ensuring Safety And Compliance
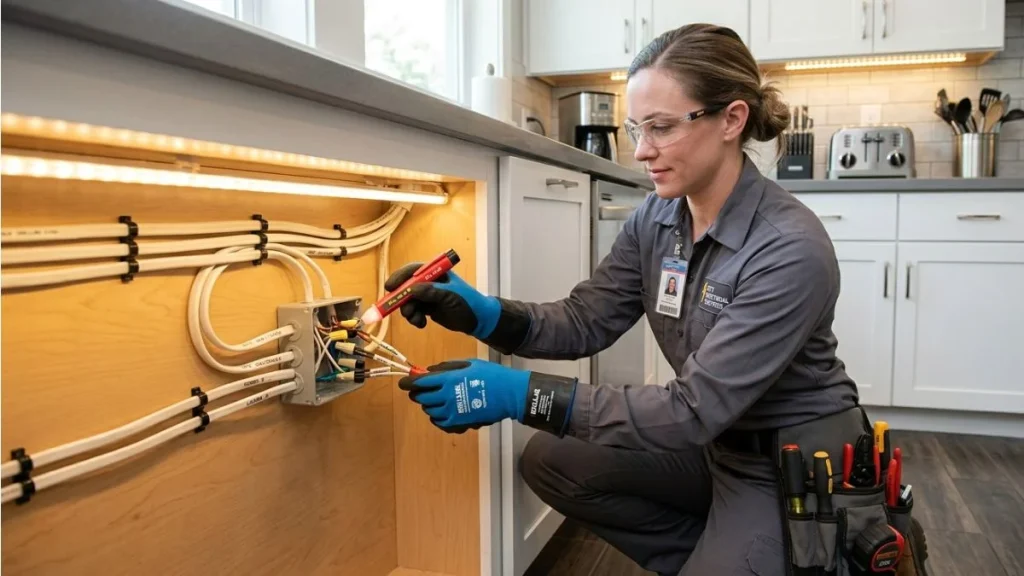
Under cabinet lighting rough-in requires careful planning to ensure safety and compliance. Proper installation prevents electrical hazards and meets building rules. This step is critical for a safe, long-lasting lighting setup under cabinets.
Following Electrical Codes
Electrical codes set the minimum safety standards for installing under cabinet lighting. These rules ensure the wiring and fixtures are safe to use and reduce fire risks. Ignoring codes can cause serious problems, including electrical shocks or fires.
Key points to follow electrical codes:
- Use wiring rated for the location and load.
- Install proper grounding to avoid electrical shocks.
- Place switches and outlets where they are easy to reach.
- Use circuit breakers suitable for the lighting load.
- Follow local and national electrical regulations (such as NEC in the US).
Here is a simple table showing important code aspects for under cabinet lighting:
| Code Aspect | Requirement | Purpose |
| Wiring Type | Use NM-B or THHN wires | Suitable for indoor, dry locations |
| Grounding | Connect all metal parts to ground wire | Prevent electrical shock |
| Circuit Protection | Use AFCI or GFCI breakers as required | Prevent arc faults and ground faults |
| Box Fill | Do not exceed box capacity | Avoid overheating and short circuits |
Following these codes keeps the lighting system safe and reliable. Always check local codes as they can vary.
Using Proper Insulation And Protection
Proper insulation and protection shield wiring and fixtures from damage. This step ensures the wires do not overheat or get exposed to moisture. It also prevents accidental contact with sharp edges or nails in cabinets.
Best practices for insulation and protection:
- Use insulated cables with ratings for indoor use.
- Run wires through conduit or protective tubing in tight spaces.
- Keep wiring away from heat sources like ovens or stovetops.
- Seal any holes around wiring to prevent drafts and pests.
- Use junction boxes with covers to protect wire connections.
Check this checklist for proper insulation and protection:
- Insulation material type
- Wire gauge and rating
- Conduit or tubing presence
- Protection from moisture and heat
- Secure fastening to avoid wire movement
Proper insulation lowers the risk of shorts and fire. It also extends the life of your lighting system. Always use materials that meet safety standards for electrical wiring.
Testing And Troubleshooting
Testing and troubleshooting are vital steps after installing under cabinet lighting rough in. These steps ensure the system works properly and safely before finishing the installation. Careful testing helps catch problems early. Troubleshooting solves issues that may arise during or after setup. This saves time and prevents damage to the lighting system or electrical wiring. Following a clear testing and troubleshooting process gives confidence in the lighting’s performance and safety.
Checking Electrical Connections
Start by turning off power at the breaker to avoid shocks. Inspect each wire connection carefully. Loose or incorrect wiring can stop the lights from working or cause flickering. Use a voltage tester to confirm power is reaching the wires. Check that all wires are connected as per the wiring diagram. Confirm that wire nuts or connectors are tight and secure.
- Look for damaged insulation or exposed wires.
- Ensure ground wires are properly connected to the grounding screw.
- Verify polarity: black (hot), white (neutral), green or bare copper (ground).
Use a simple table to guide your checks:
| Connection | What to Check | Common Problems |
| Power Source to Switch | Secure wires, correct polarity | Loose wires, reversed hot/neutral |
| Switch to Light Fixture | Firm connection, no exposed wire | Disconnected wires, damaged cable |
| Ground Wire | Connected to grounding screw | Missing ground, loose connection |
After confirming connections, restore power to test the circuit. Watch for any flickering or failure to light. If problems appear, turn off power and re-check connections.
Addressing Common Issues
Common problems with under cabinet lighting often involve power, wiring, or switches. Start troubleshooting by isolating the problem area. Use a multimeter to test voltage at different points. This helps find where the power stops. Look for these issues:
- Light does not turn on: Check power source, switch, and bulb.
- Lights flicker: Loose connections or faulty dimmer switch.
- Buzzing noise: Incompatible dimmer or bad wiring.
- Overheating: Wrong bulb type or poor ventilation.
Follow these troubleshooting tips:
- Turn off power before inspecting wiring.
- Replace bulbs with the correct type and wattage.
- Test switches by bypassing them or replacing if faulty.
- Check for damaged wires or connectors and replace as needed.
- Confirm dimmers are compatible with LED or other bulb types.
Use this checklist to quickly narrow down issues:
| Problem | Possible Cause | Solution |
| Light won’t turn on | Power off, faulty switch, bad bulb | Check power, test/replace switch, change bulb |
| Lights flicker | Loose connection, incompatible dimmer | Tighten wiring, replace dimmer |
| Buzzing sound | Wrong dimmer or wiring issue | Use compatible dimmer, fix wiring |
| Overheating lights | Incorrect bulb, poor ventilation | Use proper bulb, improve airflow |
Testing and troubleshooting ensure your under cabinet lighting works well and lasts. Careful checks prevent hazards and improve performance.
You May Also Like: How to Cover Underside of Cabinets
Conclusion
Planning your under cabinet lighting rough in helps save time and money later. It makes installing lights easier and cleaner. Proper wiring ensures your lights work safely and look neat. Take measurements and mark spots before starting the rough in.
This small step improves your kitchen’s overall feel and function. Good lighting brightens your workspace and adds style. Start early, follow basic steps, and enjoy a well-lit kitchen soon. Simple preparation brings great results.