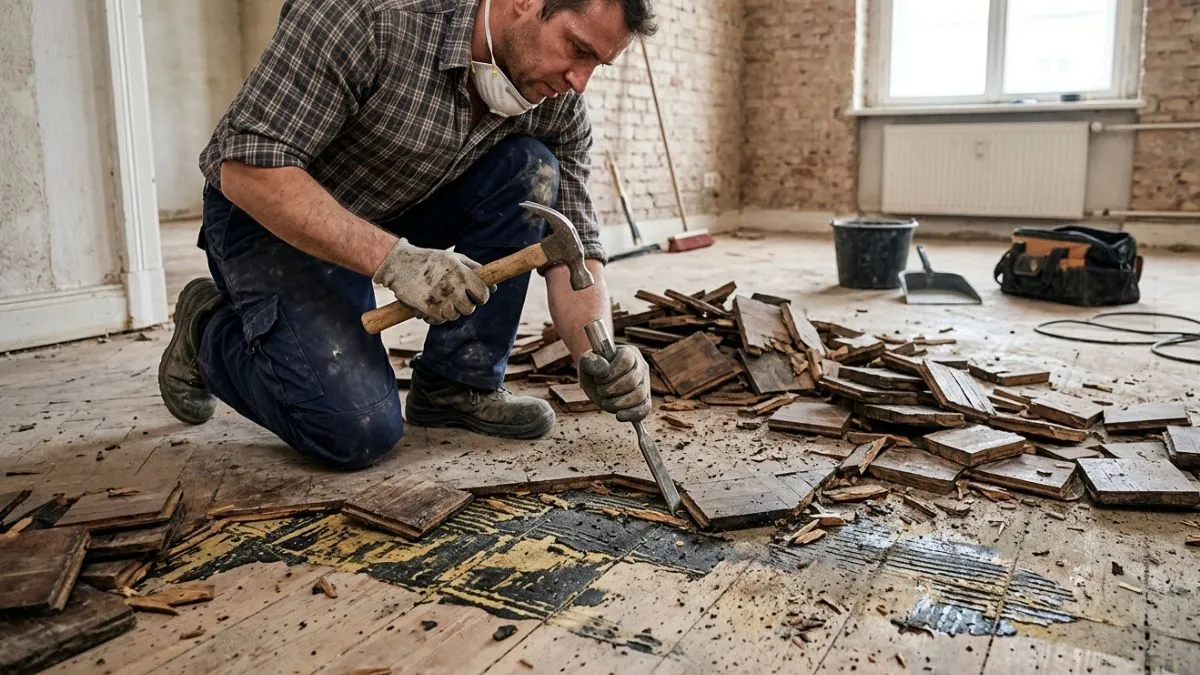
Is your parquet flooring looking worn out or damaged? Replacing parquet flooring tiles might be exactly what your space needs to feel fresh and inviting again.
You don’t have to live with scratched or faded tiles that ruin your room’s charm. You’ll discover simple steps to replace those tiles yourself, save money, and bring back the beauty of your floors. Keep reading, and you’ll find out how easy it can be to transform your home with just a few tools and some guidance.
Signs Of Damaged Parquet Tiles
Replacing parquet flooring tiles is a task many homeowners face after years of use. Over time, parquet tiles can show clear signs of damage that affect both the look and safety of the floor. Knowing the signs of damaged parquet tiles helps decide when repairs or replacement are necessary. Early detection can save money and keep the floor looking beautiful longer.
Common Wear And Tear Issues
Parquet flooring faces daily wear from foot traffic and furniture movement. Common wear and tear issues include:
- Scratches: Small to deep scratches often appear from shoes, pets, or moving objects.
- Fading: Sunlight can cause the wood’s color to fade unevenly over time.
- Surface dullness: The finish wears off, making the floor look dull and lifeless.
- Chipped edges: Tiles may chip at the edges from impacts or heavy use.
These issues reduce the floor’s appeal and may lead to more severe damage. Regular maintenance like cleaning and polishing slows down the wear. For reference, see the table below showing typical wear signs and their causes:
| Wear Sign | Cause | Effect |
| Scratches | Shoes, pets, furniture | Visible marks, rough texture |
| Fading | Sun exposure | Uneven color, dull look |
| Surface dullness | Loss of finish | Less shine, worn appearance |
| Chipped edges | Impacts, heavy use | Cracks, loose tiles |
Identifying Water Damage
Water damage is one of the most serious problems for parquet floors. Wood absorbs moisture and swells, causing lasting harm. Signs of water damage include:
- Discoloration: Dark or light stains appear where water touched the wood.
- Soft spots: Tiles feel weak or spongy underfoot.
- Warping: Tiles lift or bend out of place.
- Mold or mildew smell: Dampness causes unpleasant odors.
Water damage often starts small but worsens fast. It may come from spills, leaks, or high humidity. Check areas near sinks, windows, or basements carefully. Fixing water damage early prevents tile replacement. The following list shows common water damage causes:
- Leaking pipes or appliances
- Spilled liquids not cleaned promptly
- Poor ventilation causing humidity
- Flooding or heavy rain exposure
Spotting Loose Or Warped Tiles
Loose or warped parquet tiles cause uneven floors and trip hazards. Detecting these problems early is key. Signs to watch for:
- Movement: Tiles shift or lift when stepped on.
- Gaps: Visible spaces between tiles appear.
- Uneven surface: Floor feels bumpy or crooked.
- Clicking sounds: Noise when walking over loose tiles.
Loose or warped tiles usually result from poor installation or moisture issues. Fixing them requires removing and replacing affected tiles. Use a simple test by pressing on tiles with your hand or foot to check for movement. The table below summarizes these signs:
Recommended: How to Fix Uneven Tile Floor
| Sign | Description | Cause |
| Movement | Tile shifts under pressure | Poor glue or damaged substrate |
| Gaps | Spaces between tiles | Wood shrinkage or swelling |
| Uneven surface | Bumpy or crooked floor | Warping or loose tiles |
| Clicking sounds | Noise when walking on tiles | Tiles not fully fixed |
Removing Old Parquet Tiles
Removing old parquet tiles is the first critical step in replacing parquet flooring tiles. This task requires care to avoid damaging the subfloor beneath. Proper removal ensures a clean, smooth base for the new tiles. It also saves time and money during installation. The process involves preparing the work area, using the right tile removal techniques, and dealing with any leftover adhesive. Each step must be done carefully for the best results.

Preparing The Work Area
Start by clearing the room. Remove all furniture, rugs, and decorations. This gives enough space to work safely and efficiently. Cover doorways with plastic sheets to stop dust from spreading to other rooms. Open windows for fresh air and ventilation.
Wear safety gear such as gloves, safety goggles, and a dust mask. Parquet tiles and adhesives can create dust and small debris that irritate eyes and lungs. Protecting yourself is important.
Gather all tools before starting. Common tools include:
- Putty knife or scraper
- Hammer and chisel
- Floor scraper or pry bar
- Utility knife
- Heat gun (optional)
- Bucket and sponge for cleaning
Plan how to dispose of old tiles. Use heavy-duty trash bags or rent a small dumpster. Parquet tiles can be heavy and bulky, so proper disposal is essential.
Techniques For Tile Removal
Remove parquet tiles carefully to avoid damage. Start by loosening tiles at the edges. Use a putty knife or scraper to lift corners gently. Tap the scraper with a hammer for stubborn tiles.
For tightly glued tiles, a heat gun softens adhesive. Heat the tile area for a few minutes, then pry it up. Work slowly to prevent cracking tiles or floor damage.
Use a pry bar for larger tiles or multiple tiles stuck together. Slide the bar under the tile and lift steadily. Avoid bending or twisting the subfloor.
Follow this step-by-step method:
- Score tile edges with a utility knife to break seal.
- Insert scraper or chisel under the tile edge.
- Tap tool lightly with hammer to lift tile.
- Apply heat if adhesive resists.
- Remove loosened tile carefully.
- Repeat until all tiles are removed.
Keep tiles and debris organized for disposal. Work in small sections to control mess. Take breaks to check for damage under tiles. Fix small cracks or holes before installing new tiles.
Handling Adhesive Residue
Adhesive residue remains after tile removal. It can prevent new tiles from sticking properly. Remove residue completely for a smooth surface.
Start scraping leftover glue with a putty knife or floor scraper. Apply steady pressure to avoid gouging the subfloor. For tough adhesive, use these methods:
- Apply adhesive remover solution. Follow product instructions carefully.
- Use warm water and a sponge to soften residue.
- Scrape softened glue gently.
- Sand the surface lightly if residue is uneven.
Wear gloves and ensure good ventilation when using chemical removers. Test remover on a small area to avoid damage.
After cleaning, wipe the floor with a damp cloth to remove dust and chemicals. Let the floor dry completely before laying new parquet tiles.
Preparing The Subfloor
Replacing parquet flooring tiles requires more than just laying down new pieces. The success of the project depends heavily on preparing the subfloor properly. A well-prepared subfloor ensures the parquet tiles lay flat, stick well, and last longer. This step prevents future problems like uneven surfaces, tile lifting, or moisture damage. Taking time to clean, level, repair, and test the subfloor creates a solid base for beautiful parquet flooring.
Cleaning And Leveling
Start by removing all debris, dust, and old adhesive from the subfloor. A clean surface helps the new parquet tiles stick firmly. Use a broom or vacuum to clear loose dirt. For sticky residues, apply a gentle adhesive remover and scrub with a brush. Avoid harsh chemicals that might damage the subfloor.
Next, check the subfloor for uneven spots. A level surface is crucial for parquet tiles to fit snugly and look smooth. Use a long straightedge or level tool to find dips or high spots.
- Fill low areas with a floor leveling compound.
- Sand down any high points to even out the surface.
- Allow the leveling compound to dry completely before proceeding.
Repairing Subfloor Imperfections
Small cracks, holes, and loose boards weaken the subfloor and affect parquet tile installation. Inspect the entire area carefully for damage. Repairing imperfections creates a smooth and stable base.
Common repair steps include:
- Fill cracks and holes with a high-quality wood filler or patching compound.
- Secure loose boards by nailing or screwing them down firmly.
- Replace damaged sections of the subfloor if necessary.
Use a putty knife to apply filler smoothly. Let it dry fully and sand the surface flat. Loose boards can cause squeaks and movement underfoot, so make sure they are tight. If damage is extensive, cutting out and installing new subfloor panels may be required.
Proper repairs stop movement and support the parquet tiles. This prevents cracks or gaps from forming after installation.
Moisture Testing
Moisture is a major enemy of parquet flooring. Excess moisture causes wood tiles to warp, swell, or develop mold. Testing the subfloor for moisture levels is vital before laying parquet tiles.
Two common moisture tests are:
- Plastic Sheet Test: Tape a clear plastic sheet (2×2 feet) to the subfloor. Leave it for 24 to 48 hours. If condensation or dark spots appear under the plastic, moisture is present.
- Moisture Meter: Use a moisture meter designed for wood or concrete to get a direct moisture reading. Ideal moisture content is below 12% for wood subfloors and 3% for concrete.
If moisture levels are high, delay parquet installation and address the source of moisture. Consider:
- Improving ventilation
- Using a vapor barrier
- Repairing leaks or drainage issues
Testing moisture protects your investment. It reduces the risk of costly damage and keeps your parquet floor looking great for years.
Installing New Parquet Tiles
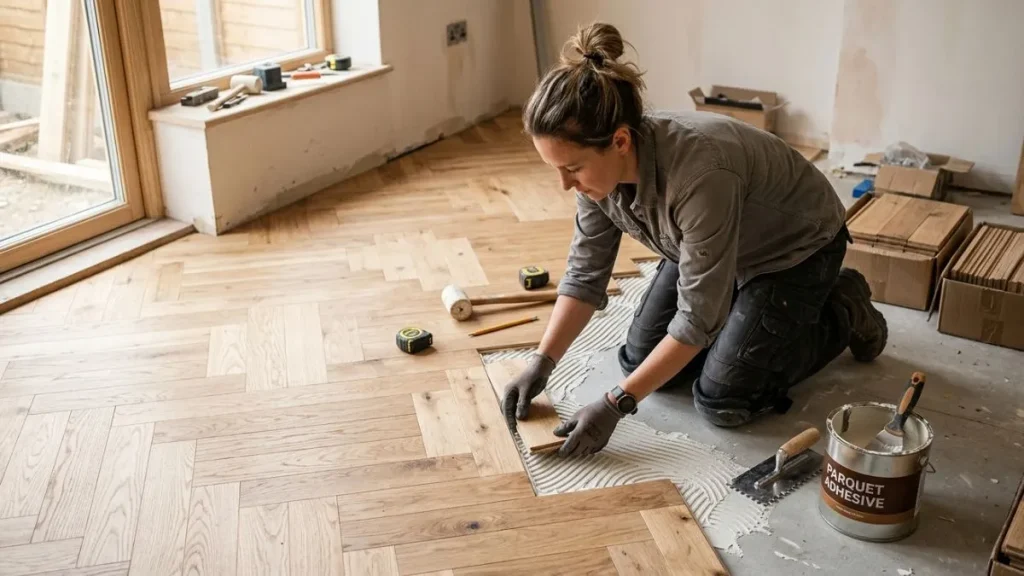
Replacing parquet flooring tiles involves careful preparation and precise installation to achieve a smooth, attractive surface. Installing new parquet tiles requires planning the layout, applying adhesive properly, and setting each tile firmly. This process ensures the floor looks even and lasts for years. Focus on these steps to get the best results.
Layout And Pattern Planning
Planning the layout and pattern is the first step in installing new parquet tiles. Parquet floors have distinct geometric patterns, so arranging tiles correctly is crucial. Start by cleaning the subfloor and measuring the room’s dimensions carefully.
Use the following tips for effective layout planning:
- Find the center of the room. Mark it to guide tile placement.
- Dry-lay tiles. Arrange a few tiles without adhesive to visualize the pattern.
- Decide on the pattern style. Common options include herringbone, basket weave, or checkerboard.
- Plan tile cuts. Identify areas where tiles will need trimming to fit edges.
- Consider room lighting. Patterns look best when aligned with natural light sources.
Applying Adhesive Correctly
Proper adhesive application is key to securing parquet tiles and preventing movement. Use a high-quality wood floor adhesive suited for parquet materials. Follow the manufacturer’s instructions for best results.
Steps to apply adhesive correctly:
- Clean the subfloor. Remove dust and debris to ensure good bonding.
- Mix adhesive. Stir thoroughly if required to achieve a smooth consistency.
- Use a notched trowel. Spread adhesive evenly over a small area, enough for a few tiles at a time.
- Check adhesive thickness. Aim for a thin but complete coverage to avoid lumps.
- Work quickly. Adhesive sets fast; place tiles before it dries.
Keep these tips in mind:
- Do not apply adhesive to the entire floor at once.
- Press tiles firmly into adhesive to remove air pockets.
- Clean excess adhesive immediately with a damp cloth.
Proper adhesive use ensures tiles stick well and the floor stays stable for years.
Setting Tiles In Place
After applying adhesive, set each parquet tile carefully to maintain the pattern and alignment. Begin from the center point marked during planning and work outward.
Follow these guidelines for setting tiles:
- Place tiles gently. Avoid sliding them too much to keep adhesive intact.
- Use spacers. Maintain uniform gaps between tiles for expansion.
- Tap tiles lightly. Use a rubber mallet to ensure full contact with adhesive.
- Check alignment often. Use a level or straightedge to keep rows straight.
- Cut edge tiles. Trim with a saw to fit edges neatly.
Once all tiles are set, place a weight or press over the floor for 24 hours to enhance bonding. Avoid walking on the floor during this time. Proper tile setting guarantees a strong, beautiful parquet floor.
Finishing Touches
Replacing parquet flooring tiles transforms a room’s look and feel. After installation, finishing touches make the floor smooth, shiny, and protected. These final steps ensure the parquet lasts long and stays beautiful. Proper sanding, sealing, polishing, and maintenance bring out the best in your new floor. Let’s explore these important finishing tasks.
Sanding And Sealing
Sanding smooths the surface of your parquet flooring. It removes rough spots, glue residue, and uneven edges from tile replacement. Use a floor sander with medium-grit sandpaper for the first pass. Follow with a fine-grit paper for a smooth finish. Sand along the wood grain to avoid scratches.
Sealing protects the wood from moisture, dirt, and wear. Choose a sealant that suits your parquet type, such as polyurethane or water-based sealers. Apply the sealant evenly with a brush or roller. Allow proper drying time between coats, usually 2-4 hours. Two to three coats work best for strong protection.
| Step | Details | Tip |
| Sanding | Use medium and fine-grit sandpaper | Sand with the wood grain |
| Cleaning | Remove dust and debris after sanding | Use a vacuum and damp cloth |
| Sealing | Apply 2-3 coats of sealant | Allow drying between coats |
Proper sanding and sealing give your floor a smooth, durable base. Never skip dust cleaning before sealing. Dust can cause bubbles and rough spots in the sealant.
Polishing Techniques
Polishing parquet floors adds shine and smoothness. It also helps protect the wood from scratches and stains. Use a floor buffer with a soft polishing pad for best results. Apply a quality floor polish designed for wood floors.
Follow these polishing steps:
- Clean the floor thoroughly before polishing.
- Pour a small amount of polish on the floor.
- Use the buffer to spread polish evenly.
- Move the buffer slowly to avoid streaks.
- Let the polish dry completely before walking.
Polishing keeps the floor looking new and helps hide minor scratches. Avoid using wax-based products on sealed parquet floors. Wax can build up and dull the shine over time.
Maintaining Your New Floor
Maintenance keeps your parquet floor beautiful and strong for years. Clean regularly using a soft broom or vacuum with a hardwood floor attachment. Avoid wet mops that soak the wood. Instead, use a damp mop with a mild wood cleaner.
Protect your floor by placing felt pads under furniture legs. This prevents scratches during movement. Use rugs or mats in high-traffic areas to reduce wear.
Follow this simple maintenance checklist:
- Sweep or vacuum daily to remove dirt.
- Use a damp mop weekly with a suitable cleaner.
- Wipe spills immediately to prevent stains.
- Apply polish every 3-6 months for shine.
- Inspect for damage and repair tiles if needed.
Proper care extends the life of your parquet floor. It also saves money by avoiding costly repairs or replacements. Routine maintenance keeps your floor looking fresh and inviting.
Conclusion
Replacing parquet flooring tiles can refresh your room’s look quickly. Choose the right materials and tools for best results. Take your time to remove old tiles carefully. Fit new tiles tightly to avoid gaps and damage. Clean the floor well after installation to keep it shiny.