

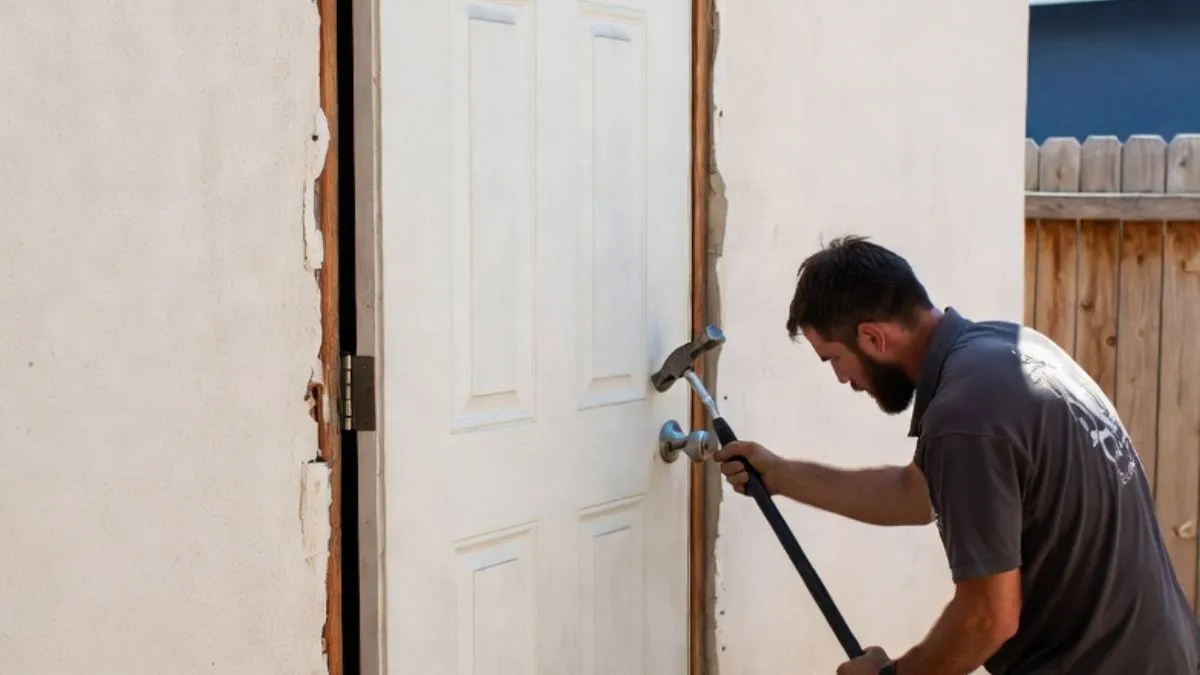
Replacing your exterior door when you have vinyl siding can feel tricky. You want the new door to look great and fit perfectly without damaging your siding.
If you choose the wrong steps, you might face leaks, drafts, or an uneven appearance that ruins your home’s curb appeal. But don’t worry—this guide will walk you through exactly what you need to know. By the end, you’ll feel confident tackling the job or discussing it with a professional, ensuring your door upgrade looks flawless and lasts for years.
Preparing For Door Replacement
Replacing an exterior door with vinyl siding requires careful preparation to ensure a smooth installation. Proper planning helps avoid mistakes and saves time. Preparing for door replacement involves taking accurate measurements, collecting the right tools and materials, and following safety steps. Each of these tasks plays a key role in achieving a neat and durable finish.
Measuring The Door Opening
Accurate measurements are the foundation of a successful door replacement. Begin by measuring the width and height of the existing door opening. Use a tape measure and note down three key points for each dimension:
- Top width: Measure from the inside edge of the left jamb to the right jamb.
- Middle width: Measure at the center of the door opening.
- Bottom width: Measure at the floor level between the jambs.
Repeat this process for the height:
- Left height: Measure from the threshold to the top jamb.
- Center height: Measure the center of the door opening.
- Right height: Measure the right side from threshold to jamb.
These multiple measurements help identify any uneven areas that may need adjustment. Record the smallest width and height to select a door that fits well without forcing.
| Measurement Point | Width (inches) | Height (inches) |
| Top | ______ | ______ |
| Middle | ______ | ______ |
| Bottom / Threshold | ______ | ______ |
After measuring, double-check the numbers. Accurate data prevents gaps that let in air or water and avoids costly returns.
Gathering Necessary Tools And Materials
Having the right tools and materials ready before starting saves time and frustration. For replacing an exterior door with vinyl siding, prepare the following:
- Tools: tape measure, level, screwdriver, hammer, pry bar, utility knife, caulk gun, drill, saw (if trimming needed).
- Materials: new door and frame, door jamb, shims, exterior-grade caulk, foam insulation, vinyl siding panels, nails or screws, weatherstripping.
Keep tools organized in a toolbox or workbench near the door area. Group materials by purpose to avoid searching during the project.
Check that the new door matches the opening size and the style fits the home’s exterior. Inspect vinyl siding pieces for damage and ensure they match existing siding color and texture.
Prepare extra materials like shims and caulk. They help create a tight, weatherproof seal around the door frame.
| Category | Items Needed |
| Measurement & Cutting | Tape measure, saw, utility knife, level |
| Installation | Drill, screwdriver, hammer, pry bar, shims |
| Sealing & Finishing | Caulk gun, exterior-grade caulk, foam insulation, weatherstripping |
| Materials | New door, door jamb, vinyl siding panels, nails/screws |
Safety Precautions
Safety is critical during door replacement work. Taking precautions protects you and others from injury and damage.
Follow these safety tips:
- Wear protective gear: Use safety glasses to shield eyes from debris and gloves to protect hands.
- Use tools properly: Read instructions for power tools. Keep blades sharp and handles dry.
- Work on stable surfaces: Use ladders or scaffolds on even ground. Avoid overreaching.
- Turn off power: Disconnect electricity to outdoor lights or alarms near the door to prevent shocks.
- Handle materials carefully: Vinyl siding and door frames can have sharp edges. Carry and store materials safely.
- Clear work area: Remove obstacles and keep children and pets away during replacement.
Keep a first aid kit nearby for minor cuts or scrapes. Knowing basic first aid helps if accidents occur. Taking safety seriously leads to a smoother project and fewer risks.
Removing The Old Door
Replacing an exterior door with vinyl siding improves your home’s look and energy efficiency. The first step is removing the old door carefully to avoid damage. This process needs patience and the right tools. Removing the door includes detaching hardware, taking off the door frame and trim, and handling the vinyl siding around it. Each part requires attention to detail to prepare for the new door installation.
Detaching Door Hardware
Start by removing all door hardware. This includes the handle, lockset, hinges, and any additional accessories like doorbells or security devices. Removing hardware first makes the door lighter and easier to handle.
- Gather the right tools: screwdriver (Phillips or flathead), drill, and pliers.
- Unscrew the hinges: Begin with the hinge pins, then remove screws from the frame or door.
- Remove the lockset and handle: Unscrew all visible screws and carefully pull off the hardware.
- Label parts: Keep screws and small parts in a container for reuse or disposal.
Note that some doors have concealed screws or hidden fasteners. Check carefully to avoid breaking any parts. Use penetrating oil if screws are rusty or tight. Keep safety glasses on to protect your eyes from debris.
| Hardware Part | Tool Needed | Tip |
| Hinges | Screwdriver, hammer (for pins) | Tap pins gently with hammer to remove |
| Handle & Lockset | Screwdriver | Keep screws organized in a container |
| Additional Accessories | Pliers, screwdriver | Remove carefully to avoid damage |
Removing Door Frame And Trim
After hardware removal, focus on the door frame and trim. Removing the frame requires care to avoid damaging the wall or siding. Start by prying off the trim gently with a pry bar or flat tool.
- Score caulk lines: Use a utility knife to cut through caulking around the trim. This prevents paint and drywall damage.
- Remove trim pieces: Pry carefully, working slowly to avoid breaking the wood or vinyl.
- Detach the frame: Unscrew or pull out nails holding the frame to the wall studs.
- Check for insulation: Remove any insulation or filler between the frame and wall.
Wear gloves to protect your hands from sharp nails and splinters. Place removed trim pieces flat to reuse or recycle. If the frame is nailed tightly, tap the pry bar gently and move along the edges to loosen it.
| Step | Tool | Purpose |
| Score caulk | Utility knife | Prevent damage to walls and paint |
| Remove trim | Pry bar, hammer | Detach trim carefully |
| Detach frame | Screwdriver, pry bar | Remove frame from wall studs |
| Clear insulation | Gloves, utility knife | Prepare opening for new door |
Handling Vinyl Siding Around Door
Vinyl siding near the door needs special care. Damaged siding can cause leaks and reduce energy efficiency. Handle siding carefully to avoid cracking or bending.
- Remove siding panels: Use a siding removal tool or flat pry bar to unlock siding around the door.
- Cut caulk and nails: Score any caulking and remove nails holding siding near the frame.
- Protect siding edges: Work slowly to avoid damaging the locking edge of panels.
- Store siding safely: Keep removed panels flat to prevent warping or breaking.
After removing the old door and frame, check the condition of the siding. Replace any damaged sections before installing new trim and door. Proper siding care ensures a tight, weatherproof seal around the new door.
| Action | Tool Needed | Tip |
| Unlock siding panels | Siding removal tool, flat pry bar | Slide tool under panel lock gently |
| Cut caulk | Utility knife | Score lines before prying |
| Remove nails | Pry bar, hammer | Pull nails slowly to avoid damage |
| Store panels | Flat surface | Prevent bending or cracking |
Adjusting The Opening For Vinyl Siding

Replacing an exterior door when your home has vinyl siding needs careful adjustment of the door opening. The opening must fit the new door properly and work well with the siding. This step keeps the door strong, weatherproof, and looks good with the siding.
Inspecting And Repairing Wall Structure
Start by examining the wall around the door opening. Look for any damage or rot in the wood framing. Vinyl siding relies on a solid wall to attach correctly. Fix weak or broken parts before continuing. Use a flashlight to see inside the wall cavity. Check for:
- Rot or mold on wood studs
- Loose or missing nails
- Water stains or soft spots
Repair any damage by replacing wood or adding support. Make sure the wall is level and square. A crooked frame can cause the door to hang unevenly or not close right.
| Common Issues | Repair Action |
| Rotting wood | Cut out and replace with new lumber |
| Loose nails | Drive nails back or use screws |
| Uneven framing | Add shims or sister studs |
Checking and fixing the wall structure ensures a solid base for the door and siding. This step saves trouble later, like drafts or siding damage.
Installing New Door Jamb
The door jamb is the frame that holds the door in place. It must fit snugly in the opening and be strong enough to support the door’s weight. Use pressure-treated wood or a jamb designed for exterior use to resist moisture.
Follow these steps to install the jamb:
- Measure the opening width and height accurately.
- Cut the jamb pieces to size, ensuring square corners.
- Place the jamb in the opening and use shims to keep it plumb and level.
- Secure the jamb with nails or screws through the framing.
- Check that the jamb is straight and the door will swing freely.
Improper jamb installation can lead to:
- Door sticking or not closing fully
- Air and water leaks
- Damage to vinyl siding around the door
Use a level and square tool to confirm the jamb’s position before fastening. The door jamb also serves as the mounting surface for the vinyl siding trim. Leave enough space around the jamb for the siding to slide in smoothly.
Ensuring Proper Insulation
Proper insulation around the door opening prevents drafts and heat loss. Vinyl siding works best when the wall cavity is well insulated. After installing the jamb, fill gaps between the jamb and framing with insulation material.
Common insulation options include:
- Expanding spray foam
- Fiberglass insulation batts
- Rigid foam board
Expanding spray foam is popular because it seals tight and resists moisture. Apply it carefully to avoid warping the jamb. Fill all gaps, especially at the top and sides of the door frame.
Insulation tips:
| Insulation Type | Benefits | Considerations |
| Expanding Spray Foam | Seals tightly, moisture-resistant | Apply evenly, avoid over-expansion |
| Fiberglass Batts | Easy to install, cost-effective | Must be cut to fit snugly |
| Rigid Foam Board | High R-value, stable | Needs precise cutting |
After insulating, cover the area with a weather-resistant barrier. This step protects the wall from moisture and prepares it for vinyl siding installation.
Installing The New Exterior Door
Replacing an exterior door when you have vinyl siding requires careful planning and precise work. Installing the new exterior door correctly ensures durability, energy efficiency, and a neat look. The process involves positioning the door properly, securing the frame firmly, and adding weatherproofing layers. Each step affects the door’s performance and the home’s protection against weather.

Positioning And Leveling The Door
Start by placing the door into the rough opening. The door must fit snugly without forcing it in. Check the sides and top for equal space to allow for adjustments and insulation. Use shims to fill gaps and keep the door steady.
- Check the rough opening size: It should be slightly larger than the door frame.
- Insert the door frame: Place it carefully to avoid damage to the vinyl siding.
- Use a level: Check horizontally and vertically to ensure the door is straight.
- Adjust with shims: Place shims behind the hinges and along the frame to correct any tilt.
Proper leveling prevents problems such as door sticking or uneven gaps. A well-positioned door also helps maintain the siding’s clean lines and appearance. Take time to verify measurements. Use a level at least twice during this stage to be sure the door stays balanced.
Securing The Door Frame
Once the door is positioned and leveled, secure the frame to the wall studs. Use screws designed for exterior use and long enough to hold the frame firmly. Do not overtighten screws to avoid bending the frame.
Follow this checklist for securing the door frame:
- Check all shims are still in place and the door remains level.
- Drive screws through the frame into the wall studs at hinge points and latch side.
- Use a drill with a clutch setting to avoid stripping screws.
- Place screws approximately every 12 to 16 inches along the frame.
Securing the frame tightly prevents drafts and keeps the door stable under daily use. Vinyl siding around the door should not be compressed or damaged during this step. Leave a small gap for insulation and expansion.
Adding Weatherproofing Elements
Weatherproofing protects the new door from water, wind, and temperature changes. Start with flashing tape around the door frame. This tape seals gaps and prevents water from entering behind the vinyl siding.
Steps to add weatherproofing:
- Apply self-adhesive flashing tape to the bottom of the door frame first.
- Cover the sides and top with flashing, overlapping the bottom layer.
- Seal all edges with exterior-grade caulk.
- Install foam insulation in gaps between the door frame and wall.
Choose weatherproofing materials that work well with vinyl siding. Proper sealing avoids moisture damage and energy loss. Check the door’s threshold and install a door sweep to block drafts.
| Weatherproofing Element | Purpose | Installation Tip |
| Flashing Tape | Prevents water intrusion | Overlap layers and press firmly |
| Caulk | Seals edges and gaps | Use exterior-grade, apply smoothly |
| Foam Insulation | Blocks air leaks | Fill gaps without overexpanding |
| Door Sweep | Stops drafts under door | Attach tightly to threshold |
Integrating Vinyl Siding Around Door
Replacing an exterior door with vinyl siding requires careful attention to detail, especially around the door frame. Integrating vinyl siding around the door ensures a clean, weatherproof finish that enhances your home’s curb appeal. Proper installation prevents water damage and keeps the siding looking neat and uniform.
Cutting And Fitting Siding Panels
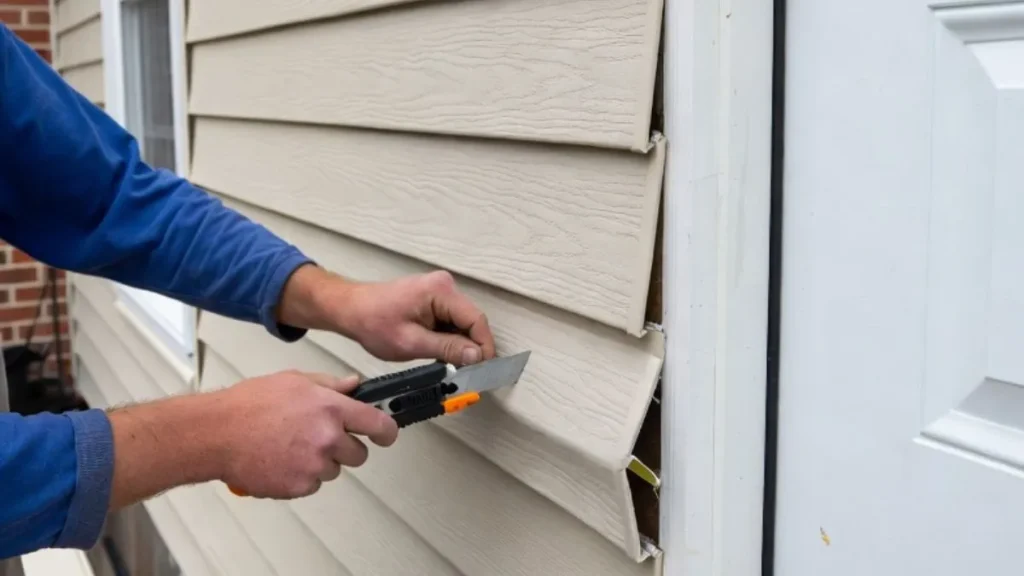
Start by measuring the door frame carefully. Measure the height and width of the door opening plus any trim or molding. Accurate measurements avoid gaps or overlaps that spoil the appearance.
Use a utility knife or tin snips to cut the vinyl siding panels. Cut slowly and follow the measurement marks for clean edges. Remember, vinyl siding can be fragile if cut too quickly.
- Leave a small gap of about 1/4 inch around the door frame for expansion and contraction.
- Trim panels to fit around corners and edges, ensuring they align smoothly with the door trim.
- Use a j-channel around the door to tuck the siding edges neatly.
Check the fit by holding the panels in place before nailing them down. Panels should lie flat without bending or buckling. If necessary, make small adjustments with a fine saw or utility knife.
| Tool | Purpose |
| Utility Knife | Cutting straight lines on siding panels |
| Tin Snips | Cutting curved or angled edges |
| Measuring Tape | Accurate measurements around door frame |
Sealing Joints And Edges
Sealing is vital to protect against water infiltration. Water can cause damage behind the siding, leading to rot and mold.
Use a high-quality, exterior-grade caulk designed for vinyl siding. Apply it to all joints and edges where siding meets the door frame and trim.
- Clean the area before applying caulk to ensure good adhesion.
- Run a continuous bead of caulk along the siding edges around the door.
- Use a caulk smoothing tool or finger to press the caulk into gaps and create a neat finish.
- Check for any missed spots or cracks and reseal if needed.
Remember to seal inside corners where the j-channel meets the door trim. These spots are common places for leaks.
For extra protection, install flashing tape under siding edges near the door. Flashing directs water away and adds a strong moisture barrier.
Finishing Touches For A Seamless Look
After cutting, fitting, and sealing, focus on the finishing touches. These details make the siding look professional and polished.
- Install trim pieces: Use vinyl or composite trim around the door to cover gaps and frame the siding.
- Paint or touch up: Match the door trim color to the siding for a uniform appearance.
- Check alignment: Make sure all siding panels are level and consistent with the surrounding walls.
- Secure panels: Nail all siding firmly but avoid overdriving nails, which can cause damage.
- Clean the area: Remove any debris, excess caulk, or dust to reveal a crisp finish.
These steps create a smooth transition between door and siding. The result is a clean, attractive exterior that stands up to weather and time.
Maintaining Door And Siding

Replacing an exterior door with vinyl siding improves your home’s look and energy efficiency. Maintaining both the door and siding keeps them working well and looking fresh. Proper care prevents damage and extends their life. Regular attention saves money on repairs and keeps your home safe from weather effects.
Routine Cleaning Tips
Clean the door and vinyl siding regularly to remove dirt, dust, and stains. Dirt can build up and cause discoloration or damage if left too long. Use gentle cleaning methods to avoid scratching or harming the materials.
- Use a soft brush or sponge: Avoid abrasive tools that can scratch surfaces.
- Mild soap and water: Mix a small amount of dish soap with warm water for effective cleaning.
- Rinse well: Use a garden hose to rinse off soap and loosened dirt.
- Clean at least twice a year: Spring and fall are good times for thorough cleaning.
- Remove mold or mildew: Use a solution of one part vinegar to three parts water for mold spots.
Below is a simple cleaning checklist for door and siding maintenance:
| Task | Frequency | Tools Needed |
| Wash door and siding | Twice a year | Soft brush, mild soap, water, hose |
| Check for mold | Once a year | Vinegar solution, sponge |
| Remove dirt buildup | Monthly | Soft cloth, water |
Inspecting For Damage
Inspect the door and vinyl siding regularly to catch damage early. Small cracks or gaps can lead to water leaks and energy loss. Look for signs of wear, cracks, dents, or warping on both door and siding surfaces.
- Check door seals: Make sure weatherstripping is intact and tight to keep drafts out.
- Look for cracks or holes: Small openings let water in and cause bigger problems.
- Inspect siding panels: Watch for loose or bent pieces that can break off in wind.
- Examine paint or finish: Fading or peeling can expose materials to damage.
- Check door hardware: Hinges, locks, and handles should work smoothly without rust.
Use this simple damage inspection guide every 3-6 months:
- Walk around the door and siding slowly.
- Look closely for cracks, dents, or discoloration.
- Test door seals and hardware for proper function.
- Note any problems and plan repairs quickly.
When To Call A Professional
Some issues need expert help to avoid bigger damage. Call a professional for repairs that require special tools or skills. Proper installation and repair protect your investment and keep your home safe.
Reasons to call a pro:
- Large cracks or holes: Professionals can fix or replace damaged siding or door panels.
- Water damage: Signs like swelling or mold need expert assessment.
- Door alignment problems: Sticking or misaligned doors require precise adjustments.
- Hardware replacement: Locks and hinges may need professional installation.
- Complex siding repairs: Matching color and material is tricky for DIY.
Hiring a professional ensures work is done safely and correctly. It also saves time and prevents future costly repairs. Keep contact info of a trusted contractor ready for emergencies or yearly checkups.
You May Read Also: Vinyl Siding Around Windows With Built-In J-Channel
Conclusion
Replacing an exterior door with vinyl siding can improve your home’s look and protection. Vinyl siding fits well around doors and stops water damage. It also needs little care and lasts a long time. Plan the project carefully to avoid gaps or leaks.
Choose the right siding color to match your home. A neat job helps keep your house safe and warm. This simple update can add value and charm to your property. Take your time and enjoy the fresh, clean appearance afterward.


