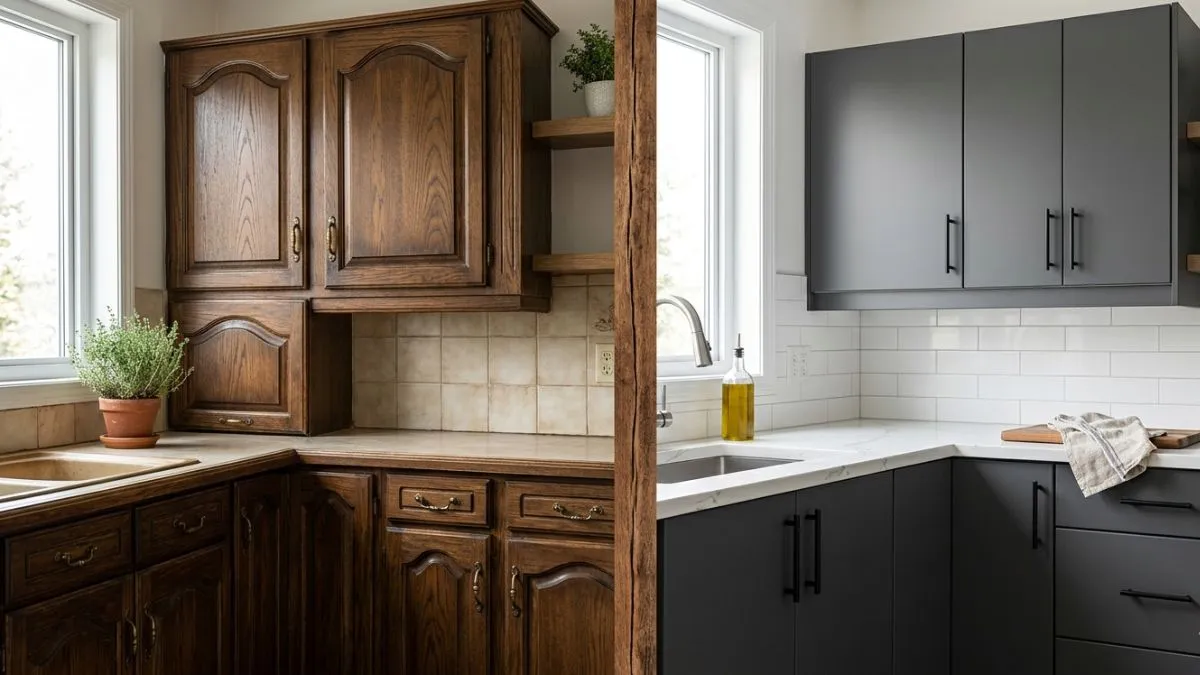
Are you tired of the arch design on your cabinet doors? Maybe you want a cleaner, more modern look that better fits your style.
Removing the arch can completely transform your cabinets without the need for a full replacement. You’ll discover simple, effective steps to remove the arch from your cabinet doors yourself. By the end, you’ll know exactly how to give your cabinets a fresh, updated look that makes your whole space feel new.
Preparing The Workspace
Removing an arch from cabinet doors requires careful preparation to ensure a smooth and safe process. Preparing the workspace sets the stage for efficient work and protects your cabinets and surroundings from damage. Taking time to organize your area helps avoid mistakes and keeps tools within reach.
Clearing The Area
Start by clearing the workspace around the cabinet doors. Remove any items on or near the cabinets, such as dishes, decor, or cleaning supplies. This creates enough space to work freely and reduces the risk of knocking things over.
Follow these steps to clear the area effectively:
- Take out all cabinet contents. Empty shelves to avoid damage and allow better access.
- Move furniture or appliances. Shift any nearby objects that could block your movement.
- Clear the floor space. Remove rugs or mats that could cause tripping.
- Gather tools in one spot. Keep everything needed within arm’s reach.
Clear space improves safety and efficiency. It allows for better lighting and gives you room to handle tools carefully. A tidy area also helps spot any issues on the cabinet surface before starting work.
Protecting Surrounding Surfaces
Protecting surfaces around the cabinet doors prevents scratches, dents, and paint damage. Use protective coverings on floors, walls, and adjacent cabinets. This keeps your kitchen or workspace clean and intact.
Here are practical ways to protect surrounding surfaces:
| Surface | Protection Method | Materials Needed |
| Floor | Cover with drop cloth or old sheets | Canvas drop cloth, painter’s tarp, or plastic sheeting |
| Walls | Use painter’s tape and plastic wrap along edges | Painter’s tape, plastic wrap, or paper masking |
| Adjacent Cabinets | Apply painter’s tape on edges | Painter’s tape |
Apply painter’s tape carefully to avoid residue. Keep protective materials secure to prevent slipping. A well-protected workspace avoids costly repairs and makes cleanup easier after the project.
Removing The Cabinet Doors
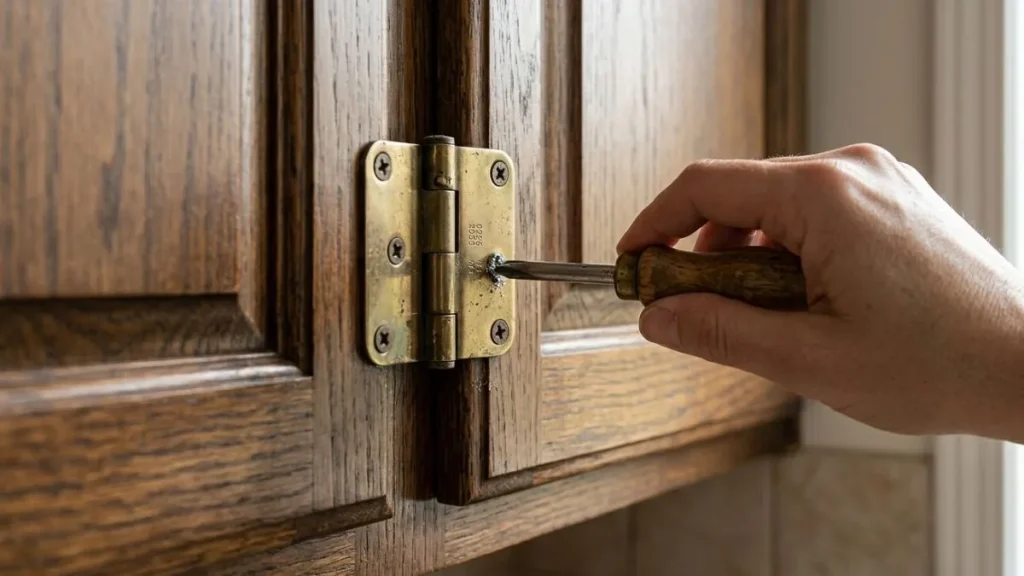
Removing the cabinet doors is the first step in changing their style, such as removing an arch from the door design. Taking off the doors carefully helps protect them and the cabinet frames. It also makes it easier to work on the doors at a comfortable height. Proper removal keeps the hinges and screws safe for reusing later. Follow clear steps to detach the doors without damage and to keep everything organized for reinstallation.
Detaching Hinges
Start by opening each cabinet door fully. Use a screwdriver that fits the hinge screws well to avoid stripping them. Loosen the screws holding the hinges to the cabinet frame first. Keep the door supported with one hand or a helper to prevent it from falling.
- Remove screws from the cabinet frame before the door side.
- Next, unscrew the hinges from the door itself.
- Place all screws and hinges in a small container to avoid loss.
Sometimes hinges are covered by plastic caps. Pry these off gently with a flathead screwdriver before unscrewing. Use the right tools to avoid damage. If the screws are tight, apply a little penetrating oil and wait a few minutes before trying again.
| Step | Tip |
| Loosen screws on cabinet side first | Supports door weight, prevents sudden fall |
| Remove screws on door side | Door can be lifted off easily |
| Store screws in container | Prevents loss and confusion later |
Handle the doors gently after removing hinges. Do not lean them against hard surfaces to avoid dents or scratches. Lay them flat on a soft cloth or padded surface for the next steps.
Labeling Doors For Reinstallation
Marking each door and its cabinet location saves time during reinstallation. Cabinets often look similar, and mixing doors can cause alignment problems. Use a simple labeling system to keep track.
- Number each door on the inside or back with a pencil or masking tape.
- Write matching numbers or letters inside the cabinet frame near the hinge area.
- Label hinges if they are different for each door.
Use masking tape to create a label if you want to avoid pencil marks. Write clearly and avoid placing tape on visible surfaces. Keep a list of labels and their cabinet locations if working on many doors.
| Label Type | Where to Apply | Purpose |
| Number or Letter | Back of door | Identify door during reinstallation |
| Matching label | Inside cabinet frame | Match door to cabinet |
| Hinge label | On hinge | Keep hinges paired with correct door |
This system reduces mistakes and frustration. It keeps the project organized and speeds up putting doors back after removing the arch or other work.
Removing The Arch Design
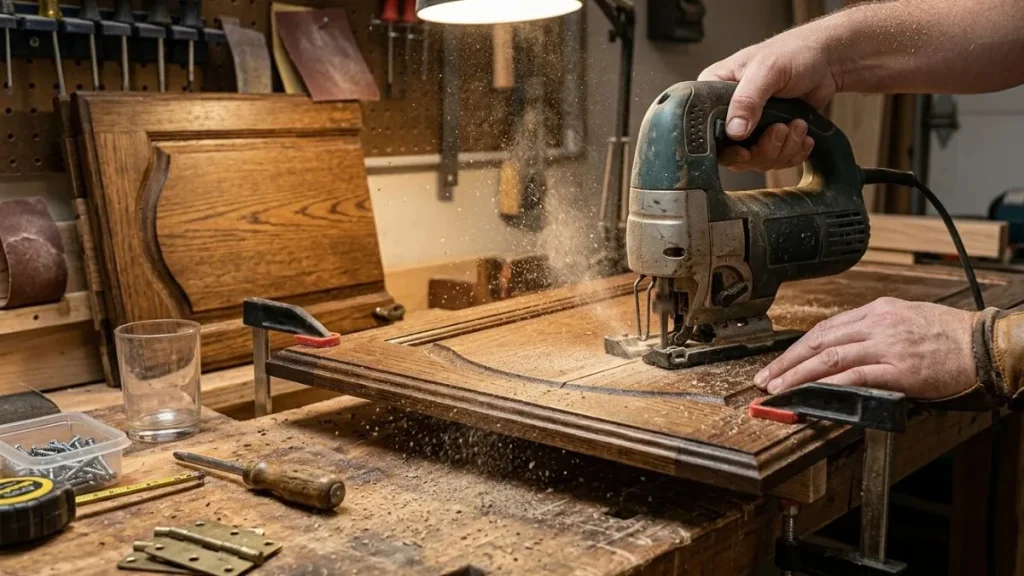
Removing the arch design from cabinet doors changes their look to a cleaner, simpler style. This process updates old or outdated cabinets, giving a fresh and modern feel to any room. The task needs careful planning and precise work to keep the door strong and neat. This guide covers the steps to remove the arch, including marking cut lines, cutting, and smoothing the edges for a professional finish.
Marking Cut Lines
Start by measuring the arch carefully. Use a tape measure to find the height and width of the arch on the cabinet door. Mark the new straight line where the arch will be removed. A pencil and a ruler or straight edge work best for this. Draw a clear, bold line across the door to guide your cut.
Follow these tips for marking:
- Clean the door surface before marking for better visibility.
- Use painter’s tape along the cut line to protect the wood.
- Double-check measurements on both sides of the door to keep cuts even.
- Mark additional guide points if the door is large or curved.
Use this simple table to organize your measurements:
| Measurement | Value (inches) | Notes |
| Arch Height | _____ | From top edge to highest point of arch |
| Arch Width | _____ | From one side of arch to the other |
| Cut Line Position | _____ | New straight line replacing arch |
Clear markings ensure accurate cuts and a smooth transition to the new design.
Cutting Techniques
Cutting the arch requires the right tools and steady hands. Most people use a jigsaw or circular saw for this job. The jigsaw is ideal for curved cuts, but here it helps to cut straight lines after marking. A circular saw gives cleaner, straighter cuts but needs more control.
Follow these steps for cutting:
- Secure the door on a stable surface with clamps.
- Wear safety glasses and a dust mask.
- Start the saw before touching the wood to avoid splintering.
- Follow the pencil line slowly and steadily without rushing.
- Use a fine-tooth blade for smoother edges.
- Stop frequently to check alignment and adjust if needed.
Here is a comparison of the two common saw types:
| Saw Type | Best For | Pros | Cons |
| Jigsaw | Curves and detailed cuts | Easy to control, versatile | Edges may need extra sanding |
| Circular Saw | Straight cuts | Fast, clean cuts | Harder to control on small pieces |
Take your time and cut carefully to avoid mistakes or damage.
Sanding And Smoothing Edges
After cutting, the edges will be rough and uneven. Sanding smooths these edges and prepares the door for painting or staining. Start with coarse sandpaper (around 80 grit) to remove large splinters and shape the edge. Then, use medium grit (120 grit) to smooth the surface further.
Use these tips for sanding:
- Sand along the edge, not against it, for a clean finish.
- Use a sanding block or sponge for flat, even pressure.
- Finish with fine sandpaper (220 grit) for a soft, smooth surface.
- Wipe off dust with a damp cloth before painting.
For curved or detailed edges, use sanding sponges or small files. This helps reach tight spots and avoid damage.
Here is a simple sanding progression table:
| Sandpaper Grit | Purpose | Notes |
| 80 | Remove rough edges and shape | Use gently to avoid deep scratches |
| 120 | Smooth surface | Prepares for fine sanding |
| 220 | Final smooth finish | Ready for painting or staining |
Proper sanding ensures the cabinet door looks neat and professional.
Refinishing The Doors
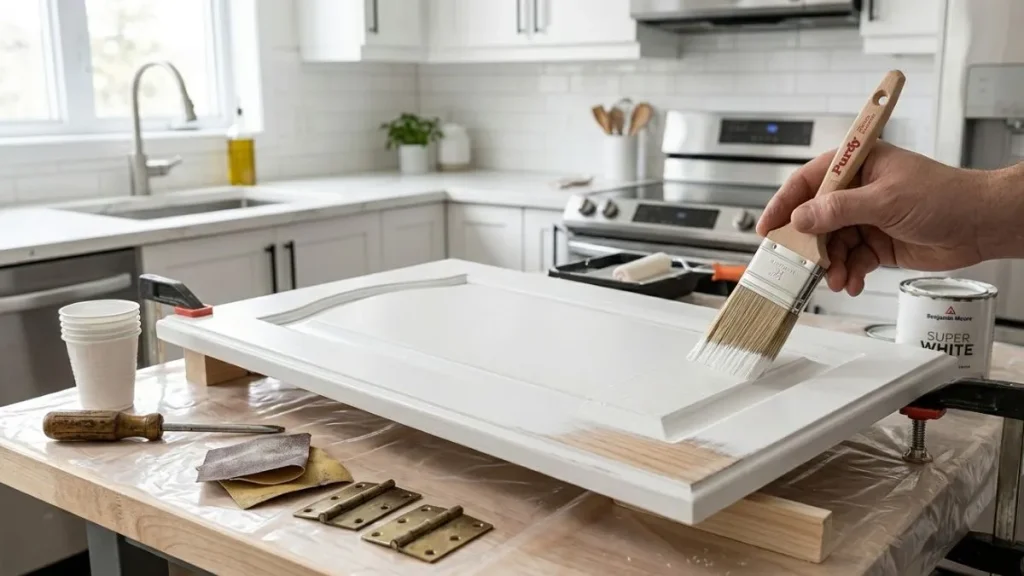
Removing the arch from cabinet doors creates a smooth, modern surface that looks fresh and clean. After this change, refinishing the doors is essential to protect the wood and enhance the appearance. Refinishing also hides any marks from the arch removal and gives the doors a new, attractive look. This process involves selecting the right finish, applying it carefully, and allowing the doors to dry properly.
Choosing Paint Or Stain
Choosing between paint and stain depends on the look and durability desired. Paint offers a solid color and covers imperfections well. Stain shows the wood grain and gives a natural feel. Both choices need a smooth surface for the best results.
- Paint hides flaws, offers many colors, and creates a uniform finish.
- Stain enhances wood texture and comes in various shades.
- Consider the cabinet style and room decor before deciding.
- Check if the wood type absorbs stain evenly.
Here is a simple comparison:
| Feature | Paint | Stain |
| Appearance | Opaque and smooth | Transparent, shows wood grain |
| Durability | High, resists scratches | Moderate, needs sealant |
| Maintenance | Easy to clean | Needs reapplication over time |
| Color Options | Wide range | Limited shades |
Choose paint for a modern, bold style. Pick stain for a warm, classic look. Proper surface prep is key for both.
Applying Finish
Applying the finish carefully ensures long-lasting results and a smooth look. Start by sanding the doors to remove old finish and create a flat surface. Use a fine-grit sandpaper for the final sanding.
- Clean the doors with a damp cloth to remove dust.
- Apply primer if painting, to help paint stick well.
- Use a high-quality brush or foam roller for even coverage.
- Apply thin coats to avoid drips and brush marks.
- Lightly sand between coats for a smooth surface.
For stain:
- Use a clean cloth or brush to apply stain evenly.
- Wipe off excess stain quickly to prevent blotches.
- Let the stain dry before sealing with a clear finish.
Follow the product instructions for the best application method. Work in a well-ventilated area for safety.
Drying And Curing Times
Drying and curing times affect the finish durability and touch-up schedule. Drying means the finish feels dry to touch. Curing means the finish is fully hardened and strong.
Typical drying times vary by product:
| Finish Type | Drying Time | Curing Time |
| Latex Paint | 1-2 hours | 7-14 days |
| Oil-Based Paint | 6-8 hours | 7 days |
| Wood Stain | 2-4 hours | 24-48 hours |
| Polyurethane Sealant | 4-6 hours | 7 days |
Tips for drying and curing:
- Keep doors in a dust-free, dry room.
- Avoid heavy use until fully cured.
- Use fans or open windows for faster drying.
- Check manufacturer’s label for exact times.
Patience during this phase prevents damage and ensures a smooth, lasting finish.
Reinstalling The Doors
After removing the arch from your cabinet doors, the next step is to reinstall them properly. This ensures the doors look smooth and fit well without gaps. Reinstalling the doors carefully helps maintain the cabinet’s style and function. Taking time to align the hinges and test the door movement guarantees a neat finish. Let’s explore the key steps to get your cabinet doors back in place correctly.
Aligning Hinges
Start by positioning the hinges on the cabinet frame and door. Proper alignment is crucial to prevent uneven gaps and ensure the door closes flush.
- Check hinge placement: Use the original hinge marks as a guide.
- Attach hinges loosely: Screw them in but keep screws slightly loose for adjustments.
- Align door edges: Hold the door in place and check if the edges are straight and even.
- Adjust hinge screws: Move the door slightly up, down, or sideways to align perfectly.
- Tighten screws: Once aligned, firmly tighten all screws to secure the hinges.
Use this table to check hinge alignment:
| Check Point | Ideal Position | Adjustment Needed |
| Top Hinge | Flush with cabinet frame | Slide up/down or in/out |
| Bottom Hinge | Aligned with door bottom edge | Adjust left/right or up/down |
| Door Edge Gap | Even 1/8 inch gap around door | Shift door position as needed |
Use a level or ruler to help keep the door straight. Work slowly and make small adjustments. Proper hinge alignment avoids rubbing or gaps after reinstalling.
Testing Door Functionality
Once hinges are aligned and secured, test the door’s movement. Smooth operation means your reinstall is successful.
- Open and close the door: Watch for smooth swings without catching or sticking.
- Check door alignment: The door should sit flush with the cabinet face.
- Listen for noises: No squeaks or rubbing sounds should occur.
- Check gaps: Ensure even spacing on all sides of the door.
- Make minor adjustments: If needed, loosen hinge screws and tweak position.
Use this quick checklist for testing:
- Door swings easily.
- Edges line up evenly.
- No scraping sounds.
- Gap size is consistent.
- Handles and knobs align.
Proper testing avoids future problems like sticking doors or damaged hinges. Take your time and repeat the test after adjustments. Your doors should work perfectly and look great after reinstalling.
Recommended Read: Cabinet Face Frame Overhang
Conclusion
Removing the arch from cabinet doors can change your kitchen’s look. It makes cabinets appear more modern and simple. The process is easy with the right tools and steps. Take your time and follow safety tips closely. Small changes can bring big improvements to your space.
You will enjoy the fresh, clean style after the update. Try this project to give your cabinets a new feel. A little effort can refresh your home’s heart.