Are you planning to install or repair your roof yourself? Knowing how to stack shingles correctly is one of the most important steps to ensure your roof stays strong and looks great.
If shingles aren’t stacked the right way, you could face leaks, damage, or costly repairs down the line. This guide will walk you through simple, clear steps to stack shingles like a pro, saving you time and money. Keep reading, and you’ll gain the confidence to protect your home with a roof that lasts.
Choosing Shingle Types
Choosing the right shingle type is an important step in stacking shingles on a roof. The type of shingles affects the roof’s durability, appearance, and cost. Different materials offer various benefits and challenges. Knowing these differences helps in making a smart choice for your roofing project.
Asphalt Shingles
Asphalt shingles are the most common roofing material used worldwide. They are popular due to their affordability and ease of installation. Asphalt shingles come in a variety of colors and styles, which helps match many home designs.
These shingles are made from a base of fiberglass or organic materials coated with asphalt and mineral granules. This coating protects against UV rays and weather damage. Asphalt shingles usually last 20 to 30 years with proper care.
Wood Shingles
Wood shingles give a natural and classic look to roofs. They are usually made from cedar, redwood, or pine. Wood shingles add charm and warmth to a home’s exterior.
These shingles need more care than asphalt. They require treatment to resist fire, rot, and insects. Wood shingles last around 25 to 30 years if maintained well. They are heavier and more expensive than asphalt.
Benefits of wood shingles include:
- Natural beauty and texture
- Good insulation properties
- Environmentally friendly if sourced sustainably
- Can be stained or painted
Wood shingles need regular inspections to avoid mold and damage. They work best in dry climates and should be installed with proper ventilation.
Metal Shingles
Metal shingles are strong and long-lasting roofing materials. They come in steel, aluminum, copper, or zinc. Metal shingles resist fire, wind, and heavy rain well. They can last 40 to 70 years.
Metal shingles are lightweight, which reduces stress on the roof structure. They reflect sunlight, helping to keep homes cooler in hot weather. These shingles often have a modern or sleek appearance.
Key advantages of metal shingles:
- High durability and long lifespan
- Low maintenance
- Energy efficient due to reflective properties
- Resistant to fire, insects, and rot
Preparing The Roof Surface
Preparing the roof surface is a crucial step before stacking shingles on a roof. A clean, smooth, and secure base helps shingles last longer and protects your home from leaks. Proper preparation prevents future problems and ensures shingles lay flat.

Cleaning The Roof
Start by removing all debris from the roof surface. Leaves, dirt, and old shingle pieces can stop new shingles from sticking well. Use a broom or leaf blower to clear the roof completely. Pay close attention to corners and edges where debris often gathers.
Next, check for moss or algae. These can cause damage if left on the roof. Use a soft brush and a cleaning solution made for roofs to scrub away moss gently. Avoid strong chemicals that might harm shingles or the environment.
Here is a simple checklist for cleaning the roof:
- Remove leaves and branches
- Clear dirt and dust with a broom or blower
- Scrub moss and algae with a soft brush
- Wash off cleaning solution with water
- Let the roof dry completely before the next step
Clean roofs help shingles stick better and reduce the chance of leaks. Taking time to clean well saves money on repairs later.
Repairing Damages
Check the roof for damaged or rotten areas. Soft spots or holes weaken the roof and affect shingle installation. Walk carefully and look for:
- Cracked or missing shingles
- Rotten wood or soft spots
- Loose nails or fasteners
- Damaged flashing around chimneys and vents
Fix small problems before stacking shingles. Replace rotten wood with new plywood. Use roofing nails to secure loose boards. Patch holes with roofing cement or new materials.
Installing Underlayment
Underlayment is a protective layer between the roof deck and shingles. It acts as a barrier against water and wind. Installing underlayment correctly is key for roof durability.
Begin at the bottom edge of the roof. Roll out the underlayment horizontally. Overlap each row by about 4 inches to prevent gaps. Secure the underlayment with roofing nails every 8 to 12 inches.
Use these steps to install underlayment:
- Start at the lower edge of the roof
- Roll out the material horizontally across the roof
- Overlap each row by 4 inches
- Secure with nails spaced 8 to 12 inches apart
- Trim excess material at edges
Common types of underlayment include:
- Felt Paper: Traditional and affordable
- Synthetic Underlayment: Durable and lighter
- Ice and Water Shield: Adds extra protection in cold climates
Choose underlayment based on your climate and roof type. Proper installation protects against water damage and improves shingle performance.
Starting The Shingle Installation
Follow these steps to build a durable roof that lasts.
Laying Starter Strip
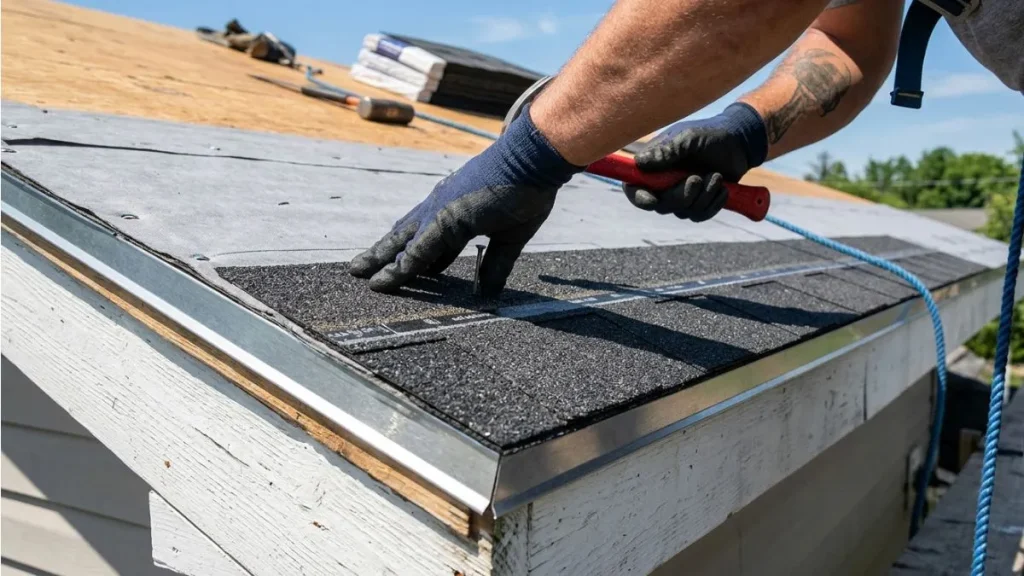
The starter strip is the first row of material installed along the roof’s edge. It creates a secure base for the first course of shingles. Without a proper starter strip, water can seep under the shingles and cause damage.
Steps to lay the starter strip:
- Choose starter strip shingles or cut regular shingles into strips.
- Begin at the bottom edge of the roof, aligning the strip flush with the eaves.
- Overlap the edges of each strip by about 1 inch to prevent gaps.
- Use roofing nails to fasten the strip, placing nails about 6 inches apart.
- Ensure the strip overhangs the edge slightly for water runoff.
Important tips:
| Tip | Reason |
| Use a chalk line | Helps keep the strip straight and even |
| Check for nails sticking out | Prevents damage to shingles and ensures tight fit |
| Overlap starter strip edges | Blocks water from entering beneath the shingles |
Starting with a neat, well-secured starter strip protects the roof’s edge and guides the next shingle rows.
Aligning First Course
The first course of shingles sets the pattern for the entire roof. Aligning it properly ensures a neat appearance and strong coverage. Mistakes here can cause gaps, uneven layers, and leaks.
Steps to align the first course:
- Place the first shingle directly on top of the starter strip, flush with the edge.
- Check alignment using a chalk line drawn parallel to the eaves.
- Adjust each shingle so it sits evenly side-by-side without gaps.
- Maintain the manufacturer’s recommended exposure length (usually about 5 inches).
- Stagger the joints if using a patterned shingle to avoid weak spots.
Tips for a perfect first course:
- Work from one end of the roof to the other, keeping shingles level.
- Use a level or straight edge to check horizontal lines.
- Trim shingles carefully at edges or valleys for a clean finish.
Aligning the first course carefully helps the next rows fit tightly. It creates a uniform look that protects the roof.
Securing Shingles Properly
Proper fastening keeps shingles in place through wind, rain, and snow. Nails must be driven correctly to avoid damage or loose shingles. Poorly secured shingles can curl, lift, or blow off.
Guidelines for securing shingles:
- Use galvanized roofing nails to resist rust.
- Place nails just below the adhesive strip on each shingle.
- Drive nails straight, flush with the shingle surface—no overdriving or underdriving.
- Use four to six nails per shingle, depending on roof pitch and local codes.
- Keep nails at least 1 inch from shingle edges to prevent splitting.
Nailing pattern example:
| Roof Pitch | Nails per Shingle | Nail Placement |
| Less than 4:12 | 4 | Along the adhesive line, evenly spaced |
| 4:12 to 6:12 | 4 to 6 | Additional nails near edges for extra hold |
| Greater than 6:12 | 6 | Extra nails for high wind resistance |
Properly securing shingles ensures a tight, weatherproof seal. Take time to nail carefully and check your work as you go.
Stacking Shingles Correctly
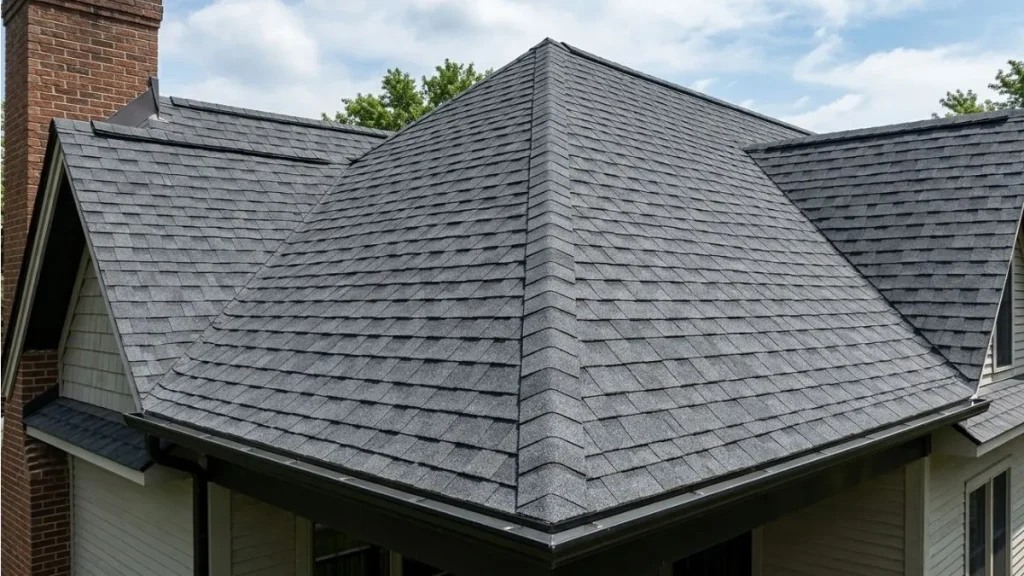
Stacking shingles correctly is essential to build a strong, weatherproof roof. Proper stacking ensures shingles lock together tightly, preventing leaks and wind damage. It also helps shingles lie flat and look neat. Small mistakes can cause big problems later, like water damage or shingles lifting.
Overlapping Techniques
Overlapping shingles is the first key step in stacking them correctly. Each shingle layer must cover part of the layer below. This overlap stops water from seeping through the roof. The amount of overlap depends on the shingle type and roof slope.
Basic rules for overlapping shingles:
- Place each new shingle over the lower shingle by at least 2 inches.
- Ensure the top edge of the lower shingle is hidden under the next shingle.
- Use starter shingles at the roof edge for proper sealing.
- Overlap more on steeper roofs to prevent water running under shingles.
Proper overlapping reduces water damage risk and keeps shingles in place. Nail shingles securely at the overlap zones to avoid wind lift.
Staggering Rows
Staggering rows means offsetting shingles so seams do not line up vertically. This helps the roof stay waterproof and strong. If seams align, water can seep in through gaps between shingles.
Follow these tips for good staggering:
- Start the second row with a half shingle to shift seams.
- Alternate full and half shingles in each row.
- Keep consistent staggering to avoid weak spots.
Here is an example of staggering in an ordered list:
- Row 1: Full shingles from left to right.
- Row 2: Begin with half shingle, then full shingles.
- Row 3: Repeat Row 1 pattern.
- Row 4: Repeat Row 2 pattern.
This pattern creates a strong, interlocking roof surface. Staggering spreads stress across the roof and prevents leaks at the joints.
Maintaining Consistent Exposure
Exposure refers to the visible part of each shingle after installation. Keeping exposure consistent helps the roof look neat and work well. Uneven exposure causes some shingles to wear faster.
Key points to maintain consistent exposure:
- Follow manufacturer’s recommended exposure length.
- Use a measuring tool or spacer for each row.
- Check exposure regularly during installation.
For example, if the recommended exposure is 5 inches, each shingle row should show exactly 5 inches. Too much exposure leaves nails uncovered. Too little causes overlapping issues.
Here is a code snippet to visualize consistent exposure spacing:
for (let row = 1; row <= totalRows; row++) { position = (row – 1) exposureLength; placeShingleAt(position); }
Consistent exposure improves roof durability and appearance. It also helps water flow smoothly without pooling on uneven areas.
Handling Roof Features
Handling roof features like chimneys, vents, and edges requires special care when stacking shingles. These areas have unique shapes and angles that need precise shingle placement. Proper handling prevents leaks and ensures a strong, weatherproof roof. Each feature demands a different approach to fit shingles tightly and maintain roof integrity.
Around Chimneys
Chimneys create tricky spots for shingles. Water can easily seep through gaps if shingles are not placed correctly. Start by installing a metal flashing around the base of the chimney. This flashing directs water away from the joint where shingles meet the chimney.
Steps to stack shingles around chimneys:
- Cut shingles to fit snugly against the chimney base.
- Use roofing cement to seal the edges and prevent water entry.
- Install step flashing in layers along the chimney sides.
- Overlap each shingle layer over the flashing to create a waterproof barrier.
Use small, precise cuts for a clean fit. Avoid large gaps or overlaps. Check the flashing for any damage before starting. A tight seal stops water from pooling and causing leaks. Proper stacking here protects the entire roof structure.
Near Vents
Vents are essential for air circulation but can cause leaks if shingles are misplaced. Begin by installing vent flashing designed to fit around vent pipes. This flashing must be sealed tightly to the vent and roof.
Key tips for stacking shingles near vents:
- Place shingles around the vent, cutting them to fit closely.
- Use roofing cement to seal all shingle edges touching the vent.
- Install counter-flashing over the base flashing for extra protection.
- Ensure shingles overlap flashing correctly to channel water down the roof.
Keep the shingles flat and avoid lifting edges near the vent. Loose shingles can catch wind and cause damage. Correct stacking around vents keeps water out and maintains roof ventilation.
Along Roof Edges
Roof edges face strong winds and heavy rain. Stacking shingles here must create a solid, sealed border. Start with an underlayment or drip edge to protect the roof deck.
How to stack shingles along roof edges:
- Lay shingles flush with the drip edge.
- Use roofing nails near the edge, but avoid nailing too close to the edge.
- Install starter shingles upside down to create a straight edge.
- Overlap shingles properly to prevent water from seeping under.
Check the edge for gaps or lifted shingles. A well-stacked edge prevents wind from lifting shingles. This strengthens the roof and extends its life.
Final Inspection And Maintenance
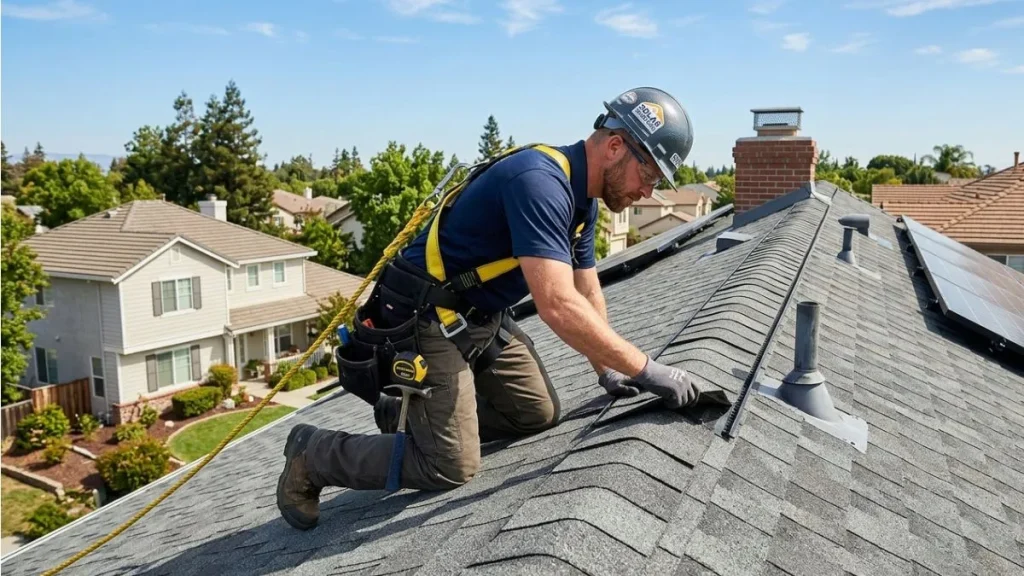
After stacking shingles on a roof, the final inspection and maintenance are vital. This step ensures the shingles stay secure and protect the house from weather damage. A careful check helps spot any issues early, saving money on repairs later. Regular upkeep keeps the roof strong and lasts longer.
Checking For Loose Shingles
Loose shingles can lead to leaks and roof damage. Start by walking around the roof and gently pressing each shingle. Pay close attention to:
- Edges lifting or curling up
- Missing nails or fasteners
- Shingles that slide or move easily
Use a ladder safely to reach all roof areas. Mark spots with loose shingles for repair. If many shingles are loose, consider re-nailing or replacing them.
Signs of loose shingles include:
| Issue | Effect | Action |
| Shingles curling at edges | Water can seep underneath | Press down and seal edges |
| Nails popping out | Shingles may blow off in wind | Hammer nails back or add new ones |
| Shingles sliding or shifting | Weak roof structure | Replace or re-secure shingles |
Regular checks help avoid major damage. Check after storms or strong winds.
Sealing And Waterproofing
Sealing shingles protects the roof from water damage. Use roofing sealant to cover gaps and cracks. This prevents leaks and keeps the roof dry.
Follow these steps for effective sealing:
- Clean the roof surface from dirt and debris
- Apply sealant under loose shingles
- Seal nail heads and edges of shingles
- Check valleys and flashing areas carefully
- Allow sealant to dry completely
Types of roof sealants:
| Sealant Type | Best Use | Durability |
| Asphalt-based | General sealing on asphalt shingles | Medium |
| Silicone | Waterproofing joints and edges | High |
| Polyurethane | Strong adhesion and flexibility | High |
Sealing is best done in dry weather for proper adhesion. Reapply sealant every few years for the best protection.
Routine Roof Care Tips
Consistent roof care keeps shingles in good shape and extends roof life. Follow these simple tips:
- Clean gutters regularly to avoid water buildup
- Trim tree branches near the roof to prevent damage
- Remove leaves and debris from roof surface
- Inspect roof twice a year, especially after harsh weather
- Check attic for signs of leaks or moisture
Use a soft broom or blower to clear debris gently. Avoid walking on the roof too often to prevent damage.
Seasonal roof care checklist:
- Spring: Clean gutters, check for winter damage
- Summer: Inspect and seal any cracks
- Fall: Remove leaves, trim overhanging branches
- Winter: Clear snow buildup carefully
Routine care saves money by preventing costly repairs. Keep a maintenance log to track inspections and repairs.
Read Also: Gable Roof Over Deck
Conclusion
Stacking shingles on a roof takes patience and care. Follow each step to keep your roof strong and safe. Use the right tools and materials for best results. Check your work often to avoid mistakes. A well-stacked roof protects your home from weather damage.
Take your time, and the job will turn out well. Good roofing helps your house stay comfortable and dry. Keep these tips in mind for future repairs or projects. Your effort pays off with a roof that lasts longer.