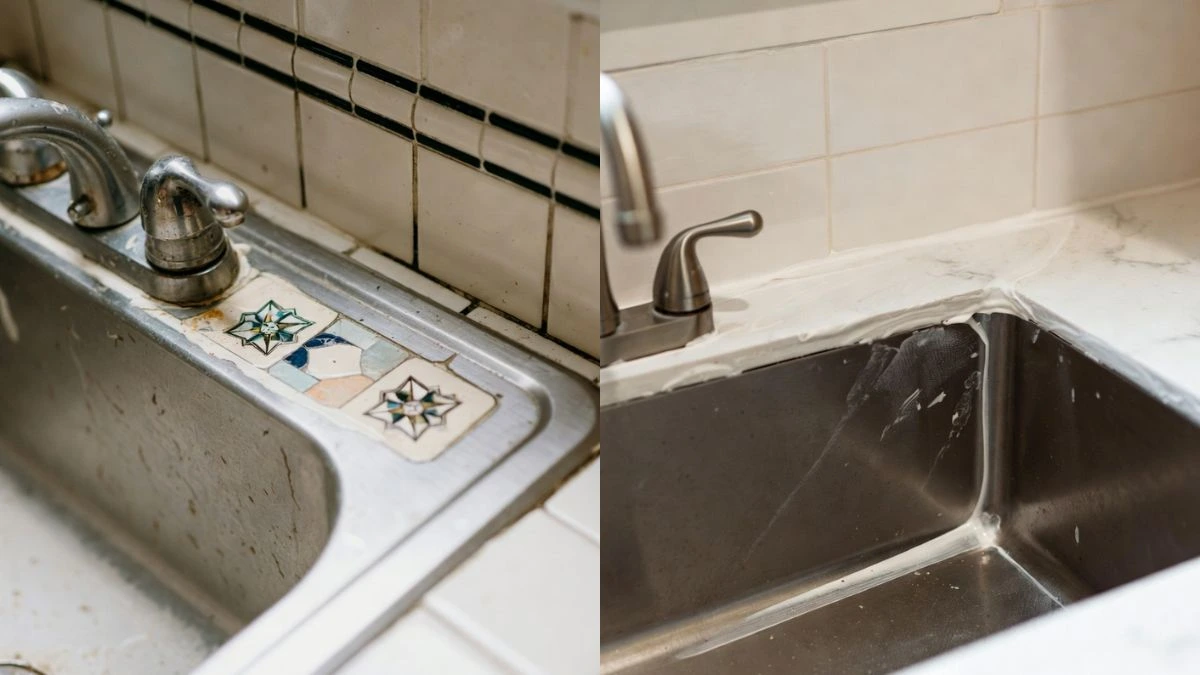
When it comes to your kitchen sink, keeping the area clean and leak-free is a must. But have you ever stopped to wonder whether grout or caulk is the right choice for sealing around your sink?
Using the wrong material can lead to water damage, mold, and costly repairs. You want a solution that not only looks good but also protects your kitchen for the long run. You’ll discover which option works best for your sink, how to apply it properly, and tips to make your kitchen stay fresh and worry-free.
Choosing Between Grout And Caulk
Choosing the right sealant around a kitchen sink is important for durability and appearance. Grout and caulk are common options, but they serve different purposes. Understanding their differences helps pick the best one for your kitchen sink area. This choice affects how well your sink stays sealed against water and how easy it is to maintain.
Material Differences
Grout is a hard, cement-like material used to fill gaps between tiles. It is usually made from a mixture of cement, sand, and water. Grout hardens to a solid form, providing a strong, rigid seal. It comes in different colors to match tiles. Grout is porous, so it may need sealing to resist water and stains.
Caulk is a flexible, soft material used to seal joints and edges. It is made from silicone, acrylic, or latex. Caulk remains slightly stretchy after drying, which helps it handle movement or expansion around sinks. It resists water and is often mildew-resistant. Caulk is easier to apply and remove than grout.
| Feature | Grout | Caulk |
| Material Type | Cement-based, hard | Silicone or acrylic, flexible |
| Texture | Rough, solid | Smooth, soft |
| Water Resistance | Needs sealing to resist water | Inherently water-resistant |
| Flexibility | Rigid, no movement | Flexible, moves with surfaces |
| Color Options | Many colors available | Limited colors, usually white or clear |
Best Uses In Kitchen Sinks
Grout works best for filling gaps between tiles around the sink. It provides a strong, stable surface that holds up well under pressure. Use grout where edges are fixed and will not move. It helps keep tiles in place and prevents dirt from filling joints. Grout needs sealing and regular cleaning to avoid stains and mold.
Caulk is ideal for sealing the edge where the sink meets the countertop. It fills uneven gaps and handles slight movement from daily use. Caulk creates a smooth, waterproof barrier that stops water from leaking under the sink. It is easy to apply and replace if damaged. Use caulk in corners, seams, and around faucets for best protection.
- Use grout: between tiles, where no movement occurs.
- Use caulk: at sink edges, joints, and seams that move.
- Check for water exposure: caulk is better in wet spots.
- Maintenance: reseal grout regularly; recaulking is quick.
Choosing the right material improves the kitchen sink’s look and function. Grout provides strength and style between tiles. Caulk offers flexibility and water protection at edges. Understanding these uses helps keep your sink area clean and leak-free.
Applying Grout
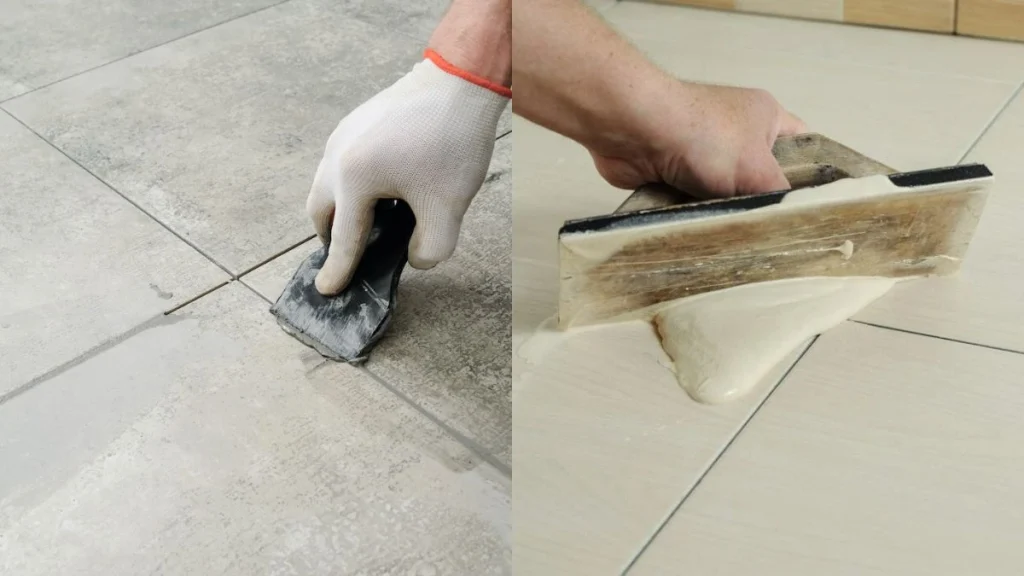
Applying grout around the kitchen sink is a key step to keep water from seeping into unwanted areas. Grout fills gaps between tiles or surfaces, creating a strong, water-resistant seal. Unlike caulk, grout is harder and offers a solid finish that blends well with tiled backsplashes or countertops. Proper grout application protects your kitchen from water damage and mold growth. It also improves the look of your sink area, making it neat and tidy. This section explains how to apply grout effectively and what tools are needed for the job.
Tools Needed
Gather the right tools to make grout application easier and achieve a clean finish. Having everything ready helps avoid mistakes and saves time. Below are the essential tools:
- Grout Float: A flat rubber tool used to spread grout evenly into gaps.
- Grout Sponge: A damp sponge to wipe off excess grout and smooth the surface.
- Bucket: To mix grout with water or liquid additive.
- Mixing Paddle or Stick: For stirring grout to the right consistency.
- Protective Gloves: To keep hands clean and safe from chemicals.
- Utility Knife or Scraper: To remove old grout or debris before applying new grout.
- Tape: Painter’s tape to protect edges and keep grout lines neat.
- Grout Sealer (optional): To protect grout after it dries, increasing water resistance.
Step-by-step Process
Follow these simple steps for grout application around your kitchen sink:
- Clean the Area: Remove old grout, dirt, and loose particles from tile joints using a scraper or utility knife.
- Prepare Grout: Mix grout powder with water or a liquid additive in a bucket. Stir until smooth and creamy, without lumps.
- Apply Grout: Use the grout float to press grout firmly into gaps around the sink. Hold the float at a 45-degree angle and move diagonally across joints.
- Remove Excess Grout: After filling gaps, scrape off extra grout from tile surfaces with the float.
- Clean Surface: Wait 10-15 minutes, then gently wipe tiles with a damp grout sponge. Rinse the sponge often to avoid smearing.
- Final Touch: After grout dries slightly, polish tile surfaces with a dry cloth to remove any haze.
Keep the workspace well-ventilated and avoid rushing. Good grout application needs patience for a neat finish.
Curing Time
Grout needs time to harden and become water-resistant. Proper curing prevents cracks and water damage. Follow these guidelines:
- Initial Set: Grout starts to harden within 30 to 60 minutes after application. Avoid touching or disturbing it during this time.
- Drying Period: Let grout dry for at least 24 hours before using the sink or exposing it to water.
- Full Cure: Grout reaches maximum strength and durability after 3 to 7 days. During this time, avoid heavy cleaning or scrubbing.
- Temperature and Humidity: Warm, dry conditions speed curing. Cold or humid environments can slow the process.
Applying Caulk
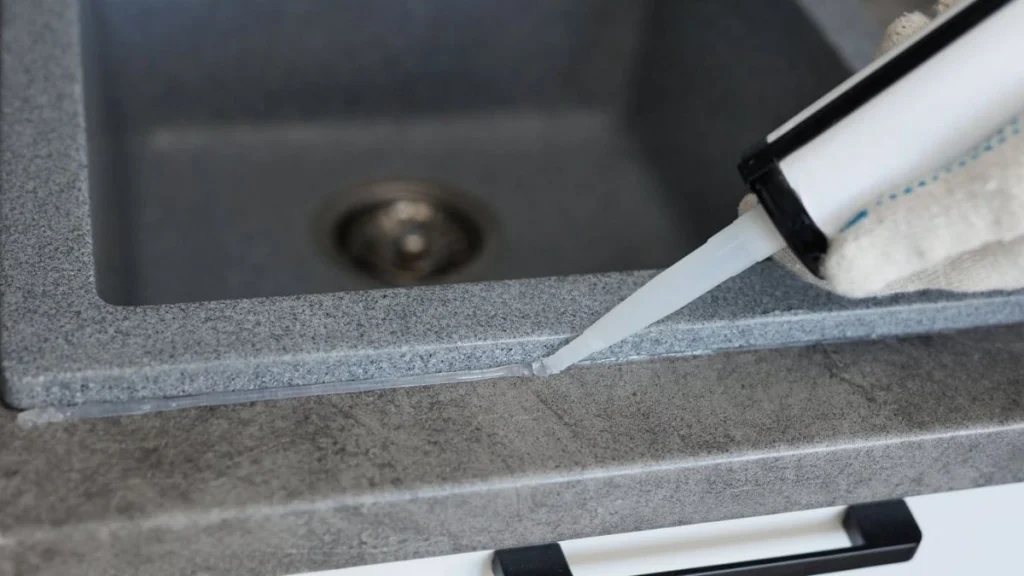
Applying caulk around the kitchen sink is essential to prevent water damage and keep your countertop looking neat. Caulk fills gaps between the sink and countertop, stopping water from seeping into spaces where mold and mildew can grow. This process is simple but requires the right materials and techniques to ensure a clean, long-lasting seal.
Selecting The Right Caulk
Choosing the correct caulk is the first step for a durable seal. Not all caulks work well in wet areas like kitchen sinks. Look for these key features:
- Water resistance: Use caulk designed for wet environments.
- Mildew resistance: Prevents mold growth over time.
- Flexibility: Allows movement without cracking.
- Paintability: Some caulks can be painted to match the sink or countertop.
Common types of caulk for kitchen sinks include silicone, latex, and acrylic. Here’s a quick comparison:
| Type | Water Resistance | Ease of Use | Durability | Paintable |
| Silicone | Excellent | Moderate | High | No |
| Latex | Good | Easy | Moderate | Yes |
| Acrylic | Fair | Easy | Low | Yes |
Silicone caulk is the best choice for kitchen sinks because it is very water-resistant and flexible. Latex caulk works well if you want to paint the area. Avoid acrylic caulk for areas exposed to constant moisture.
Application Techniques
Applying caulk correctly ensures a neat, effective seal. Follow these steps for best results:
- Clean the area: Remove old caulk, dirt, and grease. Use a scraper and cleaning solution.
- Dry the surface: Make sure the area is completely dry before applying caulk.
- Cut the caulk tube tip: Cut at a 45-degree angle. Make the opening small for better control.
- Load the caulk gun: Insert the tube into the gun and push the plunger.
- Apply steady pressure: Move the gun smoothly along the joint. Fill the gap evenly.
Tips for better application:
- Work slowly to avoid gaps or bubbles.
- Hold the gun at a consistent angle (around 45 degrees).
- Use painter’s tape on both sides of the joint to keep edges clean.
- Apply caulk in one continuous motion without stopping.
Keep a damp cloth nearby to quickly clean mistakes before the caulk dries.
Smoothing And Finishing
Smoothing the caulk improves its appearance and seals the joint fully. After applying caulk, follow these finishing steps:
- Wait a moment: Let the caulk settle for a few seconds but not dry.
- Use a smoothing tool or finger: Dip your finger or a caulk finishing tool in water mixed with a little dish soap.
- Run along the bead: Smooth the caulk bead in one steady motion to press it into the gap.
- Remove excess caulk: Wipe away extra caulk with a damp cloth.
- Remove painter’s tape: Pull tape away carefully before caulk dries to avoid pulling up the bead.
Proper smoothing creates a clean, professional look and strengthens the seal. Allow the caulk to cure fully according to the product instructions, usually 24 hours, before using the sink area to prevent water damage.
Maintenance Tips
Maintaining the grout or caulk around your kitchen sink is vital for a clean and durable kitchen. Proper care stops water damage and keeps your kitchen looking fresh. Regular upkeep prevents mold, mildew, and cracks that can lead to bigger problems. Use simple steps to keep the sealant strong and your sink area safe.
Preventing Mold And Mildew
Mold and mildew grow easily in damp areas like around the kitchen sink. They cause bad smells and damage the grout or caulk. To stop mold and mildew, keep the area dry and clean. Wipe down the sink edges after use. Use a squeegee or cloth to remove water drops.
- Ventilate the kitchen: Open windows or use an exhaust fan to reduce moisture.
- Clean regularly: Use mild soap and water to scrub the grout or caulk.
- Use a mold inhibitor: Apply a product designed to prevent mold growth.
- Fix leaks quickly: Repair any dripping faucets or pipes to avoid constant dampness.
When To Replace Sealant
Sealant around the kitchen sink wears out over time. It may crack, peel, or separate from the surface. Old sealant lets water seep in, causing damage to cabinets and walls. Check the sealant regularly for signs of wear. Replace it to keep your kitchen safe.
Look for these signs to know when to replace the grout or caulk:
- Visible cracks or gaps along the sealant line
- Peeling or lifting from the sink or countertop
- Discoloration or mold that won’t clean off
- Water pooling around the sink edges
Replacing sealant involves these steps:
- Remove old grout or caulk carefully using a scraper.
- Clean the area thoroughly and let it dry completely.
- Apply a new, waterproof sealant designed for kitchen use.
- Smooth the sealant with a tool or finger for a tight seal.
- Allow it to dry as per product instructions before using the sink.
Common Mistakes To Avoid
Applying grout or caulk around a kitchen sink keeps water from leaking and damaging cabinets. Many people try this job themselves but make mistakes. These errors cause water damage, mold, and messy finishes. Avoiding common mistakes helps the job last longer and look neat. Below are key mistakes to watch out for during this task.
Using The Wrong Material
Choosing grout instead of caulk or vice versa often causes problems. Grout is hard and cracks with sink movement. Caulk stays flexible and seals gaps better. Use silicone caulk around sinks for waterproof, lasting seals.
Skipping Surface Preparation
Cleaning the sink edges before applying grout or caulk is crucial. Dirt, grease, or old caulk stops the new material from sticking well. Use rubbing alcohol or a cleaner to wipe the area clean. Dry the surface fully before starting.
Applying Too Much Or Too Little
Applying grout or caulk unevenly causes issues. Too much material looks messy and takes longer to dry. Too little leaves gaps where water can seep through. Aim for a smooth, even bead that fills the gap completely.
Not Using Painter’s Tape
Painter’s tape helps create clean, straight lines. Without it, caulk can spread onto unwanted areas. Apply tape on both sides of the joint, then remove it right after smoothing the caulk.
Ignoring Drying And Curing Times
Rushing the drying process leads to weak seals. Follow the product’s instructions for drying and curing times. Avoid using the sink or exposing it to water until the caulk or grout fully cures.
Failing To Smooth The Caulk
Leaving caulk rough or uneven lets water collect in crevices. Use a caulk smoothing tool or a wet finger to create a smooth, even surface. This improves water resistance and looks better.
Using Paintable Caulk Instead Of Silicone
Paintable caulk dries hard and cracks with water exposure. Silicone caulk stays flexible and is waterproof. For kitchen sinks, silicone caulk is the better choice.
Conclusion
Choosing grout or caulk around your kitchen sink depends on your needs. Caulk works well for flexible, water-tight seals. Grout suits areas where strength and durability matter. Each has pros and cons to consider. Keep the sink area dry and clean for longer life.
Regular checks help spot damage early. Small repairs prevent bigger problems later. Your choice affects both look and function. Think about ease of use and maintenance too. A good seal keeps water out and your kitchen fresh.