You notice a water stain spreading across your ceiling after a heavy rainstorm. Your first instinct? Grab a can of spray foam from the garage and seal whatever crack you can find. It sounds simple, fast, and cheap — and honestly, it’s what a lot of homeowners try first.
But here’s the real question: will spray foam actually stop a roof leak, or will it just delay a much bigger problem?
The honest answer is — it depends. Spray foam can work in very specific situations, but it’s not a one-size-fits-all roofing solution. In this guide, you’ll learn exactly when spray foam helps, when it fails, how to apply it correctly if you choose to use it, and what better alternatives exist for a long-lasting fix.
What Is Spray Foam and How Does It Work?
Before deciding whether spray foam is right for your roof leak, it helps to understand what the product actually is and how it behaves once applied.
Spray foam is an expanding polyurethane material that starts as a liquid and rapidly expands to fill gaps, cracks, and voids. It’s been used for decades in construction — primarily for insulation and air sealing — because of its ability to conform to irregular surfaces and create an airtight bond.
Types of Spray Foam Used in Roofing
Not all spray foam is the same. There are two main types, and understanding the difference matters when you’re dealing with a roof leak.
Open-Cell Spray Foam is soft, spongy, and flexible after curing. It expands significantly and is great for interior insulation, but it absorbs moisture — which makes it a poor choice for direct exterior roofing applications. Using open-cell foam on an active leak area can actually trap water and make things worse over time.
Closed-Cell Spray Foam is denser, rigid, and has a much higher resistance to moisture. It creates a stronger barrier and is the type used in professional SPF (Spray Polyurethane Foam) roofing systems. If spray foam is being considered for any roofing purpose, closed-cell is always the better option.
The canned foam products you find at hardware stores — like Great Stuff — are generally open-cell or low-density formulas designed for indoor gap-filling, not outdoor roofing repairs. This distinction is critical and something many homeowners overlook before climbing up on their roof with a can.
Will Spray Foam Actually Stop a Roof Leak?

This is the core question, and it deserves a straight answer without sugarcoating.
Yes — spray foam can stop a roof leak, but only under specific conditions. It is not a universal fix, and in many cases, it only addresses the visible symptom while the actual cause of the leak continues to worsen underneath.
When Spray Foam Can Work for Roof Leaks
Spray foam is most effective in the following scenarios:
- Small gaps around roof penetrations — Areas where pipes, vents, or HVAC units pass through the roof are common leak points. Foam can fill these gaps effectively when the surrounding area is dry and structurally intact.
- Hairline cracks on flat or low-slope roofs — These roofs are more accessible and have surfaces where foam can bond more evenly.
- Temporary protection — If a professional repair is scheduled but rain is coming, foam can buy you a few days of protection.
- Clearly visible and accessible cracks — When the exact source of the leak is confirmed and the surrounding material is in good condition.
When Spray Foam Will NOT Stop a Roof Leak
This is where most homeowners run into trouble. Spray foam fails — or makes things worse — in these situations:
- When the leak source hasn’t been properly identified
- When there’s widespread shingle or membrane damage
- When flashing around chimneys, skylights, or dormers has failed
- When the roof deck is rotting or structurally compromised
- When moisture is already trapped beneath the surface — foam seals it in and accelerates mold and rot growth
The biggest mistake homeowners make is applying foam without knowing where the leak is actually coming from. Water travels. A stain on your ceiling might be caused by a leak three feet away from where you think it is.
Types of Spray Foam Products for Roof Leak Repair
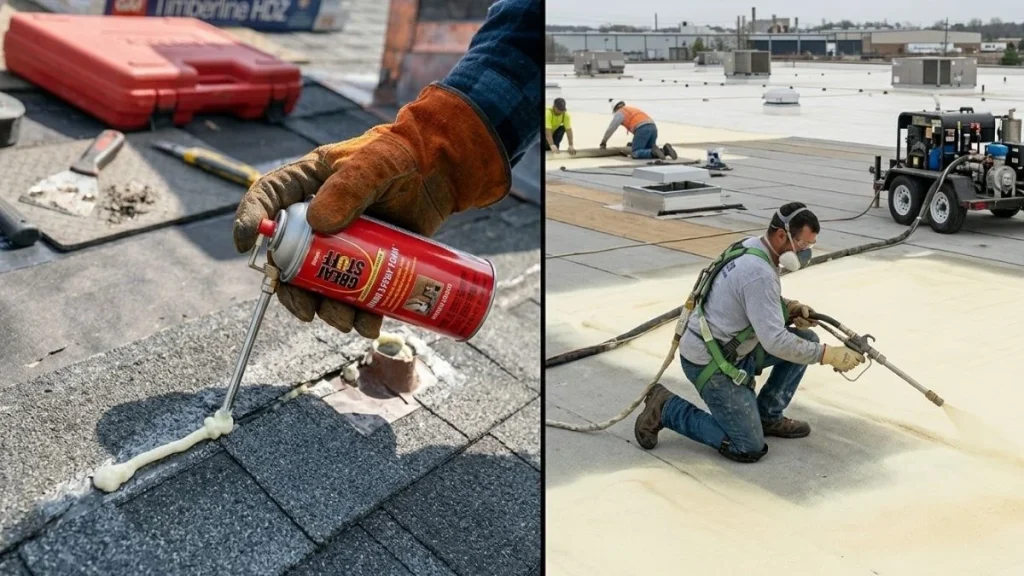
Understanding the product landscape helps you make a smarter decision before spending money on something that won’t work.
DIY Canned Spray Foam (Great Stuff and Similar Products)
These are the cans you find at Home Depot, Lowe’s, or any hardware store. They’re affordable, easy to use, and work well for interior applications. For roofing, however, they come with serious limitations:
- Not UV resistant — Sunlight breaks down exposed foam within weeks to a few months
- Not designed for wet or outdoor conditions — Poor adhesion on damp surfaces
- Cosmetically messy — Difficult to remove if a roofer needs to access the area later
- Short lifespan outdoors — Even in the best conditions, canned foam on a roof won’t last more than one season without a protective coating
If you use canned foam, always apply a UV-protective coating or roof sealant over the top. Without it, you’re looking at a repair that lasts weeks, not years.
Professional Spray Polyurethane Foam (SPF) Roofing Systems
This is a completely different product and application process. Professional SPF roofing involves contractors using specialized equipment to spray a thick, seamless layer of closed-cell foam across an entire roof surface. Once cured, it’s coated with a protective elastomeric coating that shields it from UV rays and weather.
SPF roofing systems are a legitimate, long-term solution — particularly for flat and low-slope roofs. They create a fully seamless, waterproof membrane with no joints or seams where water can penetrate. They also add insulation value, which can reduce energy bills noticeably.
The tradeoff is cost and maintenance. A professionally installed SPF system requires recoating every 10 to 15 years, and it must be installed by a trained contractor to perform correctly.
How to Use Spray Foam on a Roof Leak (Step-by-Step)
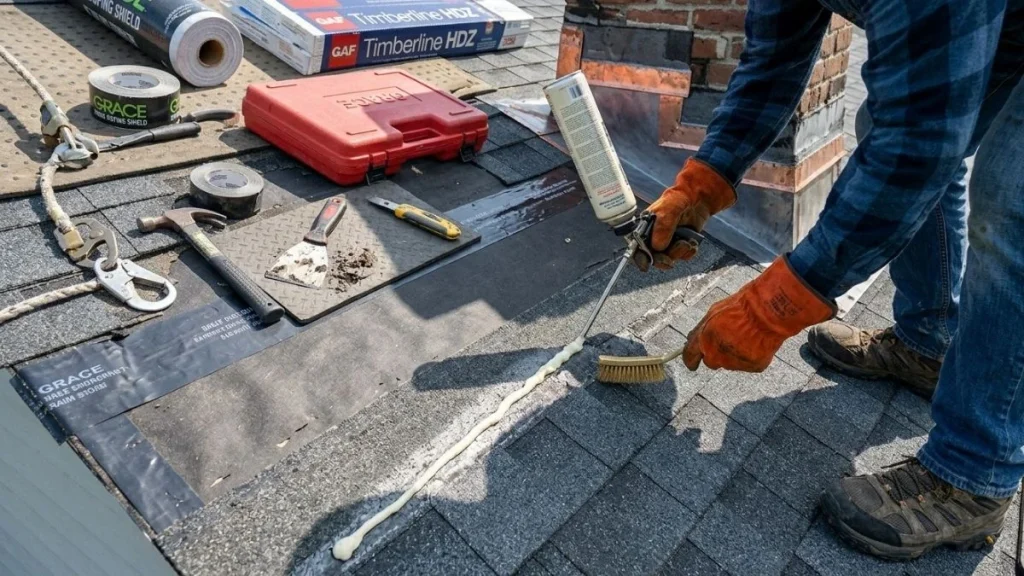
If you’ve confirmed a small, clearly visible crack or gap and want to use spray foam as a temporary fix, here’s how to do it correctly.
Safety First
Roof work carries real risk. Before you go up there:
- Wear non-slip rubber-soled shoes
- Use a safety harness anchored to a secure point
- Work with a partner who can assist from the ground
- Never go on a wet or icy roof
- Check weather — you need at least 24–48 hours of dry conditions after application
How to Locate the Exact Leak Source
This step is non-negotiable. Applying foam in the wrong place wastes your time and money.
Start from inside your attic on a sunny day. Look for daylight coming through, water stains on the sheathing, or soft/discolored wood. Trace the moisture trail upward to find the actual entry point. Common leak locations include:
- Around chimney flashing
- Along roof valleys
- Around vent pipes and skylights
- At ridge caps and hip joints
- Where two different roof sections meet
Applying Spray Foam Correctly
Once you’ve confirmed the source:
- Clean the area thoroughly — Remove debris, dirt, old sealant, and any loose roofing material
- Let it dry completely — Foam bonds poorly to wet surfaces
- Apply foam in a controlled bead — Don’t overfill; foam expands significantly
- Allow full cure time — Most products need 2–4 hours minimum, but 24 hours is ideal before rain exposure
- Trim excess foam — Use a utility knife to create a flat, clean surface
- Apply a UV-protective coating — This step is mandatory if you want the repair to last more than a few weeks
Pros and Cons of Using Spray Foam for Roof Leaks
| Factor | Spray Foam (DIY Can) | Professional SPF System |
| Cost | $5 – $15 per can | $4 – $7 per sq ft |
| Durability | Weeks to months | 20+ years with maintenance |
| UV Resistance | Poor (needs coating) | Excellent (coated system) |
| Waterproofing | Limited | Seamless membrane |
| DIY Friendly | Yes | No |
| Permanent Fix | No | Yes (for flat roofs) |
The table above makes one thing clear — DIY canned foam is a short-term tool, not a roofing solution. It has a place in your repair toolkit, but only when used with realistic expectations.
Better Alternatives to Spray Foam for Roof Leak Repair

If spray foam isn’t the right fit for your situation, here are the options worth considering — both for temporary relief and permanent repair.
Short-Term Fixes
Roofing Tape (Butyl or Flashing Tape) is arguably better than canned foam for most temporary repairs. It’s flexible, UV-resistant, adheres to most roofing surfaces, and is far easier to apply neatly. Products like Gorilla Waterproof Patch & Seal Tape or 3M All Weather Flashing Tape are worth keeping on hand.
Roofing Cement or Caulk provides better adhesion and longer outdoor durability than foam. It’s ideal for sealing around flashing, ridge caps, and pipe penetrations. Most formulas are UV-resistant right out of the tube.
Emergency Roof Tarps are the most reliable short-term option when you have significant damage or can’t identify the leak source. A heavy-duty polyethylene tarp properly secured with sandbags or boards will protect your home until a contractor can assess the damage.
Long-Term Solutions That Actually Fix the Problem
- Flashing repair or replacement — Most residential roof leaks trace back to failed flashing. A licensed roofer can replace it cleanly for a fraction of the cost of a full roof repair.
- Shingle replacement — For damaged or missing asphalt shingles, targeted replacement is permanent and affordable.
- Re-roofing or roof overlay — For aging roofs with widespread wear, a professional overlay or full replacement addresses the root problem.
- Professional SPF roofing system — The right permanent solution for flat and low-slope roofs needing a seamless waterproof membrane.
How Much Does Roof Leak Repair Cost?
Cost is often what drives homeowners toward the spray foam option first. Here’s a realistic look at what different repair paths actually cost:
| Repair Option | Estimated Cost |
| DIY canned spray foam | $5 – $15 |
| Roofing tape or sealant | $10 – $40 |
| Minor professional repair | $150 – $600 |
| Flashing repair/replacement | $200 – $500 |
| Professional SPF roofing system | $4 – $7 per sq ft |
| Full roof replacement | $5,000 – $15,000+ |
| Mold remediation (if delayed) | $500 – $6,000 |
The cost of delaying proper repairs is always higher than fixing the problem early. A $200 flashing repair ignored for a season can turn into $3,000 worth of water-damaged decking, insulation, and drywall. That’s not a scare tactic — it’s a pattern roofing contractors see constantly.
Read Also: Roof Leaking Where Porch Meets House
Conclusion
Spray foam isn’t a bad product — it’s just a misunderstood one when it comes to roofing. A can of spray foam can absolutely serve a purpose: buying you time after a storm, sealing a small visible crack around a vent pipe, or holding things together until your roofer shows up. In those situations, it’s a reasonable tool to reach for.
If you’re dealing with a recurring roof leak, water stains on your ceiling, or visible damage you can’t clearly identify, the right move is a professional inspection. A licensed roofer can find the actual source of the leak, assess the full extent of the damage, and give you repair options that actually solve the problem — not just hide it for another season.
The cost of a proper repair today is almost always less than the cost of the damage that builds up when you keep patching and hoping.