Is your garage door looking a little dull or worn out? Painting the trim around your garage door can instantly boost your home’s curb appeal and make your entire exterior look fresh and inviting.
But if you’ve never tackled this kind of project before, you might wonder where to start or how to avoid common mistakes. You’ll discover simple, step-by-step tips that will help you paint your garage door trim like a pro. Keep reading to transform your home’s look without spending a fortune or hiring a professional!
Preparing The Surface
Painting the trim around your garage door gives your home a fresh, clean look. Preparing the surface is the first important step. It helps the paint stick better and last longer. Without proper preparation, paint can peel or chip quickly. Taking time to prepare the trim properly saves effort and money later.
Cleaning The Trim
Cleaning the trim removes dirt, dust, and grime that block paint from sticking well. Start by using a soft brush or broom to sweep off loose dirt. Then, wash the trim with warm water mixed with mild detergent.
- Use a sponge or cloth to scrub gently.
- For tough spots, try a soft-bristle brush.
- Rinse the trim thoroughly with clean water.
Allow the trim to dry fully before moving to the next step. Wet surfaces cause paint to bubble and peel. If the trim has mold or mildew, mix one part bleach with three parts water. Apply carefully and rinse well.
Sanding And Smoothing
After cleaning, sanding the trim creates a smooth surface. This helps paint stick well and look even. Use medium-grit sandpaper (around 120 to 150 grit) to gently sand the entire trim surface.
- Sand in the direction of the wood grain or trim material.
- Focus on rough spots, peeling paint, and edges.
- Use fine-grit sandpaper (220 grit) for a final smooth finish.
Wipe away dust with a damp cloth after sanding. Dust left on the surface can cause paint to look uneven or dull. Take care not to sand too hard. Too much pressure can damage the trim or expose bare wood in unwanted areas.
Tip: For corners and tight spots, use sanding sponges or small sanding blocks. They fit better and make the job easier.
Repairing Damages
Trim around garage doors often has cracks, holes, or rotting spots. Repairing these issues before painting is essential. It ensures the surface looks neat and extends the paint’s life.
Follow these steps:
- Fill small cracks and holes: Use exterior wood filler or putty. Apply with a putty knife and smooth it out.
- Fix larger damaged areas: Cut out rotted wood and replace with new trim pieces if needed.
- Sand repaired spots: Smooth the filler or new wood so it blends with the trim.
- Prime repaired areas: Apply primer to seal repairs before painting.
Check for loose nails or screws and tighten or replace them. Loose trim can cause paint to crack or peel. Repairing damages creates a solid, clean surface ready for paint.
Choosing The Right Paint
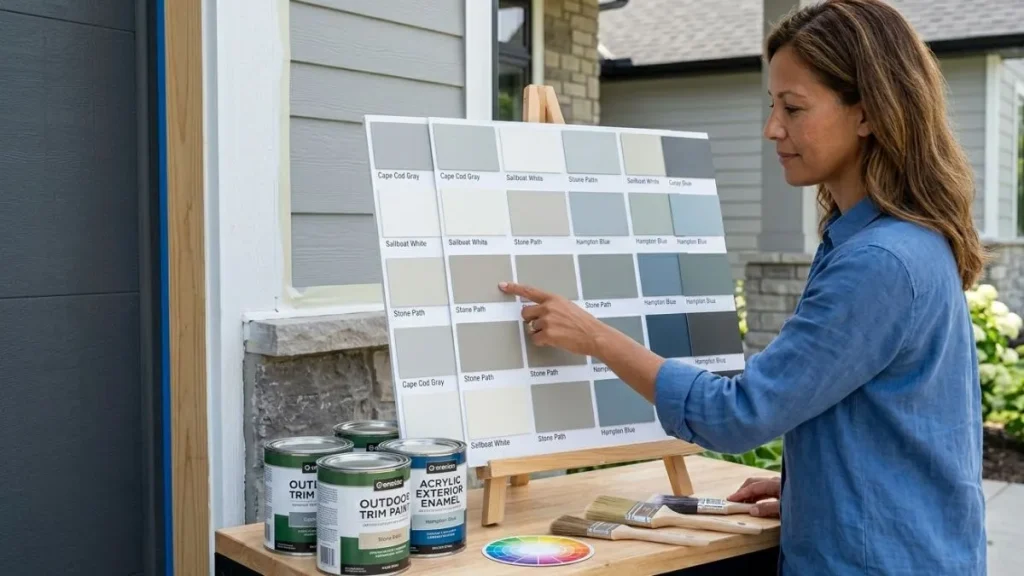
The right paint not only improves appearance but also guards against weather, dirt, and wear. Picking paint involves understanding types, colors, and weather resistance to get the best results for your garage door trim.
Types Of Paint For Exterior Trim
Exterior trim paint comes in several types, each with unique qualities. Choosing the correct type affects durability and finish. The main types include:
- Acrylic Latex Paint: Water-based, easy to clean, and flexible. It resists cracking and peeling well.
- Oil-Based Paint: Provides a smooth, hard finish. Dries slower and can be harder to clean, but offers strong protection.
- Enamel Paint: Known for its glossy finish and toughness. Ideal for high-traffic or exposed areas.
- Primer: Not a paint type but essential before painting. Helps paint stick better and lasts longer.
Selecting Colors
Color affects the garage door trim’s look and how it fits with the house. Choose colors carefully for balance and style.
Simple tips for color selection:
- Match the trim color to the house’s main color or siding for a smooth look.
- Use contrasting colors to make the trim stand out and highlight architectural details.
- Neutral colors like white, beige, or gray work well with most homes.
- Dark colors can add drama but may show dirt more easily.
Bold colors can create curb appeal but keep harmony. Soft colors offer a classic, clean look. Choose what fits your style and home design.
Considering Weather Resistance
Garage door trim faces sun, rain, wind, and temperature changes. Paint must protect against these elements.
Key weather resistance features to check:
- UV Resistance: Prevents paint from fading or chalking under sunlight.
- Moisture Resistance: Stops water from seeping into the trim and causing rot or mold.
- Flexibility: Allows paint to expand and contract with temperature changes without cracking.
- Mildew Resistance: Keeps paint clean and free from mold growth.
Use paints labeled for exterior use and ask for weatherproof or waterproof options. Paint with these qualities lasts longer and keeps trim looking fresh.
Weather-resistant paint saves time and money by reducing frequent repainting and damage repairs.
Painting Techniques
Painting the trim around a garage door improves the home’s look and protects the wood or metal from weather damage. Good painting techniques ensure a smooth finish and long-lasting results. Each step—from preparing the surface to applying the last coat—matters. Careful work prevents peeling and makes the trim look fresh and clean.
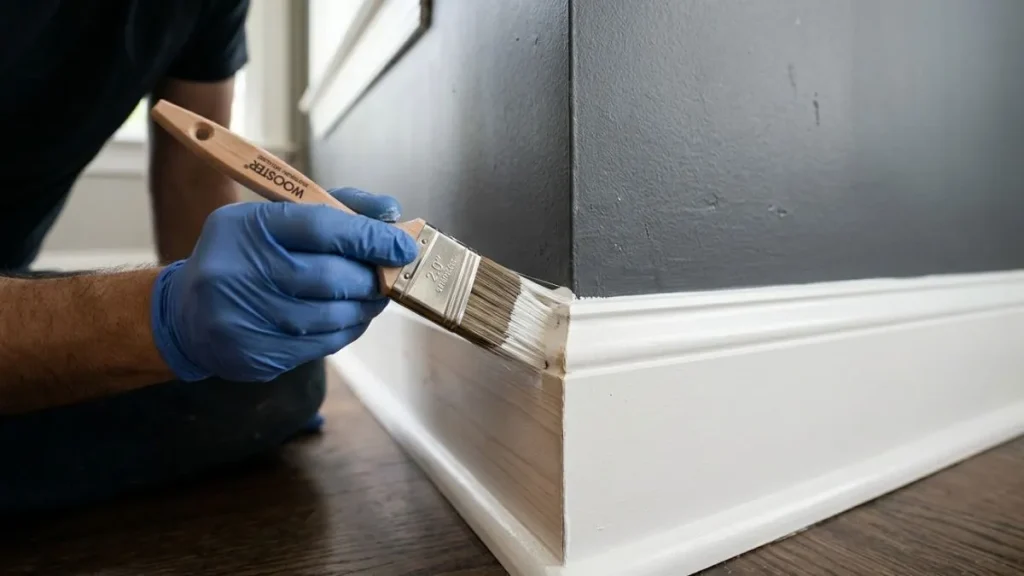
Applying Primer
Primer creates a strong base for paint and helps it stick better. Start by cleaning the trim with a mild detergent and water. Remove dirt, dust, and old peeling paint using a scraper or sandpaper. This step stops bumps and rough spots under the paint.
- Choose the right primer: Use an oil-based primer for wood trim or a rust-inhibiting primer for metal.
- Apply evenly: Use a brush or small roller to cover all surfaces, including edges and corners.
- Thin layers: Apply thin coats to avoid drips and uneven surfaces.
- Dry time: Let the primer dry fully, usually 2-4 hours, before painting.
Primer seals the surface and blocks stains. It also stops wood knots from bleeding through the paint. Skipping primer may cause the paint to peel or crack faster. Proper primer application helps paint last longer and look better.
First Coat Application
The first coat of paint sets the tone for the final look. Use high-quality exterior paint made for trim and siding. Stir the paint well to mix all ingredients evenly. Use a small angled brush for better control and to reach tight corners.
- Cut in edges: Paint along trim edges first, using smooth, steady strokes.
- Fill in large areas: Use a brush or small roller to cover flat surfaces.
- Brush direction: Follow the grain of the wood or the shape of the trim for a smooth finish.
- Avoid overloading brush: Too much paint causes drips and uneven texture.
Allow the first coat to dry completely, typically 4-6 hours. Check the surface for missed spots or rough patches. Lightly sand any bumps to create a smooth base for the next coat. This step improves paint adhesion and the final finish.
Second Coat And Touch-ups
The second coat gives full color and protects the trim. Apply it the same way as the first coat, but be more careful with coverage. Use thin, even layers to avoid runs or thick spots. This coat hides any imperfections from the first coat.
| Tip | Why It Matters |
| Use a fresh brush | Prevents old paint clumps and ensures smooth strokes. |
| Paint in good weather | Helps paint dry evenly and avoid bubbles or cracks. |
| Check edges and corners | Prevents peeling and gives a clean, finished look. |
After the second coat dries, inspect the trim carefully. Touch up any thin spots or areas with uneven color. Use a small brush for these details. Proper second coat and touch-ups make the trim look neat and last many years.
Maintaining Painted Trim
Painting trim around your garage door enhances curb appeal and protects wood from weather damage. Keeping the painted trim in good shape requires regular care. Maintaining painted trim ensures it looks fresh and lasts longer. Simple steps like cleaning, inspecting, and timely repainting keep the trim strong and beautiful.
Regular Cleaning
Cleaning painted trim regularly removes dirt, dust, and grime that build up outdoors. These particles can cause paint to fade or peel over time. Clean trim helps maintain a bright, neat look around your garage door.
Follow these simple cleaning tips:
- Use a soft brush or cloth to gently remove loose dirt.
- Mix mild soap with water for washing.
- Apply the soapy water with a sponge, scrubbing lightly.
- Rinse with clean water to avoid soap residue.
- Dry the trim with a soft towel or let it air dry.
Cleaning frequency depends on your local environment. Here is a quick guide:
| Environment | Cleaning Frequency |
| Urban (pollution, dust) | Every 1-2 months |
| Suburban (moderate dirt) | Every 2-3 months |
| Rural (less dust) | Every 3-4 months |
Regular cleaning prevents paint damage and keeps your garage door trim looking fresh year-round.
Inspecting For Damage
Check painted trim for damage every few months. Early detection stops small problems from growing. Look closely at all sides of the trim, especially near the ground and corners.
Signs to watch for:
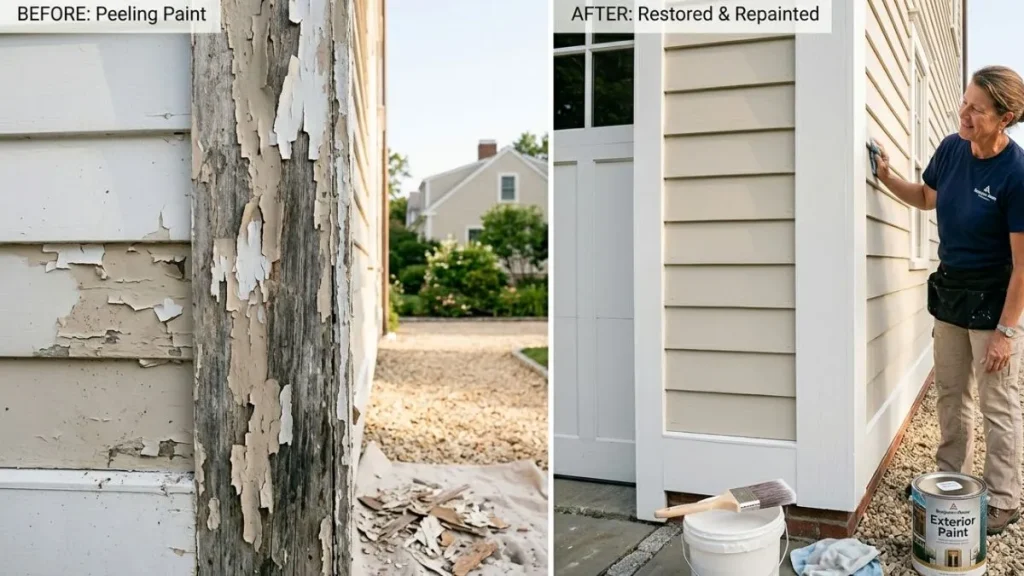
- Peeling or cracking paint
- Wood swelling or warping
- Faded or discolored areas
- Mold or mildew spots
- Insect holes or damage
Use a flashlight for better visibility in shaded areas. Tap the wood gently to find soft spots that may mean rot. Keep a checklist to track issues found during each inspection.
Repainting Schedule
Repainting the trim around your garage door keeps it protected and attractive. Paint wears down over time due to sun, rain, and temperature changes.
Plan to repaint every 3 to 5 years, depending on these factors:
- Paint type and quality
- Climate and weather exposure
- Previous paint condition and preparation
- Regular maintenance and cleaning
Signs it is time to repaint:
- Noticeable fading or discoloration
- Paint cracking or peeling
- Wood exposed or damaged
- Frequent moisture problems
Conclusion
Painting trim around your garage door adds fresh charm to your home. It protects wood from weather damage and wear. Choose the right paint and tools for smooth results. Take your time and follow each step carefully. A neat paint job boosts your home’s curb appeal.
It makes your garage look clean and well-kept. Small projects like this bring big changes. Enjoy the sense of pride from your hard work. Keep your trim looking great with regular touch-ups. Simple care keeps your garage door trim strong and bright.
You Can Read Also: How to Convert a Garage Door to Sliding Glass Doors