Are you worried about those loose stone steps in your home? They can be more than just an eyesore—they might cause you to trip or fall.
Fixing them quickly keeps your steps safe and looking great. You’ll discover simple and effective ways to repair loose stone steps. By the end, you’ll feel confident handling the problem and protecting your home. Let’s get your steps solid and secure again!
Causes Of Loose Stone Steps
Loose stone steps can cause accidents and damage the beauty of your home. Several factors contribute to stone steps becoming unstable over time. Identifying these causes is the first step in effective repair.
Weather Effects
Weather plays a major role in loosening stone steps. Stones and the materials holding them together expand and contract with temperature changes. This movement can cause cracks and gaps.
- Freeze-thaw cycles: Water seeps into cracks, freezes, expands, and breaks the stone or mortar.
- Rain and moisture: Excess water weakens the mortar and can wash away the base material under the stones.
- Sun exposure: Continuous heat can dry out and crack mortar, reducing its strength.
Regular maintenance helps protect stone steps from these weather effects. Proper sealing and drainage reduce water damage and prolong step life.
Wear And Tear
Stone steps face constant pressure from daily use. Over time, this pressure causes the materials to break down and stones to loosen.
Common signs of wear and tear include:
- Surface erosion from foot traffic
- Loose or missing mortar between stones
- Chipped or cracked stones
The material type and step location also affect how fast wear occurs. For example, steps near busy entrances wear out faster.
Poor Installation
Poor installation is a common cause of loose stone steps. Using the wrong materials or not following proper methods leads to weak steps.
Some mistakes during installation include:
- Inadequate base preparation
- Using low-quality mortar or adhesive
- Improper stone alignment
- Skipping proper drainage setup
Each mistake reduces the step’s ability to stay firm under pressure and weather changes.
Signs Of Damage

Loose stone steps need attention to stay safe and look good. Signs of damage often appear before a step breaks or causes injury. Spotting these signs early helps fix problems quickly. Common signs include cracks and gaps, wobbling stones, and discoloration. Each sign tells a different story about the step’s condition.
Cracks And Gaps
Cracks and gaps are clear signs that stone steps need repair. Over time, stones may develop small cracks. These cracks can grow larger if ignored, leading to bigger problems. Gaps between stones may also appear due to shifting ground or weather effects.
Why cracks and gaps are a problem:
- Water can enter and freeze, causing stones to crack more.
- Dirt and debris collect in gaps, making steps slippery.
- Structural strength decreases, raising the risk of breaks.
Here is a simple table to identify crack sizes and urgency for repair:
| Crack Size | Repair Urgency |
| Hairline (less than 1mm) | Low – Monitor regularly |
| Small (1mm to 3mm) | Medium – Plan repair soon |
| Large (more than 3mm) | High – Repair immediately |
Regular checks: Walk on your stone steps and look closely for cracks or gaps. Use a flashlight for better view. Early detection saves money and prevents accidents.
Wobbling Stones
Wobbling stones are a serious sign of damage. A stone step should feel solid and steady underfoot. If a stone moves or rocks, it means the base or mortar is failing. Loose stones can cause trips and falls.
Common causes of wobbling stones include:
- Soil erosion under the step.
- Wear and tear of mortar or adhesive holding stones.
- Heavy weight or impact damage.
How to test for wobbling stones:
- Press down firmly on each stone.
- Try to move the stone side to side.
- Check for gaps under the stone.
Wobbling stones need fast repair to avoid accidents. A professional can reset the stone with fresh mortar or replace the base. Simple fixes can restore safety and extend step life.
Discoloration
Discoloration often shows early damage signs. Stones may change color due to moisture, mold, or dirt buildup. Some stains indicate water damage or poor drainage around steps.
Common discoloration causes:
- Moss or algae growth in damp areas.
- Rust stains from metal nearby.
- Efflorescence – white powdery salt deposits.
Discoloration can also signal deeper problems:
- Water seepage causing stone weakening.
- Cracks hidden under stains.
- Base erosion leading to loose stones.
Cleaning tips: Use a mild detergent and soft brush to remove dirt and moss. Avoid harsh chemicals that can damage stone. Regular cleaning helps spot problems early and keeps steps safe and attractive.
Step-by-step Repair Process
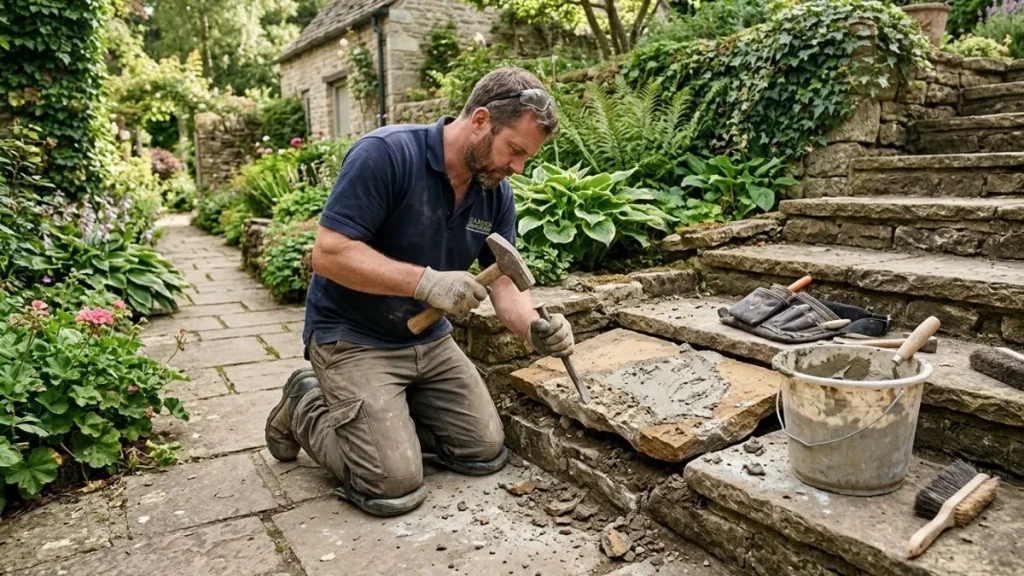
Repairing loose stone steps requires careful attention to detail and a clear process. Each phase in the repair plays an important role in preventing future damage. Below is a detailed guide that breaks down the process into simple, easy-to-follow steps.
Removing Loose Stones
Start by identifying all loose stones on the step. These stones may shift underfoot or show gaps around their edges. Use a small hammer or chisel to gently tap the stones and test their stability. If a stone moves easily, it must be removed.
Follow these steps to remove loose stones safely:
- Wear gloves and safety glasses to protect yourself.
- Use a chisel and hammer to carefully pry out the loose stones.
- Work slowly to avoid damaging surrounding stones.
- Place removed stones on a soft surface to keep them intact.
After removing the loose stones, inspect the underlying surface. Clear away any debris or crumbling mortar. This step prepares the area for a strong, lasting repair.
Cleaning The Area
Cleaning the area is crucial before fixing the stones back in place. Dirt, dust, and old mortar can prevent adhesive from bonding properly. Clean surfaces help the repair last longer and look better.
Follow this cleaning routine:
- Remove loose dirt and debris with a brush or broom.
- Use a wire brush to scrape off old mortar remnants.
- Wash the area with water and mild detergent to remove grease or stains.
- Rinse thoroughly and allow the area to dry completely.
Use a vacuum or compressed air to clear out dust from cracks. This step ensures the adhesive will stick firmly to both the stones and the base.
Applying Adhesive
Select an adhesive suitable for stone and outdoor use, such as a strong construction adhesive or mortar mix. Proper adhesive application is key to a durable repair.
Steps for applying adhesive:
- Mix the adhesive according to package instructions if needed.
- Use a trowel or putty knife to spread adhesive evenly on the base.
- Apply a thick enough layer to fill gaps and hold the stone firmly.
- Cover the entire contact surface of the stone with adhesive.
Avoid applying too little adhesive, which weakens the bond. Too much adhesive can squeeze out and look messy. Aim for an even, controlled application to secure the stones perfectly.
Repositioning Stones
Once adhesive is applied, place each stone back carefully. Positioning stones correctly restores the step’s safety and appearance.
Follow these tips for best results:
- Align stones with surrounding ones to maintain level surface.
- Press stones firmly into adhesive to remove air pockets.
- Tap stones gently with a rubber mallet to secure placement.
- Check for even spacing and adjust stones as needed.
Use a level tool to ensure the step surface remains flat and safe. Proper repositioning prevents tripping hazards and keeps the steps looking neat.
Allowing Proper Drying Time
Drying time is critical for the repair to set fully. Adhesive needs time to cure and reach maximum strength. Rushing this step can cause stones to loosen again.
Follow these drying guidelines:
| Adhesive Type | Recommended Drying Time | Notes |
| Construction Adhesive | 24-48 hours | Keep area dry and avoid pressure on stones. |
| Mortar Mix | 48-72 hours | Protect from rain and direct sunlight. |
During drying, avoid walking on the repaired steps. Cover the area if rain or dust may interfere. Proper drying ensures a strong, lasting fix for loose stone steps.
You May Read Also: Brick Cracking above Garage Door
Conclusion
Loose stone step repair keeps your steps safe and strong. Fixing loose stones stops accidents and damage. Small repairs now save big costs later. Use proper materials and tools for best results. Regular checks help catch problems early. Well-maintained steps add beauty to your home.
Don’t ignore loose stones; act quickly. Safe steps mean peace of mind for everyone. Simple care keeps your stone steps lasting longer. Keep your home secure with easy step repairs.