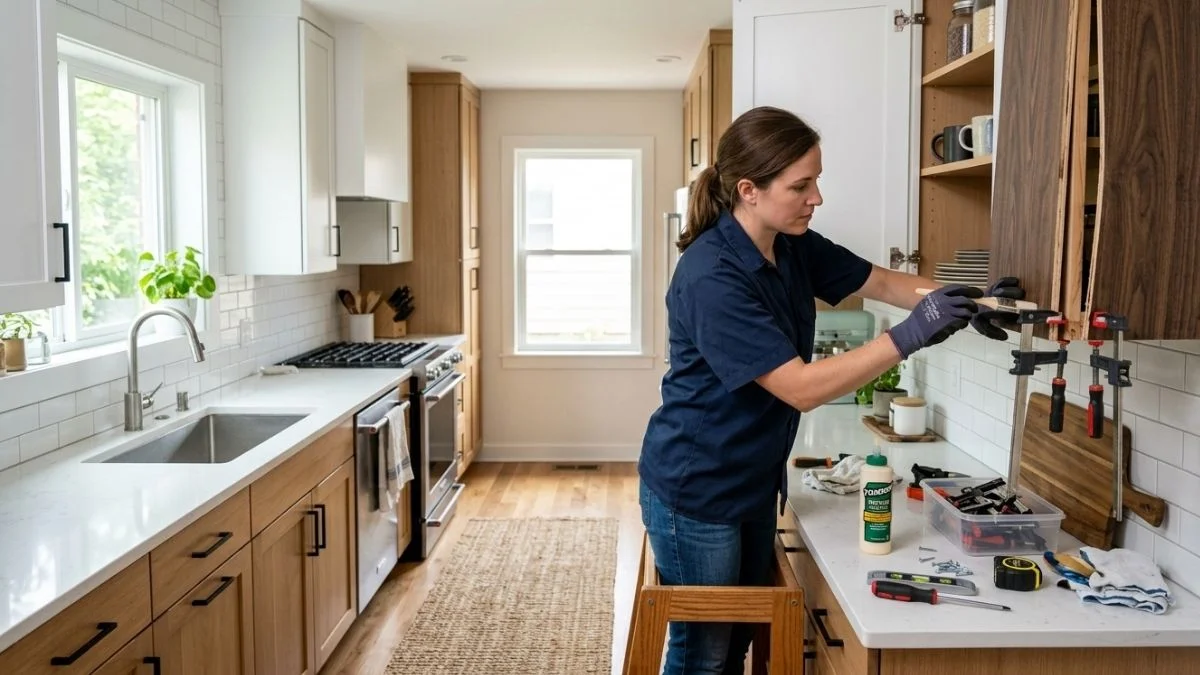
If you’ve noticed a gap forming where your kitchen cabinet back panel meets the sides — you’re not alone. This is one of the most common cabinet problems homeowners deal with, and the good news is that in most cases, you don’t need to call a contractor or spend money on brand-new cabinets.
Whether it’s a small crack along the joint or a back panel that’s visibly pulling away, catching it early and fixing it the right way makes all the difference. Left alone, a separating cabinet back can lead to sagging shelves, misaligned doors, and even structural failure of the entire cabinet box.
This guide walks you through exactly why kitchen cabinet backs separate from the sides, what tools and materials you need, and how to fix it step-by-step — the right way.
Common Causes of Kitchen Cabinet Back Separating From Sides

Understanding why this happens is just as important as knowing how to fix it. Different causes call for slightly different repair approaches, so take a minute to identify what’s behind the damage.
Moisture and Humidity Damage
Kitchens are tough on wood. Steam from cooking, splashing water near the sink, and general humidity fluctuations cause wood and MDF to repeatedly swell and contract. Over time, this movement weakens the glue joints and loosens fasteners holding the back panel in place.
MDF is especially vulnerable to moisture. Once it absorbs water, it swells, loses its structural integrity, and becomes almost impossible to re-glue reliably.
Signs moisture is the cause:
- Swelling or bubbling along the back panel edges
- Soft or spongy texture when you press on the panel
- Discoloration, water stains, or visible mold behind the panel
Poor Construction or Low-Quality Materials
Not all cabinets are built the same. Many stock cabinets — especially budget options from big-box stores — use thin ¼-inch MDF back panels fastened with just a few staples and minimal glue. There’s simply not much holding the panel in place to begin with.
What to Watch For in Budget Cabinets
- Back panels thinner than ¼ inch
- Staple-only fastening with no glue
- No dado joint — the panel sits flat against the back rather than into a groove
- Particleboard or low-density MDF that crumbles rather than holds fasteners
Higher-quality cabinets use ½-inch plywood backs secured in dado grooves — these rarely separate under normal use.
Age and General Wear
Even well-built cabinets aren’t immune to time. Wood glue breaks down over decades, and the natural settling of a home — foundation shifts, seasonal wood movement — puts constant stress on cabinet joinery.
If your kitchen cabinets are 20 or more years old and the back is pulling away from the sides, age-related wear is likely a factor. The fix is still the same, but you may also want to reinforce other joints in the cabinet while you’re at it.
Improper Installation
A cabinet that wasn’t properly secured to wall studs during installation puts extra stress on the cabinet box. When the cabinet shifts slightly on the wall, it torques the box and strains the back panel joints.
Uneven walls are another culprit. If the cabinet was shimmed or forced into place to compensate for an out-of-plumb wall, the sides and back panel may never have sat flush — making separation more likely over time.
Impact and Physical Stress
This one is easy to overlook. Years of slamming cabinet doors send vibrations through the entire cabinet box. Overloading shelves — especially heavy dishes, appliances, or canned goods stored above weight capacity — pulls the sides away from the back panel.
Even a single hard bump from moving furniture or appliances can start a separation that gradually worsens.
Tools and Materials You’ll Need for the Repair
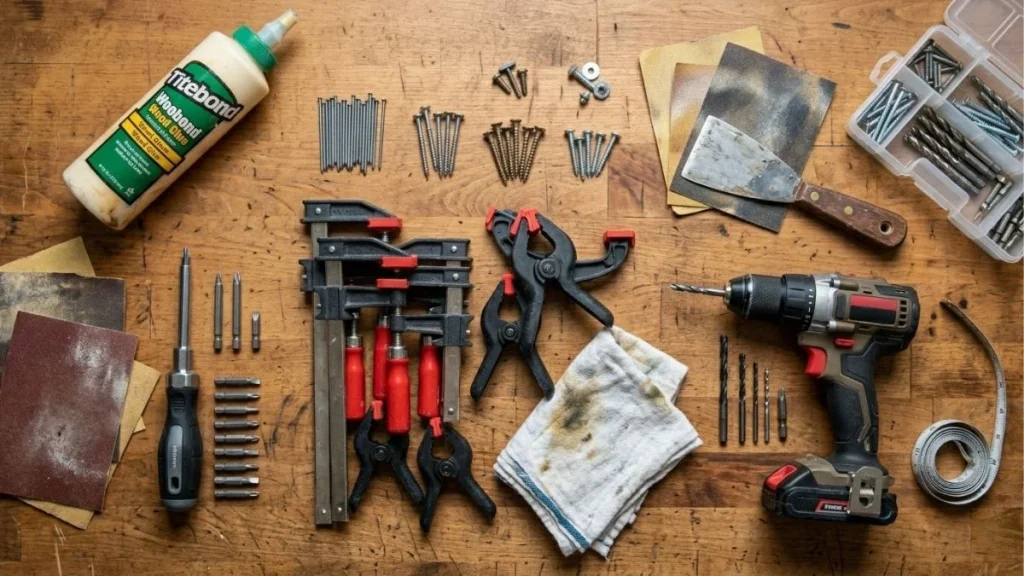
Before you start, gather everything so you’re not stopping mid-repair. The good news: you probably already own most of these.
Basic Tools
- Hammer or rubber mallet
- Drill and screwdriver set
- Bar clamps or corner clamps (at least 2–4)
- Putty knife or paint scraper
- Measuring tape and pencil
- Sandpaper (120-grit and 220-grit)
- Clean cloths or rags
Materials and Supplies
- Wood glue — PVA wood glue works well for most repairs; use a moisture-resistant or waterproof formula for cabinets near the sink
- Brad nails or finish nails (1–1.5 inch)
- Small wood screws (appropriate to cabinet thickness)
- Wood filler or wood putty
- Touch-up paint, stain, or cabinet finish to match your cabinets
Optional but Helpful
- Corner brackets or L-brackets for added structural support
- Replacement back panel sheet (if the existing panel is too damaged to save)
- A brad nailer for faster, more consistent fastening
- Painter’s tape to protect surrounding surfaces
How to Fix a Kitchen Cabinet Back Separating From Sides — Step-by-Step

This repair works for partial separations and full panel detachments on wood, plywood, and MDF cabinets. Work carefully, and don’t rush the drying time.
Step 1 — Assess the Damage Before You Start
Don’t skip this step. The right repair depends on what you’re actually dealing with.
- Run your fingers along the joint to feel how far the separation extends
- Press gently on the back panel — if it feels soft, spongy, or crumbles, moisture damage may make re-gluing ineffective
- Look inside the cabinet with a flashlight for mold, rot, or water staining
- Check whether the separation is isolated to one spot or runs the full length of the joint
Key rule: If the panel material is intact and firm, proceed with the repair below. If you find rot, mold, or structural failure, scroll down to the replacement section first.
Step 2 — Empty the Cabinet and Prepare Your Workspace
Remove everything from the shelves and the cabinet interior. Move items off nearby countertops and protect them with a drop cloth or old towels. You’ll want a clean, uncluttered area to work in.
If the cabinet has a face frame, you won’t need to remove it. The repair is done from inside the cabinet.
Read Also: Cabinet Face Frame Overhang
Step 3 — Clean the Separated Joint Surfaces
This is the step most DIYers rush — and it’s where a lot of repairs fail.
Use a putty knife or paint scraper to remove all old glue residue from both the back panel edge and the cabinet side panel. Old, failed glue prevents new adhesive from bonding properly.
Once scraped clean, wipe both surfaces with a dry cloth to remove dust and debris. Let them air dry completely — especially important if moisture was involved. Give it at least an hour if you suspect dampness.
What If the Surfaces Are MDF?
MDF that has swollen from moisture won’t return to its original shape, and it doesn’t hold glue or fasteners reliably once damaged. If the MDF is puffed up or crumbly along the edges, the panel likely needs to be replaced rather than repaired. See the replacement section below.
Step 4 — Apply Wood Glue to the Joint
Apply a thin, even bead of wood glue along the full length of the separated edge. Use a small brush, foam brush, or your finger (with a glove) to spread it evenly across both mating surfaces if you can reach them.
Don’t over-apply — excess glue squeezes out when you clamp and creates more cleanup work without adding strength.
For cabinets near the sink or dishwasher, use a moisture-resistant wood glue like Titebond III. Regular PVA glue breaks down when repeatedly exposed to humidity.
Step 5 — Press and Clamp the Panel Firmly Into Place
Press the back panel firmly against the cabinet sides, starting at one corner and working your way along the joint. Use bar clamps or corner clamps to hold the panel in place while the glue cures.
Apply enough clamping pressure to close the gap fully — you should see a small, even bead of glue squeeze out along the joint. Wipe away the excess immediately with a damp cloth before it dries.
Check that the panel sits flush and square before leaving it to cure. Most wood glues need a minimum of 24 hours of clamping time for a reliable bond — check the manufacturer’s instructions.
What If You Don’t Have Clamps?
In a pinch, use heavy books, paint cans, or anything with weight placed inside the cabinet pressing the panel against the sides. It’s not ideal, but it works for lighter separations.
Step 6 — Reinforce With Nails or Screws
Once the glue is fully cured (wait the full 24 hours), add mechanical fasteners for long-term strength. Glue alone, while strong, benefits from the added security of nails or screws — especially in a kitchen environment where humidity and vibration are ongoing stressors.
Using brad nails: Drive 1–1.5 inch brad nails through the back panel into the cabinet side, spacing them every 6–8 inches along the joint. Angle them slightly toward the center of the side panel for better grip.
Using screws for a stronger hold: Pre-drill pilot holes to avoid splitting the panel, then drive small wood screws along the joint. Countersink them slightly so the heads sit flush with the back panel surface.
Adding Corner Brackets for Extra Support

For cabinets that have separated repeatedly or are under heavy load, installing small L-brackets or corner brackets at the interior corners of the cabinet adds significant structural reinforcement. Use #8 screws and place brackets at the top and bottom corners where the back meets the sides.
Step 7 — Fill, Sand, and Finish
Fill any nail or screw holes with wood filler. Let it dry according to the product instructions, then sand smooth — start with 120-grit and finish with 220-grit for a clean surface.
Touch up the repaired area with paint, stain, or cabinet finish to match the surrounding wood. Most hardware stores can color-match paint if you bring in a cabinet door or a small sample.
Once everything is fully dry, reinstall your shelves and restock the cabinet.
When a Simple Fix Isn’t Enough — Signs You Need a Full Cabinet Replacement
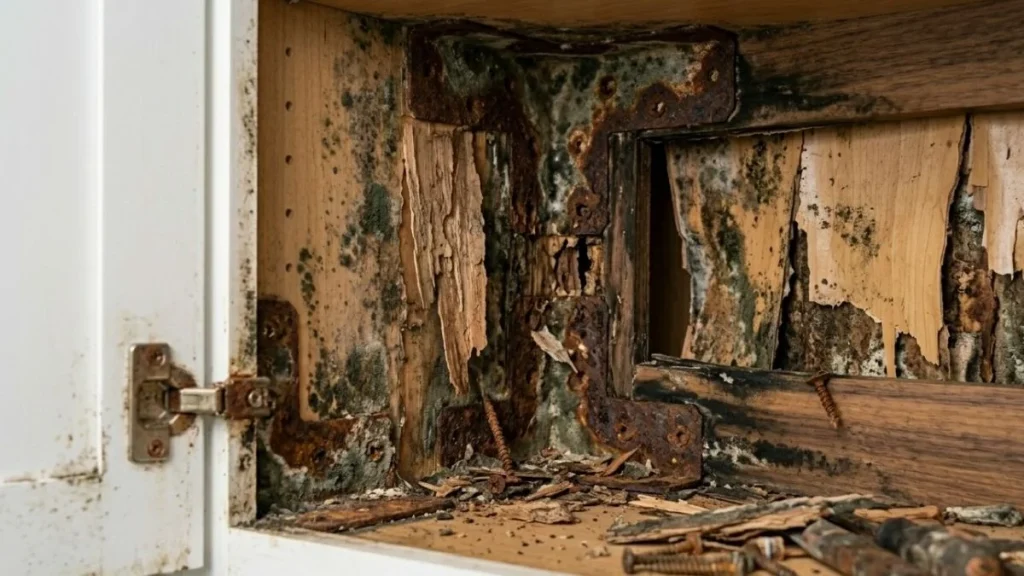
Most separations are repairable, but there are situations where patching a damaged cabinet doesn’t make sense.
Extensive Moisture or Mold Damage
If the back panel or the cabinet sides have soaked up enough moisture to become soft, spongy, or visibly rotted, the wood can no longer hold fasteners or bond reliably with glue. Attempting to repair it will only delay the inevitable.
Mold behind the back panel is a more serious concern. It can spread to the wall behind the cabinet and create a health hazard. If you find mold, address the moisture source first, then assess whether the cabinet can be salvaged or needs to come out entirely.
Structural Cabinet Box Failure
If multiple joints are separating at once, the cabinet sides are bowing or warping, or the entire box has shifted out of square, the structural integrity of the cabinet is compromised. Repairing one joint while the rest of the box is failing is a short-term fix.
When Repair Costs More Than Replacement
Run a quick cost comparison:
- DIY repair: $10–$30 in materials for a single cabinet
- Professional cabinet repair: $75–$200+ per cabinet depending on damage
- Cabinet refacing: $1,000–$3,000 for a full kitchen
- New stock cabinets: $60–$200 per cabinet (supply only)
If the cabinet is old, heavily damaged, or one of several failing at once, investing in new cabinets during a broader kitchen refresh is often the smarter financial move.
How to Prevent Kitchen Cabinet Backs From Separating Again
Fixing the problem is only half the job. A few simple habits will keep your cabinet joints solid for years.
Control Moisture in Your Kitchen
- Always use your range hood vent when cooking, especially when boiling or steaming
- Fix plumbing leaks under the sink immediately — even slow drips cause significant damage over time
- Apply a water-resistant sealant inside cabinets near the sink and dishwasher
- Run a kitchen exhaust fan or crack a window during heavy cooking sessions
Avoid Overloading Shelves
Every cabinet shelf has a weight limit — most standard shelves are rated for 25–50 lbs. Overloading puts outward pressure on the cabinet sides, which eventually pulls the back panel away from the joints.
Use pull-out organizers and shelf risers to distribute weight more evenly. Store heavier items like cast iron cookware in base cabinets, not upper cabinets.
Do a Quick Annual Cabinet Check
A five-minute inspection once a year can catch early separation before it becomes a major repair:
- Press on the back panel in each cabinet to check for movement
- Look for small gaps forming along the side joints
- Check that hinges and drawer slides are tight and functioning properly
- Look for any signs of water intrusion under the sink
Choose Better Cabinets During a Remodel
If you’re planning a kitchen remodel, knowing what to look for in cabinet construction will save you from this headache down the road:
- Plywood box construction over particleboard or MDF — plywood holds fasteners better and resists moisture far more effectively
- Dado-set back panels rather than stapled — a panel seated in a routed groove is far more resistant to separation
- Soft-close hinges and drawer slides to eliminate the vibration and impact stress from slamming
- ½-inch back panels rather than ¼-inch for added rigidity
DIY vs. Hiring a Professional — Which Is Right for You?
Most kitchen cabinet back repairs are well within DIY territory. But a few situations are better left to a professional.

When DIY Makes Sense
- The separation is limited to one or two spots along the joint
- The back panel material is intact, firm, and free of rot or mold
- You’re comfortable using basic hand tools and clamps
- The repair is on a lower cabinet where access is easy
When to Call a Cabinet Repair Professional
- The damage spans multiple cabinets or the entire back panel has detached
- You’ve found mold or rot behind the panel
- The cabinet box itself is warped or structurally compromised
- The cabinet is a high-end custom unit where a repair mistake would be costly
Estimated Cost of Professional Cabinet Repair
Hiring a handyman or cabinet repair specialist typically runs:
- Minor joint regluing: $75–$125 per cabinet
- Full back panel replacement: $150–$300 per cabinet (materials + labor)
- Structural cabinet box repair: $200–$400+ depending on extent of damage
Always get at least two quotes, and ask specifically whether the estimate includes addressing the underlying cause (moisture, improper installation) not just the visible damage.
Conclusion
A kitchen cabinet back separating from the sides is rarely a disaster — and in most cases, wood glue, clamps, and a free afternoon are all you need to fix it. The key is acting early, because a small gap today can turn into sagging shelves and structural failure tomorrow.
Identify the root cause first — moisture, age, or poor construction — and address it before making the repair, or the problem will simply come back. If you find rot or mold, skip the patch job and go straight to replacement.
Either way, take a few minutes to check your other cabinets too. If one panel is separating, others are likely not far behind.