Wiring a bathroom light and fan might seem tricky, but it’s something you can do yourself with the right guidance. Imagine having better lighting and fresh air in your bathroom, all controlled with a simple switch.
You don’t need to wait for a costly electrician or guess where the wires go. This step-by-step guide will show you exactly how to connect your bathroom light and fan safely and easily.
By the end, you’ll feel confident handling the wiring and improving your bathroom’s comfort.
Planning The Wiring Setup
Planning the wiring setup is the first step in installing a bathroom light and fan. This stage ensures safety, efficiency, and proper function of the electrical system. Careful planning avoids common problems such as overloads or faulty connections.
Assessing Electrical Requirements
Start by checking the bathroom’s existing electrical setup. Identify the power source and circuit breaker connected to the bathroom. Bathrooms need dedicated circuits due to moisture and safety concerns. Calculate the total wattage of the light and fan to ensure the circuit can handle the load.
Key points to assess:
- Voltage type (usually 120V in residential homes)
- Current rating of the circuit breaker (typically 15 or 20 amps)
- Total wattage of all bathroom fixtures
- Distance from the power source to the fixture location
Choosing Suitable Fixtures
Select fixtures that fit your bathroom size and style. The light should provide enough brightness for tasks like shaving or applying makeup. The fan should have enough airflow to remove moisture efficiently.
Consider these factors:
- Light type: LED lights save energy and last longer.
- Fan capacity: Measured in CFM (cubic feet per minute). A small bathroom needs about 50 CFM, a larger one 80 or more.
- Noise level: Look for fans rated under 1.5 sones for quiet operation.
- Installation type: Ceiling-mounted fixtures are common for bathrooms.
- Moisture rating: Fixtures must be rated for damp or wet locations.
Use the following chart to choose fan size by bathroom area:
| Bathroom Size (sq ft) | Recommended Fan CFM |
| Up to 50 | 50 |
| 51-100 | 80 |
| 101-150 | 110 |
Choosing the right fixtures ensures comfort and safety while improving your bathroom’s look.
Gathering Tools And Materials
Collect all necessary tools and materials before starting the wiring work. Proper preparation reduces interruptions and mistakes during installation. Basic tools include wire cutters, wire strippers, screwdrivers, and a voltage tester.
Essential tools list:
- Wire cutters and strippers
- Flathead and Phillips screwdrivers
- Voltage tester or multimeter
- Drill with bits
- Fish tape (for pulling wires through walls)
- Electrical tape
- Wire nuts/connectors
Materials needed:
- Electrical wire (usually 14/2 or 12/2 NM cable)
- Bathroom light fixture
- Bathroom exhaust fan
- Switches (single or combination switch)
- Electrical boxes (for fixtures and switches)
- GFCI outlet or breaker (if required)
- Ducting for fan vent
Organize tools and materials in a safe, dry place near your work area. Double-check each item to avoid multiple trips. Safety gear such as gloves and safety glasses protect during installation. Prepare a clear workspace with good lighting.
Safety Precautions
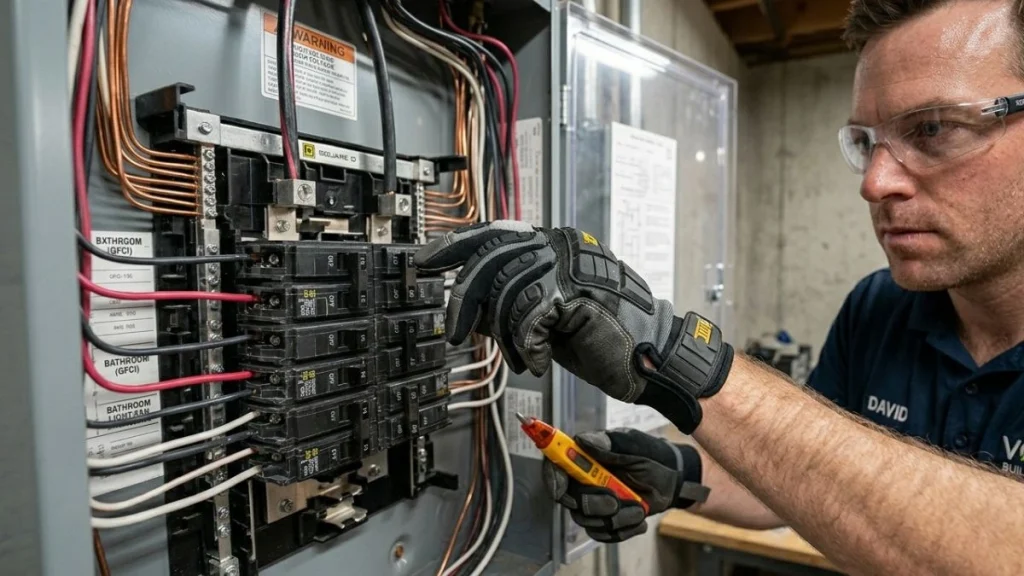
Wiring a bathroom light and fan requires careful attention to safety precautions. Electrical work can be dangerous if not done properly. Taking steps to protect yourself and follow rules ensures a safe and successful installation. This section covers key safety tips to keep in mind before and during the wiring process.
Turning Off Power
Always turn off the power at the main circuit breaker before starting any electrical work. This step prevents electric shock and accidents. Simply flipping the light switch off is not enough. The power must be cut at the source to ensure safety.
Follow these steps to turn off power safely:
- Locate the main electrical panel in your home.
- Identify the circuit breaker that controls your bathroom lighting and fan.
- Switch off the breaker to cut power to that circuit.
- Use a voltage tester to confirm no electricity flows to the wires.
Using Proper Protective Gear
Wear proper protective gear to avoid injuries during wiring. Electric shocks and cuts are common hazards. Using the right equipment keeps you safe and comfortable.
Essential protective gear includes:
- Insulated gloves to prevent electric shock.
- Safety goggles to protect eyes from debris or sparks.
- Non-slip shoes for good footing on ladders or wet floors.
- Long sleeves to shield your arms from cuts and abrasions.
Additional tips for protective gear:
- Check gloves for holes or damage before use.
- Use tools with insulated handles.
- Avoid loose clothing that can catch on fixtures.
Checking Local Codes
Follow local electrical codes to ensure your wiring is legal and safe. Codes vary by location and cover wiring methods, materials, and safety standards. Ignoring codes can cause hazards and lead to failed inspections.
Steps to check local codes:
- Visit your city or county building department website.
- Look for electrical code requirements for bathroom lighting and fans.
- Note specific rules about wiring, circuit breakers, and ventilation.
- Contact an inspector or electrician if you have questions.
Important code points often include:
- Use of GFCI (Ground Fault Circuit Interrupter) outlets in bathrooms.
- Proper wiring gauge for the circuit.
- Fan installation rules to ensure ventilation.
- Separation of light and fan switches.
Here is a checklist to verify compliance:
| Code Item | Requirement | Action |
| GFCI Protection | Required for bathroom circuits | Install GFCI breaker or outlet |
| Wire Gauge | Use 12 or 14 gauge wire depending on amperage | Match wire size to circuit breaker |
| Switch Separation | Fan and light must have separate switches | Wire switches independently |
| Ventilation | Fan vents outside or to approved duct | Check fan vent installation |
Following codes protects your home and ensures safety for all users.
Running Electrical Cables

This process connects the power source to your fixtures, allowing them to work safely and efficiently. Proper cable running prevents electrical hazards and makes maintenance easier. Taking time to plan cable paths and secure wiring ensures the bathroom light and fan operate correctly without interruptions or damage.
Locating Power Source
Start by finding the main power source for your bathroom light and fan. Usually, power comes from the circuit breaker panel or an existing light switch box. Confirm the circuit is off to avoid shocks during work.
- Check the breaker panel: Identify which breaker controls the bathroom circuits.
- Look for existing wiring: Find wires inside the wall near the planned fixture locations.
- Use a voltage tester: Verify no power flows in the wires before cutting or connecting.
Some bathrooms may share circuits with other rooms, so note all affected areas. Use a simple table to record important details:
| Item | Details |
| Power Source | Breaker panel or existing switch box |
| Circuit Voltage | Typically 120 volts |
| Breaker Size | Usually 15 or 20 amps |
| Wire Type | Romex NM cable, 14/2 or 12/2 gauge |
Understanding the power source location saves time and avoids confusion during wiring.
Routing Wires To Fixtures
After locating the power source, plan the cable path to the bathroom light and fan. The wires must run safely inside walls or ceilings, avoiding plumbing or other hazards.
Follow these steps for routing wires:
- Measure the distance from the power source to each fixture.
- Use fish tape or wire puller to guide cables through wall studs or ceiling joists.
- Drill holes in studs if needed, keeping wires centered to prevent nails or screws from piercing cables.
- Leave some extra cable length at fixture boxes for easy connections.
Use appropriate cable types and sizes:
- 14-gauge wire for 15-amp circuits
- 12-gauge wire for 20-amp circuits
- Use cable clamps at entry points to fixture boxes
Keep wires away from heat sources and sharp edges. Neat, straight wire runs make future repairs simpler and safer.
Securing Cables Properly
Securing cables prevents movement that can cause damage or shorts. Proper fastening also meets electrical codes and ensures safety.
Follow these best practices to secure cables:
- Use cable staples or straps every 4 to 6 feet along the run.
- Fasten cables within 12 inches of every fixture box or junction box.
- Avoid over-tightening staples that can crush cables.
- Keep cables flat against framing members without bends or kinks.
- Protect cables passing through holes with plastic grommets or bushings.
Connecting The Bathroom Light
Connecting the bathroom light is a key step in wiring your bathroom light and fan. This process involves attaching the light fixture safely and correctly to the electrical circuit. Proper connection ensures your light will work well and lasts long. It also keeps you safe from electrical hazards.
Wiring The Light Fixture
Start by turning off the power at the breaker box to avoid shocks. Use a voltage tester to confirm no electricity flows to the wires. Remove the old fixture if needed and prepare the wires for the new light.
Follow these steps to wire the light fixture:
- Strip about ¾ inch of insulation from each wire end using wire strippers.
- Identify the wires: usually, black or red is the hot wire, white is neutral, and green or bare is ground.
- Connect the black (hot) wire from the fixture to the black supply wire.
- Connect the white (neutral) wire from the fixture to the white supply wire.
- Attach the green or bare copper ground wire to the fixture’s ground screw or wire.
Use wire nuts to secure each connection tightly and wrap with electrical tape for extra safety.
| Wire Color | Purpose | Connection |
| Black (or Red) | Hot (Power) | Connect to fixture black wire |
| White | Neutral | Connect to fixture white wire |
| Green or Bare | Ground | Connect to fixture ground screw or wire |
Attach the fixture to the ceiling or wall bracket securely. Double-check all wire connections before moving on.
Connecting To The Switch
The switch controls the light power. Connecting it correctly lets you turn the bathroom light on or off safely. Start by identifying the switch wires and power source wires.
Steps to connect the switch:
- Turn off power at the breaker.
- Remove the switch cover plate and unscrew the switch from the box.
- Locate the black (hot) wire coming from the power source and the black wire going to the light fixture.
- Connect the power source black wire to one switch terminal.
- Connect the black wire leading to the light fixture to the other switch terminal.
- Connect the ground wire to the switch’s green grounding screw.
- Ensure the white neutral wires bypass the switch and are connected together in the box.
Use wire nuts and electrical tape to secure all connections. Tuck the wires neatly back into the switch box and mount the switch firmly. Replace the cover plate after.
| Switch Terminal | Wire Connected |
| Terminal 1 | Black wire from power source |
| Terminal 2 | Black wire to light fixture |
| Ground screw | Green or bare ground wire |
Testing The Light
Testing confirms the light works safely and correctly after wiring. Follow these steps to test your bathroom light:
- Turn the power back on at the breaker box.
- Flip the bathroom light switch to the ON position.
- Check if the light turns on immediately.
- If the light does not turn on, turn off the power and recheck all wire connections.
- Use a voltage tester to ensure power reaches the fixture wires.
- Verify the bulb is properly screwed in and functional.
Look for flickering or dim light, which may indicate loose connections. Tighten connections if needed. Test the switch multiple times to ensure consistent operation. Proper testing keeps your bathroom light safe and reliable.
Wiring The Bathroom Fan

Follow each step carefully to avoid electrical hazards and ensure your bathroom stays fresh and dry.
Hooking Up The Fan Motor
The fan motor is the heart of the bathroom fan system. Start by turning off the power at the circuit breaker to prevent shocks. Locate the fan’s wiring harness or terminal block. Most fans have three wires:
- Black wire: Power (hot)
- White wire: Neutral
- Green or bare wire: Ground
Use wire nuts to connect the corresponding wires from the house wiring to the fan wires. Ensure each connection is tight and secure.
| Fan Wire | House Wire | Purpose |
| Black | Black | Power supply |
| White | White | Neutral return |
| Green/Bare | Green/Bare | Ground safety |
After connecting, tuck the wires neatly into the electrical box. Mount the fan securely to avoid vibrations or noise. Use screws and follow the manufacturer’s instructions closely.
Integrating Fan Switch
The fan switch controls the power flow to the fan motor. Before wiring the switch, confirm the power is off at the breaker. Identify the fan switch wires, usually black and white or red. Follow these steps:
- Connect the incoming power wire (black) from the circuit to the switch’s input terminal.
- Attach the switch’s output terminal to the fan’s black wire.
- Connect the neutral wires (white) together, bypassing the switch.
- Ground the switch by connecting the green or bare wire to the grounding terminal.
Use a voltage tester to confirm no current flows before touching any wires. Secure all connections with wire nuts and wrap with electrical tape for safety.
Some fan switches come combined with a light switch. In such cases, separate wires for the fan and light will be present. Make sure to connect them accordingly:
- Fan switch controls the fan motor wire (black or red).
- Light switch controls the light wire (usually black).
Mount the switch into the wall box and fasten with screws. Attach the switch cover plate to complete the installation.
Verifying Fan Operation
Checking the fan’s operation ensures proper wiring and safety. Restore power at the circuit breaker. Test the fan switch by turning it on and off. The fan should start running smoothly without strange noises.
- Listen for constant and quiet motor sound.
- Check if the fan speed matches the switch setting.
- Ensure the fan stops immediately when the switch is off.
If the fan does not run, turn off the power and inspect all wire connections. Look for loose or reversed wires. Use a multimeter to check voltage at the fan terminals.
Also, check the fan’s airflow by holding a piece of tissue paper near the vent. The paper should move easily, showing strong airflow. Clean any dust or obstructions blocking the fan if airflow is weak.
Proper testing guarantees your bathroom fan works correctly. It prevents moisture buildup and improves air quality.
Controlling Light And Fan Separately
Controlling the bathroom light and fan separately improves convenience and energy efficiency. You can turn on the light without running the fan and vice versa. This setup prevents unnecessary power use and reduces noise. Proper wiring and switch selection are key to achieve this.
Installing Dual Switches
Installing dual switches means placing two separate switches in one box. Each switch controls either the light or the fan independently. This method offers simple control and is easy to wire for beginners.
Steps to install dual switches:
- Turn off power at the circuit breaker.
- Remove the existing switch and wiring cover.
- Install a double-gang electrical box if needed.
- Connect the power supply (line) wire to the common terminal on each switch.
- Attach the load wire from the light to one switch’s load terminal.
- Attach the load wire from the fan to the other switch’s load terminal.
- Connect all ground wires together and to the switches’ ground screws.
- Secure switches and attach the cover plate.
- Turn the power back on and test each switch separately.
Here is a simple wiring table for dual switches:
| Switch | Wire Connected | Purpose |
| Switch 1 | Line (Hot) & Load (Light) | Controls bathroom light |
| Switch 2 | Line (Hot) & Load (Fan) | Controls bathroom fan |
| Ground | Ground wires | Safety grounding |
Dual switches provide clear, separate control for each device. They work well in most bathroom wiring setups.
Using Combination Switches
Combination switches combine two switches in one unit. They save space and look neat on the wall. These switches allow separate control of the fan and light like dual switches but fit in a standard single-gang box.
Benefits of combination switches:
- Compact size reduces wall clutter.
- Simple wiring similar to dual switches.
- Available in many styles and finishes.
Wiring a combination switch involves:
- Turn off power at the breaker.
- Remove old switch and prepare wiring box.
- Connect line (hot) wire to the common terminal on the combo switch.
- Connect the load wire for the light to one switch terminal.
- Connect the load wire for the fan to the other switch terminal.
- Attach ground wires to the switch’s ground screw.
- Mount the switch and install the cover plate.
- Restore power and test both switches individually.
Combination switches offer a clean look and easy installation. They are ideal for bathrooms with limited wall space.
Troubleshooting Common Issues
Problems with bathroom light and fan wiring often include switches not working or devices running together. Identifying the cause saves time and prevents damage.
Common issues and fixes:
| Issue | Possible Cause | Solution |
| Light and fan turn on/off together | Incorrect wiring of load wires to same switch | Check wiring; separate load wires to different switches |
| Switch does not control device | Loose or disconnected wires | Tighten all terminals; verify wire connections |
| Fan or light hums or flickers | Poor grounding or bad switch | Ensure ground wire is connected; replace faulty switch |
| Breaker trips when switch used | Short circuit or overload | Inspect wiring for shorts; replace damaged wires |
Always turn off the power before checking wiring. Use a voltage tester to confirm no electricity flows. Patience and careful inspection fix most problems quickly.
Final Inspection And Cleanup
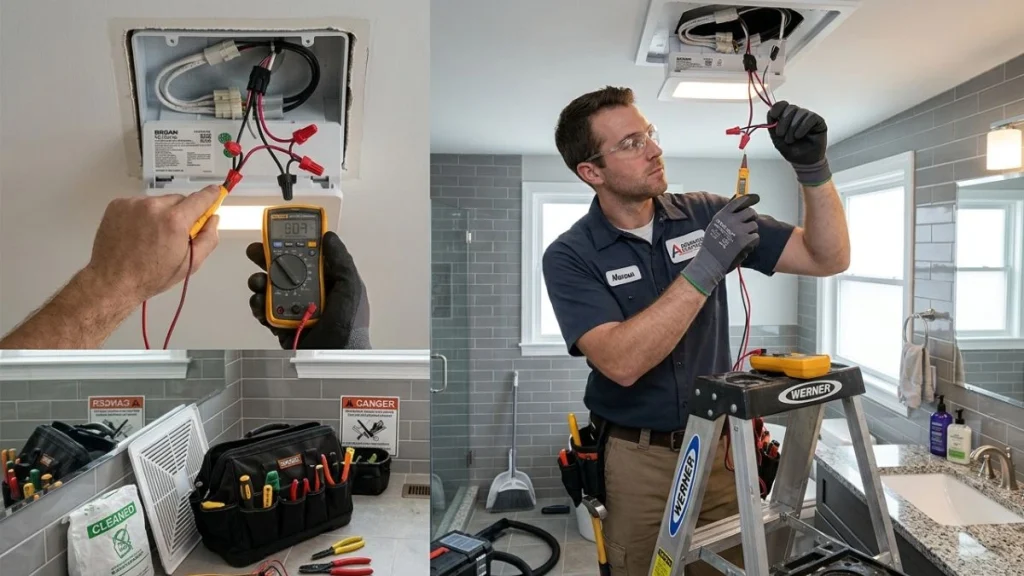
After completing the wiring of your bathroom light and fan, the final step is the final inspection and cleanup. This stage ensures the installation is safe, fully functional, and your workspace is tidy. Skipping this step might lead to electrical hazards or a messy bathroom space. Taking the time to carefully check and clean up gives peace of mind and extends the life of your work.
Checking Connections
Start by carefully inspecting all electrical connections. Loose or incorrect wiring can cause shorts or prevent the light and fan from working properly.
- Turn off the power at the breaker before touching wires.
- Make sure all wire nuts are tight and secure.
- Look for any exposed copper wires that might cause a short circuit.
- Verify the ground wire is connected correctly to the metal box or grounding screw.
- Check that the wires match the color codes: black (hot), white (neutral), and green or bare (ground).
Use a voltage tester to confirm no current is flowing during inspection. Look for damaged insulation or loose screws on terminals. Tighten any screws holding the wires. If you used a junction box, ensure the cover is properly installed.
| Common Wiring Issues | How to Fix |
| Loose wire nut | Remove, twist wires together tightly, and replace nut |
| Exposed wire | Trim damaged section and strip wire again |
| Wrong wire color used | Re-route or re-label wires correctly |
Double-checking connections prevents future electrical problems. Take your time and be thorough.
Restoring Power
After confirming all wiring is safe, restore power to test your work. This step confirms the light and fan operate correctly.
- Return to your circuit breaker panel.
- Flip the breaker switch back to the ON position.
- Go back to the bathroom and turn on the light switch.
- Check that the light turns on without flickering.
- Switch on the fan and listen for smooth operation.
If the light or fan does not work:
- Turn off the breaker immediately.
- Re-inspect your wiring connections.
- Look for any signs of damage or incorrect wiring.
- Fix issues and repeat the test.
Use a voltage tester or multimeter to check voltage at the fixture. Confirm it matches your home’s electrical system (usually 120V in the US). Avoid forcing switches or using faulty bulbs during testing. Once everything works smoothly, you can be confident in your installation.
Cleaning Work Area
Cleaning the work area is essential for safety and neatness. Leftover debris or tools can cause accidents or damage the new installation.
- Pick up any wire scraps, insulation, or packaging materials.
- Use a vacuum to remove dust and small particles.
- Wipe down surfaces near the work area with a damp cloth.
- Store tools and unused materials properly.
- Dispose of any sharp objects carefully to avoid injury.
Inspect the floor and nearby counters for nails, screws, or wire clippings. Make sure nothing is left that could cause harm. Clean light covers and fan grills gently with a soft cloth. A clean area improves the bathroom’s appearance and protects your new wiring from damage.
Keeping your workspace tidy also helps in future maintenance. Label your circuit breaker if needed, so others know which switch controls the bathroom light and fan. This small step saves time during any later repairs or upgrades.
Similar Read: Electrical Wiring Bathroom Fan and Light
Conclusion
Wiring a bathroom light and fan is a useful skill anyone can learn. Always turn off the power before starting work. Follow safety rules to avoid accidents. Use the right tools and parts for the job. Take your time and check each step carefully.
This helps your bathroom stay bright and fresh. You can save money by doing it yourself. Trust your skills and ask for help if needed. Enjoy the comfort of your new setup!