


Tiles installed before 1980 — including nearly all 1950s bathroom tile — commonly contain asbestos, and removing 1950’s bathroom wall tile without testing first puts your lungs at serious risk.
The real problem is that most homeowners don’t know whether their walls hide asbestos, lead adhesive, or a crumbling substrate that could turn a weekend project into a costly structural repair.
This guide gives you a clear, step-by-step method to test safely, choose the right tools, protect your walls, and know exactly when a professional is the smarter call.
Identifying Your Substrate: Why It Changes Everything

Before you touch a single tile, you need to know what’s behind it. The backing material — your substrate — determines which tools to use, how fast the work goes, and whether you’ll end up patching a small hole or replacing an entire wall.
The 3 Most Common 1950s Substrates
Metal lath and plaster was the standard in homes built before the mid-1950s. Tile was set directly into a thick mortar bed over wire mesh. Metal lath tile removal is slow, heavy, and unforgiving — the mortar bonds are extremely strong, and aggressive prying often pulls chunks of plaster with it.
Corrugated sheetrock (also called “rock lath” or button board) replaced plaster in many mid-century bathroom renovations. It looks like small rectangular gypsum panels, roughly 16 by 48 inches. This 1950s corrugated sheetrock is more fragile than modern drywall and crumbles easily when wet or disturbed.
Standard drywall sometimes appears in 1950s homes that were renovated in the 1960s or 1970s. It’s the easiest substrate to work with but the least water-resistant — any moisture intrusion behind tile often means the drywall is already compromised.
How to Identify Your Substrate Before You Start
Pry up one corner tile near the floor using a stiff putty knife. Shine a flashlight into the gap and look at the exposed edge. Plaster over metal lath feels rock-hard and appears gray or tan. Corrugated sheetrock shows small, distinct rectangular panels. Standard drywall has a visible paper facing.
Structural and Water Damage Checks
Probe the wall surface around grout lines with a screwdriver handle. Soft spots, dark staining, or a hollow sound indicate water damage — a critical find before any vintage bathroom tile demolition begins. Also confirm whether the wall is load-bearing before cutting into it; consult a structural engineer if you’re unsure, since mid-century bathroom renovation projects frequently involve walls that carry roof or floor loads.
Removal Methods Ranked by Speed, Damage, and Cost

No single method works for every situation. Your substrate, your goal (salvage vs. demolish), and your timeline determine which approach makes sense.
Manual Pry Bar Extraction
This is the right method when historic tile preservation or vintage tile restoration matters — or when you’re working over corrugated sheetrock that can’t handle aggressive impact.
Start with bathroom tile grout removal. Use an oscillating multi-tool (the Fein MultiMaster or DeWalt DCS356 are reliable choices) or a manual grout saw to score and clear the grout joints completely. Removing grout first breaks the mechanical bond between tiles and gives your pry bar a clean entry point.
For pry bar tile extraction, hold the bar at a 15-to-20-degree angle against the wall — nearly flat, not perpendicular. Push inward and lever gently. Perpendicular prying cracks tiles and punches through substrate. Work from the bottom of each row upward, since gravity helps release the adhesive bond.
Best for: gentle tile removal preservation, salvage methods, and fragile substrates.
Sawzall and Power Tool Approach
The tile removal Sawzall technique is fast and effective for large-scale vintage bathroom tile demolition where tile condition doesn’t matter. Fit a reciprocating saw with a scraper blade or a bi-metal demolition blade, and work the blade flat behind the tile surface.
Here’s the problem: dust control in tile demolition becomes critical immediately. Old mastic adhesives and grout generate fine silica dust — and potentially asbestos fibers. Seal the room with plastic sheeting, run a HEPA air scrubber, and wear an N100 respirator, not a standard dust mask.
Best for: speed, full-room gut renovations, and situations where substrate removal is already planned.
Cost and Timeline Reality Check
| Scope | DIY Time Estimate | Key Hidden Costs |
|---|---|---|
| Single accent wall | 4–8 hours | Grout saw blade replacement, patching compound |
| Full bathroom (tile only) | 2–3 days | HEPA vacuum rental, debris disposal bags |
| Full bathroom (tile + substrate) | 3–5 days | Drywall replacement, backer board, disposal fees |
Tool rental typically runs $40–$80 per day for an oscillating tool or rotary hammer. Debris disposal — especially for plaster and mortar from metal lath tile removal — adds $150–$400 for a half-yard dumpster bag in most markets.
When to Stop and Call a Professional
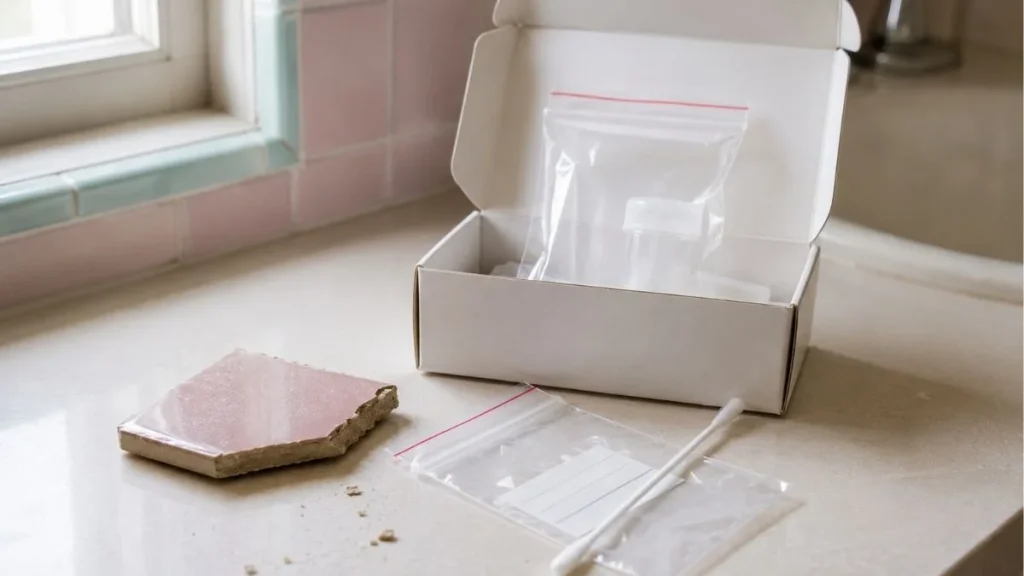
Some tile removal situations cross a line where DIY stops being cost-effective and starts being dangerous or legally problematic. Knowing that line before you start saves money and protects your health.
Asbestos Is Present or Suspected
Asbestos testing for old bathroom tile is non-negotiable before any demolition in a pre-1980 home. Send a sample to an accredited lab — the NVLAP (National Voluntary Laboratory Accreditation Program) maintains a directory of certified testing labs. Kits from companies like Pro-Lab or Zoro cost $30–$50 and return results in 3–5 business days.
If results come back positive, stop completely. According to EPA guidelines, asbestos-containing materials that are disturbed during vintage bathroom tile demolition release fibers that cause mesothelioma and asbestosis — both irreversible conditions. Licensed abatement contractors carry EPA and state certification, proper containment equipment, and legal disposal authorization that no DIYer can replicate safely.
Substrate Is Severely Compromised
Black mold, soft plaster, or fully saturated 1950s corrugated sheetrock means the substrate removal scope has grown beyond surface work. A contractor can assess whether the framing behind the wall has also been damaged — a critical distinction before any mid-century bathroom renovation proceeds.
Structural or Load-Bearing Concerns
If your bathroom wall runs perpendicular to floor joists or sits directly below a roof ridge, treat it as load-bearing until a licensed structural engineer says otherwise. Cutting into or destabilizing these walls during metal lath tile removal can compromise the home’s structural integrity.
Professional Cost Benchmarks
| Scope | Estimated Professional Cost |
|---|---|
| Asbestos abatement (single bathroom) | $1,500–$3,000 |
| Full tile and substrate removal | $800–$2,000 |
| Water damage assessment + remediation | $1,200–$4,500 |
These ranges vary by region, access difficulty, and disposal requirements — always get 3 itemized bids.
Frequently Asked Questions
Can you remove 1950s bathroom tile without breaking it?
Yes, but only with the manual pry bar method after fully clearing the grout joints with an oscillating tool. Tiles set in mastic adhesive release more cleanly than those in mortar beds — expect a 40–60% intact salvage rate even under ideal conditions.
What’s the difference between metal lath and drywall backing?
Metal lath is a wire mesh embedded in a thick plaster or mortar bed, common in homes built before the mid-1950s — it’s extremely hard and requires significant force to remove. Drywall backing is a gypsum panel with paper facing, introduced later, and it cuts and breaks far more easily but offers no structural strength in wet areas.
Do you need a permit for bathroom tile removal?
Tile removal alone typically does not require a permit in most U.S. jurisdictions. However, if removal reveals structural damage, triggers plumbing or electrical work, or involves asbestos abatement, permits become required — check with your local building department before starting any mid-century bathroom renovation that may expand in scope.
Read Also: Install Shower Pan Over Existing Tile Floor
Next Steps After Tile Comes Off
The substrate condition you find after tile removal determines every decision that follows — repair, replace, waterproof, or call a contractor — so inspect it before buying a single sheet of new backer board. Order an asbestos test kit today from Pro-Lab or a NVLAP-certified lab, confirm your substrate type using the corner-pry method, and only then price out cement backer board, RedGard waterproofing membrane, or drywall replacement for your specific situation.


