


The flat roof sitting above your attached garage is, in most cases, unused outdoor living space that can legally and structurally become a functional deck — and most homeowners never consider it.
The problem is that converting a garage roof to a deck touches three disciplines at once: structural engineering, waterproofing systems, and local building code compliance, and most DIY resources only cover one.
This guide gives you a complete feasibility and conversion roadmap — covering load calculations, membrane waterproofing, permit requirements, and real cost data — so you can make informed decisions before you hire a single contractor.
Is Your Garage Roof Suitable for Conversion?
Not every garage roof is a viable deck candidate. Two factors determine suitability before anything else: roof geometry and structural load capacity.
Does Your Roof Type Work?
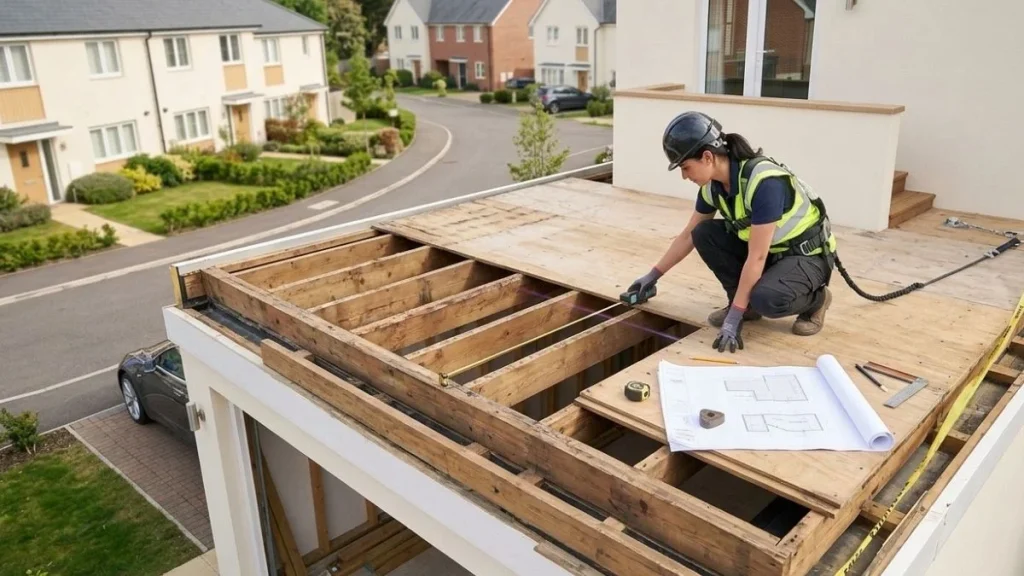
Flat and low-slope roofs — defined by the International Building Code (IBC) as roofs with a pitch of 3:12 or less — are the natural candidates for a flat roof garage deck conversion. The surface is accessible, the framing runs horizontally, and drainage systems like scuppers or interior drains can be integrated without major reconstruction.
Pitched roofs above 3:12 are a different problem entirely. Converting them requires either removing the existing roof structure and rebuilding a flat framing system, or constructing a separate elevated platform above the peak — both of which add significant cost and complexity.
For drainage, a finished rooftop deck needs a minimum slope of 1/8 inch per foot directing water toward drains or scuppers. Less than that and water pools, which accelerates membrane deterioration.
Can the Structure Handle the Load?
Rooftop deck structural requirements are more demanding than standard roof loads. The IBC requires a minimum 40 pounds per square foot (psf) live load for decks used as occupiable space, compared to the 20 psf live load typical for residential roofs. Your existing garage framing was almost certainly not designed to that standard.
A licensed structural engineer can assess your existing joists, beam spans, and connections for roughly $300–$600. That assessment determines whether reinforcement is needed — and skipping it is the single most common and costly mistake homeowners make on these projects.
Permits, Codes & Structural Requirements
Skipping permits on a rooftop deck conversion is not a calculated risk — it is a liability that can void your homeowner’s insurance, trigger fines, and force demolition at resale. Every U.S. jurisdiction requires building permits for rooftop deck projects.
Navigating the Permit Process
Rooftop deck permits and codes vary by municipality, but the application process follows a consistent pattern. You submit structural drawings, a site plan, and load calculations to your local building department. Most jurisdictions turn around residential permits in 2–6 weeks, though dense urban areas like Chicago or Los Angeles can take 8–12 weeks.
The IBC sets the minimum safety floor. Section 1015 requires guardrails on any walking surface more than 30 inches above grade, with a minimum height of 42 inches and balusters spaced no more than 4 inches apart. Snow load requirements are geographic — a garage in Denver must account for a ground snow load of 30 psf, while Portland, Maine designs to 60 psf. ASCE 7 (Minimum Design Loads for Buildings) is the referenced standard for these regional calculations.
Structural Reinforcement Requirements
Deck framing over a garage typically requires upsizing existing joists or sistering new ones alongside them. A common upgrade is moving from 2×8 joists at 16 inches on center to 2×10 or 2×12 members, depending on span length.
Ledger board connections to the existing garage wall must use structural lag screws or through-bolts — never nails — and require flashing to prevent water intrusion behind the connection point.
Engineer certification becomes legally required, not optional, when your project involves altering the primary structure, adding concentrated loads like a hot tub, or when your building department explicitly requests stamped drawings. In practice, most departments require stamped plans for any rooftop deck conversion.
Waterproofing: The Critical Layer
Waterproofing is where most garage roof deck conversions succeed or fail. A structural frame can be reinforced, but a failed membrane system means water in your garage ceiling — and that repair costs more than getting it right the first time.

Choosing the Right Membrane System
Three membrane systems dominate residential rooftop deck applications:
| Membrane | Cost per sq ft (installed) | Lifespan | Best For |
|---|---|---|---|
| EPDM (rubber) | $4–$8 | 20–30 years | Budget-conscious projects, simple geometries |
| TPO | $5–$10 | 15–25 years | Energy efficiency, heat-reflective surfaces |
| PVC | $6–$12 | 20–30 years | Chemical resistance, complex rooflines |
EPDM is the most widely used garage roof waterproofing membrane in North America due to its cost, flexibility, and proven track record. TPO reflects solar heat effectively, which matters in southern climates. PVC handles rooftop grease exposure better than the others, making it the preferred choice when a rooftop grill area is planned.
A complete waterproofing assembly runs deeper than the membrane alone. The full stack is: structural sheathing, a self-adhering underlayment, the primary membrane, and then a protection board before any decking material contacts the surface.
Managing Drainage and Slope
Rooftop deck drainage requires a minimum slope of 1/4 inch per foot to prevent ponding water. Ponding accelerates membrane degradation and adds unexpected dead load — one inch of standing water across a 400 square foot deck weighs over 2,000 pounds.
Scuppers or interior drains must connect to downspouts routed away from the foundation. In northern climates, EPDM and TPO both remain flexible at temperatures as low as -40°F, but lap seams and penetration flashings are freeze-thaw vulnerable and require inspection every spring.
Step-by-Step Conversion: Structural Build to Finish
A garage roof deck conversion follows a strict sequence — structural work first, waterproofing second, finishes last. Reversing any step means tearing out completed work.
Phase 1: Prep and Structural Reinforcement
Start with a full roof inspection before removing anything. Look for soft spots in the sheathing, deteriorated joists, and existing membrane condition. If the current membrane is intact and adhered, some contractors leave it as a secondary layer beneath the new system — confirm this with your engineer based on added dead load implications.
Once the structural assessment is complete, install sistered joists or new blocking to bring the frame to the required 40 psf live load capacity. Every new framing connection must follow a verified load path — meaning the added load transfers cleanly from deck surface to joist to beam to foundation wall. Your structural engineer’s stamped drawings define that path.
Phase 2: Waterproofing Application
Membrane installation requires a minimum 6-inch overlap at all seams, sealed with manufacturer-specified adhesive or heat welding for TPO and PVC systems. EPDM seams use contact cement and seam tape rated for the membrane thickness.
Before any decking goes down, conduct a flood test: dam the surface, fill it with 2 inches of water, and wait 24 hours. Any interior moisture means the membrane has failed and must be corrected.
Phase 3: Decking and Finishing
| Decking Material | Cost per sq ft | Maintenance | Lifespan |
|---|---|---|---|
| Composite (Trex, Fiberon) | $8–$15 | Low | 25–30 years |
| Pressure-treated lumber | $3–$6 | Moderate | 15–20 years |
| Cedar | $5–$10 | Moderate-high | 20–25 years |
Install decking on sleepers or pedestal supports — never fastened directly to the membrane. Railings must meet IBC Section 1015 standards: 42 inches high, posts anchored to the structural frame, not the membrane assembly. Build at least one access panel into the deck surface for drain inspection and membrane maintenance.
Does a Rooftop Deck Add Resale Value?
A rooftop deck adds measurable resale value, but the return depends heavily on your market, the quality of the build, and whether the project is permitted and code-compliant.
What the Numbers Show
According to Remodeling Magazine’s Cost vs. Value Report, a wood deck addition recoups approximately 50–65% of project cost at resale nationally. Rooftop decks on garage conversions tend to perform at the higher end of that range in urban and suburban markets where outdoor space is scarce — think dense neighborhoods in Seattle, Boston, or Chicago where yard space is limited and a private rooftop is a genuine differentiator.
A permitted, professionally built rooftop deck on an attached garage typically adds $15,000–$40,000 to appraised value depending on size, finish quality, and local demand. An unpermitted deck, by contrast, often appears as a liability on disclosure forms and can actually reduce buyer confidence or require expensive retrofitting before closing.
Buyer Perception and Market Fit
The demographic most likely to pay a premium for a garage rooftop deck is the same one most likely to build one: homeowners aged 35–55 in established neighborhoods who prioritize outdoor entertaining space over raw square footage. Real estate agents in high-density markets consistently report that usable outdoor space ranks among the top 3 buyer priorities.
Here’s the practical reality: a rooftop deck that is structurally sound, properly waterproofed, and built to code reads as a premium feature. One that shows visible membrane damage, lacks proper railings, or has no permit history reads as a future problem — and buyers price it accordingly.
Read Also: Guide to Building an Addition Roof Higher than Existing Roof
Your Garage Roof Conversion Starts with Structural Truth
Every failed rooftop deck traces back to one skipped step: verifying that the existing structure can actually carry the load before any other decision is made. Hire a licensed structural engineer for a feasibility assessment — at $300–$600, it is the lowest-cost, highest-leverage action you can take before committing to design, permits, or contractor bids. That single report tells you whether your project is a straightforward upgrade or a full structural rebuild, and it gives every contractor you consult an honest baseline to price from.


