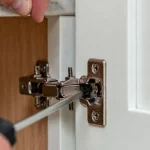
Are your cabinet handles crooked and driving you crazy every time you open a door? You’re not alone, and the good news is fixing them is easier than you think.
Crooked handles can make your kitchen or bathroom look messy, even if everything else is spotless. But don’t worry—you don’t need to call a handyman or spend a fortune to get them straight again. In this guide, you’ll discover simple, step-by-step tips that anyone can follow to fix crooked cabinet handles quickly and confidently.
Identify The Cause
Fixing crooked cabinet handles starts with identifying the root cause. Handles may appear slanted due to simple misalignment or deeper issues with screws or the cabinet itself. Pinpointing the exact problem saves time and effort during repair.
Check Handle Alignment
First, observe the handle’s position on the cabinet door. Sometimes, the handle is installed slightly off-center or at an angle. This causes the crooked look even if the screws are tight. Use a ruler or measuring tape to measure from the edges of the door to each end of the handle. Both sides should have equal distances.
- Place the ruler horizontally along the door surface.
- Measure distance from the handle’s top and bottom to the door edges.
- Mark the center point if the handle is off-center.
Also, a level tool helps check if the handle is straight. Lay it against the handle’s length. If the bubble is off-center, the handle is crooked. Small misalignments can be corrected by loosening screws and adjusting handle position.
Inspect Screws And Mounts
Loose or worn screws often cause handles to hang crooked. Check each screw holding the handle to the door. Tighten any loose screws with a screwdriver. If screws spin without tightening, they might be stripped or too short.
- Remove the handle carefully to inspect screws.
- Look for stripped threads or damaged screw heads.
- Replace screws that don’t hold firmly.
Mounting holes in the cabinet door can also wear out. If holes are too big, screws won’t hold tight, causing the handle to shift. Using wall anchors or wooden toothpicks with glue inside the hole can help tighten the grip.
Examine Cabinet Door
Sometimes the cause of crooked handles lies in the cabinet door itself. Warped or damaged doors make handles look uneven even when properly installed. Look for bends, cracks, or swelling in the door surface near the handle.
- Open and close the door to check for smooth movement.
- Check the door edges with a straightedge or level.
- Look for water damage or swelling, especially near the handle area.
If the door is warped, the handle will never sit flush. Minor warping might be fixed by adjusting hinges or sanding the door edge. Severe warping may require door replacement. Also, dirt or debris behind the handle can cause misalignment. Clean the area thoroughly before reinstalling the handle.
Gather Necessary Tools
Fixing crooked cabinet handles starts with having the right tools. Without proper tools, the job becomes harder and may cause more damage. Preparing your workspace and gathering necessary tools saves time and helps achieve a neat, professional look.
Screwdrivers And Drills
Screwdrivers and drills are the backbone for fixing cabinet handles. You need tools that fit screws well to avoid stripping or damaging them. A manual screwdriver offers control, especially for delicate adjustments. A drill speeds up work but requires care to prevent over-tightening.
- Phillips head screwdriver: Fits most cabinet handle screws with cross-shaped slots.
- Flathead screwdriver: Useful for screws with a single straight slot.
- Electric drill with screwdriver bits: Speeds up screw removal and installation.
- Adjustable torque setting: Helps prevent over-tightening and damaging the handle or cabinet.
Keep a small container nearby to hold removed screws. This avoids losing tiny parts during the process. Test your drill on a scrap piece of wood before working on cabinets to get a feel for speed and torque. Use gentle pressure and slow speed to keep screws aligned and avoid slipping. Proper screwdrivers and drills make handle adjustments faster and protect your cabinets from damage.
Measuring Tools
Measuring tools ensure your cabinet handles line up perfectly. Precise measurements avoid crooked handles and uneven gaps. Start with tools that help you measure distances and mark points where screws go.
- Tape measure: Flexible and easy for measuring handle placement and screw distances.
- Ruler or straightedge: Useful for smaller or more precise measurements.
- Caliper: Helps measure screw hole diameter or handle thickness if needed.
Use the tape measure to check the distance from the cabinet edge to each screw hole. Compare measurements on both sides to keep handles even. A ruler or straightedge helps verify handle length and placement. Keep measurements consistent across all cabinet doors for a uniform look.
Accurate measurements prevent guessing and reduce errors. This ensures handles align perfectly after adjustment.
Level And Marking Tools
Level and marking tools help position cabinet handles straight and mark screw holes clearly. A crooked handle looks untidy even if screws are tight.
- Spirit level: Checks horizontal or vertical alignment of handles.
- Laser level: Projects a straight line across multiple cabinets for precise alignment.
- Pencil or fine-tip marker: Marks screw hole positions clearly without damage.
- Masking tape: Protects cabinet surface when marking or drilling.
Place the spirit level along the handle to check if it is straight. Adjust until it reads level before tightening screws. A laser level works best for aligning handles across several cabinet doors at once. Mark screw holes lightly with a pencil to guide drilling or screwing. Use masking tape over the area before marking to avoid scratches and make pencil marks clearer.
Remove The Handle
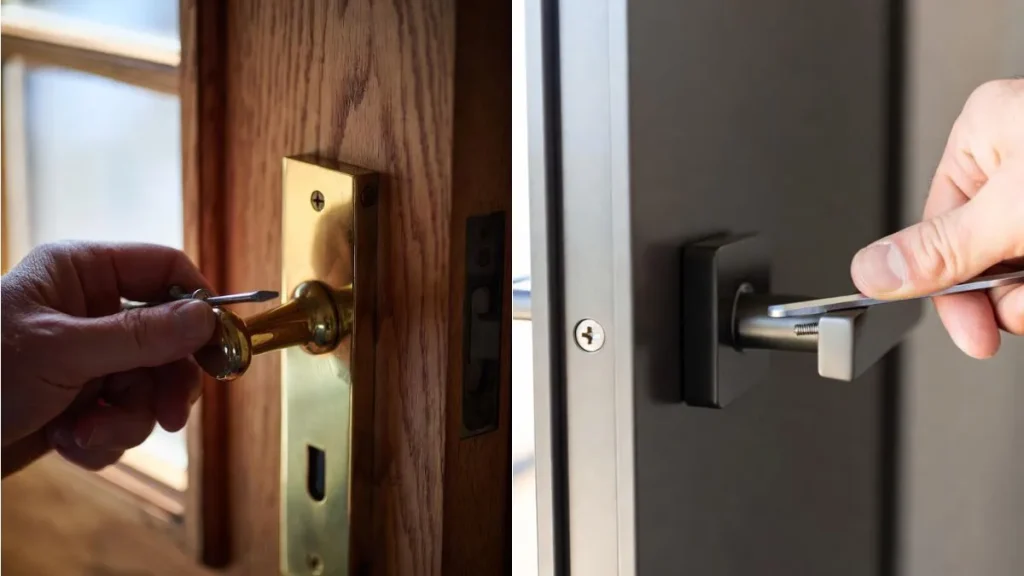
Removing a crooked cabinet handle is the first step to fixing it properly. Taking the handle off allows you to realign or replace it without damaging your cabinet. This process needs care to avoid scratching or weakening the cabinet door. Follow these steps to remove the handle safely and prepare for a perfect reinstallation.
Unscrew Carefully
Start by locating the screws holding the handle in place. These screws are usually on the inside of the cabinet door. Use a screwdriver that fits the screw heads to avoid stripping them.
- Choose the right screwdriver: A Phillips or flathead screwdriver, depending on the screw type.
- Turn slowly: Unscrew in a steady, counterclockwise motion to loosen.
- Keep screws safe: Place removed screws in a small container to avoid losing them.
If the screws are tight or stuck, apply gentle pressure without forcing. You can try a bit of lubricant like WD-40 on the screws. Let it sit for a few minutes before trying again.
| Tool | Use | Tip |
| Phillips screwdriver | Most common screws | Fits cross-shaped heads |
| Flathead screwdriver | Flat slot screws | Use if Phillips does not fit |
| Lubricant (optional) | Loosen stuck screws | Apply sparingly, wipe excess |
After removing screws, gently pull the handle away from the cabinet. Avoid bending or forcing it, as this can damage both the handle and door.
Protect Cabinet Surface
Protecting your cabinet surface during handle removal prevents scratches and dents. Use simple tools and materials to shield the finish while you work.
- Place a cloth: Lay a soft cloth or towel under the handle area.
- Use painter’s tape: Stick tape around the handle edges to protect paint or wood.
- Work slowly: Avoid sudden movements that could chip or scratch the surface.
Tools and hardware can slip during removal. Take these steps to minimize damage:
- Cover the cabinet door with a thin cloth or felt pad.
- Apply painter’s tape in a square or circle around the handle.
- Hold the screwdriver steady and aligned with the screw head.
- Keep your hands steady to reduce slips.
These precautions keep your cabinet looking good and make reinstalling the handle easier. A protected surface means less cleanup and no need for touch-ups after fixing the handle.
Fix Misaligned Holes
Fixing crooked cabinet handles often starts with addressing misaligned holes. When holes do not line up properly, handles will sit unevenly, causing frustration and an untidy look. Fixing these holes ensures a clean, professional finish. The process involves filling old holes and marking new drill points carefully. Taking these steps prevents further damage and guarantees the handle fits perfectly.
Fill Old Holes
Filling old holes is the first step to fix crooked cabinet handles. Leaving old holes open makes the handle unstable and weak. Use wood filler or putty designed for cabinets to fill these holes. This material hardens and creates a strong base for new screws.
Follow these steps to fill holes correctly:
- Clean the hole area from dust and debris.
- Apply wood filler with a putty knife, pressing it firmly into the hole.
- Smooth the surface to match the cabinet texture.
- Let the filler dry completely, usually for 1-2 hours.
- Sand the area lightly to make it flat and smooth.
Choose the right filler color. Match the cabinet finish for a seamless look. If the cabinet is painted, you can paint over the dried filler to hide it completely.
| Material | Drying Time | Best Use |
| Wood Filler | 1-2 hours | Solid wood cabinets |
| Wood Putty | Varies (check label) | Painted or stained surfaces |
| Epoxy Filler | 5-20 minutes | Quick repairs and strong hold |
Filling holes properly prevents screws from loosening. It also hides old damage, making the cabinet look new. Take time to do this step carefully.
Mark New Drill Points
After filling old holes, mark new drill points for the cabinet handles. Precise marking ensures handles sit straight and secure. Use a ruler or measuring tape for accuracy.
Follow this simple process:
- Measure the distance between the screw holes on the handle.
- Use a pencil to mark the new points on the cabinet door.
- Double-check measurements to avoid mistakes.
- Use a level to make sure marks are perfectly horizontal.
Consider using masking tape on the surface. It prevents the wood from splintering when drilling. Mark the points on the tape for a clearer guide.
Tools needed for marking new drill points:
- Measuring tape or ruler
- Level
- Masking tape
- Pencil or fine-tip marker
Correct marking saves time and effort. It ensures the new holes align perfectly with the handle. This step is key to fixing crooked cabinet handles.
Reattach The Handle

Reattaching a crooked cabinet handle is a simple but important step to make your cabinets look neat. A loose or misaligned handle can spoil the entire cabinet’s appearance. Follow these steps carefully to fix the handle and keep it straight and secure.
Align Handle Correctly
Start by placing the handle in the correct position. Proper alignment is key to avoid crooked handles. Measure the distance between the screw holes on the cabinet and the handle. Use a ruler or tape measure to check if both sides match perfectly.
- Hold the handle against the cabinet door.
- Check if the holes on the handle line up with the cabinet holes.
- Adjust the handle slightly until it sits straight and even.
Mark the screw hole spots lightly with a pencil if needed. This helps to keep the handle in place during reattachment. Use a level tool if available, to ensure the handle is horizontal. Even a small tilt can make the handle look crooked.
| Tip | Reason |
| Use a measuring tape | Ensures equal spacing on both sides |
| Mark holes with pencil | Keeps the handle steady while attaching |
| Check with a level | Prevents crooked placement |
Take your time in this step. Precise alignment makes the next steps easier and results in a neat finish.
Tighten Screws Properly
After aligning the handle, secure it by tightening the screws. Loose screws cause handles to tilt or fall off. Use the right screwdriver that fits the screws well. This avoids damaging the screw heads.
- Insert screws through the cabinet holes into the handle.
- Start tightening both screws slowly and evenly.
- Alternate between screws to keep pressure balanced.
Do not overtighten screws. Over-tightening can strip the screw holes or damage the handle. Tighten screws just enough to hold the handle firmly in place. Check the handle’s stability by gently pulling it after tightening.
| Common Mistake | Solution |
| Using wrong screwdriver | Use one that fits screw head perfectly |
| Tightening one screw fully first | Tighten screws alternately for balance |
| Over-tightening screws | Tighten gently to avoid damage |
Keep screws clean and free of dust before tightening. This ensures better grip and longer-lasting results. Tight screws keep the handle straight and make your cabinets look good for a long time.
Recommended: How to Fix Crooked Cabinet Doors
Prevent Future Crooked Handles

Fixing crooked cabinet handles is only part of the job. Preventing handles from becoming crooked again saves time and effort. Taking simple steps during installation and maintenance keeps your cabinets looking neat. A straight handle improves the cabinet’s overall look and makes opening doors easier. Careful planning and regular checks help maintain perfect alignment.
Use Templates For Drilling
Using templates is a smart way to keep cabinet handles straight. Templates guide where to drill holes, ensuring each handle sits evenly. You can buy ready-made templates or create your own with cardboard or thin wood.
How to use a drilling template:
- Place the template on the cabinet door.
- Align it with the edges or center of the door.
- Mark the drill points through the template holes.
- Remove the template and drill carefully at the marks.
- Attach the handle securely.
Regular Maintenance
Keeping cabinet handles straight requires regular checks. Handles can loosen or shift after repeated use. Tightening screws and cleaning around handles helps maintain their position.
Steps for regular maintenance:
- Check screws every 3-6 months.
- Tighten any loose screws with a screwdriver.
- Clean handles to remove dirt and grime.
- Inspect for damage or wear that affects alignment.
Regular care prevents handles from becoming loose and crooked. Create a simple maintenance schedule like this:
| Task | Frequency | Tools Needed |
| Tighten screws | Every 3 months | Screwdriver |
| Clean handles | Every month | Soft cloth, mild cleaner |
| Inspect for damage | Every 6 months | Visual check |
Maintaining cabinet handles is simple. Small efforts keep handles straight and cabinets looking good for years.
Conclusion
Fixing crooked cabinet handles is easier than it seems. A few simple steps can make a big difference. Tighten screws carefully and check alignment often. Use a level or measuring tape for accuracy. Take your time to avoid mistakes. Straight handles improve your kitchen’s look instantly.
Small repairs keep cabinets functional longer. You don’t need special tools or skills. Just follow these tips and enjoy neat, even handles every day. Simple fixes bring better style and comfort to your home.