There’s a certain excitement that comes with deciding to add a staircase to your basement or attic. You’ve got the vision, maybe even the tools — and you’re ready to get started. But then you pull up the subfloor plans, stare at those floor joists, and realize framing a stairwell opening is a whole different level of work than you expected.
This isn’t like installing a new light fixture or patching drywall. Framing a stairwell opening is a structural modification. It involves cutting through load-bearing floor joists, redistributing weight, and building a frame that has to hold up safely for decades. One wrong cut, one undersized header, or one skipped step can lead to sagging floors, failed inspections, or worse — a serious safety hazard for your family.
The good news? It absolutely can be a DIY project — if you know what you’re doing. This guide breaks down the entire process, highlights the most common and costly mistakes homeowners make, and gives you the practical knowledge to frame your stairwell opening correctly, safely, and up to code.
What Is a Stairwell Opening and Why Does Framing It Correctly Matter?
Understanding the Role of a Stairwell Opening
A stairwell opening is the hole cut into your floor system to allow a staircase to pass between floors. It sounds straightforward, but your floor isn’t just a flat surface — it’s a structural system made up of joists that carry the load of everything above them. When you cut into that system, you’re removing structural members that were doing an important job.
That’s why framing a stairwell opening correctly isn’t optional — it’s essential. The framing you install has to compensate for the joists you remove, redirect the load to the surrounding structure, and meet local building code requirements. Get it right, and you’ll have a solid, safe stairway for the life of your home. Get it wrong, and you’re looking at expensive structural repairs and potential safety risks.
The Real Cost of Getting It Wrong
Structural mistakes in stairwell framing don’t always show up immediately. Sometimes it takes months — or even years — before you notice the floor starting to bounce, the subfloor cracking, or the drywall around the opening developing stress cracks. By that point, repairs are far more expensive than doing it right the first time.
Beyond structural damage, improper framing can lead to failed building inspections, which may require you to tear out finished work. In worst-case scenarios, it can become a liability issue if you ever sell the home.
Before You Start — Planning and Permits Are Non-Negotiable

Skipping the planning phase is one of the fastest ways to turn a manageable project into an expensive nightmare. Before you pick up a saw, there are two things you must address: permits and load-bearing assessment.
Do You Need a Permit?
Yes — in almost every municipality, framing a stairwell opening requires a building permit. This isn’t bureaucratic red tape. Permits exist because stairwell framing is a structural modification, and inspectors are there to make sure the work is safe.
Pulling a permit protects you in several ways. It ensures the work is inspected and approved, which matters when you sell the home. It also gives you access to local code requirements specific to your area, so you’re not guessing at header sizes or joist hanger specs.
Contact your local building department before you start. The permit process is often simpler than homeowners expect, and the cost is minimal compared to the risk of unpermitted structural work.
How to Determine If Your Joists Are Load-Bearing
Not all floor joists carry equal structural responsibility, but in most cases, the joists you’ll be cutting into for a stairwell opening are load-bearing to some degree. Here’s a simple way to assess the situation:
- Joists that run perpendicular to a main beam or exterior wall typically carry significant load
- Joists that run parallel to a wall below are often less critical, but should still be evaluated
- Older homes frequently have non-standard joist sizing, which complicates load calculations
If you have any doubt — and especially if you’re cutting more than two joists — hire a structural engineer for a consultation. A one-time fee of $300–$600 for an engineering assessment can save you thousands in mistakes.
Measuring the Rough Opening
Standard stairwell rough openings typically run between 9 and 10 feet long and 36 to 48 inches wide, depending on your stair design. Always factor in:
- Minimum 36-inch width for the staircase
- Headroom clearance (minimum 80 inches per IRC code)
- Landing space at the top and bottom
- Wall thickness if the stairwell runs alongside a wall
Measure twice, cut once. Inaccurate measurements at this stage will affect every single step that follows.
Tools and Materials You’ll Need

| Category | Items Needed |
| Cutting Tools | Circular saw, reciprocating saw, jigsaw |
| Layout Tools | Chalk line, speed square, tape measure, level |
| Fastening Tools | Framing nail gun, drill/driver, hammer |
| Safety Gear | Safety glasses, dust mask, knee pads, work gloves |
| Lumber | 2×10 or 2×12 dimensional lumber (match existing joist size) |
| Hardware | Joist hangers, structural screws, LVL beam if needed |
For wider openings — anything over 6 feet — you’ll likely need LVL (Laminated Veneer Lumber) for your header beams. LVL is stronger and more dimensionally stable than standard lumber and is often required by code for longer spans.
How to Frame a Stairwell Opening — The Right Way

Mark the Opening on the Subfloor
Start by marking the exact location of your opening on the subfloor using chalk lines. Account for the stair direction, any walls adjacent to the opening, and the finished stair width. Transfer measurements from below using a plumb bob or laser level to make sure everything lines up accurately between floors.
Double-check your layout before making any cuts. A few minutes of careful measurement here prevents major problems later.
Build Temporary Support Walls First
This is the step most DIYers skip — and it’s the most dangerous mistake you can make. Before cutting a single joist, you must install temporary support walls on both sides of the opening to carry the load while the permanent framing is being installed.
Build your temporary walls using 2×4 studs spaced 16 inches on center, positioned about 2 feet away from the cutting line on each side. They need to run perpendicular to the joists and bear on solid structure below. Don’t rush this step. These walls are what stand between a clean project and a collapsed floor.
Cut the Floor Joists
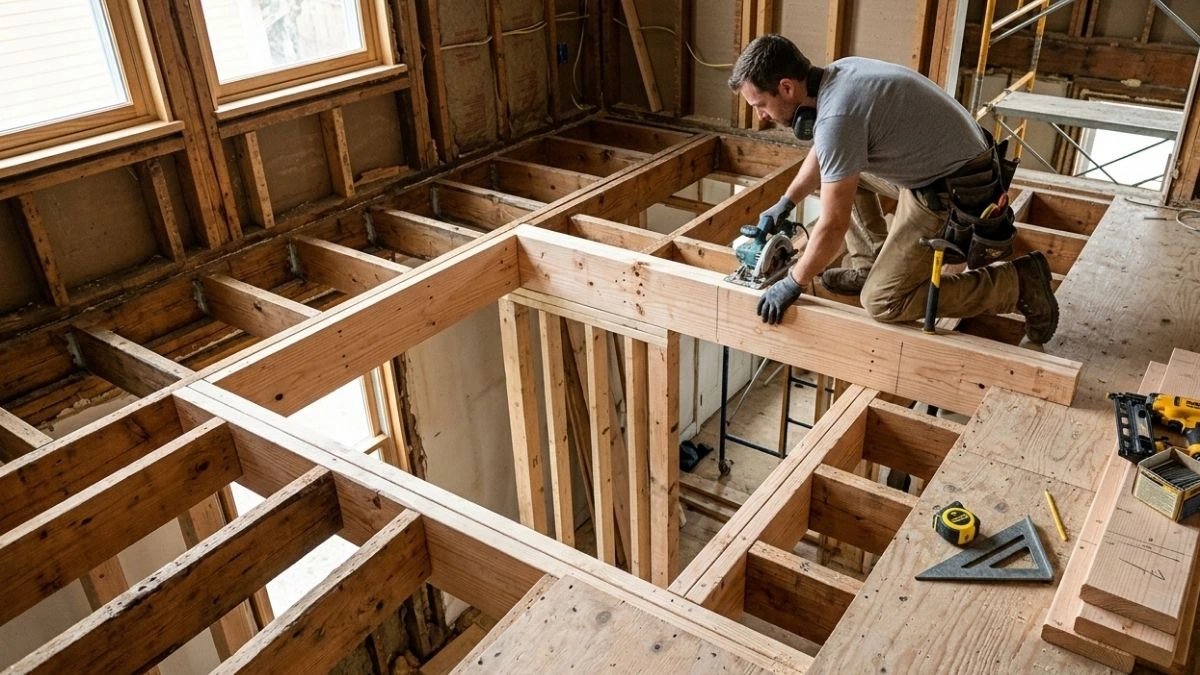
Once your temporary support walls are in place and confirmed solid, you can begin cutting the joists. Use a circular saw set to the exact depth of the joist to avoid cutting into anything below.
Cut in a deliberate sequence — work from the center of the opening outward. If you encounter any electrical wiring, plumbing, or HVAC runs during cutting, stop immediately and address them before continuing. Never cut through these systems without proper rerouting.
Install the Double Header Beams
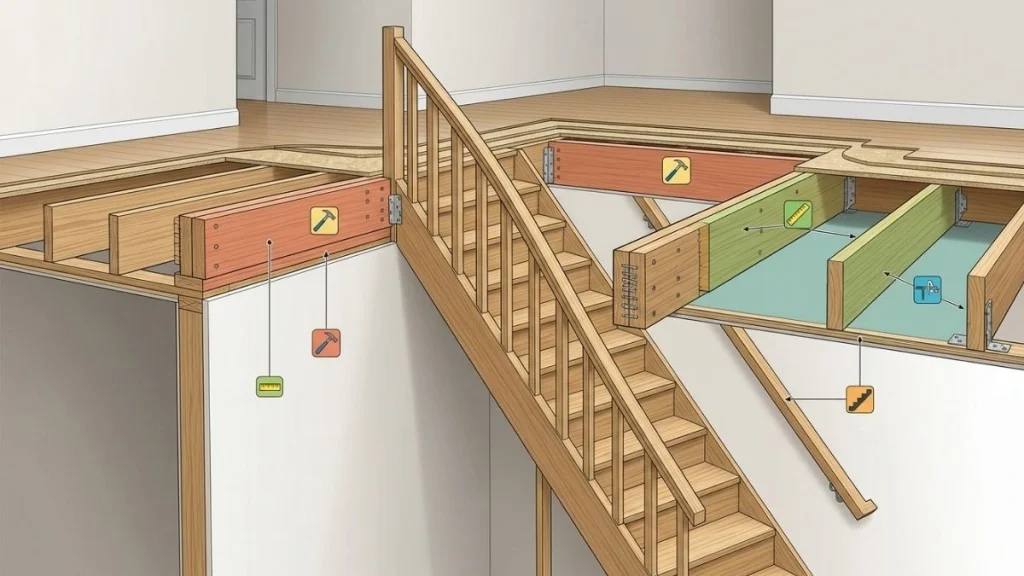
The header beam runs perpendicular to the joists at each end of the opening. Its job is to carry the load from the cut joists and transfer it to the trimmer joists on either side. For most residential stairwell openings, double headers — two pieces of lumber nailed together — are required.
Header sizing depends on the span of your opening. A general rule:
- Up to 4-foot span: doubled 2×8
- 4 to 6-foot span: doubled 2×10 or 2×12
- Over 6 feet: LVL beam (consult span tables or engineer)
Use joist hangers to attach the headers to the trimmer joists. Follow the manufacturer’s nailing schedule exactly — joist hangers are only as strong as their fasteners.
Install Trimmer and Tail Joists
Trimmer joists run along the sides of the opening, parallel to the existing joists. They support the ends of the header beams and need to be doubled for most stairwell openings. Nail them securely to the existing full-length joists beside them.
Tail joists are the shortened joists that run from the header to the existing framing at each end of the opening. Attach tail joists with joist hangers — never just toe-nail them. Use the correct hanger size for your joist dimensions and follow the nail pattern specified on the hanger packaging.
Check for Level, Square, and Plumb
Before removing your temporary support walls, verify that everything is level, square, and plumb. Use a 4-foot level on the headers and a framing square at each corner of the opening.
Small errors at this stage are easy to fix. After you’ve removed the temporary walls and moved on, they’re not.
Reinforce the Surrounding Structure
Add solid blocking between the joists adjacent to the opening for added rigidity. For longer joist spans, install bridging — either solid wood blocking or metal cross-bridging — to prevent the surrounding joists from twisting or deflecting over time. If any of the existing joists near the opening show signs of stress or damage, sister them with a new joist nailed alongside the old one.
The Biggest Mistakes DIYers Make When Framing a Stairwell Opening
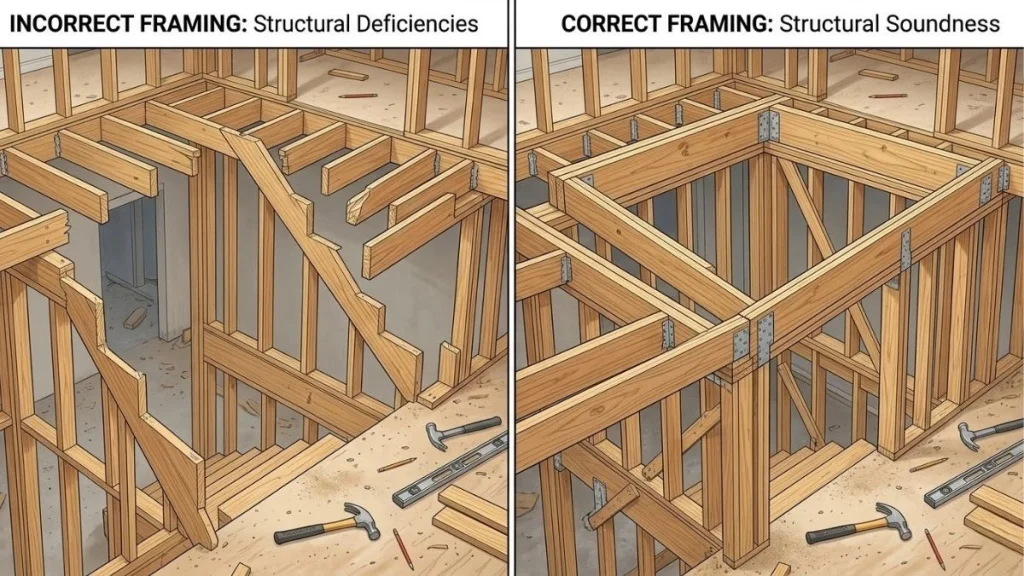
Most framing mistakes fall into predictable patterns. Here are the ones that show up most often — and cost the most to fix.
Skipping the temporary support wall is the single most dangerous mistake. Cutting into load-bearing joists without temporary support puts enormous stress on the surrounding structure immediately. This can cause the floor above to sag before you even finish cutting.
Using undersized headers is the second most common problem. A header that’s too small for the span will deflect over time, causing the floor to bounce and the opening to shift. Always consult IRC header span tables or your local code for the correct sizing.
Improper joist hanger installation is surprisingly common. Many DIYers face-nail hangers or use the wrong nail size. Joist hangers must be installed with the specific nails listed by the manufacturer — typically 10d or 16d structural nails, not drywall screws.
Ignoring headroom clearance causes real problems. The IRC requires a minimum of 80 inches of headroom along the stair path. This needs to be calculated from the rough opening down to the finished stair, accounting for flooring, subflooring, and ceiling finishes below. Discovering a headroom problem after framing is done is an expensive fix.
Not pulling a permit creates long-term liability. Unpermitted structural work can complicate home sales, void homeowner’s insurance claims, and require costly remediation if discovered during an appraisal.
Stairwell Framing Code Requirements You Can’t Ignore
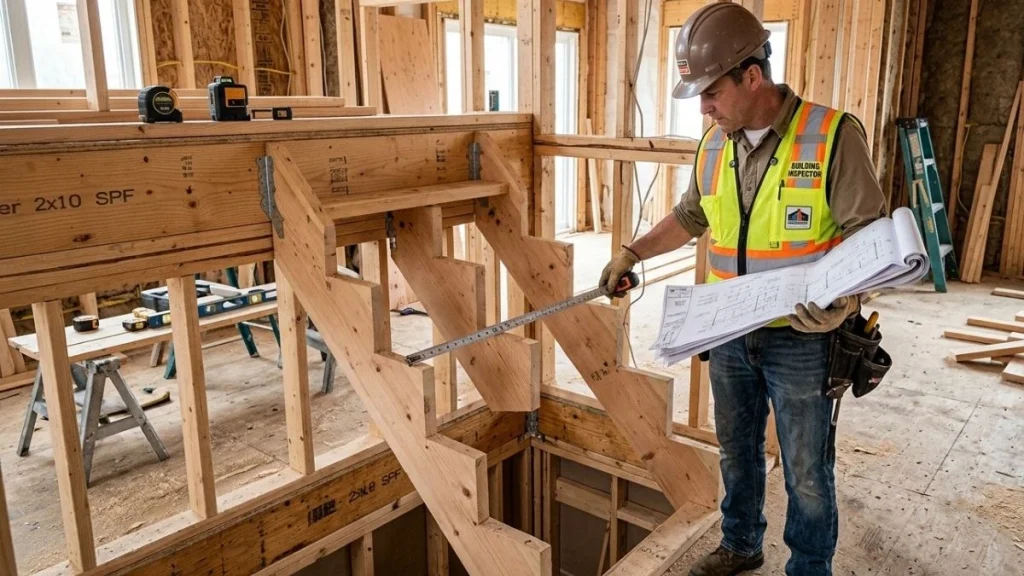
The International Residential Code (IRC) sets minimum standards for stairwell framing that most local codes adopt directly or build upon.
| Requirement | IRC Minimum Standard |
| Stair width (clear) | 36 inches |
| Headroom clearance | 80 inches (6 feet 8 inches) |
| Header sizing | Per span table (IRC Table R602.7) |
| Joist hanger fasteners | Per manufacturer specification |
| Permit requirement | Required in most jurisdictions |
Your local building department may have additional requirements, particularly in high-wind or seismic zones. Always verify with your local code office before finalizing your framing plan.
Read Also: Patching Hardwood Floor After Removing Wall
Conclusion
Framing a stairwell opening is one of those projects that separates capable DIYers from the rest. It’s not just about cutting a hole in the floor — it’s about understanding how your home’s structure works, respecting load paths, and building something that will hold up safely for decades.
The most important things to remember: pull your permit, build your temporary support walls before cutting anything, use correctly sized headers and doubled trimmer joists, and install your joist hangers with the right fasteners. These aren’t suggestions — they’re the difference between a project you’re proud of and one that costs you far more to fix later.
If you follow the steps in this guide and take the time to do it right, framing a stairwell opening is absolutely achievable as a DIY project. And when you’re done, you’ll have the satisfaction of knowing the work was done correctly — structurally sound, code-compliant, and built to last.