

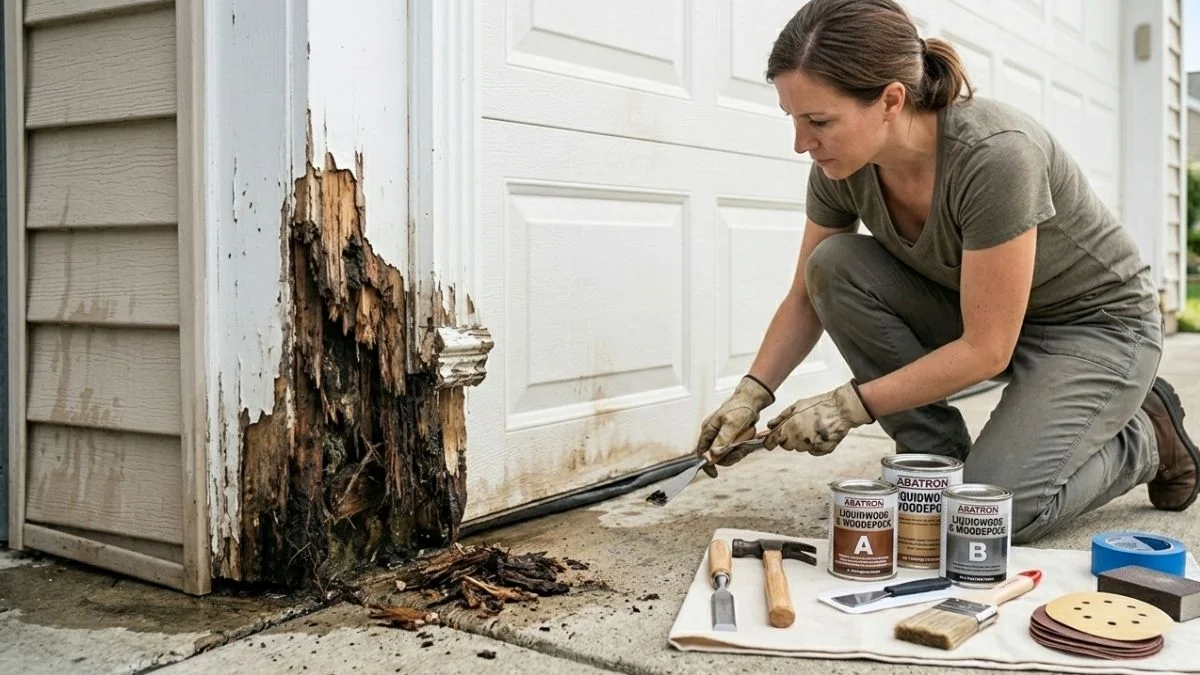
If you’ve noticed soft, crumbling, or discolored wood around your garage door, chances are you’re dealing with wood rot — and it’s more common than you think. A rotted garage door frame isn’t just an eyesore. Left untreated, it can compromise the structural integrity of your garage, create security vulnerabilities, and lead to costly repairs down the road.
The good news? Most rotted garage door frames can be repaired without hiring a contractor — as long as you catch the damage early. In this guide, you’ll learn how to assess the damage, gather the right tools, and fix a rotted garage door frame the right way, step by step.
What Causes a Garage Door Frame to Rot?
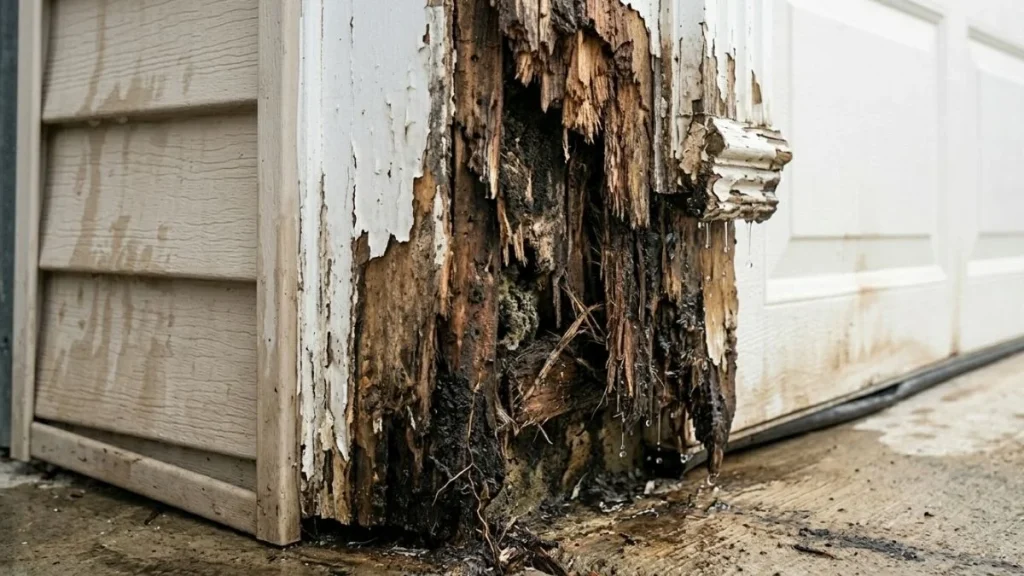
Common Reasons Wood Rot Develops Around Garage Doors
Wood rot doesn’t happen overnight. It’s the result of prolonged exposure to moisture, and it’s almost always preventable. Understanding what causes it is the first step toward fixing it — and making sure it doesn’t come back.
The most common culprit is water intrusion. Rain, melting snow, and ground moisture can seep into gaps between the door and frame, slowly saturating the wood over time. Once wood stays wet long enough, fungi begin to grow inside the fibers — and that’s where rot begins. Poor drainage around the garage foundation, clogged gutters overflowing near the roofline, and inadequate weatherstripping all contribute to the problem.
Another major factor is lack of protective coating. Wood that isn’t properly painted or sealed is essentially unprotected against the elements. Paint and sealant act as a moisture barrier. When that barrier breaks down — through peeling, cracking, or simply aging — water finds its way in.
Insects also play a role. Termites and carpenter ants are especially destructive around garage door frames because they’re attracted to damp, softening wood. In many cases, insect activity accelerates the rot and makes the damage far worse than moisture alone would cause.
Finally, age is a factor you can’t ignore. Older garage door frames made from untreated pine or softwood are simply more vulnerable. As wood ages, it becomes more porous, making it easier for water to penetrate even when a coat of paint is present.
How to Tell If Your Garage Door Frame Has Rot
Before you start any repair, you need to know how bad the damage actually is. Here are the most reliable signs of wood rot around a garage door frame:
- Soft or spongy wood — Press a flathead screwdriver firmly into the frame. Healthy wood resists the pressure. If the screwdriver sinks in easily, the wood is rotted.
- Discoloration or dark staining — Brown, black, or gray patches on the wood surface are classic signs of moisture damage and fungal growth.
- Flaking or peeling paint — Paint that won’t stay adhered to the wood usually means the wood beneath is wet or already decomposing.
- Visible cracks and gaps — Wood that is splitting, warping, or pulling away from the wall is structurally compromised.
- Musty or earthy smell — Fungal rot has a distinct odor. If the area around your garage door smells musty even when dry, rot is likely present.
- Door alignment issues — If your garage door no longer closes evenly against the frame, a warped or rotted frame may be the cause.
Should You Repair or Replace the Garage Door Frame?

This is the most important decision you’ll make before touching anything. Not every rotted frame needs full replacement — but not every damaged frame can be saved with a patch job either.
When a Repair Is Enough
A repair is a perfectly good solution when the rot is limited in scope. If the damage affects less than 30% of the frame’s surface area and the wood beneath the damaged layer is still structurally sound, epoxy filler and consolidant can restore the frame to full strength. Repairs are also appropriate when there’s no sign of rot spreading to the surrounding wall studs or interior framing — those are areas where damage becomes significantly more expensive to fix.
When Full Replacement Is the Better Option
If the rot has penetrated deep into the frame and reached the structural core of the wood, a surface repair won’t hold. Similarly, if the rot has spread to adjacent wall studs, the scope of the repair goes well beyond what epoxy filler can address. In these cases, full replacement with pressure-treated lumber is the right call. Another practical consideration: if the cost of materials and labor for a repair approaches the cost of simply replacing the frame, replacement often makes more long-term financial sense.
Cost Comparison — Repair vs. Replace
| Option | DIY Cost | Professional Cost |
| Epoxy Patch Repair | $50 – $150 | $200 – $500 |
| Partial Section Replacement | $80 – $200 | $300 – $600 |
| Full Frame Replacement | $150 – $400 | $600 – $1,200+ |
How to Fix a Rotted Garage Door Frame — Step by Step
Assess the Full Extent of the Damage
Don’t assume the rot is limited to what you can see on the surface. Use your flathead screwdriver to probe every inch of the frame — top, sides, and corners. Mark all damaged sections with painter’s tape so you have a clear picture of the full repair area. While you’re at it, check the wall studs directly behind the frame. If they feel soft or crumbly, you’re looking at a structural repair that may need a professional.
Prepare the Work Area
Lay a drop cloth on the ground to catch wood debris and epoxy drips. Put on gloves, safety glasses, and a dust mask before you start removing any rotted material. If the garage door opener is mounted near the area you’re working on, disconnect it from power to avoid any accidental activation while you’re working.
Remove All Rotted Wood
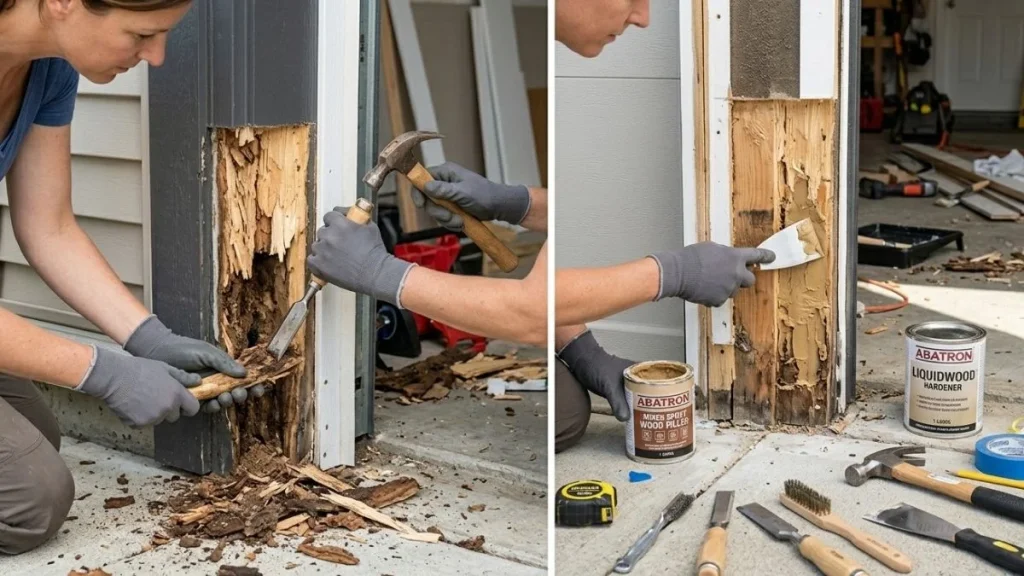
This is the most critical step. Use a chisel, oscillating multi-tool, or even a stiff wire brush to remove every bit of rotted wood from the damaged area. Don’t be tempted to leave soft spots in place — any rot you leave behind will continue to spread beneath the repair and eventually cause it to fail.
Cut or dig back to clean, firm, solid wood on all sides. The goal is a repair zone with hard, healthy wood edges all around. Once all the rot is out, brush or vacuum away all dust and loose debris from the cavity.
Apply Epoxy Wood Consolidant
Epoxy consolidant is a liquid hardener that soaks into the remaining wood and chemically strengthens it. This step is what separates a repair that lasts 15 years from one that starts failing in two.
Using a paintbrush, apply the consolidant generously to all exposed wood surfaces inside the repair area. Let it soak in fully. Apply a second coat to any areas that absorbed the first coat quickly. Allow it to cure according to the manufacturer’s instructions — typically 4 to 6 hours, though conditions like temperature and humidity can affect this. The wood should feel hard and solid to the touch before you move on.
Fill the Damaged Area With Epoxy Wood Filler
Mix your two-part epoxy wood filler according to the package directions. Work in small batches because epoxy sets quickly once mixed — usually within 20 to 30 minutes depending on temperature.
Press the filler firmly into the repair area using a putty knife, making sure it bonds fully to the consolidant-treated wood beneath. Slightly overfill each void — you’ll sand it back down to the correct profile later. While the filler is still workable, roughly shape it to match the original contour of the frame. Allow it to cure fully before sanding (usually 2 to 6 hours).
Sand and Shape the Repaired Area
Once the filler has hardened completely, start sanding with medium-grit sandpaper (80 grit) to shape the repaired area back to its original profile. Blend the edges carefully so the repair sits flush with the surrounding wood. Switch to fine-grit sandpaper (150 grit) to smooth the surface for painting. Check the repaired area for any low spots or pinholes, and apply a thin second coat of filler where needed. Finish by wiping the surface clean with a tack cloth.
Prime and Paint the Frame
Apply one coat of exterior wood primer to the repaired area and allow it to dry completely. Primer is non-negotiable here — it seals the epoxy, helps the topcoat bond properly, and provides an extra layer of moisture protection.
Once the primer is dry, apply two coats of exterior paint matched to your existing trim color. Feather the edges of each coat to blend the repaired section seamlessly with the surrounding paint. Give each coat adequate drying time — rushing this step leads to uneven finish and poor adhesion.
Seal and Weatherproof the Entire Frame
Load your caulking gun with weatherproof exterior caulk and run a clean, continuous bead along every joint and seam in the frame — especially where the frame meets the garage wall and where the trim pieces join at the corners. Smooth the caulk with a wet finger for a clean, professional finish.
While you’re at it, inspect the door’s weatherstripping. If it’s cracked, compressed, or pulling away, replace it now. Fresh weatherstripping is your first line of defense against future moisture getting behind the frame.
How to Prevent Garage Door Frame Rot From Coming Back
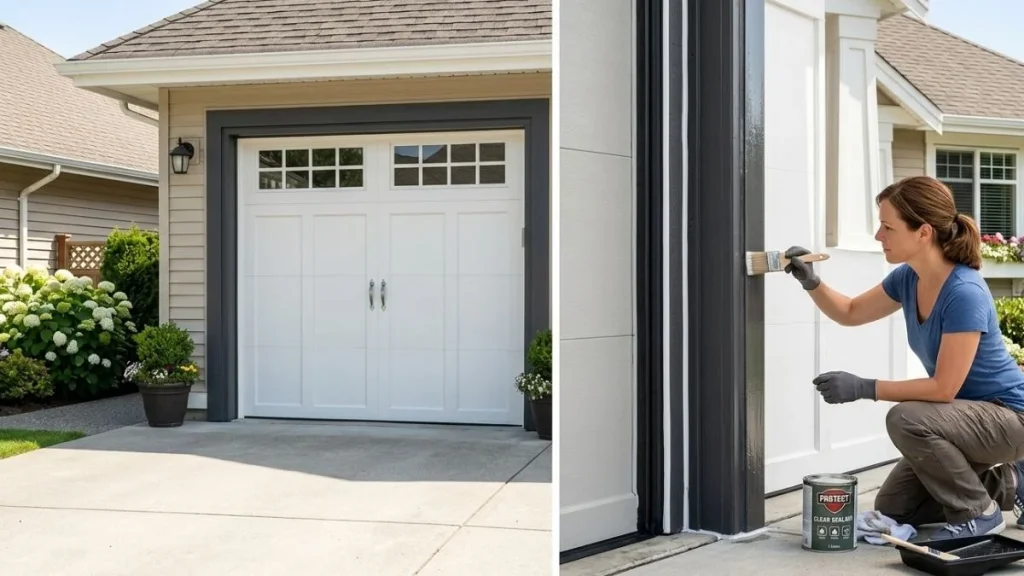
Fixing the rot is only half the job. The other half is making sure it doesn’t happen again.
Inspect your garage door frame every spring and fall. Look for peeling paint, soft spots, and gaps in the caulking. Catching problems early means a quick touch-up instead of a full repair. Repaint or reseal the frame every two to three years — exterior paint breaks down over time, and a fresh coat is your best and cheapest moisture barrier.
Keep your gutters clean and properly directed. Overflowing gutters dump large amounts of water directly onto the areas most vulnerable to rot. Also make sure the grading around your garage slopes away from the foundation so pooling water drains away instead of soaking into the structure.
If you want a long-term upgrade, consider replacing wooden trim boards with PVC or composite alternatives. These materials look identical to wood once painted but are completely immune to rot, insects, and moisture — meaning you’ll never have to deal with this repair again.
Read Also: Cinder Block Garage Repair
Conclusion
A rotted garage door frame is one of those repairs that sounds intimidating but is actually very manageable when you break it down into steps. The key is acting early — before the rot spreads to structural framing — and using the right materials for the job. Epoxy consolidant and wood filler, when applied correctly, create a repair that’s every bit as strong as the original wood.
Walk through the steps: assess the damage, remove all the rot, apply consolidant, fill, sand, prime, paint, and seal. Do it right the first time, and your garage door frame will look great and stay solid for years to come. And with a little seasonal maintenance, you won’t have to worry about dealing with this repair again anytime soon.


