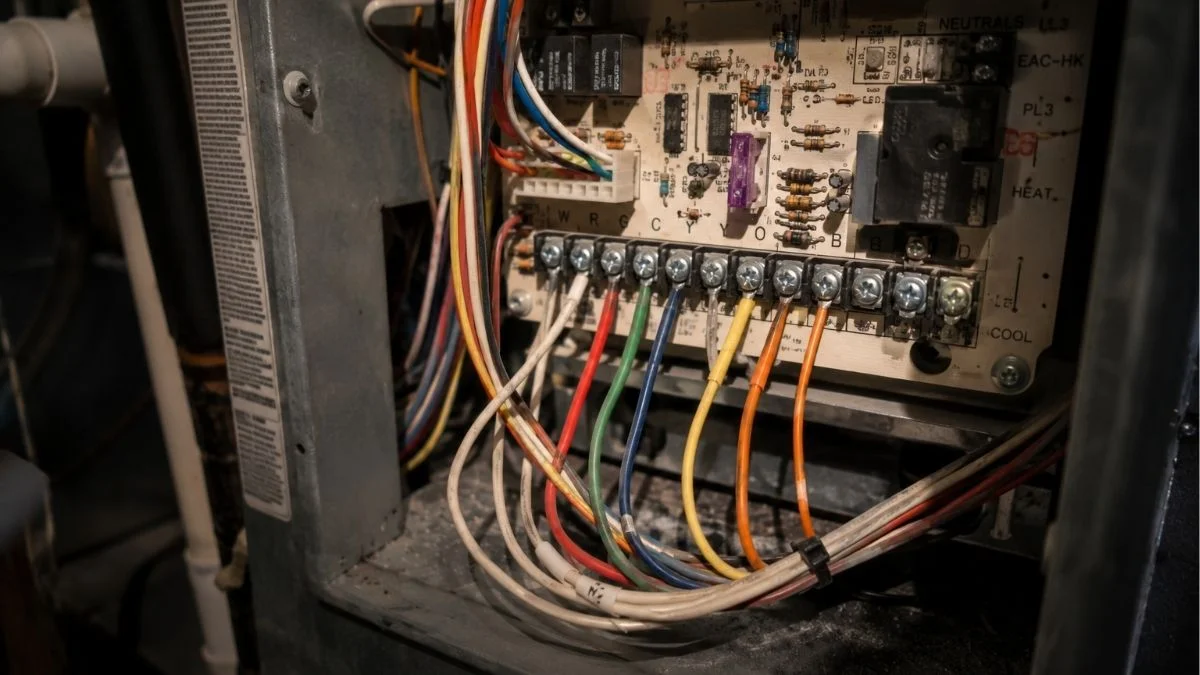
A failed thermostat can leave your home without cooling or heating in hours — and knowing how to bypass thermostat on air conditioner wiring is the fastest way to restore operation while you diagnose the real problem.
The pain point is immediate: your thermostat is dead, locked, or malfunctioning, and you need your system running now without waiting for a replacement part or a service appointment.
This guide walks you through safe, wire-based bypass methods for standard 24V AC systems — covering terminal functions, brand-specific wiring on Honeywell, Carrier, and Trane units, and the exact point where a temporary fix becomes a job for a licensed HVAC technician.
Thermostat Terminal Basics for Bypassing
Before you touch a single wire, you need to understand what each terminal actually does. Bypassing thermostat wiring without this knowledge risks damaging your control board — a component that costs $200–$600 to replace on systems like Carrier or Trane.
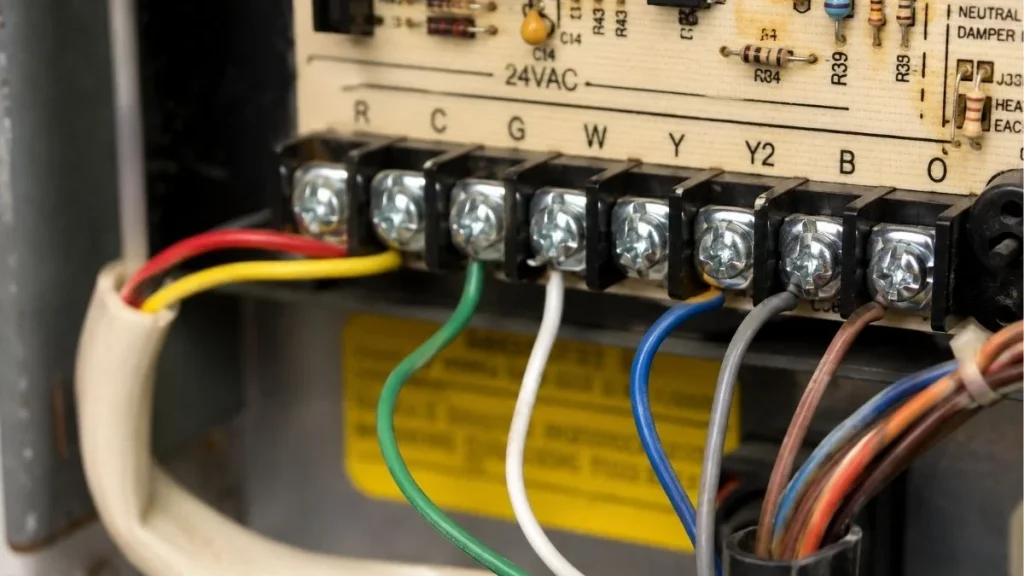
What Each Wire Does
Every standard 24V low-voltage thermostat system uses the same terminal logic, regardless of brand.
| Terminal | Function | Wire Color (typical) |
|---|---|---|
| R | 24V power supply from transformer | Red |
| Y | Compressor activation signal | Yellow |
| G | Fan motor call signal | Green |
| W | Furnace/heat call signal | White |
| C | Common return path (completes the circuit) | Blue or Black |
The R terminal powers the entire control circuit. Without it energized, nothing runs. The Y terminal tells the compressor to start cooling. The G terminal runs the air handler fan independently. Jumping R to Y and G simultaneously is the core of any emergency thermostat workaround for cooling.
Single-Stage vs. Multi-Stage and Heat Pump Wiring
Single-stage cooling systems use only three connections for manual operation: R, Y, and G. That covers the majority of residential window and split systems.
Multi-stage systems add Y2 and W2 terminals for second-stage compressor and heat calls. Heat pumps complicate this further — they use an O or B terminal to control the reversing valve, which switches the system between heating and cooling modes. Jumping wires on a heat pump without accounting for the reversing valve can lock the system in the wrong mode or trigger a defrost cycle fault.
For heat pump bypass testing, confirm whether your system uses O (energized in cool, common on Carrier and Trane) or B (energized in heat, common on Rheem) before connecting AC wires without the thermostat in the circuit.
Bypassing for Air Conditioning: Step-by-Step Wiring
This is the core procedure for emergency thermostat workaround on a standard central AC system. Follow each step in order — skipping the safety checks is the most common cause of control board damage.
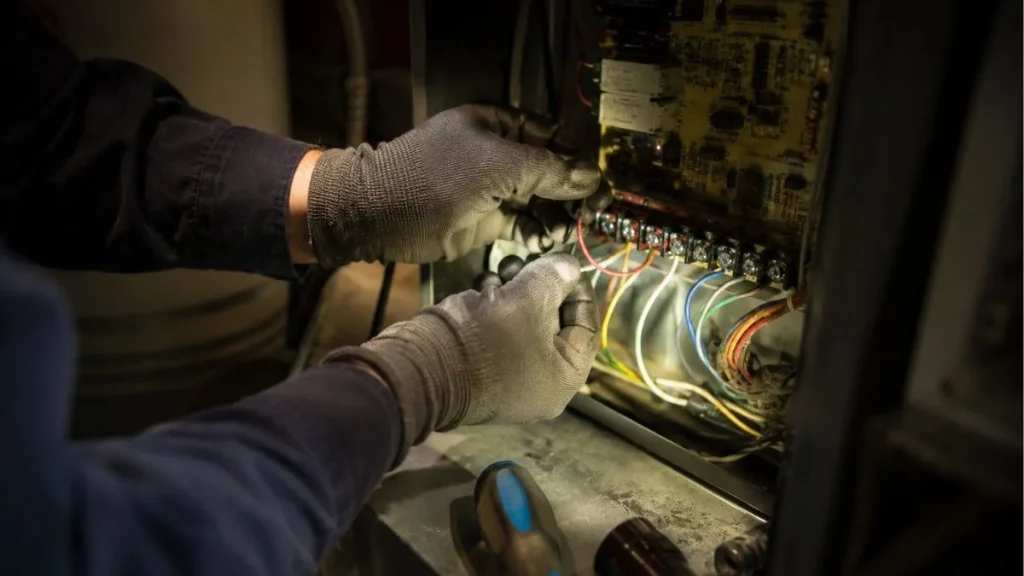
Cooling Wire Connections
Step 1: Power Down First
Switch off the system at the thermostat, then cut power at the air handler breaker. Never jump thermostat wires for cooling while the system is live.
Step 2: Access the Control Board
Remove the air handler panel to expose the low-voltage terminal strip. On most Honeywell, Carrier, and Lennox systems, the R, Y, and G terminals are clearly labeled on the control board itself.
Step 3: Make the Jumper Connections
Use a short piece of 18-gauge thermostat wire or a dedicated jumper wire — never solder a temporary connection.
- R to Y: triggers compressor activation
- R to G: triggers fan operation
- Both jumps together: full cooling mode — compressor runs, fan circulates air
Connecting R to G alone runs the fan without engaging the compressor. That cools nothing.
Step 4: Restore Power and Test
Turn the breaker back on and observe. The compressor and fan should start within 30 seconds.
Safety Precautions and Equipment Protection
Capacitors in the outdoor condenser unit can hold a charge of 370–440 volts even after power is cut. Never touch capacitor terminals without discharging them first using an insulated resistor tool.
A blown 3-amp or 5-amp control board fuse is the most common result of an incorrect jump. Locate the fuse on the control board before testing — replacing it costs under $5, replacing the board does not.
Troubleshooting Non-Responsive Systems
If the system won’t activate despite correct R-Y-G jumps, work through these possibilities in order:
- Tripped breaker or blown fuse — check both the air handler and outdoor disconnect
- Compressor lockout timer — wait at least 5 minutes between restart attempts; most compressors have a built-in delay to prevent pressure damage
- Capacitor failure — a humming outdoor unit that won’t start points to a failed run or start capacitor, not a wiring issue
- Contactor failure — if power reaches the outdoor unit but the compressor still won’t run, the contactor (the high-voltage switching relay) may be faulty
Correct jumps with no response means the thermostat was not the problem. At that point, further diagnosis requires a multimeter and, in most cases, a licensed technician.
Bypassing for Heating: Furnace and Heat Pump Differences
Heating bypass follows the same low-voltage wiring logic as cooling, but the consequences of a wrong connection are different — and on heat pump systems, significantly more complex.

Furnace Bypass: R to W Connection
For a gas or electric furnace, manual operation requires just 2 terminal connections:
- R to W: sends the heat call signal, activating the burner or electric heating elements
- R to G: runs the air handler fan independently if needed
On most systems, the furnace initiates its own fan sequence after the heat exchanger warms up — typically 30–60 seconds after the W call. Adding an R-to-G jump forces immediate fan operation, which can blow cold air for the first minute. In most emergency furnace operation scenarios, jumping R to W alone is sufficient.
Heat Pump Bypass: Reversing Valve Complications
Heat pump wiring requires one additional decision before any bypass attempt: identifying your O/B terminal configuration.
- O terminal (Carrier, Trane, Lennox): energized during cooling mode
- B terminal (Rheem, Ruud): energized during heating mode
For heating on an O-type system, jump R to W without energizing O. Energizing O while calling for heat sends the reversing valve the wrong signal, locking the system into cooling mode regardless of outdoor temperature.
Heat pump bypass also carries defrost cycle risk. Without thermostat control managing defrost intervals, the outdoor coil can ice over within 1–2 hours in temperatures below 40°F.
Operating Duration Limits
Bypass operation — on any system type — should not exceed 2–4 hours continuously. Without thermostat-controlled cycling, compressors run without the normal rest periods that prevent thermal overload. Short-cycling risk increases sharply if you cut and restore power repeatedly during testing. Allow a minimum 5-minute off period between any manual restart attempts.
When Bypass Is Temporary vs. When to Replace
A wire bypass is a diagnostic tool and an emergency workaround — not a long-term HVAC manual operation method. Knowing when to stop bypassing and start replacing saves you from turning a $30 thermostat problem into a $600 control board replacement.
Signs the Thermostat Needs Replacement
If your system responds correctly when you jump the R, Y, and G terminals directly at the control board, the thermostat itself is confirmed faulty. That’s the clearest diagnostic outcome of a bypass test.
Replace the thermostat — not just the wiring — when you see any of these conditions:
- Display is blank or unresponsive despite fresh batteries and confirmed 24V power at the R terminal
- System short-cycles randomly (turns on and off in under 5 minutes) with no wiring fault found
- Settings change but the system doesn’t respond — fan operation, compressor activation, or heat calls all fail consistently
- Physical damage: cracked housing, burn marks, or corrosion on low-voltage terminals
A basic single-stage replacement thermostat like the Honeywell Home T6 Pro costs $30–$50 and installs in under 30 minutes for most homeowners.
Warranty and Liability Implications
Here’s what most DIY guides skip entirely. Bypassing thermostat wiring on a system still under manufacturer warranty can void that warranty — particularly on Carrier, Trane, and Lennox units, which require licensed installation and service documentation to maintain coverage.
Homeowner’s insurance policies vary, but DIY electrical work that causes secondary equipment damage — a burned control board, a failed compressor — may not be covered if the insurer determines the damage resulted from unauthorized modifications.
The practical boundary is this: bypass for testing and short-term emergency operation only. If the system needs to run bypassed for more than one session, the correct next step is a thermostat replacement or a licensed HVAC technician, not continued wire jumping.
Brand-Specific Bypass Notes
Terminal labels are standardized across the HVAC industry, but physical layout, fuse placement, and control board behavior differ enough between manufacturers that a few brand-specific details can save you significant troubleshooting time.
Honeywell Systems
Honeywell air handlers and furnace control boards use the standard R/Y/G/W/C terminal arrangement with clearly printed labels directly on the board. The 3-amp control fuse is typically located within 2 inches of the low-voltage terminal strip. Honeywell systems are the most straightforward for thermostat bypass testing — terminal access is open, labels are consistent, and the boards respond predictably to direct wire jumps.
Carrier and Lennox Systems
Carrier and Lennox control boards follow the same terminal logic but vary in fuse placement. On Carrier systems, the fuse often sits on the opposite side of the board from the terminal strip — check both sides before assuming there isn’t one. Lennox furnace control boards sometimes use a separate low-voltage harness connector rather than individual screw terminals, which means you may need to back-probe the connector rather than jump at the board directly.
Smart Thermostats: Ecobee and Nest
Bypassing a system previously controlled by an Ecobee or Nest requires one additional step after restoring normal operation: a full power reset of the thermostat. Both platforms log compressor activation and fan operation data continuously. A direct wire bypass without a subsequent reset can trigger equipment alerts or cause the thermostat to misread system state, resulting in lockout behavior or incorrect staging calls.
Furnace Control Boards vs. AC-Only Systems
Furnace control boards manage more functions than AC-only air handler boards — draft inducer timing, ignition sequencing, and limit switch monitoring all run through the same board. This means an incorrect jump on a furnace board carries higher fault risk than on a standalone AC system. On furnace boards, always confirm the W terminal location independently rather than assuming it matches the position on an AC control board.
You May Like Also: How to Wire Air Handler With Heat Strips
When Bypass Isn’t the Answer
A wire bypass confirms whether your thermostat is the problem — if the system still won’t run with correct R-Y-G jumps applied directly at the control board, the fault lies deeper than any DIY thermostat workaround can reach. At that point, the next step is a licensed HVAC technician with a manifold gauge set and multimeter, not another jump wire.
If you’re a renter locked out of thermostat controls, contact your landlord in writing and request emergency HVAC service — that creates a documented repair request and protects your rights under most residential lease agreements.