Water seeping through a garage wall is rarely a random event — it follows predictable patterns tied to hydrostatic pressure, drainage failure, or material breakdown.
Most homeowners notice the water but can’t pinpoint the source, and guessing wrong means spending money on a fix that solves nothing while the real damage quietly continues.
This guide walks you through all 5 causes with specific, actionable fixes so you can accurately diagnose your situation before deciding whether to grab a caulk gun or call a waterproofing contractor.
What’s Causing Water to Seep Into Your Garage?
Water doesn’t pass through a garage wall randomly — each cause has a distinct fingerprint. Matching the symptom to the source is the fastest way to avoid wasted repairs.

Hydrostatic Pressure
Hydrostatic pressure is the force water exerts against a surface when it has nowhere else to go. After heavy rainfall, saturated soil pushes that pressure directly against your garage foundation wall. The higher your local water table, the worse this gets — even without recent rain. You’ll typically see water weeping through the lower third of the wall or pooling at the wall-floor junction.
Porous Concrete and Failed Waterproofing
Concrete is not naturally waterproof. It contains microscopic pores that absorb moisture under pressure. Over time, original waterproofing coatings — products like DRYLOK or Xypex — crack, peel, or simply wear out, leaving bare concrete exposed. The result is a damp wall that looks like sweating rather than active seepage.
Foundation Cracks
Hairline cracks are common in cured concrete and often harmless at first. The problem starts when water pressure against the garage wall forces water through those cracks and widens them over time. Cracks wider than 1/4 inch, horizontal cracks, or cracks with displacement on one side can indicate structural movement and warrant a professional evaluation.
Poor Exterior Grading
The ground around your garage should slope away at least 1 inch per foot for the first 6 feet. When soil settles or was never graded correctly, water flows toward the foundation instead of away, concentrating moisture against the wall.
Sill Plate and Wall-Floor Junction Gaps
The sill plate — the wood framing member sitting directly on your foundation — is a common entry point. Gaps between the sill plate and concrete, or along the wall-floor junction, let water in even when the wall itself is sound. Missing or degraded sealant here is an easy fix that homeowners often overlook entirely.
Finding Where Water Actually Enters
Fixing garage wall seepage without locating the exact entry point is like patching a roof without finding the leak — you’ll spend money and the water will still find a way in. A 20-minute inspection covers most cases.

Visual Inspection First
Start inside the garage after a rain event, or simulate one with a garden hose run along the exterior wall for 10 minutes. Look for 3 specific markers:
- Water stains — yellowish-brown discoloration indicating repeated moisture cycles
- Efflorescence — white chalky deposits left behind when water carries minerals through concrete and evaporates on the surface
- Wet patches or active drips — concentrated seepage points to a crack or gap; generalized dampness across a wide wall section points to porous concrete or failed waterproofing
The pattern tells you a lot. A single wet streak running down from one spot suggests a foundation crack above it. A uniformly damp wall after every rain suggests hydrostatic pressure working through degraded concrete.
Targeted Checks
Once you have a general area, get specific.
Wall-floor junction: Run your hand along the base where the wall meets the floor. Gaps, soft sealant, or visible cracks here are common entry points for water pressure against the garage wall.
Foundation wall surface: Look for spalling (flaking concrete), visible fractures, or horizontal cracks. Horizontal cracks are the most serious — they indicate lateral soil pressure and need professional assessment.
Exterior grading and gutters: Step outside and check whether the ground slopes toward or away from the garage. Also confirm that downspouts discharge at least 4 feet from the foundation — closer than that, and you’re funneling roof runoff directly against the wall.
6 Quick Fixes to Stop the Water (Ranked by Effort)
Not every fix requires excavating your foundation. Start with the lowest-effort options and escalate only if the problem persists or worsens.
Interior Quick Wins
These address symptoms and buy time — they are not permanent solutions for active hydrostatic pressure.
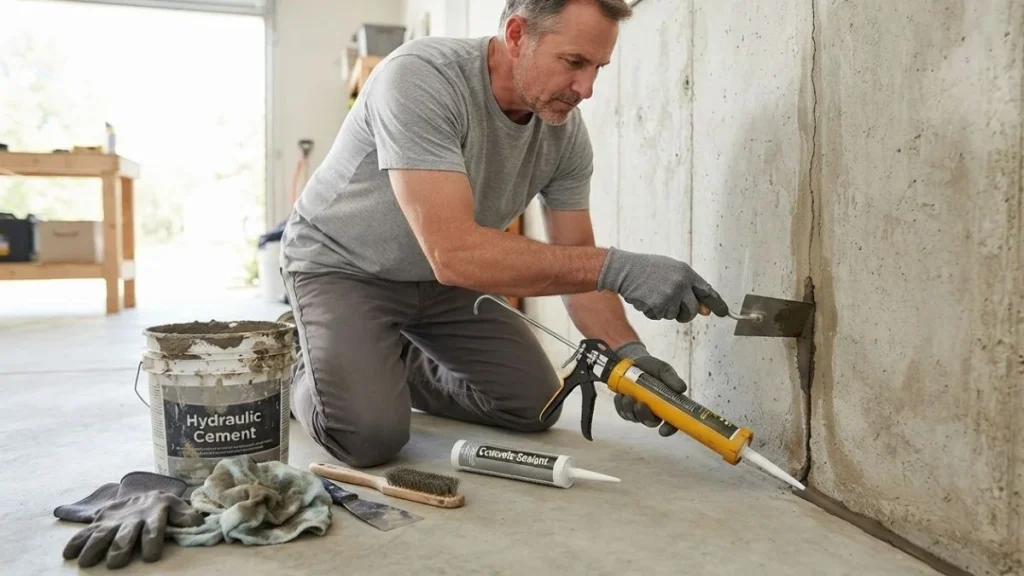
Hydraulic cement for visible cracks: Products like QUIKRETE Hydraulic Water-Stop Cement expand as they cure, physically blocking water flow through foundation cracks. It works on cracks up to 1/2 inch wide and sets in 3-5 minutes. Clean the crack first, removing loose material with a wire brush.
Waterproof paint or interior sealant: DRYLOK Masonry Waterproofer bonds to porous concrete and reduces moisture transmission. It handles minor seepage through degraded concrete but won’t hold against significant hydrostatic pressure in garage walls. Think of it as a maintenance coat, not a structural fix.
Vapor barrier installation: A 6-mil polyethylene sheet anchored along the interior wall intercepts moisture before it reaches your floor or stored items. This is a management strategy, not a cure.
Permanent Exterior Solutions
These fix the root cause — water pressure against the garage wall — rather than its symptoms.
Exterior waterproofing coating: Excavating to apply a product like DRYLOK Extreme or a rubberized membrane directly to the exterior foundation wall is the most durable long-term fix for porous concrete and failed waterproofing.
Grading and gutter improvements: Regrade soil to slope 1 inch per foot away from the foundation for 6 feet. Extend downspouts to discharge at least 4-6 feet out. These two steps alone eliminate the most common exterior drainage problems.
Sump pump system: For chronic water table issues or significant foundation wall leaking after rain, a sump pump with a perimeter drain tile system removes water before it builds pressure against the wall. This is a $1,500-$4,000 installation depending on garage size and contractor.
Seal the wall-floor junction: Apply hydraulic cement or a polyurethane caulk like Sikaflex-1a along the entire wall-floor joint. This is a high-ROI, low-cost fix that many homeowners miss completely.
Interior Fix vs. Exterior Work: Which Comes First?
The sequence matters as much as the solution. Jumping straight to expensive exterior work before confirming the source wastes money, but ignoring the problem while you plan also causes damage.
Start Interior When You Need Immediate Relief
Interior fixes — hydraulic cement on visible cracks, waterproof sealant on porous concrete, sealing the wall-floor junction — cost between $20 and $150 in materials and stop active water intrusion fast. They protect your garage floor, stored items, and drywall from further moisture damage while you assess the bigger picture.
Here’s the problem: interior sealants work against the direction water is traveling. Water pressure against the garage wall will eventually push past any interior coating if the exterior source isn’t addressed. DRYLOK and similar products are rated for up to 15 PSI of hydrostatic pressure — enough for mild seepage, not enough for a foundation wall leaking after sustained heavy rain.
Follow Up With Exterior Solutions
Exterior drainage upgrades fix the reason water is reaching your wall in the first place. Regrading soil, extending downspouts, and applying exterior waterproofing coatings remove the pressure before it builds. These jobs run $300 to $5,000+ depending on scope — regrading a small area is a weekend DIY project, while a full perimeter drain tile system requires a contractor.
The Right Sequence
- Seal active entry points interior-side to stop immediate damage
- Identify and correct exterior drainage problems within the same season
- Reassess after the next heavy rain cycle before deciding on larger investments
Skipping step 2 means repeating step 1 every year.
Keeping Your Garage Dry Long-Term
A single repair stops today’s water. Consistent maintenance stops tomorrow’s. Most recurring garage wall moisture problems trace back to neglected exterior systems that take less than an hour per season to check.
Check Grading Every Spring and Fall
Soil settles over time, especially in the first 3-5 years after construction or landscaping work. A slope that was correct when installed can reverse direction as the ground shifts. Walk the perimeter of your garage twice a year and look for areas where soil has settled against the foundation. Add compacted fill dirt to restore the 1-inch-per-foot slope away from the wall for the first 6 feet. This is the single most cost-effective prevention step against hydrostatic pressure building against your garage foundation wall.
Maintain Gutters and Downspout Extensions
Clogged gutters overflow at the roofline and dump water directly against the foundation — the same effect as having no gutters at all. Clean gutters at minimum twice yearly: once after spring pollen season and once after fall leaf drop. Confirm downspout extensions reach at least 4-6 feet from the wall and discharge onto ground that slopes away. Flexible downspout extenders from brands like Amerimax cost under $15 and prevent significant exterior drainage problems.
Test and Service Your Sump Pump System
If you have a sump pump, test it monthly by pouring a bucket of water into the pit and confirming it activates. According to the Water Quality Association, sump pumps have an average lifespan of 10 years — a failed pump during a heavy rain event is the fastest way to go from minor seepage to a flooded garage. Check that the discharge line is clear and draining well away from the foundation. Inspect drain tile inlets annually for sediment buildup that restricts flow.
You Should Read Also: Water Leaking from Garage Ceiling
Stop Garage Wall Seeping Before It Spreads
Water seeping through a garage wall always has a specific, fixable cause — the damage only compounds when that cause goes unidentified. This weekend, walk the exterior perimeter of your garage after the next rain, check the grading slope, confirm your downspouts discharge at least 4 feet out, then go inside and mark any wet patches or efflorescence on the wall with painter’s tape so you have a precise map before buying a single product.