Most installers nail every flange without a second thought — but whether you should nail the top flange of a window is one of the most debated questions in window installation, and getting it wrong leads directly to water infiltration or cracked frames.
Conflicting advice online and on job sites leaves homeowners and contractors guessing, and a single misstep in flange nailing can void a manufacturer’s warranty, compromise the rough opening seal, or cause structural damage over time.
This article gives you a clear, field-tested decision framework for nailing window flanges correctly — every side, every condition.
Why Top Flange Nailing Differs from Other Flanges
The top flange of a window does not carry the window’s weight — the header or lintel above it does. That single engineering fact changes everything about how you should fasten it.

The Header Bears the Vertical Load, Not the Flange
In standard wood-frame construction, the rough opening header transfers the structural load from above down through the jack studs on either side of the window. The window frame itself sits on the sill plate, supported by shims for level alignment. The nailing fin — the thin plastic or aluminum flange that extends from the window frame — exists to secure the window in the plane of the wall sheathing, not to carry vertical load.
Nailing the top flange tightly to the header locks the window frame in a fixed position. That sounds like a good thing. It is not.
Thermal Expansion and Frame Movement
Vinyl window installation nailing requires extra care at the top because vinyl expands and contracts with temperature changes. A standard vinyl window can move 1/8 inch or more across its width between summer and winter. When you drive a nail through the top nailing fin and pull it flush against the sheathing, you eliminate that movement. The result is a bowed frame, a distorted sash, or a broken seal — all common failure modes in improperly nailed vinyl window installations.
How Bottom and Side Flanges Differ
Bottom and side flanges are the primary structural fastening points in any nailing fin window installation. The sill flange holds the window against wind load pulling it outward. The side flanges — nailed into the king studs through the wall sheathing — keep the window plumb and secure the plane position. Nail flange placement best practices call for fasteners every 6 to 8 inches along the sides and bottom, driven snug but not overdriven.
The top flange follows completely different rules, which the next section covers in detail.
The Right Way to Nail Window Flanges

Should You Nail the Top Flange?
No — or only minimally. The header handles vertical load, so the top nailing fin only needs to hold the window flush against the wall sheathing, not anchor it structurally. Most manufacturer installation instructions, including those from Marvin and Pella, either prohibit top flange nailing entirely or specify a single centered nail left slightly proud — not driven flush — to allow thermal movement.
The exception is retrofit installations where the rough opening header is undersized or compromised. In those cases, a single nail at the center of the top flange can prevent inward deflection, but it should never be driven tight.
Nailing Pattern for Sides and Bottom
Follow the manufacturer’s specified spacing — typically every 8 to 12 inches along side flanges and the bottom flange. You do not need to use every pre-punched hole in the nailing fin. A staggered pattern works well on wider windows to distribute load evenly across the wall sheathing.
Nail type matters. Use corrosion-resistant nails — hot-dipped galvanized or stainless steel — sized specifically for flange installation, typically 1-3/4 inch to 2 inch roofing nails. Oversized nails crack vinyl flanges and create leak points. Wood-frame windows need a denser nailing pattern than vinyl because wood does not flex to absorb minor misalignment.
Pre-Nailing and Post-Nailing Sequence
Shim the window before driving a single nail. Place shims under the head jamb, at the lock rail height on both sides, and at the full height of the side jambs. Check plumb, level, and square — all three, not just one.
Nail in this order: bottom flange first, then side flanges working from bottom to top, then the top flange last (one center nail only, if at all). After nailing, leave composite or wood shims in place and trim them flush. Seal all flanges with compatible flashing tape or caulk as the final weatherproofing step.
Common Installation Failures That Cost Money
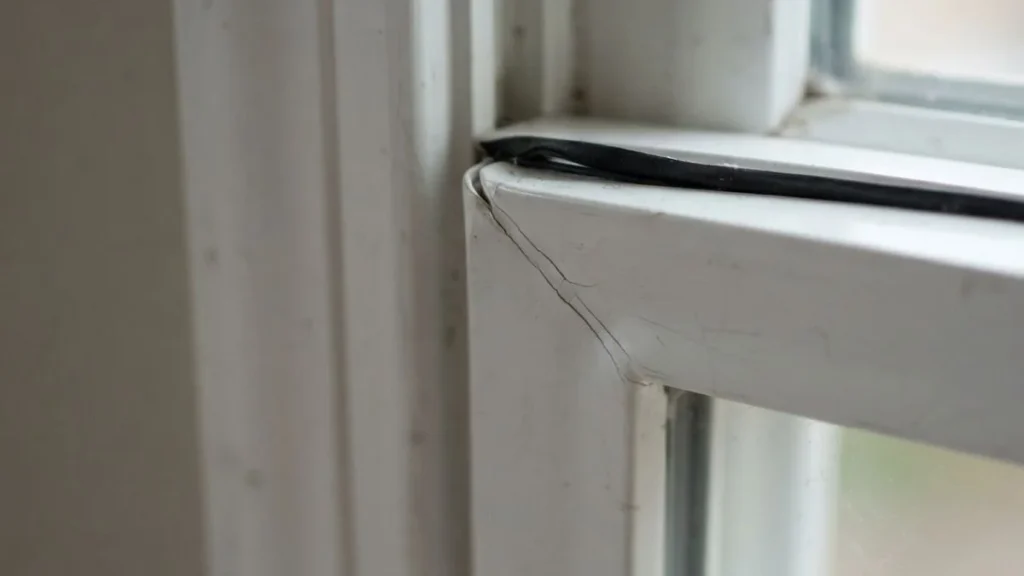
Most window installation failures trace back to 4 repeatable mistakes. Each one is avoidable with the right technique.
Nailing Too Tight
Driving nails flush — or worse, countersinking them — through the nailing fin pulls the flange hard against the wall sheathing and eliminates the small gap needed for thermal movement. On vinyl windows, this causes the frame to bow inward, which binds the sash, distorts the weatherstripping seal, and eventually cracks the corner welds. The fix costs more than the original installation. Leave nail heads approximately 1/16 inch proud of the flange surface on vinyl windows.
Improper Shimming Before Nailing
Skipping shims or placing them only at the sill creates an out-of-plane installation — the window tilts slightly inward or outward relative to the wall sheathing. Water then pools at the sill flange instead of draining away, and the window flange nailing pattern locks that misalignment permanently. Fine Homebuilding consistently identifies improper shimming as the leading cause of premature sill rot in replacement window installations.
Flange Tape Failing at Nail Heads
Nail heads that sit proud of the nailing fin create small humps under the flashing tape. Those humps prevent full adhesion, leaving a gap where water infiltrates directly into the rough opening. Use a nail set to bring fasteners to the correct height — not flush, not proud — then apply flashing tape as a continuous, uninterrupted layer over the entire flange.
Over-Nailing the Top Flange
Driving multiple nails across the full width of the top flange is the single most common window weatherproofing mistake made by DIYers. It locks the frame rigidly to the header, transfers settlement load directly through the nailing fin rather than through the structural framing, and causes long-term racking as the house moves seasonally. One centered nail, left slightly loose, is the maximum for standard installations.
Flange Nailing and Weatherproofing Integration
Nailing and weatherproofing are not two separate steps — they are one connected system. The sequence you follow determines whether water stays out for 20 years or finds a path in after the first hard rain.
Sealant Must Bridge Nail Head Gaps
Every nail driven through a nailing fin creates a penetration point. Even corrosion-resistant nails leave a micro-gap between the shank and the vinyl flange material as the window moves seasonally. Flashing tape applied over the nailing fin must fully bridge those nail heads — which means the tape needs to be pressed firmly around each head, not just smoothed flat across the surface. Products like Huber ZIP System tape and 3M 8067 flashing tape are compatible with vinyl flange material and bond tightly enough to maintain that seal through thermal cycling.
Housewrap Overlap: Over the Flange, Not Under
The housewrap goes over the nailing fin on the sides and top, not tucked behind it. This creates a shingled water-shedding layer — water running down the wall sheathing hits the housewrap, which laps over the flange, and drains past the window rather than behind it. The sill flange is the one exception: housewrap tucks behind the bottom flange so any water that does enter the rough opening can drain outward.
The Correct Sequence
Order matters more than any individual product choice. Follow this sequence exactly:
- Shim the window plumb, level, and square
- Nail the flanges — bottom first, sides next, top last or not at all
- Apply sill pan flashing at the bottom
- Lap housewrap over side and top flanges
- Apply flashing tape continuously over all flanges and nail heads
- Seal the interior rough opening perimeter with low-expansion foam
Sealing before nailing traps fasteners under the tape and makes any adjustment impossible without tearing the weatherproofing layer and starting over.
What You’ll Need to Get It Right
Having the right materials before you start prevents the two most common mid-installation problems: substituting the wrong nail type and improvising shims that compress unevenly. Here is exactly what to gather.
Nails
Use 1-3/4 inch to 2 inch hot-dipped galvanized or stainless steel roofing nails for standard vinyl window installation nailing. Stainless steel is the better choice in coastal climates where salt air accelerates corrosion on galvanized fasteners. Never use standard bright steel nails — they rust within 2 to 3 years, stain the wall sheathing, and leave gaps in the nailing fin as the shank corrodes down. Nail gauge matters too: 11-gauge or 12-gauge shanks are standard for nailing fin applications. Thinner shanks flex; thicker ones crack vinyl flanges.
Shims
Full-width composite or plastic shims outperform tapered cedar pairs for window installation. Cedar shims compress over time and can introduce a slight lean into the frame after nailing. Products like Calculated Industries Shim Stack or generic composite shims maintain their thickness permanently. Place shims at the four corners and at each hinge or lock point along the sides — never rely on a single shim at the center of the sill.
Sealants and Flashing Tape
Match your tape and sealant to the window manufacturer’s installation instructions. Pella specifies butyl-based flashing tape for its nailing fin windows. Marvin recommends fluid-applied flashing at the sill before setting the window. For caulk, use a paintable polyurethane sealant — not silicone — at the interior perimeter, since silicone cannot be painted and degrades adhesion with some trim materials.
Tools
A pneumatic finish nailer set to leave heads 1/16 inch proud is faster and more consistent than a hand hammer for nailing fin installation. If you are using a hand hammer, use a nail set to control final depth precisely. You also need a 4-foot level, a speed square, and an oscillating tool or utility knife for trimming shims flush after installation.
You May Read Also: How to Install Vinyl Siding Around Window
FAQ
Do you need to shim before nailing the window flange?
Yes — shimming before nailing is mandatory, not optional. Nailing an unshimmed window locks any misalignment permanently into the installation, causing the frame to sit out of plane, the sash to bind, and water to pool at the sill flange instead of draining away.
How do you seal a window flange properly?
Apply sill pan flashing first, then lap housewrap over the side and top flanges, then cover all flanges and nail heads with continuous flashing tape — products like Huber ZIP System tape or 3M 8067 bond reliably to vinyl nailing fins. Never seal before nailing, as fasteners driven through sealed flanges tear the weatherproofing layer and create direct water entry points.
What happens if you nail the top flange?
Nailing the top flange tightly locks the window frame to the header and eliminates the thermal movement vinyl frames require, which bows the frame, binds the sash, and can crack corner welds over time. It also transfers structural settlement load through the nailing fin rather than through the jack studs, accelerating long-term frame distortion — particularly in newer construction where the framing lumber is still drying and shrinking.
Installation Done Right Means No Callbacks
The top flange of a window is not a structural anchor — treating it like one is the single most common mistake that turns a straightforward installation into a costly repair. Before your next installation, pull the manufacturer’s instruction sheet for your specific window model and confirm the top flange nailing specification in writing. Then follow the shimming and nailing sequence in this article exactly, in order.