


If you’re staring at your old, worn-out linoleum floor and dreaming of a fresh upgrade, you’re probably wondering whether you really need to rip it all out before laying new flooring. The good news is — you don’t always have to.
Yes, you can lay vinyl plank flooring over linoleum in most cases. But here’s the thing: it’s not as simple as just snapping planks into place and calling it a day. The success of your installation depends almost entirely on the condition of the existing linoleum beneath your feet.
This guide breaks down everything you need to know — when it works, when it doesn’t, how to prepare correctly, and how to install vinyl plank flooring over linoleum the right way. Whether you’re a first-time DIYer or a homeowner looking to save money on renovations, this is the complete resource you need before you start.
Can You Lay Vinyl Plank Flooring Over Linoleum?
The short answer is yes — and it’s actually one of the more practical flooring upgrades a homeowner can make. Vinyl plank flooring, especially the click-lock floating variety, is designed to go over existing floors without requiring full demolition underneath. This makes it an attractive option for kitchens, bathrooms, laundry rooms, and basements where linoleum is commonly found.
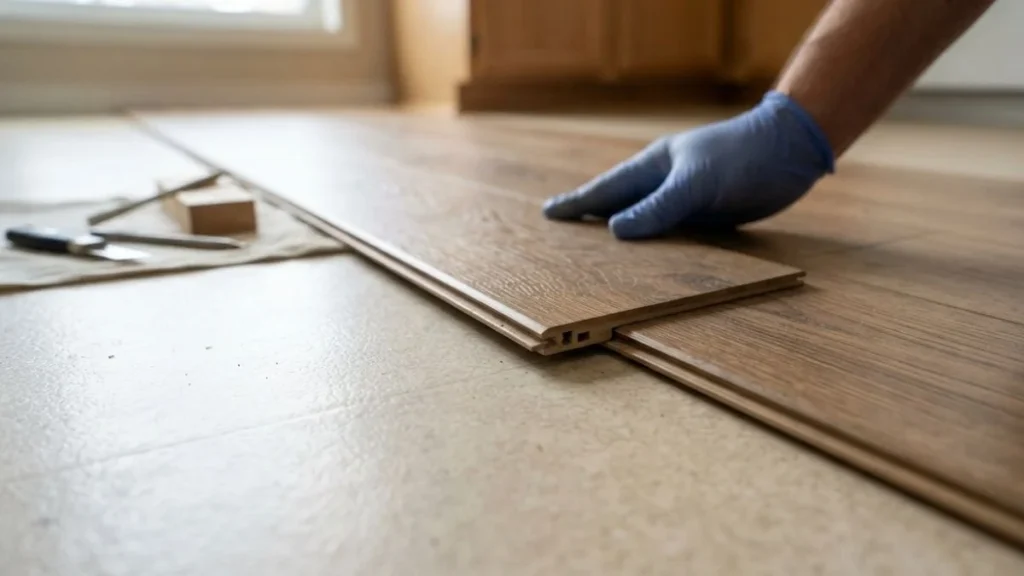
That said, the condition of your linoleum is the deciding factor. A flat, firmly bonded, single-layer linoleum surface gives you a solid foundation for vinyl plank installation. A damaged, bubbling, or multi-layered linoleum floor is a different story — and skipping proper evaluation upfront can lead to costly problems down the road.
Many homeowners also choose to install over linoleum rather than remove it because older linoleum — particularly anything installed before 1980 — may contain asbestos in its backing or adhesive. Disturbing that material without professional abatement is a serious health risk. In those situations, leaving the linoleum undisturbed and covering it with vinyl plank is not just convenient — it’s the safer choice.
So before you decide either way, take an honest look at what you’re working with. The sections below will walk you through exactly what to look for.
When Is It Safe to Lay Vinyl Plank Over Linoleum?
Not every linoleum floor is a good candidate for vinyl plank installation. There are specific conditions the existing surface needs to meet before you move forward.
Conditions the Linoleum Must Meet
The linoleum must be flat, smooth, and completely bonded to the subfloor beneath it. Walk across the entire floor and press down firmly in different areas. If you feel any soft spots, hear hollow sounds, or notice sections that shift or flex, those areas need to be repaired before installation. Even small imperfections can telegraph through vinyl plank over time, causing the floor to feel spongy or causing the click-lock joints to stress and eventually separate.
Flatness is one of the most critical requirements. Industry standards call for no more than 3/16 of an inch variation per 10-foot span. Anything beyond that needs to be corrected with a self-leveling compound before you lay a single plank.
The surface also needs to be free of wax, grease, and cleaning product residue. These coatings interfere with how the floor performs underfoot and can affect adhesive products if you’re using glue-down vinyl plank.
How Many Layers of Linoleum Are Acceptable?
One layer of linoleum is generally acceptable for vinyl plank installation. Two or more layers start to create problems — the floor height builds up significantly, which causes issues with door clearances, transitions to adjacent rooms, and overall structural stability. Most flooring manufacturers and local building codes limit total floor buildup to a specific height, so check before you proceed.
If you’re already working with two layers of existing linoleum, removal is the smarter long-term investment.
When You Should NOT Install Vinyl Plank Over Linoleum
There are situations where installing over linoleum is a mistake, and being upfront about those scenarios can save you a significant amount of time, money, and frustration.
Signs the Linoleum Must Be Removed First
If the linoleum is peeling, bubbling, or lifting at the edges, those areas will not provide a stable base for vinyl plank. You can try re-adhering small sections, but widespread delamination means the floor has lost its bond and needs to come out entirely.
Visible water damage is another red flag. Staining, soft patches, or any sign of moisture damage beneath the linoleum suggests a problem that won’t go away by covering it up. Mold or rot in the subfloor needs to be addressed before any new flooring goes down — no exceptions.
If the floor surface is so uneven that a self-leveling compound would need to be applied in excessive amounts just to reach minimum flatness standards, removal and subfloor repair is the more practical path.
The Asbestos Warning You Shouldn’t Ignore
This point deserves serious attention. Linoleum flooring and adhesives used before approximately 1980 frequently contained asbestos. If your home was built before that period and the linoleum has never been replaced, there’s a real possibility the material contains asbestos fibers.
Do not sand, cut, scrape, or otherwise disturb the linoleum without professional testing first. Hire a certified inspector to take a sample and have it tested at an accredited lab. If the results come back positive, you have two options: hire a licensed asbestos abatement contractor to remove it safely, or leave it completely undisturbed and install your vinyl plank flooring directly over it. The second option is often the preferred choice when the linoleum is still firmly bonded and in decent condition.
Types of Vinyl Plank Flooring That Work Best Over Linoleum
Not all vinyl plank products perform equally well over an existing linoleum surface. Choosing the right type upfront makes installation easier and produces better long-term results.
Floating (Click-Lock) LVP is the most popular and practical choice for installation over linoleum. The planks lock together at the edges and float freely over the existing floor without any adhesive. This method tolerates minor surface imperfections better than glue-down options and is the most beginner-friendly installation method available.
Glue-Down Vinyl Plank requires a near-perfect surface to bond properly. Because adhesive is applied directly to the linoleum, any wax residue, texture variation, or soft spots will compromise the bond. This option is better suited for professional installations where the subfloor can be fully prepped.
Peel-and-Stick Vinyl Plank is the least recommended option over linoleum. The self-adhesive backing on these planks struggles to form a reliable bond over older linoleum surfaces, especially if any wax or sealant is present. These products are better suited for clean, hard, smooth surfaces like concrete or bare plywood.
For most homeowners tackling this project themselves, floating click-lock LVP is the clear winner.
How to Prepare Linoleum for Vinyl Plank Installation
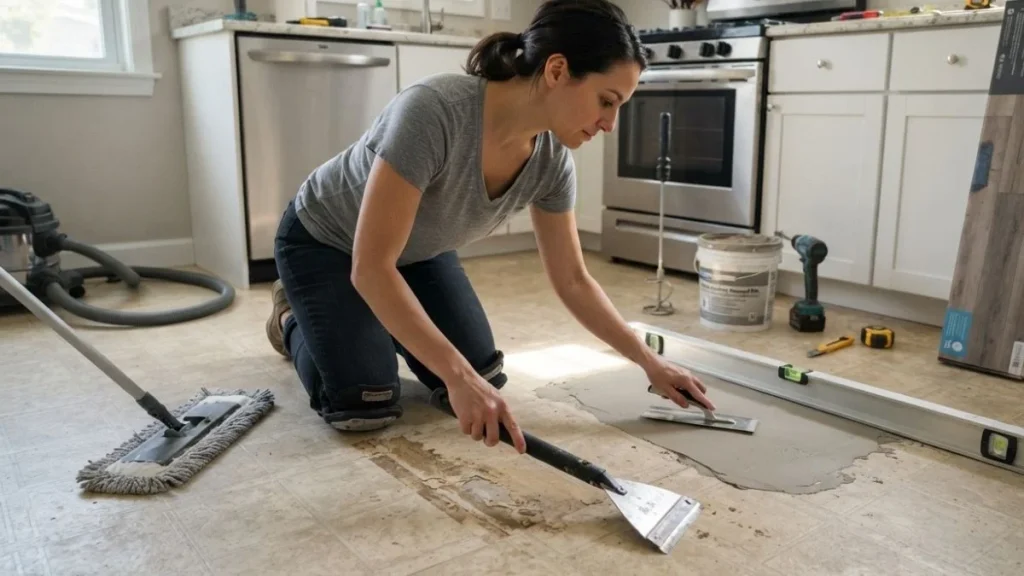
Preparation is where most DIY flooring projects either succeed or fail. Rushing through this stage is the single biggest mistake homeowners make. Take your time here, and the installation will go much more smoothly.
Clean the Linoleum Thoroughly
Start by stripping any wax or floor finish from the linoleum surface. Use a commercial wax stripper and follow the product instructions carefully. After stripping, clean the entire floor with a degreasing floor cleaner to remove any remaining residue, dirt, and grease. Let the floor dry completely — at least 24 hours — before moving to the next step.
Inspect and Repair the Surface
Get down close to the floor and look across the surface at a low angle. This helps you spot bubbles, lifted edges, and low spots that might not be obvious standing up. Press along every section of the floor to identify soft or hollow areas. Re-adhere any lifting edges using a floor seam adhesive, weigh them down, and allow them to cure completely before proceeding.
Level the Floor
Use a long straightedge or level to identify high and low spots. Fill low areas with a self-leveling floor compound, feathering it smooth as you go. Grind down any high spots with a floor grinder. Once the compound has cured, recheck the flatness and repeat if necessary until the floor meets the 3/16-inch-per-10-foot standard.
Check for Moisture
Moisture is the silent enemy of any flooring installation. Tape a 24-inch square piece of plastic sheeting to the linoleum and seal all four edges with tape. Leave it for 24–48 hours. If condensation forms underneath, you have a moisture problem that must be addressed before installation. Use a vapor barrier or moisture-blocking underlayment as recommended by your vinyl plank manufacturer.
Acclimate the Vinyl Plank
Leave the unopened boxes of vinyl plank in the installation room for at least 24–48 hours before you begin. This allows the material to adjust to the room’s temperature and humidity levels. Keep the room temperature between 65°F and 85°F during both acclimation and installation.
Step-by-Step Guide to Installing Vinyl Plank Flooring Over Linoleum
Once your linoleum is properly prepped, installation is straightforward — especially with click-lock LVP.
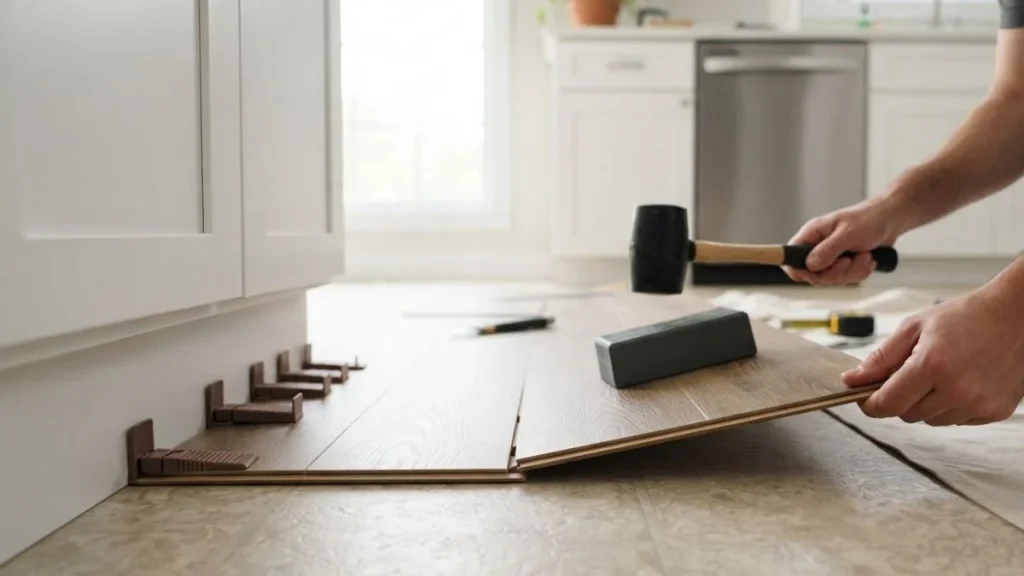
Tools and Materials You’ll Need
- Tape measure and chalk line
- Utility knife and straight edge
- Tapping block and pull bar
- Rubber mallet
- Spacers (¼ inch)
- Underlayment (if not pre-attached)
- Transition strips and trim pieces
Installation Steps
Measure and Plan Your Layout
Measure the room’s length and width and calculate the total square footage. Add 10% to your material order to account for cuts and waste. Plan your layout so that the first and last rows are roughly equal in width — this creates a balanced, professional look. Snap a chalk line parallel to your starting wall as a straight reference guide.
Install the Underlayment
Many LVP products come with underlayment already attached to the back of each plank. If yours doesn’t, roll out a thin foam underlayment across the clean linoleum. Never layer two sheets of underlayment — this creates too much cushion, which causes click-lock joints to flex and eventually fail.
Lay the First Row
Start along the longest, straightest wall in the room. Place ¼-inch spacers between the planks and the wall to maintain the expansion gap. This gap is essential — vinyl plank expands and contracts with temperature changes, and without room to move, the floor will buckle. Lock the planks in the first row end-to-end and confirm the row is perfectly straight before moving forward.
Continue Laying Rows
Work row by row, staggering the end joints by at least 6 inches between adjacent rows. Use a tapping block and rubber mallet to gently click each plank into place — never strike the plank directly. Cut planks around door frames, vents, and obstacles using a utility knife scored along a straight edge, or a jigsaw for more complex cuts.
Finish With Trim and Transitions
Once all planks are down, remove all the spacers. Install transition strips where the vinyl plank meets a different flooring material in adjacent rooms. Reinstall or replace baseboards and quarter-round molding to cover the expansion gap along the walls.
Common Mistakes to Avoid
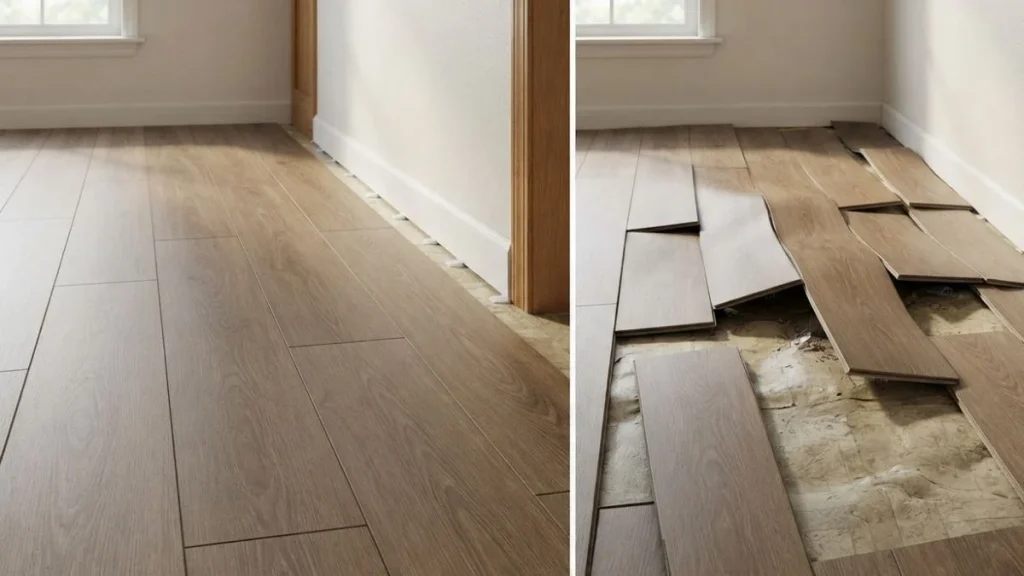
Even experienced DIYers run into avoidable problems during LVP installation over linoleum. Keep these pitfalls in mind:
- Skipping the flatness check leads to a spongy, uneven floor that wears unevenly and sounds hollow underfoot
- Forgetting the expansion gap causes planks to buckle when temperatures rise
- Installing over multiple linoleum layers creates instability and door clearance problems
- Ignoring moisture before covering it up leads to mold growth and flooring failure
- Using too thick an underlayment weakens the click-lock joint system over time
Cost Considerations: Installing Over Linoleum vs. Removing It
| Cost Factor | Installing Over Linoleum | Removing Linoleum First |
| LVP Material | $2–$7 per sq ft | $2–$7 per sq ft |
| DIY Labor Savings | $1.50–$4 per sq ft | $1.50–$4 per sq ft |
| Linoleum Removal | $0 | $1–$3 per sq ft (pro) |
| Asbestos Abatement | $0 (if left intact) | $5–$15 per sq ft |
| Prep Materials | $50–$200 | $100–$300+ |
For most homeowners with linoleum in reasonable condition, installing over it is the more budget-friendly choice. If the linoleum is badly damaged or you’re dealing with multiple layers, the cost of removal is worth it to avoid future flooring failures.
You May Read Also: How to Install Vinyl Plank Flooring on Stairs
Conclusion
So, can you lay vinyl plank flooring over linoleum? In most cases, yes — and it’s a smart, cost-effective way to upgrade your floors without a full demolition. The key is doing your homework first. Check the condition of your existing linoleum, test for moisture, correct any flatness issues, and choose the right type of vinyl plank for the job.
When the prep work is done properly, vinyl plank flooring over linoleum can look just as clean and last just as long as an installation over bare subfloor. Take your time, follow the steps outlined in this guide, and you’ll end up with a floor you’re genuinely proud of


