


If you’re planning a flooring upgrade and wondering whether you can pour concrete over an existing wood subfloor — the answer is yes. But only if you do it the right way. Many homeowners make the mistake of jumping straight into the pour without proper preparation, and that leads to cracked concrete, moisture damage, and costly repairs down the road.
This complete guide walks you through everything — from understanding what the process actually involves, to prepping your subfloor, pouring the concrete, and finishing the surface. Whether you’re a confident DIYer or just researching before hiring a contractor, this guide gives you the full picture.
What Does Pouring Concrete Over a Wood Subfloor Actually Mean?
Before getting into the steps, it’s worth clearing up what this process actually involves — because “concrete over wood subfloor” can mean a few different things depending on your project goals.

Concrete Overlay vs. Full Concrete Pour
A concrete overlay is a thin layer — usually ¼ inch to ½ inch thick — applied over an existing surface for decorative or smoothing purposes. It’s not structural. It’s mainly used to give floors a polished, modern look or to level out minor imperfections before installing tile or hardwood.
A full concrete pour is thicker, typically ¾ inch to 1.5 inches, and is used as a functional underlayment. This type adds more weight, provides better structural support for finished flooring, and works well as a base for radiant heat systems or large-format tiles.
For most wood subfloor applications, a self-leveling concrete underlayment in the ¾ inch to 1.5 inch range is the most practical and commonly used option. It bonds to the primed wood surface, levels out imperfections, and creates a firm, stable base for whatever flooring goes on top.
Why Homeowners Choose Concrete Over Wood Subfloor
The main appeal is durability. Concrete doesn’t flex, warp, or rot like wood can over time. It provides a rock-solid, flat surface that’s ideal for tile, stone, polished concrete finishes, or even luxury vinyl plank flooring. It also works exceptionally well as an underlayment for radiant in-floor heating systems, since concrete retains and distributes heat evenly.
From a cost perspective, pouring a concrete overlay is often cheaper than tearing out an existing subfloor and replacing it entirely — especially when the wood structure underneath is still sound and just needs a better surface on top.
Can You Actually Pour Concrete Over a Wood Subfloor?
Yes — but there are real conditions that have to be met first. This isn’t a project where you can cut corners and hope for the best.
When It Works Well
Concrete bonds well to wood when the subfloor is structurally sound, properly prepared, and adequately stiff. Specifically, it works well when:
- The subfloor is at least ¾ inch thick plywood with no soft or damaged spots
- Joists are spaced no more than 16 inches on center
- The subfloor has minimal flex or bounce when you walk on it
- Moisture levels in the wood are within acceptable range (typically below 14%)
- There’s sufficient ceiling height to accommodate the added thickness
When You Should Avoid It
There are situations where pouring concrete over a wood subfloor is a bad idea — and pushing forward anyway will cost you more in the long run:
- Rotted or water-damaged wood — concrete won’t fix an already compromised subfloor; it’ll just trap moisture and make things worse
- Excessive subfloor deflection — if the floor bounces or flexes significantly underfoot, the concrete will crack
- Very low ceiling height — adding even ¾ inch of concrete can create clearance problems with doors, cabinets, and transitions
- Active moisture intrusion — if water is getting in from below, no membrane will protect you indefinitely
How to Prepare a Wood Subfloor for Concrete
This is where most projects succeed or fail. Preparation is everything with concrete over wood. Skipping or rushing any of these steps will almost certainly lead to cracking, delamination, or moisture problems later.

Inspect and Repair the Subfloor
Walk every inch of the subfloor and press down firmly with your foot to check for soft spots, squeaks, and any bounce. Any damaged boards need to be replaced before you do anything else. Loose boards should be secured with screws — not nails — every 6 to 8 inches along the joists. Nails can work loose over time and allow movement that cracks the concrete above.
Fill any large gaps between boards with a patching compound and sand down any raised edges. The goal is a surface that’s as flat and tight as possible before the concrete ever touches it.
Test for Moisture
This step is non-negotiable. Wood and moisture are a dangerous combination under concrete. Use a pin-type or pinless moisture meter to check the moisture content of the subfloor in multiple spots. Readings above 14% are a red flag. High moisture content means the wood is still actively moving — expanding and contracting — which will crack any concrete layer on top.
If moisture levels are elevated, identify and address the source first. This could mean improving crawl space ventilation, fixing a plumbing leak, or installing a more robust vapor barrier from below.
Check Subfloor Deflection
Deflection refers to how much the floor flexes under load. Concrete is rigid and has almost no ability to flex — so if your subfloor moves, the concrete will crack. The industry standard for concrete overlays is L/360 deflection, meaning the floor can deflect no more than 1/360th of the span length.
If your subfloor feels bouncy, you may need to add blocking between joists, install an additional layer of plywood, or use construction adhesive to bond the existing plywood layers more firmly together.
Clean the Surface
Any dirt, oil, wax, old adhesive, or paint left on the subfloor will prevent proper bonding between the wood and your primer or concrete. Sweep thoroughly, then scrub the surface with a floor cleaner to remove any residue. Let it dry completely before moving on.
Apply a Crack-Isolation Membrane
A crack-isolation membrane is a flexible layer — usually a fabric or sheet product — that sits between the wood and the concrete. It allows for minor movement in the wood subfloor without that movement transferring directly into the concrete above. This is especially important at panel seams and knot areas in the plywood.
Apply it according to the manufacturer’s instructions, making sure to overlap seams and press out any air bubbles.
Install a Moisture Barrier
Even if your moisture readings are acceptable now, conditions can change. A vapor barrier adds a layer of protection that prevents moisture vapor from migrating up through the wood and into the concrete, which can cause bonding failures and surface efflorescence over time.
You can use a sheet polyethylene barrier (6-mil minimum) or a liquid-applied membrane. Whichever you choose, make sure seams are overlapped by at least 6 inches and taped securely.
Apply Bonding Primer
Bonding primer is the critical link between the wood surface and the concrete. Without it, the concrete has almost nothing to grab onto and will eventually separate. Roll or brush the primer evenly across the entire surface, including all edges. Follow the manufacturer’s drying time — usually 1 to 3 hours — before pouring.
Do not skip this step. It’s what separates a floor that lasts from one that fails within a year.
How to Pour Concrete Over a Wood Subfloor — Step by Step

With preparation done, the actual pour is relatively straightforward — but it still requires attention to detail.
Mix the Concrete
Follow the manufacturer’s water-to-mix ratio precisely. Too much water weakens the mix and increases shrinkage cracking. Use a drill with a paddle attachment and mix until the consistency is smooth and lump-free — similar to thick pancake batter for self-leveling compounds.
Pour and Spread
Start at the far end of the room and work toward the exit so you’re not walking on freshly poured concrete. For self-leveling compounds, pour directly from the bucket and use a gauge rake to help spread it evenly. Work quickly — most self-leveling products begin to set within 20 to 30 minutes.
For a standard pour thickness of ¾ inch to 1.5 inches, you may need to work in sections, especially in larger rooms.
Level and Smooth
Self-leveling concrete largely does the work for you, but you’ll still need to use a trowel to smooth edges, corners, and any spots where the compound didn’t quite reach. Check the surface with a straightedge after 10 to 15 minutes. Any low spots can be filled while the concrete is still workable.
Allow Full Curing Time
This is where patience pays off. Light foot traffic is usually safe after 24 hours. However, the concrete needs a full 28 days to reach its maximum strength. Installing finished flooring — especially tile — before the concrete has fully cured can lead to cracking and grout failure. Don’t rush it.
Common Mistakes to Avoid
Even experienced DIYers trip up on this project. Here are the most common mistakes and how to avoid them:
- Skipping the moisture test — always test, even if the floor looks dry
- Not using bonding primer — this single step prevents most delamination failures
- Pouring too thick in one pass — thick pours trap air and crack; build up in layers if needed
- Ignoring deflection — a bouncy floor will crack concrete every time
- Rushing the cure — 28 days is not a suggestion; it’s a structural necessity
- Forgetting perimeter expansion gaps — concrete expands and needs room at the edges
Cost Breakdown — Concrete Over Wood Subfloor
| Item | DIY Cost (per sq ft) | Professional Cost (per sq ft) |
| Self-leveling underlayment | $1.50 – $3.00 | $3.50 – $6.00 |
| Bonding primer | $0.20 – $0.50 | Included |
| Vapor barrier | $0.10 – $0.30 | Included |
| Crack-isolation membrane | $0.30 – $0.60 | Included |
| Subfloor repairs (if needed) | $0.50 – $2.00 | $1.00 – $4.00 |
| Total Estimated Range | $2.60 – $6.40 | $5.00 – $12.00 |
The biggest variable in cost is the condition of your existing subfloor. If repairs are needed before the pour, that adds both time and money. Professional installation also typically includes a warranty on the work, which is worth factoring in for larger projects.
Finishing Options After the Pour
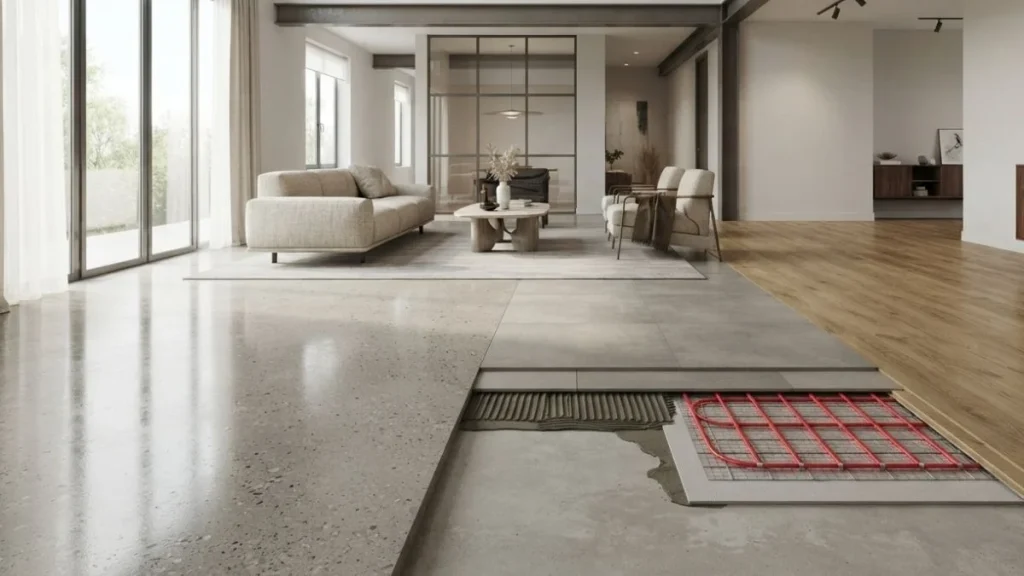
Once your concrete has fully cured, you have several great options for the finished floor:
Polished Concrete — grind and seal the surface for a sleek, modern look. Low maintenance and extremely durable.
Ceramic or Porcelain Tile — concrete makes an excellent tile base. Use a polymer-modified thinset for best adhesion.
Luxury Vinyl Plank (LVP) — install over a moisture barrier for a warm, wood-look finish with concrete-level stability underneath.
Radiant Heat Systems — concrete over wood subfloor is one of the best setups for in-floor heating. The concrete acts as a heat sink, radiating warmth evenly across the room.
Related Read: Can You Pour Concrete On Top Of Concrete
Conclusion
Pouring concrete over a wood subfloor is a smart, durable solution — but it’s only as good as the preparation behind it. Inspect the subfloor thoroughly, address moisture and deflection issues before you start, and never skip the bonding primer. Follow the steps in this guide and you’ll end up with a solid, long-lasting surface that’s ready for virtually any finished flooring on top.
For larger rooms, complex layouts, or significant subfloor repairs, it’s worth consulting a flooring contractor before diving in. A professional assessment upfront can save you from expensive mistakes down the line.


