Picture this — you head down to your basement and notice chunks of concrete scattered on the floor. The walls look like they’re slowly falling apart. It’s easy to brush it off as “just old concrete,” but here’s the truth: crumbling basement walls get significantly worse the longer you ignore them.
What starts as minor surface flaking can turn into serious structural damage, water intrusion, and mold growth. And when that happens, you could be staring down a repair bill of $10,000 to $30,000 or more.
The good news? If you catch the problem early, knowing how to repair crumbling basement walls can save you thousands — and in many cases, it’s something you can handle yourself. You’ll learn what causes basement walls to crumble, how to spot the warning signs early, a clear step-by-step repair process, and how to keep the problem from coming back.
What Causes Basement Walls to Crumble?
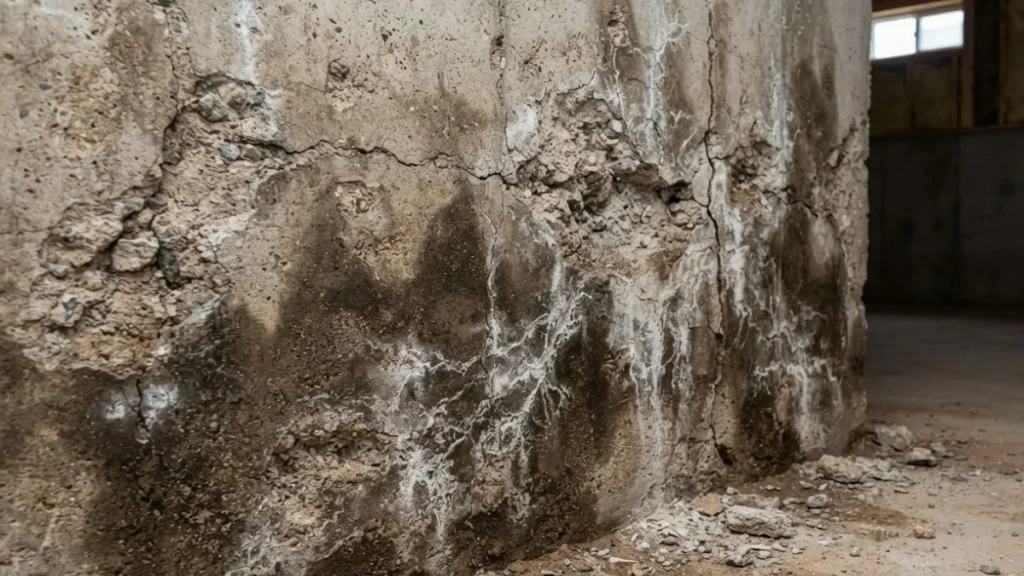
If you patch the surface without addressing what’s causing the damage, the problem will come back — often worse than before. There are several common culprits behind basement wall deterioration, and in many cases, more than one factor is at play at the same time.
Water Damage and Moisture Infiltration
Water is the number one enemy of basement walls. When moisture continuously seeps through your foundation walls — whether from groundwater, poor drainage, or surface runoff — it slowly breaks down concrete and masonry from the inside out. Over time, this weakens the structural integrity of the wall material itself.
One of the most damaging processes is the freeze-thaw cycle. During colder months, water that has seeped into small pores and cracks in your concrete walls freezes and expands. When it thaws, it contracts. This repeated expansion and contraction gradually widens cracks and breaks apart the concrete — a process called spalling. Homes in colder climates are especially vulnerable to this type of damage.
Poor yard grading and clogged gutters make this worse by directing water straight toward your foundation instead of away from it.
Hydrostatic Pressure From Surrounding Soil
Hydrostatic pressure is the force that water-saturated soil exerts against your basement walls. After heavy rain or snowmelt, the soil around your foundation absorbs a large amount of water. That water has to go somewhere, and it pushes against your walls with significant force.
Over the years, this constant pressure causes walls to crack, bow inward, and eventually begin to crumble — especially in older homes where the original construction didn’t account for modern waterproofing standards. Cinder block and concrete block walls are particularly vulnerable because the hollow cores can fill with water and increase internal pressure.
Age and Natural Material Wear
No building material lasts forever. Concrete, mortar, and masonry naturally degrade over time — especially when exposed to repeated moisture cycles. Older homes built before 1980 often used lower-grade concrete mixes or thinner mortar joints that simply weren’t designed to last 50+ years without maintenance.
As mortar joints between concrete blocks deteriorate, water finds easy pathways into the wall system. Once moisture gets inside, the deterioration accelerates quickly. What starts as soft, crumbling mortar can become large sections of failing wall if left unaddressed for several years.
Warning Signs Your Basement Walls Are Failing
Catching basement wall problems early is everything. The difference between a $200 DIY repair and a $20,000 contractor job often comes down to how quickly a homeowner responds to early warning signs. Here’s what to look for during regular basement inspections.
Visible Crumbling or Flaking Concrete (Spalling)
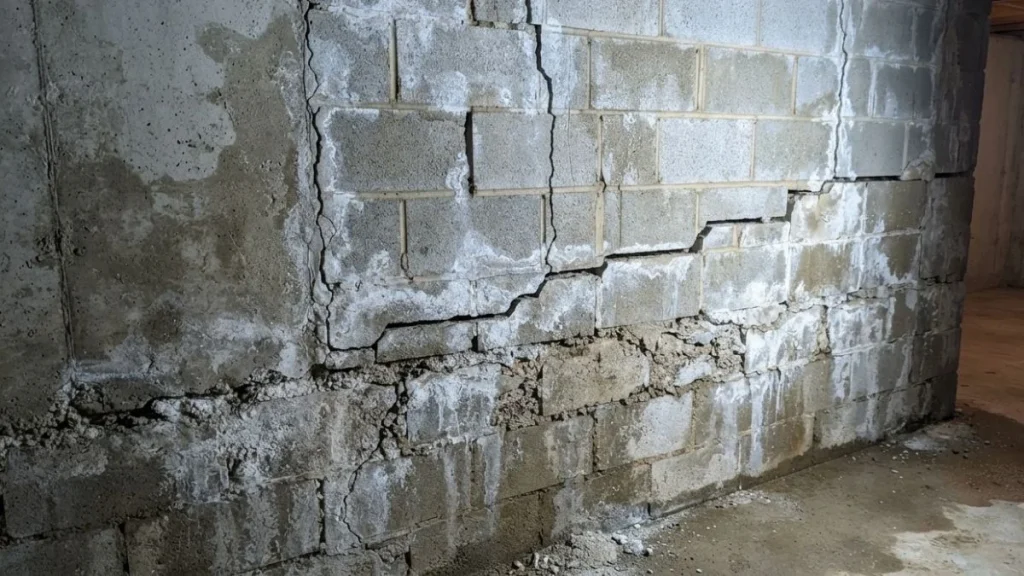
If you see concrete or masonry literally flaking off your basement walls, that’s called spalling. Light surface dusting is common in older basements and isn’t always an emergency. However, if chunks of material are falling away or you can press your finger into the wall surface and it crumbles, the damage has progressed beyond cosmetic and needs prompt attention.
White Powdery Residue — Efflorescence
That chalky white powder you sometimes see on basement walls is called efflorescence. It forms when water moves through concrete or masonry, dissolves minerals inside the material, and then deposits those minerals on the surface as the water evaporates. Efflorescence itself isn’t dangerous, but it’s one of the clearest early warning signs that moisture is actively moving through your walls. Left unaddressed, that moisture will eventually cause serious deterioration.
Cracks in the Wall
Not all cracks are equal. Here’s a simple breakdown:
| Crack Type | What It Likely Means |
| Hairline vertical cracks | Common, often from normal concrete curing — usually low risk |
| Wide vertical cracks (>¼ inch) | May indicate foundation settling — monitor closely |
| Horizontal cracks | Serious — often caused by soil pressure, needs professional review |
| Stair-step cracks (block walls) | Sign of settling or shifting — warrants inspection |
| Diagonal cracks | Can indicate uneven foundation settlement |
Bowing or Bulging Walls
A wall that visibly leans or bows inward is a serious structural red flag. This happens when hydrostatic pressure from outside soil overwhelms the wall’s ability to resist. Bowing walls don’t fix themselves — they get worse over time. If you notice any inward movement in your basement walls, stop what you’re doing and call a foundation specialist. This is not a DIY situation.
Dampness, Musty Odors, and Mold
Persistent dampness, a musty smell, or visible mold growth on basement walls are all signs that moisture is getting in — and that your walls may already be compromised. Mold can begin growing within 24–48 hours of a moisture event and poses real health risks, particularly for people with respiratory conditions.
How to Assess the Damage Before Starting Repairs
Before you buy a single product or pick up a tool, take time to honestly assess how bad the damage is. Not all crumbling basement walls require the same level of repair, and misidentifying the severity can lead to wasted money or — worse — an incomplete fix.
Start with what’s called the screwdriver test. Press the tip of a screwdriver firmly against the wall surface. If the concrete holds firm, you’re likely dealing with surface-level spalling that can be repaired with patching compounds. If the screwdriver sinks in easily or the material crumbles away with light pressure, the deterioration runs deeper and may require more extensive repair or professional evaluation.
Also use a flashlight to check the full perimeter of the wall — look closely at mortar joints, corners, and the area where the wall meets the floor (called the cove joint), as these are common entry points for moisture.
Take photos of every crack, crumble spot, and damp area before you start any work. This gives you a baseline to track improvement and is useful documentation if you later bring in a contractor.
Get a professional inspection if you notice any of the following:
- Horizontal cracks running the length of the wall
- Any wall that appears to bow or lean inward
- Cracks wider than ½ inch
- Signs of active water flowing (not just dampness) through the wall
- Sections of wall that feel hollow when tapped
How to Repair Crumbling Basement Walls — Step by Step
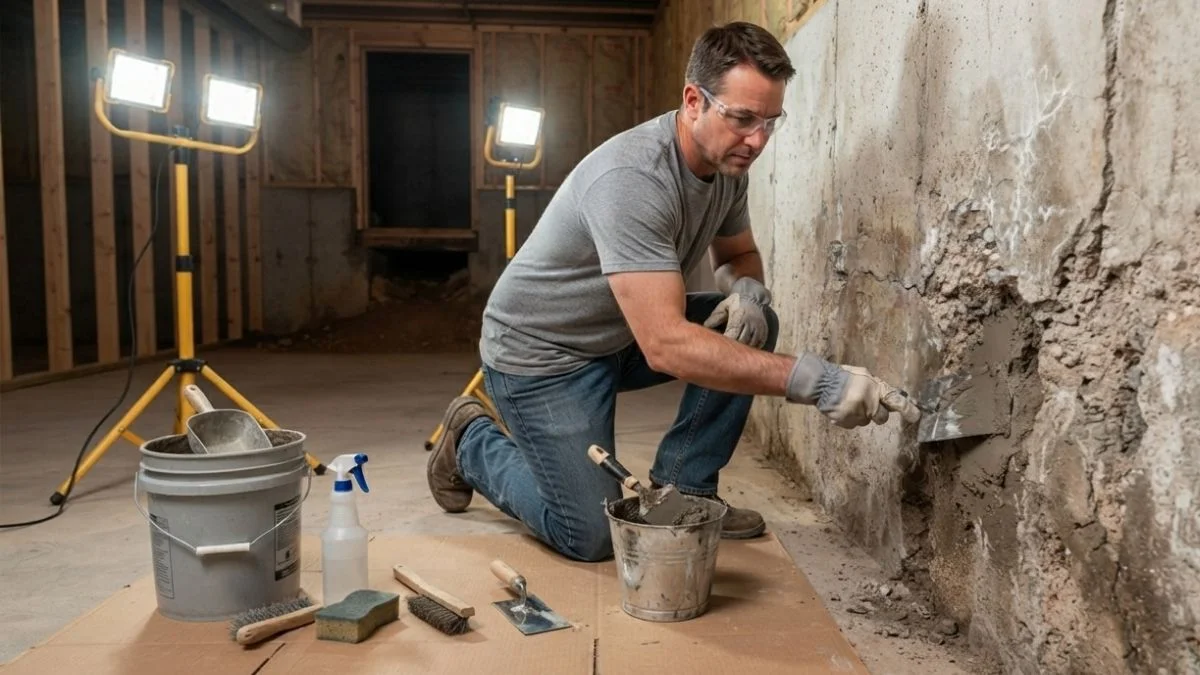
For damage that falls within the DIY range — surface spalling, minor cracks, deteriorated mortar joints, and early-stage moisture issues — here’s a straightforward repair process that produces lasting results when done correctly.

Tools and Materials You’ll Need
Tools:
- Cold chisel and hammer
- Wire brush or angle grinder with wire wheel
- Shop vacuum
- Trowel and margin trowel
- Safety goggles and work gloves
- Paintbrush (for applying sealer)
Materials:
- Hydraulic cement (for active leaks)
- Masonry patching compound
- Mortar mix (for tuckpointing)
- Waterproof masonry sealer (such as DRYLOK or RadonSeal)
Clean and Prepare the Damaged Area
This step is more important than most people realize. No patching compound or sealer will bond properly to a dusty, loose, or contaminated surface. Use your cold chisel and hammer to chip away all loose, crumbling concrete. Don’t try to patch over weak material — remove it until you reach solid, stable concrete.
Once loose material is removed, scrub the area vigorously with a wire brush to remove dust, efflorescence, and any mold. Vacuum the entire area with your shop vac, then wipe down with a damp cloth. Allow the surface to dry — or for hydraulic cement applications, keep it slightly damp as directed by the product instructions.
Fill Cracks and Holes
For hairline to medium cracks, a masonry patching compound applied with a trowel works well. Force the compound firmly into the crack, slightly overfilling it, then smooth it flush with the surrounding wall surface. Allow it to cure fully according to the manufacturer’s instructions before proceeding.
For active water leaks — cracks where water is visibly seeping through — use hydraulic cement. This fast-setting product actually stops water flow as it cures and can be pressed directly into a wet crack. Mix it according to directions (it sets quickly, so work fast), press it firmly into the crack, and hold it in place for 3–5 minutes until it hardens.
Best Products for Crumbling Basement Wall Repair
| Product | Best Used For |
| Quikrete Hydraulic Water-Stop | Active water leaks and wet cracks |
| DRYLOK Masonry Waterproofer | Surface waterproofing and sealing |
| RadonSeal Deep-Penetrating Sealer | Porous concrete, long-term moisture protection |
| Sakrete Mortar Mix | Tuckpointing deteriorated mortar joints |
Repair Mortar Joints (Tuckpointing)
If your basement walls are made of concrete block or brick, the mortar joints between them are often where deterioration begins. Tuckpointing is the process of removing damaged mortar and replacing it with fresh mortar — and it makes a significant difference in both structural integrity and moisture resistance.
Use a cold chisel or an angle grinder to remove deteriorated mortar to a depth of at least ¾ inch. Vacuum out the joint thoroughly, then dampen it slightly with water. Pack fresh mortar into the joint using a margin trowel, pressing firmly to eliminate air pockets. Tool the joint smooth once the mortar begins to stiffen slightly. Allow it to cure for at least 24–48 hours before applying any sealer over it.
Apply a Waterproof Masonry Sealer
Once all cracks are filled and mortar joints are repaired, apply a quality waterproof masonry sealer to the entire wall surface. This is a step that many DIYers skip — and it’s a big mistake. Sealing the wall creates a barrier that prevents moisture from penetrating the surface in the first place.
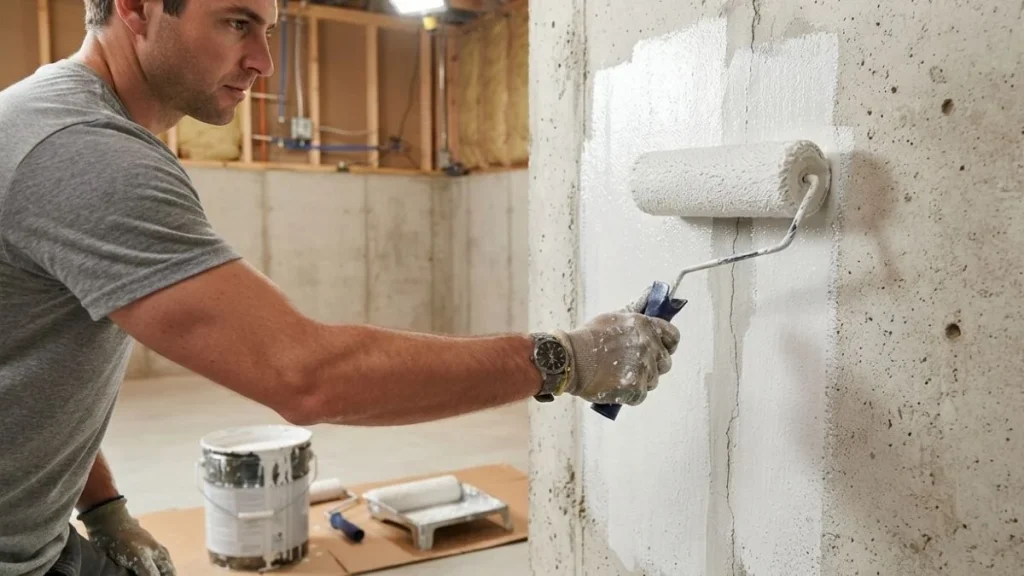
Apply the sealer with a heavy nap roller or stiff brush, working it into the surface rather than just painting it on. Most quality sealers require two coats for full protection. Follow the manufacturer’s drying time between coats — typically 2–4 hours.
Fix the Root Cause of Moisture
Repairing the wall without addressing the source of moisture is like bailing water out of a boat without plugging the hole. Check these external factors after completing your interior repairs:
- Yard grading: The ground should slope away from your home at least 6 inches over the first 10 feet
- Gutters and downspouts: Clean gutters and make sure downspouts direct water at least 6 feet away from the foundation
- Sump pump: Test your sump pump regularly and replace it every 7–10 years
DIY vs. Hiring a Professional
Knowing when to put down the tools and make a phone call is just as important as knowing how to do the repair yourself.
Handle it yourself if:
- Cracks are hairline to ¼ inch wide
- Damage is limited to surface spalling or efflorescence
- Mortar joints are soft but walls are structurally sound
- There’s no visible bowing or inward movement
Call a licensed contractor if:
- Walls are bowing, leaning, or shifting
- Horizontal cracks run across a significant length of the wall
- Water is actively flowing through the wall (not just dampness)
- You see signs of foundation settlement like uneven floors or sticking doors
What Does Basement Wall Repair Cost?
| Repair Type | Estimated Cost |
| DIY patching and sealing | $50 – $250 in materials |
| Professional crack injection | $500 – $2,500 |
| Carbon fiber strap installation | $4,000 – $8,000 |
| Interior drainage system | $5,000 – $15,000 |
| Full wall replacement | $15,000 – $30,000+ |
How to Prevent Basement Walls From Crumbling Again
Repairs only make sense if you take steps to prevent the same damage from returning. The most effective prevention strategy comes down to moisture control — both inside and outside your home.
Keep your gutters clean at least twice a year and make sure downspouts extend far enough from the foundation. Check your yard grading every spring, as soil settles over time and can gradually begin directing water back toward the house. Inside, consider running a dehumidifier in your basement year-round to keep humidity levels below 50%, which significantly slows moisture-related deterioration.
Inspect your basement walls at least once a year — ideally in spring after snowmelt and heavy rain season. Look for new cracks, soft mortar, or any signs of efflorescence. Catching problems when they’re small keeps repair costs low and prevents minor issues from
Conclusion
Crumbling basement walls rarely fix themselves — and the longer you wait, the more expensive the solution becomes. The encouraging part is that most early-stage damage is completely repairable without professional help, as long as you use the right materials and take the time to address the underlying moisture problem.
Start with a thorough inspection, honestly assess whether you’re dealing with surface damage or something more serious, and follow the repair steps in order. If anything about the damage looks structural — especially bowing walls or horizontal cracks — don’t hesitate to bring in a professional. The cost of an inspection is nothing compared to what full foundation repair can run.
Take action on crumbling basement walls now, before a manageable problem turns into one of the most expensive repairs a homeowner can face.