There’s nothing more frustrating than cutting perfect stair stringers — only to set them on the concrete and watch them rock, gap, or sit completely crooked. Uneven concrete slabs are one of the most common problems in any outdoor stair project, and most guides don’t tell you how to actually deal with them.
This isn’t just a cosmetic issue. When stringers don’t sit flat on the base, riser heights become inconsistent — a leading cause of stair-related falls. Anchors don’t seat properly, and trapped moisture rots the wood from the bottom up.
The good news is that this is a completely solvable problem — without professional help or expensive tools. How to assess your concrete surface, choose the right leveling method, and avoid the most common mistakes homeowners make — so you can build stairs that are safe, solid, and built to last.
What Are Stair Stringers and Why Leveling Matters
A Quick Overview of Stair Stringers
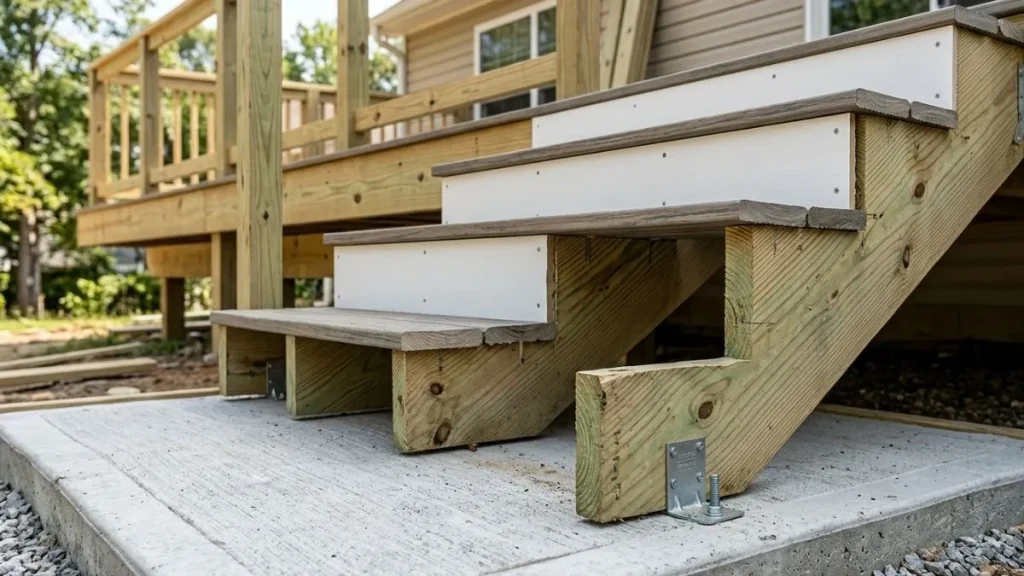
Stair stringers are the diagonal structural members that run along the sides of a staircase and support the treads you actually step on. Think of them as the backbone of your stairs. Without properly installed stringers, the entire staircase lacks structural integrity — no matter how nice the treads look on top.
Stringers come in two main styles. Open stringers have the step profile cut into them, so the tread and riser profile is visible from the side. Closed stringers have a straight top edge with treads attached using dadoes or brackets hidden inside. For most exterior concrete applications, open-cut pressure-treated stringers are the go-to choice.
Common materials include pressure-treated lumber (the most widely used for exterior stairs), steel stringers for modern or commercial applications, and engineered wood products for interior use.
Why a Level Base Is Non-Negotiable
When a stringer sits on uneven concrete, it doesn’t just look bad — it creates a chain reaction of problems throughout the entire staircase. Even a half-inch variation in the base can throw off every riser height on the staircase. Under the International Residential Code (IRC), the maximum allowable difference between the tallest and shortest riser in a staircase is just 3/8 of an inch. That’s a very tight tolerance, and uneven concrete makes it almost impossible to hit without proper leveling.
Beyond code compliance, there’s the moisture issue. When a stringer sits flush against uneven concrete, it traps moisture in the gaps and hollows beneath it. That trapped moisture accelerates wood rot — sometimes within just two or three seasons — and weakens the anchor points holding the stringer to the slab.
How to Assess the Uneven Concrete Before You Start
Skipping the assessment phase is where most DIY stair projects go wrong. Before you cut a single stringer or drill a single anchor hole, you need to know exactly what you’re working with.
Measuring the Slope and Surface Variation
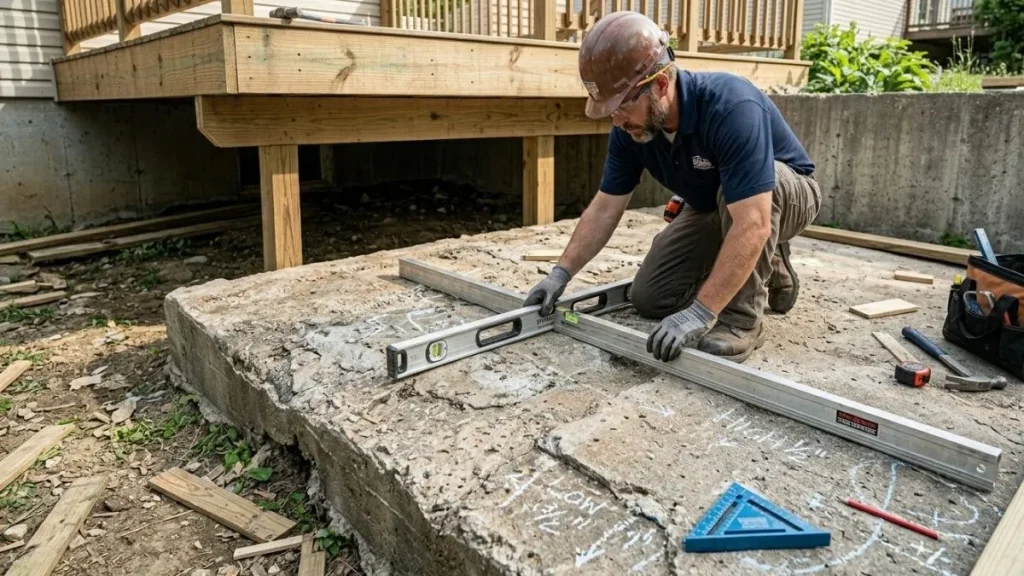
Lay a 4-foot level flat on the concrete in multiple directions — side to side, front to back, and diagonally. Note where the bubble drifts and by how much. Then use a straightedge and a tape measure to quantify the gap between the straightedge and the concrete surface at the low points.
Mark every high spot and low spot with chalk. This gives you a clear map of the problem before you start problem-solving.
Identifying the Type of Unevenness
Not all uneven concrete is the same, and the fix depends on the type of variation you’re dealing with:
| Type | Description | Best Fix |
| Sloped slab | Entire surface tilts one direction | Adjust stringer bottom cut |
| Crowned slab | Raised center, lower edges | Grind high center spot |
| Pitted/cracked | Localized low spots | Non-shrink grout fill |
| Settled corner | One corner significantly lower | Self-leveling compound |
When to Fix the Concrete First
If the total variation across your stringer footprint exceeds 1 inch, seriously consider applying a self-leveling concrete compound before installing anything. For variations under ¼ inch, grinding or shimming is usually sufficient. For anything in between, the methods in Section VI will handle it cleanly.
Common Mistakes to Avoid When Leveling Stair Stringers on Uneven Concrete
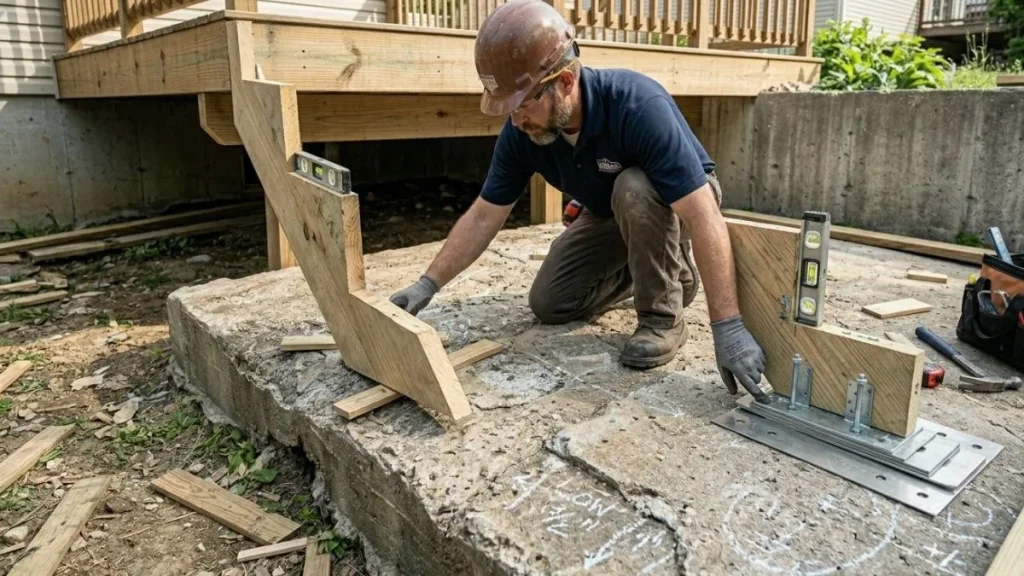
This is the section most guides skip — and it’s the one that saves you the most headaches. These aren’t theoretical mistakes. They’re the ones that show up on job sites and in DIY projects constantly.
Mistake: Skipping the Site Assessment
Assuming the concrete is “close enough” without actually measuring is the single most common error. Half an inch of slope might look insignificant on the ground, but it gets compounded across every step on the staircase. Always measure first. Always.
Mistake: Using Wood Shims Directly on Concrete
Wood shims seem like a quick fix, but they’re a slow-motion failure waiting to happen. Wood absorbs moisture from the concrete, compresses under load, and rots — sometimes within a single season. Use steel shim plates, composite shims, or non-shrink grout pads instead. These materials don’t compress, don’t rot, and won’t shift under load.
Mistake: Not Dry-Fitting Before Fastening
A dry run takes maybe 30 extra minutes. Skipping it can cost you an entire day of rework. Set all your stringers in position, check every one for level, and make all adjustments before a single permanent fastener goes in. Catching problems during the dry-fit is free. Catching them after everything is bolted down is expensive.
Mistake: Ignoring Local Building Codes
Exterior stair projects often require a permit. More importantly, they must meet IRC standards for riser height consistency, stringer bearing, and anchor requirements. Skipping this step doesn’t just risk a failed inspection — it creates liability if someone gets hurt on your stairs.
Mistake: Using the Wrong Anchors
Not all concrete anchors are created equal. Using the wrong type or embedment depth for your concrete thickness is a structural failure waiting to happen. For most residential stair applications on a standard 4-inch slab, use ½-inch diameter wedge anchors with a minimum 1¾-inch embedment into solid concrete.
Mistake: Cutting the Stringer Bottom Incorrectly
On a sloped slab, a standard 90-degree bottom cut won’t sit flat. You need to scribe the stringer to match the actual slope of the concrete and recut accordingly. Many DIYers skip this step, leave a rocking gap at the base, and try to fill it with caulk. Caulk is not a structural fix.
Mistake: Poor Top Connection
The top of the stringer connects to the deck frame or landing above. If this connection is sloppy — wrong hardware, missing fasteners, or a gap between the stringer and the header — the whole staircase will flex and bounce underfoot. The top and bottom connections are equally critical.
How to Level Stair Stringers on Uneven Concrete: Step-by-Step
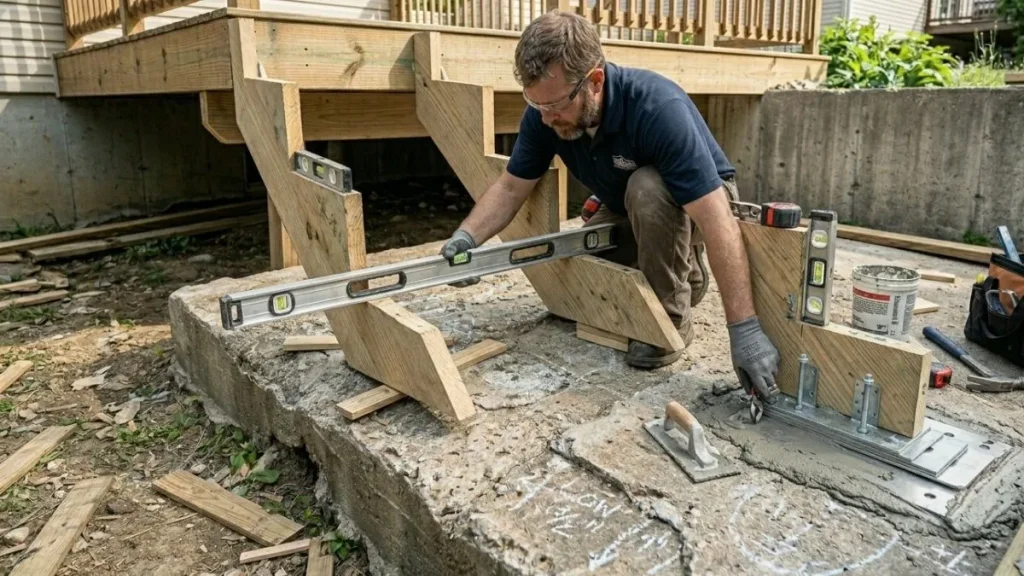
Measure Total Rise and Plan Your Layout
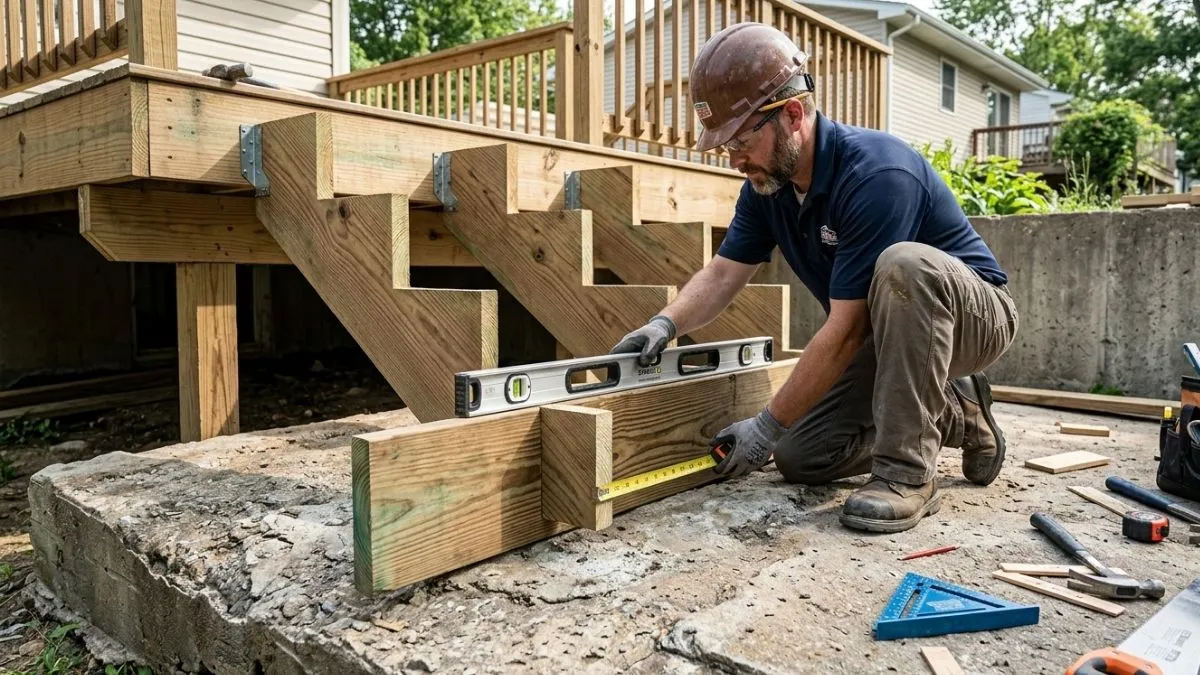
Start by measuring the total rise — the vertical distance from the concrete surface to the top of the deck or landing the stairs will connect to. Divide that number by your intended riser height (typically 7 to 7¾ inches) to get your number of steps. This gives you your stringer layout before any cutting begins.
Map and Mark the Concrete
Use your 4-foot level and chalk to mark every high and low spot across the entire stringer footprint. Knowing exactly where the problem areas are lets you choose the right fix for each zone rather than guessing.
Choose and Apply Your Leveling Method
Grind Down High Spots
For high spots under ¼ inch, an angle grinder with a diamond cup wheel removes the material quickly. Work in overlapping passes and re-check with your level frequently. Wear a dust mask and eye protection — concrete dust is nasty.
Fill Low Spots with Non-Shrink Grout
For low areas where the stringer won’t have full bearing, mix non-shrink grout to a stiff consistency and trowel it into the low zone. Strike it level with the surrounding surface and allow it to cure fully — typically 24 hours — before loading the stringer on top.
Use Steel Shim Plates
Steel shims are the fastest and most reliable fix for moderate variations. Place them under the stringer hardware bracket to bring it up to the correct height. Stack as needed, check with a level, and fasten through the shims into the concrete with your anchor hardware.
Recut the Stringer Bottom
For a sloped slab, scribe a line along the bottom of the stringer that follows the actual slope of the concrete. Recut along that line with a circular saw. The result is a stringer that sits in full contact with the slab — no rocking, no gaps.
Install Stringer Mounting Hardware
Mark and drill your anchor holes using a hammer drill and the correct masonry bit for your anchor diameter. Blow out the dust from each hole with compressed air before inserting anchors — dust in the hole dramatically reduces holding strength. Set your stringer brackets, insert anchors, and hand-tighten only at this stage.
Dry-Fit All Stringers and Verify Level
Set all stringers in position and check every one with your 4-foot level. Lay a straightedge across all three stringers (for a standard 36-inch wide staircase) to confirm they’re all sitting at the same height. Make final micro-adjustments with shims before anything is permanently fastened.
Final Fastening and Riser Height Verification
Once everything checks out, torque your anchor fasteners to the manufacturer’s spec. Then measure every riser height from top to bottom. The total variation must stay within 3/8 inch. If one riser is off, it’s almost always traceable back to an unlevel stringer — catch it now before the treads go on.
Safety Tips for Stair Stringer Installation
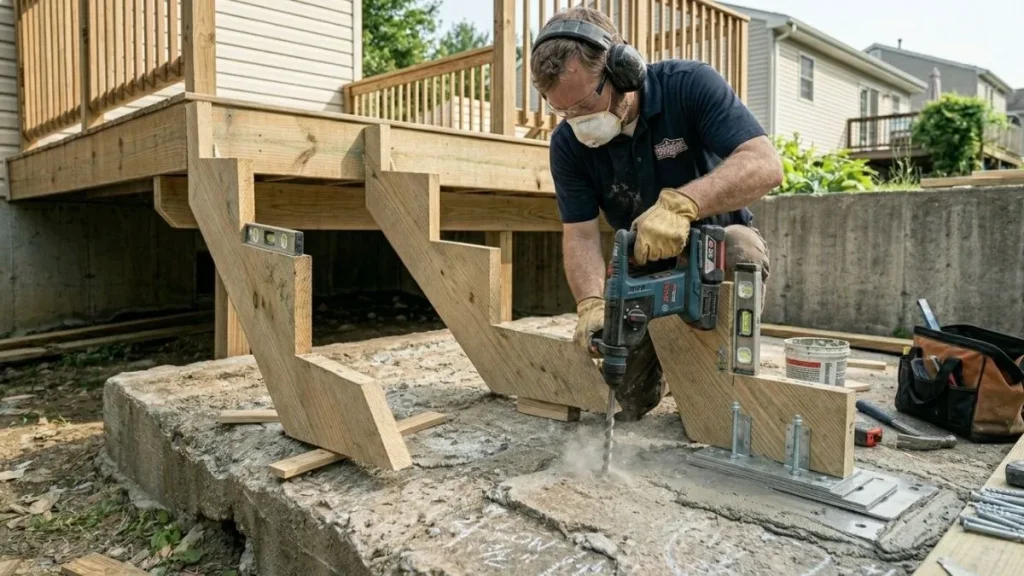
- Always wear a dust mask and safety glasses when grinding or drilling concrete
- Never load stringers with body weight or materials before anchors are fully cured
- Test for wobble by pressing down firmly on each stringer before installing treads
- Check anchor torque one final time after the first 48 hours — concrete anchors can Fsettle slightly
- Inspect the stringer base annually for signs of moisture damage or movement
You May Read Also: How to Attach Stair Stringers to Joist
Conclusion
Leveling stair stringers on uneven concrete isn’t the most glamorous part of a stair project — but it’s absolutely the most important. Get it right, and everything that follows goes smoothly. Get it wrong, and you’re looking at wobbly stairs, code violations, and potentially a dangerous situation for everyone who uses them.
The good news is that none of the fixes here require special skills or expensive equipment. A level, a grinder, some steel shims, and a bag of non-shrink grout can solve the majority of uneven concrete situations you’ll encounter. The key is taking the time to assess properly, dry-fit before fastening, and check your riser heights before the treads go on.
Take it one step at a time — literally — and you’ll end up with a staircase that’s solid, safe, and built to handle years of daily use.