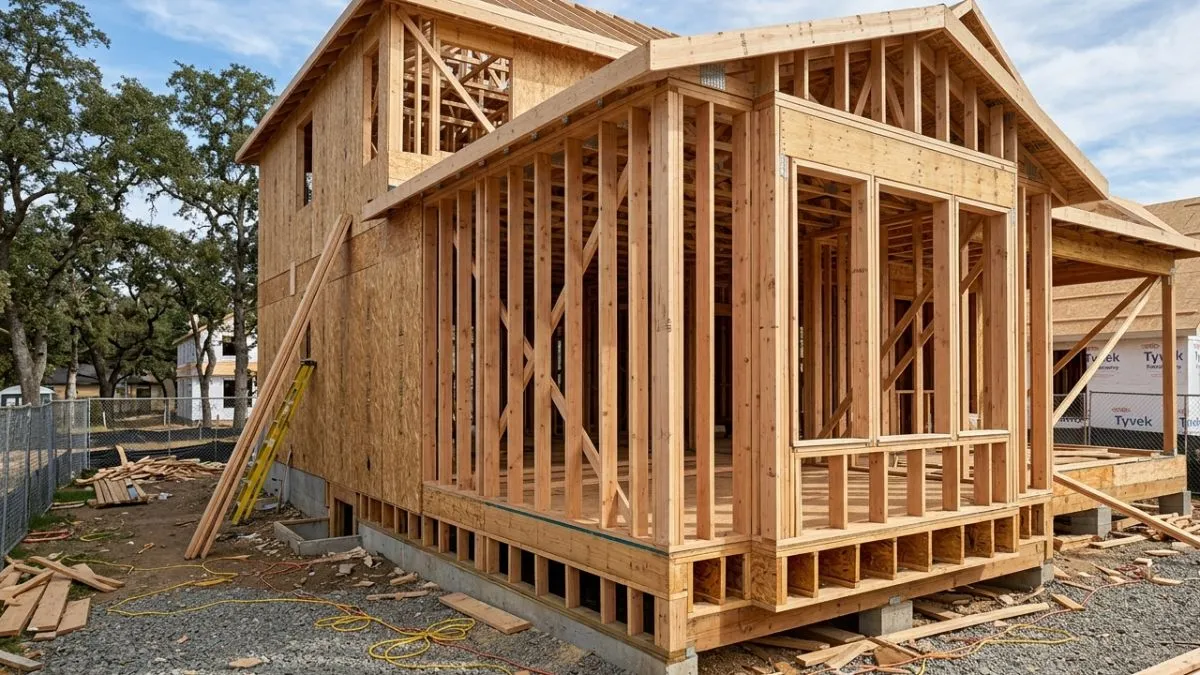
Are you thinking about adding more space and natural light to your home without a full renovation? Window bump out framing might be the perfect solution for you.
This simple yet effective technique can transform a flat wall into a charming nook, making your room feel bigger and brighter. You’ll discover how window bump out framing works, why it’s a smart choice, and what you need to know before starting.
Planning Window Bump Out
Planning window bump out framing requires careful thought and preparation. This step ensures the new window space fits well with your home’s structure and style. Proper planning helps avoid costly mistakes during construction. It also guarantees the bump out adds value and comfort to your space.
Assessing Space And Dimensions
Start by measuring the area where the window bump out will be installed. Accurate measurements prevent issues later. Consider the following:
- Width, height, and depth: Measure the wall space and how far the bump out will extend.
- Interior space: Check how the bump out affects room size and furniture placement.
- Exterior impact: Ensure the bump out fits the home’s outside look.
Use a tape measure and level tool for precise results. Sketch a rough plan showing the bump out location and size. Include nearby doors, windows, and rooflines. This helps visualize the final outcome.
| Measurement | Purpose | Tool Needed |
| Width | Determines horizontal space for bump out | Tape measure |
| Height | Ensures window aligns with room and exterior | Tape measure |
| Depth | Controls how far bump out extends outside | Tape measure |
Check for any obstacles inside the wall, such as plumbing or wiring. Mark these on your plan to avoid damage. Assessing space thoroughly sets a strong foundation for your project.
Choosing Materials
Material choice affects durability, appearance, and cost of the bump out. Pick materials that match your home’s style and climate. Common framing options include:
- Wood: Easy to work with, offers good insulation, but needs treatment against moisture.
- Steel: Strong and long-lasting, ideal for larger bump outs, but more expensive.
- Engineered lumber: Resistant to warping, good for precise framing.
Consider exterior finishes too. Vinyl siding, brick, or stucco can cover the bump out to blend with existing walls.
| Material | Advantages | Disadvantages |
| Wood | Affordable, easy to cut and shape | Prone to rot, needs maintenance |
| Steel | Strong, fire-resistant | Higher cost, requires special tools |
| Engineered Lumber | Stable, less shrinkage | Costlier than regular wood |
Choose insulation materials to keep the space warm or cool. Foam board and fiberglass batts are common options. Selecting the right materials improves energy efficiency and comfort.
Local Building Codes
Local building codes set rules for window bump out construction. Following these codes keeps your project safe and legal. Visit your city or county building department for requirements. Key points often include:
- Structural support: Rules on framing size and load-bearing walls.
- Window size and placement: Minimum sizes for light and emergency exits.
- Energy efficiency: Standards for insulation and window ratings.
- Permits: Whether you need a permit before starting work.
Ignoring codes can cause fines or force you to redo work. Consult a professional if unsure about code details. Keep all permits and inspections documented during the project.
| Code Aspect | Typical Requirements | Reason |
| Framing | Use specified lumber size and spacing | Ensure structural strength |
| Window Size | Minimum egress dimensions | Allow safe emergency exit |
| Insulation | Meet R-value standards | Improve energy efficiency |
| Permits | Obtain before construction | Legal compliance and inspections |
Preparing The Site
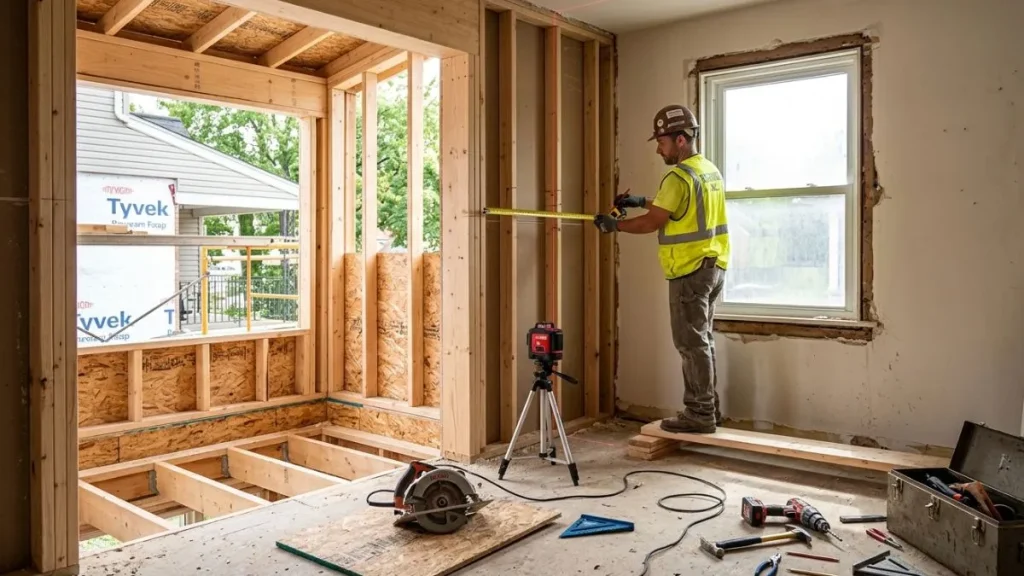
Preparing the site is a crucial step in window bump out framing. It sets the stage for a smooth build and ensures the new window fits perfectly. Proper preparation helps avoid delays, extra costs, and structural problems. This phase involves clearing the work area, removing existing materials, and checking the wall’s strength. Taking time here saves effort later and creates a solid base for the bump out.
Removing Exterior Siding
Start by carefully removing the exterior siding around the window area. This step exposes the wall framing and allows access for adjustments. Use tools like pry bars and hammers to gently pull off the siding without damaging it. Save undamaged siding if possible for reuse or patching.
Key points for siding removal:
- Wear safety gloves and goggles to protect from nails and debris.
- Work slowly to prevent cracking or breaking siding panels.
- Label siding pieces to match their original position for easier reinstallation.
- Check for nails or screws hidden under paint or caulk before removal.
Framing Removal
After siding removal, the next step is to remove the existing framing around the window. This includes the window trim, studs, and any sheathing in the bump out area. Removing framing allows room to build the new extended frame.
Steps for safe framing removal:
- Remove window trim carefully with a pry bar.
- Cut any nails or screws holding studs in place.
- Remove damaged or rotten wood first.
- Keep framing lumber that is in good condition for reuse.
- Dispose of debris to keep the site clean.
Important tips for framing removal:
- Check for electrical wiring or plumbing inside the wall before cutting.
- Support the wall temporarily if it holds up weight.
- Use proper tools like saws and crowbars safely.
- Work with a helper to handle large framing pieces.
Removing framing needs care to avoid weakening the wall structure. It creates the open space needed to build the bump out frame securely.
Ensuring Structural Support
Once framing is removed, check the wall’s structural support. The bump out adds weight and changes forces on the wall. Ensuring strong support prevents future cracks or sagging.
How to ensure structural support:
- Inspect existing studs and headers for damage or decay.
- Install additional studs around the bump out opening.
- Use proper-sized headers to carry the weight above the window.
- Add blocking between studs for extra strength.
- Consult building codes for required support sizes and spacing.
Use this table as a quick guide for header sizes based on opening width:
| Opening Width | Header Size | Material |
| Up to 3 feet | 2×8 | Laminated veneer lumber (LVL) or solid wood |
| 3 to 6 feet | 2×10 or 2×12 | LVL or engineered wood |
| Over 6 feet | Consult structural engineer | Custom engineered solution |
Additional support tips:
- Use metal brackets for strong connections.
- Secure all framing with nails or screws per code.
- Level and square the new framing before finishing.
Proper structural support ensures the bump out lasts long and stays safe. It keeps the wall stable under new loads.
Framing The Bump Out
Framing the bump out is a crucial step in creating a strong, stable window extension. This process shapes the structure that supports the walls and roof of the bump out. Proper framing ensures the bump out is safe, durable, and looks good. It also helps the window fit perfectly and keeps out drafts and water. The framing involves building a base frame, installing wall studs, and adding top plates and headers. Each part plays an important role in making the bump out sturdy and long-lasting.
Building The Base Frame
The base frame is the foundation of the bump out. It sits on the existing floor or foundation and supports the entire structure above. Start by measuring the bump out area carefully to make sure the frame fits exactly. Use pressure-treated lumber for the base to resist moisture and rot.
- Cut the bottom plate: This is the horizontal piece that runs along the floor.
- Attach rim joists: These run perpendicular to the bottom plate and provide extra support.
- Secure with screws or nails: Use galvanized fasteners to prevent rust.
Check the base frame for level and square before moving on. A simple way to check square is the 3-4-5 rule:
| Side A | Side B | Diagonal |
| 3 feet | 4 feet | 5 feet |
If the diagonal measures 5 feet, the frame is square. A square base frame means walls will be straight and windows will fit well.
Installing Wall Studs
Wall studs form the vertical skeleton of the bump out. They carry the weight from the roof and upper walls down to the base frame. Use 2×4 or 2×6 studs spaced 16 inches apart for good support. Mark the bottom plate with stud locations before installing.
- Cut studs to the right height: Measure from base frame to top plate height.
- Place each stud on the marks: Keep them straight and plumb.
- Secure studs to the bottom plate: Use nails or screws driven at an angle for strength.
- Add blocking: Install horizontal blocks between studs for extra rigidity.
Wall studs also create spaces for insulation and wiring. Using consistent spacing helps keep the frame strong and makes it easier to add drywall later.
Adding Top Plates And Headers
The top plate sits on top of the studs and ties the wall together. It spreads the load evenly and keeps studs aligned. Use two layers of lumber for the top plate for extra strength. Nail the first plate directly on the studs, then add the second plate offset to cover joints.
Headers go above window openings. They carry the weight from above and transfer it around the opening safely. Build headers by stacking two pieces of lumber with a piece of plywood or OSB sandwiched between them. This sandwich creates a strong beam.
- Measure the window width: Include extra length to rest on studs.
- Cut header pieces: Make sure they fit snugly.
- Assemble header: Nail or screw the layers together firmly.
- Install header above the window opening: Support it temporarily until it is secured to the studs.
Headers prevent sagging and maintain the wall’s shape. Proper installation means the bump out will support the roof and resist settling.
Installing Windows
Installing windows in a window bump out framing is a crucial step for both appearance and function. Proper installation ensures the window fits perfectly, blocks drafts, and prevents water damage. This process involves choosing the right window type, applying effective flashing and waterproofing, and securely fastening the frame. Each step demands attention to detail to create a durable, energy-efficient bump out that enhances your home’s charm and comfort.
Selecting Window Types
Choosing the correct window type impacts light, ventilation, and energy use in the bump out. Consider these common window styles:
- Casement Windows: Open outward with a crank, offering good ventilation and a tight seal.
- Double-Hung Windows: Have two movable sashes; easy to clean and provide balanced airflow.
- Fixed Windows: Do not open but allow maximum light and clear views.
- Sliding Windows: Slide horizontally; simple to operate and good for wide openings.
Match window materials with your home’s style and climate needs. Common materials include:
| Material | Benefits | Considerations |
| Vinyl | Low cost, low maintenance, good insulation | Limited color options, can warp in extreme heat |
| Wood | Classic look, good insulator, paintable | Needs regular maintenance, susceptible to rot |
| Aluminum | Strong, lightweight, modern appearance | Poor insulator, can corrode without coating |
Energy efficiency is key. Look for windows with low U-values and good solar heat gain coefficients (SHGC). These numbers show how well the window keeps heat in or out.
Flashing And Waterproofing
Proper flashing and waterproofing protect the window bump out from water damage. Water can enter around windows and cause mold, rot, or structural problems.
Start by installing a water-resistant barrier (WRB) around the window opening. This barrier blocks moisture from entering walls.
Use flashing tape or metal flashing to seal edges:
- Apply flashing tape over the WRB at the bottom first to create a drip edge.
- Next, cover the sides of the window frame with flashing to direct water away.
- Finally, install flashing at the top, overlapping side flashing to prevent water entry.
Seal all joints and nail holes with a high-quality, exterior-grade sealant. This extra step stops tiny leaks.
Check these waterproofing tips:
| Step | Purpose |
| Install WRB | Creates a moisture barrier behind the wall |
| Apply flashing tape bottom to top | Directs water away from the window opening |
| Seal joints and nail holes | Prevents water leaks through small gaps |
Good flashing extends window life and keeps your home dry.
Securing The Window Frame
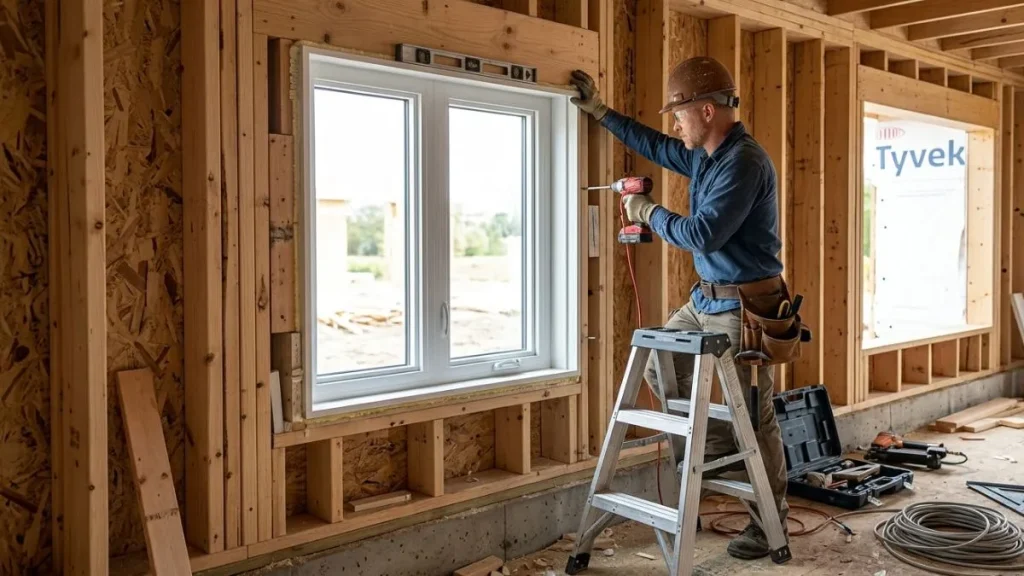
Fastening the window frame tightly to the bump out framing ensures stability and proper function. The frame must be level, plumb, and square.
Follow these steps for secure installation:
- Check the rough opening: It should be slightly larger than the window frame for adjustments.
- Apply a bead of sealant: Place sealant on the sill to create a weatherproof seal.
- Set the window in place: Center it in the opening and verify level and plumb.
- Fasten the window: Use corrosion-resistant screws through pre-drilled holes in the frame.
- Shim as needed: Insert shims to maintain alignment and prevent frame warping.
- Check operation: Open and close the window to confirm smooth movement.
Secure fastening prevents air leaks and water infiltration. It also helps the window withstand wind and weather.
Use this quick checklist for frame securing:
- Seal sill with weatherproof caulk
- Level and plumb the frame carefully
- Fasten with corrosion-resistant screws
- Use shims for perfect alignment
- Test window operation before finishing
Properly secured windows improve energy efficiency and home comfort.
Insulation And Sealing
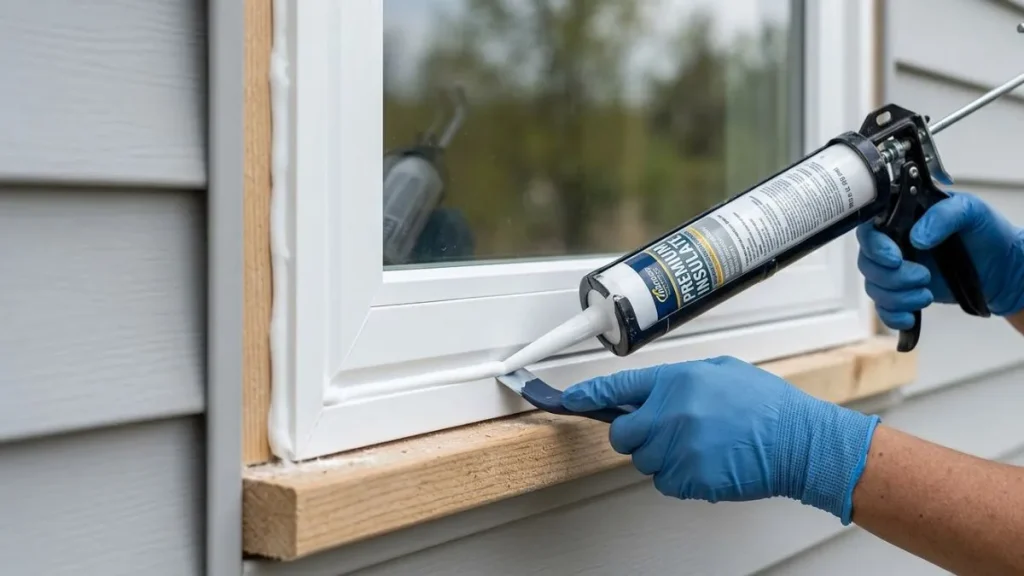
Proper insulation and sealing are vital steps in window bump out framing. They keep your home warm in winter and cool in summer. This reduces energy bills and stops drafts. Insulation fills gaps around the window frame, while sealing blocks air leaks. Both work together to improve comfort and protect against moisture. Careful attention to these details ensures a durable, efficient bump out that lasts for years.
Adding Insulation Around Frame
Adding insulation around the window bump out frame is key to preventing heat loss. Use materials that fit tightly into gaps without compressing. Common options include:
- Fiberglass batt insulation – easy to cut and install
- Spray foam insulation – expands to fill irregular spaces
- Rigid foam board – offers high R-value in thin layers
Start by measuring the cavity space between framing members. Cut insulation pieces slightly larger than the cavity. This ensures a snug fit and reduces air pockets. Avoid leaving any gaps or voids as they cause cold spots and drafts.
Tips for proper insulation installation:
- Wear gloves and a mask to protect from fibers or fumes.
- Insert insulation carefully to avoid compression.
- Fill corners and small voids with spray foam or fiberglass scraps.
- Check for wires or pipes before placing insulation.
| Insulation Type | R-Value per Inch | Best Use | Cost |
| Fiberglass Batt | 2.9 – 3.8 | Standard cavities, easy install | Low |
| Spray Foam | 6.0 – 7.0 | Irregular gaps, high performance | High |
| Rigid Foam Board | 4.0 – 6.5 | Thin spaces, added vapor barrier | Medium |
Proper insulation around the bump out frame creates a thermal barrier. It keeps your home comfortable and energy-efficient.
Air Sealing Techniques
Air sealing prevents unwanted drafts and moisture from entering the bump out. It complements insulation by blocking airflow paths. Effective air sealing uses:
- Caulk – seals small cracks and joints
- Expanding spray foam – fills larger gaps and voids
- Weatherstripping – seals movable window parts
- House wrap or flashing tape – covers seams and edges
Begin by inspecting the window frame for gaps or cracks. Apply caulk smoothly along joints between wood and window frame. Use spray foam in deeper cavities, but trim excess after it cures. Weatherstripping goes on moving parts to maintain airtight closure.
Common air sealing areas in bump outs:
- Between window frame and wall framing
- Along the sill plate
- At corners and joints in framing
- Where siding meets the bump out
Use a handheld blower door or smoke pencil to detect leaks. Sealing these gaps improves indoor air quality and lowers heating and cooling costs.
Pro tips for lasting air sealing:
- Use high-quality exterior-grade caulk for durability.
- Apply sealants in dry weather for best adhesion.
- Check seals annually and repair cracks as needed.
- Combine multiple sealing methods for best results.
Exterior And Interior Finishing
Window bump out framing creates extra space and adds charm to any room. After framing, the focus shifts to exterior and interior finishing. These finishing steps protect the structure, improve insulation, and boost curb appeal. Proper finishing also ensures the bump out blends smoothly with the rest of the building. Both outside and inside surfaces need careful attention for a clean, polished look.
Applying Exterior Siding
The exterior siding protects the bump out from weather and adds style. First, install a weather-resistant barrier over the framing. This stops moisture from seeping in. Next, choose siding that matches or complements the home’s existing style. Common options include vinyl, wood, fiber cement, and composite materials.
Key steps for applying exterior siding:
- Inspect the surface: Make sure the sheathing is smooth and clean.
- Install flashing: Add metal or vinyl flashing around windows and edges to direct water away.
- Start siding at the bottom: Work upward, overlapping each row to shed water.
- Secure siding firmly: Use nails or screws recommended for your siding type.
- Seal joints and corners: Apply caulk or sealant to prevent drafts and leaks.
Interior Drywall And Trim
Inside the bump out, drywall and trim create a smooth, finished appearance. Start by installing drywall sheets over the framing. Cut drywall to fit around windows and corners. Secure sheets with drywall screws, spacing them evenly. After hanging, tape and mud the joints to hide seams.
Follow these steps for drywall and trim:
- Hang drywall: Attach sheets firmly to framing.
- Tape seams: Use drywall tape on all joints.
- Apply joint compound: Smooth mud over tape and screw heads.
- Sand surfaces: Sand dried mud for a flat surface.
- Install trim: Add window and baseboard trim for a clean edge.
The trim hides drywall edges and adds style. Choose simple or decorative profiles based on room design. Use nails and wood glue for secure attachment. Caulk any gaps between trim and walls for a neat finish.
Tips for a great interior finish:
- Use moisture-resistant drywall near windows.
- Sand carefully to avoid dust clouds.
- Prime drywall before painting.
Painting And Final Touches
Painting adds color and protects both interior and exterior surfaces. Begin by priming all drywall and trim. Primer helps paint stick well and evens out the surface. Choose paint types suitable for walls and trim. Water-based latex paints work well inside and dry quickly.
Steps for a smooth paint job:
- Clean surfaces: Remove dust and dirt before painting.
- Apply primer: Cover all new drywall and wood trim.
- Paint base coat: Use a roller for large areas and brushes for edges.
- Apply second coat: Add another coat for full coverage.
- Touch up details: Fix small spots and clean edges.
Final touches improve function and appearance:
- Install window casings and sills.
- Add weatherstripping to window edges.
- Clean all surfaces carefully.
Quality paint and careful application ensure the bump out looks great for years. These finishing steps complete the project and make the space inviting.
You May Read Also: Window Frame Separating from Wall?
Conclusion
Window bump out framing adds space and light to any room. It improves the look of your home’s exterior. The process is simple but needs careful planning and measuring. Using the right materials ensures a strong and safe structure. This project can increase your home’s value and comfort.
Take your time and follow steps closely. Small changes bring big differences in your living space. Consider this option to brighten and widen your rooms.