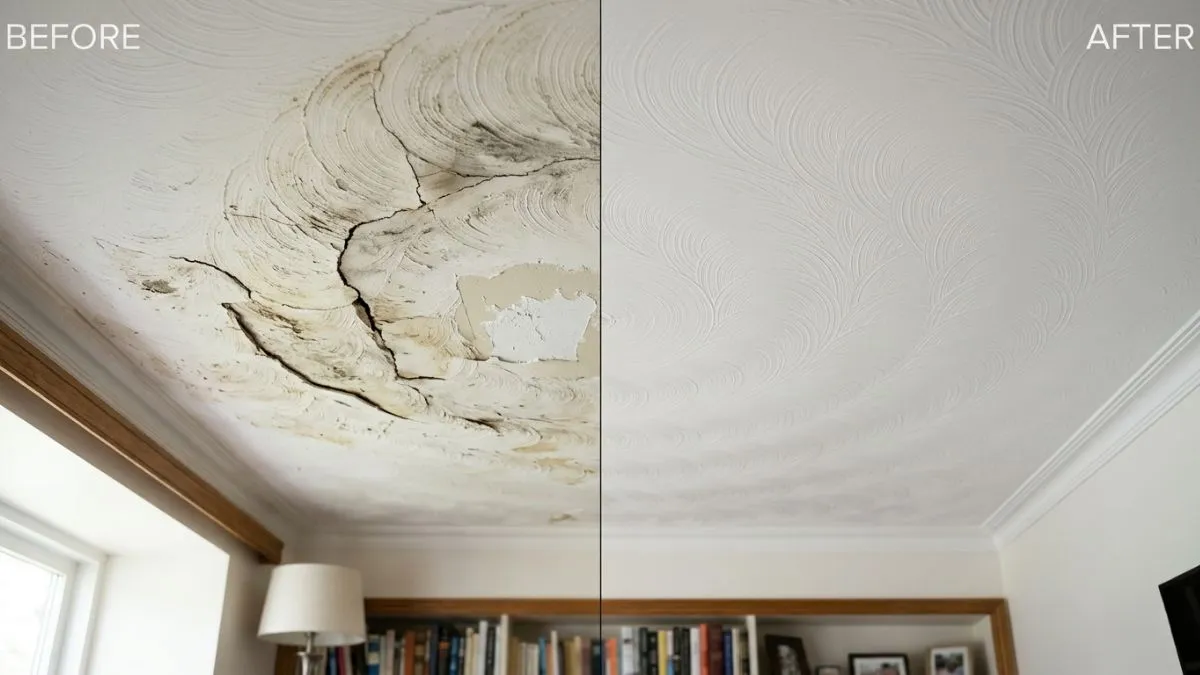
Is your ceiling showing signs of wear with cracked or damaged swirl texture? You might feel unsure about how to fix it without making things worse.
Swirl textured ceilings add a unique charm to your space, but when they start to peel or crack, it can be frustrating. The good news is, you don’t have to live with those imperfections or hire expensive professionals right away.
You’ll discover simple, effective steps to repair your swirl textured ceiling and restore its original beauty. Keep reading to learn how you can bring your ceiling back to life with confidence and ease.
Causes Of Swirl Ceiling Damage
Swirl textured ceilings add a unique look to homes but can suffer damage over time. Understanding the causes of swirl ceiling damage helps in effective repair and maintenance. Damage often appears as cracks, peeling, or discoloration, affecting both appearance and ceiling integrity. Identifying the root causes ensures you address problems early and keep your ceilings looking fresh.
Common Wear And Tear Factors
Swirl ceilings face regular wear and tear from everyday conditions. Small impacts or vibrations can cause cracks or chips in the textured surface. Over time, dust and dirt settle into the swirls, dulling their appearance.
- Physical impacts: Accidental bumps or hitting the ceiling with furniture cause visible damage.
- Vibrations: Loud noises or nearby construction can weaken the texture.
- Dust accumulation: Dust sticks to the texture, making it look old and worn.
- Cleaning challenges: Rough cleaning can damage the swirl pattern.
Impact Of Moisture And Humidity
Moisture and humidity are major threats to swirl textured ceilings. Water stains, bubbling, and peeling often start from dampness in the ceiling material.
High humidity softens the ceiling surface and weakens adhesives holding the swirl texture. Over time, this causes sections to sag or fall off. Moisture also invites mold, which damages the ceiling and harms indoor air quality.
- Water leaks: Roof or pipe leaks soak the ceiling, causing stains and texture loss.
- Condensation: Poor ventilation leads to moisture buildup on the ceiling.
- Humidity levels: Consistently high humidity weakens ceiling materials.
Typical moisture damage signs include:
- Yellow or brown stains
- Peeling or bubbling texture
- Soft or sagging areas
- Mold or mildew spots
Effects Of Aging Materials
Swirl ceilings age like any other building material. Over years, paint loses adhesion and the texture becomes brittle. Drywall beneath the texture may crack or crumble, causing visible damage.
Older swirl ceilings often show these signs:
- Cracking: Small cracks appear as materials shrink or shift.
- Discoloration: Fading or yellowing paint changes the ceiling color.
- Brittleness: Texture flakes off easily due to material breakdown.
- Loose texture: Adhesive failure causes swirl patterns to separate.
Material aging speeds up if the ceiling faces moisture or physical stress. Regular inspection helps catch aging problems early. Timely repair prevents costly replacements and keeps ceilings looking good longer.
Preparing The Ceiling Surface
Preparing the ceiling surface is a crucial step in swirl textured ceiling repair. This step ensures the repair materials stick well and the final result looks smooth and neat. Proper preparation helps avoid future peeling or cracking. Taking time to clean and protect the area makes the repair easier and more durable. Follow these steps carefully to get the best outcome.
Cleaning And Removing Loose Texture
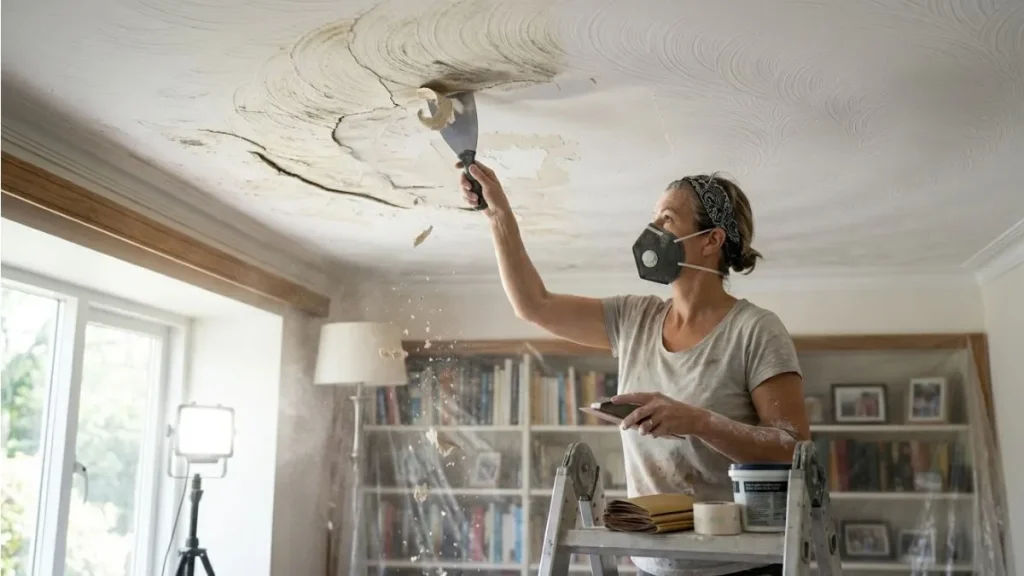
Start by cleaning the ceiling to remove dust, dirt, and any loose texture pieces. Use a soft brush or vacuum with a brush attachment. This removes debris that can stop new material from sticking properly. Next, check for loose or flaking texture. Gently scrape these areas with a putty knife. Avoid damaging the ceiling underneath.
Steps to clean and remove loose texture:
- Wear safety goggles and a dust mask.
- Use a soft brush or vacuum to clear dust and dirt.
- Lightly spray water on loose texture to soften it.
- Carefully scrape away loose texture with a putty knife.
- Wipe the area with a damp cloth to remove remaining dust.
Use a damp cloth to clean the surface after scraping. Let the ceiling dry fully before moving on. Wet or damp surfaces can cause repair material to fail. If the texture damage is large, consider patching the area before applying new texture. This step helps create a smooth base for the swirl pattern.
Protecting Surrounding Areas
Protect the walls, furniture, and floor before starting repair work. Ceiling repair can create a lot of dust and debris. Cover everything to avoid stains and damage. Use plastic sheets or drop cloths for protection. Tape the covers securely so they don’t move during work.
Essential items for protecting the area:
| Item | Purpose |
| Plastic drop cloths | Protect floors and furniture from dust and debris |
| Painter’s tape | Secure plastic covers to walls and trim |
| Masking paper | Cover walls close to the ceiling |
| Old sheets or blankets | Extra layer of protection for furniture |
Remove or cover light fixtures and ceiling fans. Use painter’s tape to protect edges and corners. Wear old clothes and safety gear to stay clean and safe. Preparing the space well saves time and stress during cleanup.
Repair Techniques For Small Damages
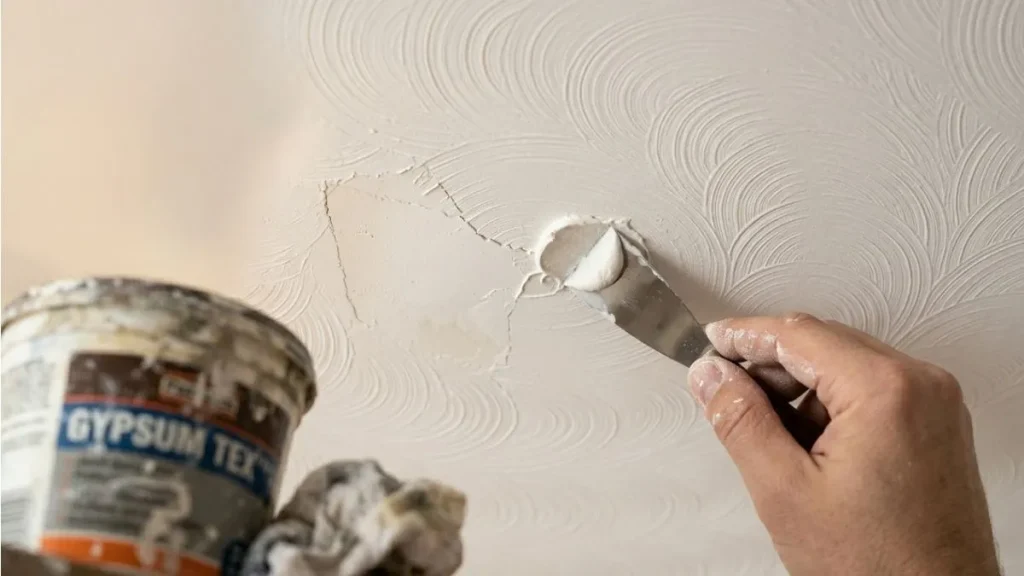
Small damages on swirl textured ceilings can be fixed without replacing the entire surface. Repair techniques for small damages save time and money. These repairs keep the ceiling looking fresh and clean.
Patching Minor Cracks And Holes
Start by cleaning the damaged area. Remove any loose paint or debris with a soft brush or cloth. For cracks, widen them slightly with a putty knife to allow filler to stick well.
Use a quality spackling compound or joint compound to fill cracks and holes. Follow these steps:
- Apply a thin layer of compound using a putty knife.
- Press firmly to fill the crack or hole completely.
- Smooth the surface to blend with the surrounding ceiling.
- Let the compound dry fully, usually 24 hours.
- Sand lightly with fine-grit sandpaper for a smooth finish.
For holes larger than 1 inch, use a patch made of drywall or mesh tape before applying compound. This gives extra support and prevents future cracks.
| Damage Type | Repair Material | Drying Time | Tools Needed |
| Small cracks | Spackling compound | 24 hours | Putty knife, sandpaper |
| Holes up to 1 inch | Joint compound + mesh tape | 24-48 hours | Putty knife, sandpaper, patch |
Blending Texture Seamlessly
After patching, matching the swirl texture is key. The goal is to make the repair invisible. Follow these simple steps:
- Use a small brush or sponge to apply texture compound.
- Practice on cardboard to copy the swirl pattern.
- Apply the texture lightly over the patched area.
- Use a comb, brush, or your finger to create swirls.
- Allow texture to dry completely.
- Paint over the patch with matching ceiling paint.
Tips for better blending:
- Work in natural light to see texture clearly.
- Use the same type of compound as original texture.
- Apply thin layers to avoid clumps.
- Be patient and build texture gradually.
Matching swirl texture may take practice. Take your time and compare the patch with surrounding ceiling. The right technique keeps repairs hidden and restores your ceiling’s beauty.
Fixing Extensive Damage
Fixing extensive damage on a swirl textured ceiling requires careful steps to restore its original look. Large cracks, holes, or peeling texture need more than just a quick patch. The repair process involves removing all damaged areas and then reapplying the swirl texture with precision. This helps maintain a smooth, uniform ceiling that looks clean and fresh. Proper preparation and technique are key to a lasting repair.
Removing Damaged Sections
Start by identifying all the damaged parts of the ceiling. Use a utility knife or drywall saw to cut away loose or broken material. Remove any flaking paint or texture around the damaged area to avoid future peeling. Be careful not to cut too deep into the ceiling structure.
Follow these steps for effective removal:
- Clear the room or cover furniture with drop cloths to protect from dust.
- Wear safety goggles and a mask to avoid inhaling dust.
- Score the edges of the damaged section to create clean lines.
- Remove damaged drywall or plaster completely.
- Sand the edges smooth to blend with the surrounding ceiling.
Use a damp cloth to wipe away dust after sanding. This creates a clean surface for new material. If water damage caused the problem, check for leaks before starting repairs.
| Tool | Purpose |
| Utility Knife | Cut damaged texture and drywall |
| Drywall Saw | Remove large damaged drywall sections |
| Sanding Block | Smooth edges after removal |
| Drop Cloths | Protect furniture and floors |
Reapplying Swirl Texture Patterns
Reapplying the swirl texture requires matching the original pattern and texture thickness. Use a premixed swirl texture compound or mix your own with joint compound and water. The key is consistency in the mixture for smooth application.
Follow these steps to reapply the texture:
- Apply a base coat of joint compound to the repaired area with a trowel.
- Let the base coat dry completely.
- Use a brush or sponge to create swirl patterns while the compound is still wet.
- Practice the swirl motion on a piece of cardboard before applying to the ceiling.
- Work in small sections to maintain control and uniformity.
- Allow the texture to dry fully before painting.
Use tools like a swirl brush or a stiff-bristled brush for the best effect. Matching the size and shape of the original swirls helps the patch blend in seamlessly. Lightly sanding the edges of the textured area after it dries can smooth out any harsh lines.
Painting And Finishing Touches
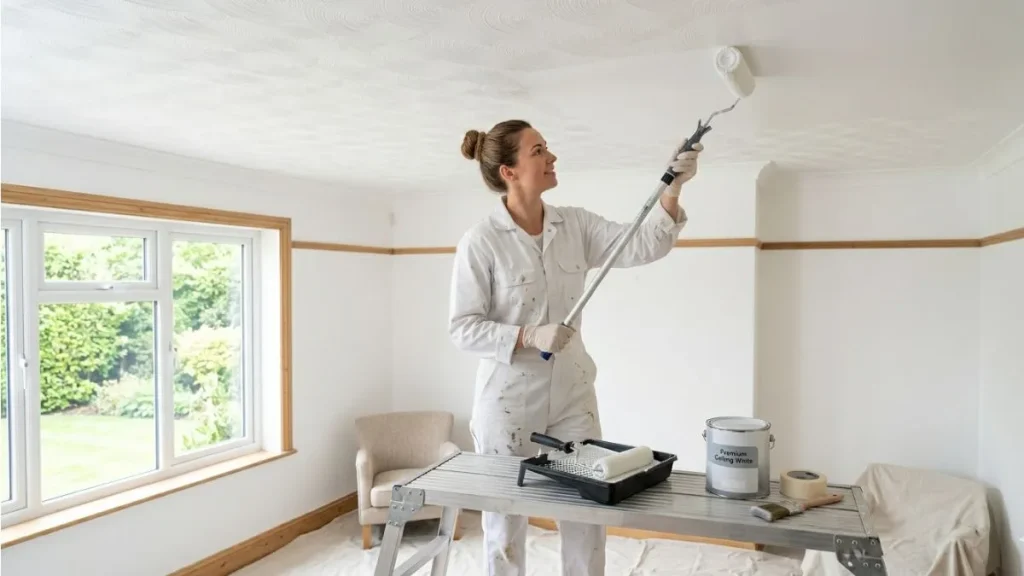
After repairing a swirl textured ceiling, painting and finishing touches are crucial for a smooth, polished look. Painting helps blend the repair area with the rest of the ceiling, making the swirl texture stand out evenly. Proper finishing adds durability and enhances the ceiling’s appearance. Careful attention during this stage ensures the repair is nearly invisible and the ceiling looks fresh and clean.
Choosing The Right Paint
Picking the correct paint is essential to match the swirl texture ceiling. Use a flat or matte finish paint. This type hides imperfections well and reduces glare. Swirl textured ceilings often have a rough surface, so paint with good coverage and thickness works best.
Consider these points when selecting paint:
- Color matching: Use the same color as the existing ceiling for a uniform look.
- Type of paint: Latex paint is easy to clean and dries fast.
- Primer: Use a primer on repaired spots to help paint stick better.
- Durability: Choose paint that resists moisture and stains for long-lasting results.
Test a small area before painting the whole ceiling. This helps ensure the color and finish match perfectly.
Tips For Even Coverage
Achieving even paint coverage on swirl textured ceilings requires careful technique. Use the right tools and follow steps to avoid streaks and blotches. Start by cleaning the ceiling surface to remove dust and debris. This allows paint to stick better.
Use these tips for smooth, even coverage:
- Use a thick-nap roller: A roller with ¾ inch to 1 inch nap holds more paint and reaches into the texture.
- Apply thin coats: Multiple thin layers prevent drips and uneven spots.
- Paint in one direction: Consistent strokes reduce visible lines.
- Feather edges: Lightly blend edges of each stroke to avoid harsh lines.
- Allow drying time: Let each coat dry fully before adding another.
Using a brush for corners and edges ensures full coverage. Keep the room well-ventilated to help paint dry faster and reduce fumes. Maintain a steady hand and patience for best results. Even coverage enhances the ceiling’s swirl texture and gives it a fresh, clean look.
Read Also: Lean-to Roof Flashing
Conclusion
Swirl textured ceiling repair keeps your home looking fresh and neat. Small cracks or holes don’t have to stay forever. Fixing them soon saves more work later. Use the right tools and materials for best results. Take your time to match the swirl pattern carefully.
Clean, smooth ceilings make rooms feel brighter and bigger. A well-done repair adds value and comfort to your space. Try simple steps first, then ask for help if needed. Keep your ceiling strong and beautiful for years to come.