Is your home’s siding starting to look worn or damaged? The problem might be rotted sheathing underneath.
If you ignore it, the damage can spread, causing bigger issues and costing you more money. But don’t worry—you can fix this yourself or know exactly what to ask a pro. You’ll learn how to replace rotted sheathing under your siding step-by-step.
Signs Of Rotted Sheathing
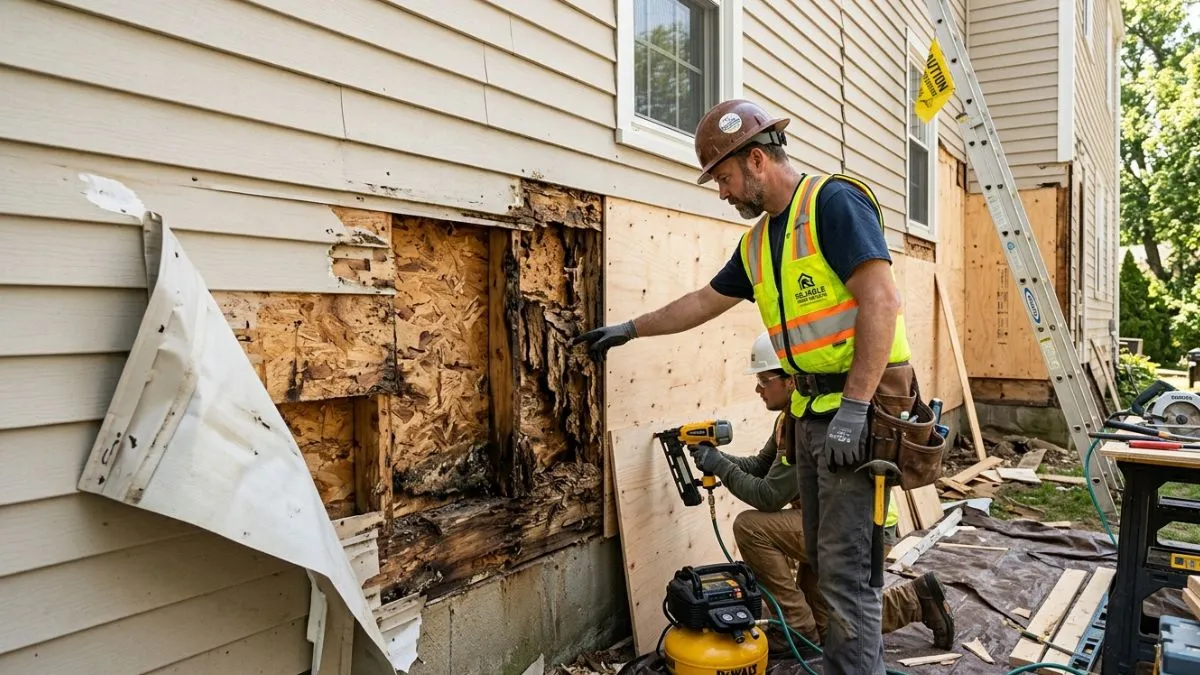
Rotted sheathing under siding can cause serious damage to your home’s structure and appearance. Detecting signs of rot early helps prevent costly repairs. Sheathing is the wooden layer beneath your siding that supports and protects your walls.
When it rots, it weakens your home’s defense against weather and pests. Knowing the signs of rotted sheathing allows you to act quickly and keep your home safe.
Visible Damage Indicators
Visible signs are the first clues to rotted sheathing. They often appear on your siding or around windows and doors. Look closely for:
- Peeling or bubbling paint: Moisture under the siding causes paint to lose adhesion.
- Warped or soft siding: Wood that feels spongy or bends easily signals decay beneath.
- Cracks or gaps: Spaces in siding can let water reach the sheathing.
- Discoloration: Dark or stained areas often point to water damage.
Here is a quick checklist to spot visible damage:
| Damage Type | What to Look For | Why It Matters |
| Peeling Paint | Paint bubbles or flakes off near siding | Indicates trapped moisture under siding |
| Warping | Siding is bent, soft, or feels spongy | Sheathing may be weakened or decayed |
| Cracks/Gaps | Visible openings between siding boards | Allows water to seep inside walls |
| Discoloration | Dark or stained spots on siding | Signs of water damage and rot |
Moisture And Mold Issues
Moisture is the main cause of sheathing rot. Trapped water encourages mold and mildew growth. Look for these signs:
- Musty odors: A damp, earthy smell near walls or siding.
- Visible mold spots: Black, green, or white patches on siding or inside walls.
- Condensation: Water droplets forming inside walls or windows.
- Water stains: Brown or yellow marks on interior walls.
Moisture problems often occur from poor drainage or leaks. Check gutters, downspouts, and siding seams. Fix these to stop water from reaching the sheathing.
Here is a simple guide to identify moisture and mold issues:
- Smell for dampness near your siding and inside the house.
- Inspect siding and walls for dark mold patches.
- Look for water stains or discoloration on walls.
- Check windows and walls for condensation buildup.
Structural Concerns
Rotted sheathing weakens your home’s structure. Ignoring it causes bigger problems. Watch for these signs:
- Soft spots on walls: Press gently; softness means decay.
- Wall bulges or sagging: Walls may bow due to weakened support.
- Loose or shifting siding: Sheathing failure can move siding panels.
- Doors and windows sticking: Rot causes frame warping, making openings hard to use.
Structural damage can spread quickly. Early detection saves time and money. Use this checklist for structural concerns:
| Issue | What to Check | Potential Risk |
| Soft Walls | Press siding or wall surface for softness | Sheathing decay reduces support |
| Bulging Walls | Look for uneven wall surfaces | Indicates structural instability |
| Loose Siding | Check for siding that moves or gaps | Sign of failing sheathing attachment |
| Sticking Doors/Windows | Try opening and closing frames | Warped framing from rot |
Removing Rotted Sheathing
Removing rotted sheathing is a crucial step in the process of replacing damaged siding. The sheathing, which supports the siding and adds structural strength, can deteriorate due to moisture and pests. Removing the rotted sections carefully prevents further damage and prepares the wall for new, solid sheathing. This step demands attention and proper technique to maintain the home’s integrity and prevent future problems.
Cutting Out Damaged Sections
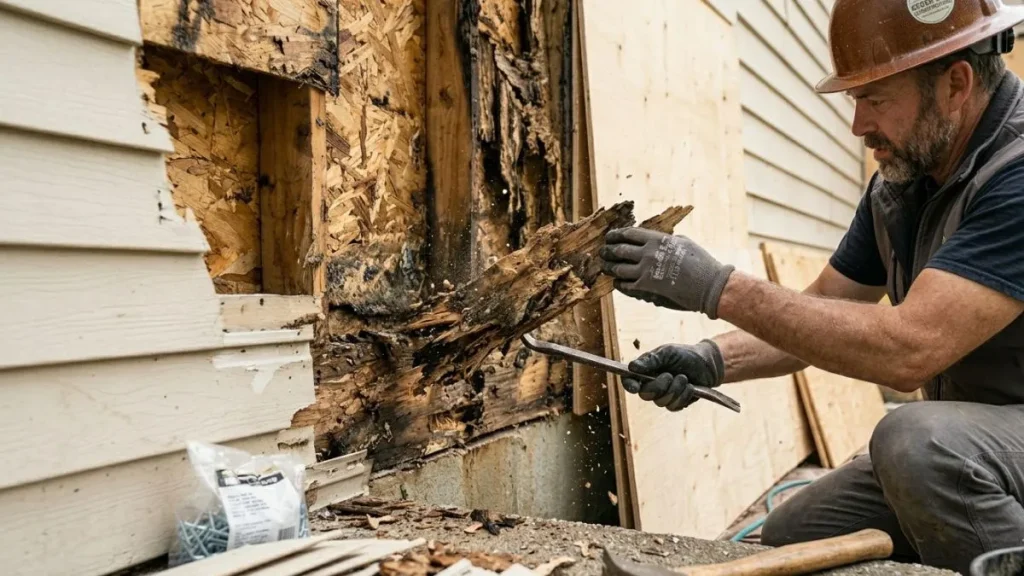
Start by inspecting the sheathing to identify all rotted areas. Use a utility knife or circular saw to cut out the damaged wood. Cut beyond the visibly rotted parts to ensure no weak spots remain. Make straight cuts to fit replacement sheathing easily.
- Mark the edges of the damaged sheathing clearly.
- Wear safety goggles and gloves to protect from debris.
- Set the saw depth to avoid cutting into wall studs.
- Cut in manageable sections for easier removal.
Use a pry bar to remove the cut pieces carefully. Avoid damaging the surrounding sheathing or studs. Check the wall cavity for mold or moisture. Let the area dry completely before installing new sheathing.
| Tool | Purpose | Tip |
| Utility Knife | Score along cut lines | Helps guide saw cuts |
| Circular Saw | Cut through sheathing | Adjust blade depth carefully |
| Pry Bar | Remove cut wood sections | Work gently to avoid damage |
Handling Fragile Areas
Fragile areas around the rotted sheathing need extra care. These spots may crack or crumble during removal. Use hand tools like chisels or small pry bars to work slowly. Avoid using heavy force, which can damage the wall frame.
Follow these tips to handle fragile areas:
- Inspect nearby sheathing for softness or cracks.
- Use a hammer and chisel to gently loosen wood fibers.
- Support loose sheathing with temporary braces if needed.
- Remove damaged wood in small pieces to maintain control.
Be patient and take time. Rushing can cause further damage and increase repair costs. Once removed, clean the area thoroughly and check for hidden mold or rot. Treat the exposed wood with a wood preservative to protect it from future damage.
Disposal Of Old Sheathing
Proper disposal of old sheathing prevents pest infestations and environmental harm. Rotted wood may contain mold spores or chemicals from treatments. Handle disposal carefully to keep your home and surroundings safe.
Here are steps for safe disposal:
- Wear a dust mask and gloves during removal and disposal.
- Place rotted sheathing in heavy-duty trash bags or containers.
- Check local regulations on construction waste disposal.
- Take the material to an approved waste facility or recycling center.
- Do not burn rotted wood, as it releases harmful particles.
Following these guidelines keeps your worksite clean and reduces health risks. Proper disposal also helps maintain environmental standards and supports community safety.
Installing New Sheathing
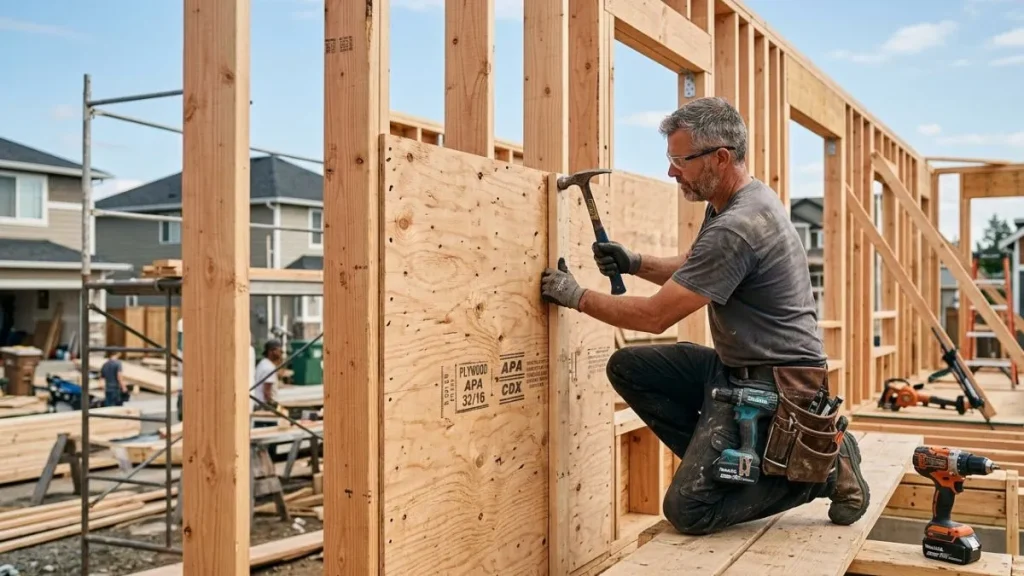
Replacing rotted sheathing under siding is crucial to protect your home from moisture and structural damage. Installing new sheathing creates a strong, dry base for siding and insulation. This step requires care to ensure the sheathing fits perfectly, stays secure, and keeps water out. Proper installation helps maintain your home’s energy efficiency and prevents future repair costs.
Measuring And Cutting
Start by measuring the area where the rotted sheathing was removed. Use a tape measure to get the exact height and width of the space. Double-check each measurement to avoid mistakes. Cutting the sheathing accurately is key to a snug fit and solid protection.
- Mark the measurements clearly on the new sheathing board.
- Use a straight edge or carpenter’s square to draw cutting lines.
- Choose the right saw for clean cuts: a circular saw works well for plywood or OSB sheathing.
- Cut slowly to avoid splintering or damaging the edges.
Keep extra pieces for small repairs or adjustments later. If the sheathing pieces are irregular, cut them into manageable shapes and fit them tightly together.
| Material | Recommended Saw | Cutting Tips |
| Plywood | Circular saw or handsaw | Cut along marked lines slowly to reduce splintering |
| OSB (Oriented Strand Board) | Circular saw | Use fine-tooth blade for smoother cuts |
| Zip System Sheathing | Circular saw with carbide blade | Score the panel first to avoid tearing the outer layer |
Securing Sheathing Properly
Properly securing new sheathing keeps your walls strong and stable. Use the right nails or screws and follow spacing rules for safety and durability. Fasteners should hold the sheathing tight without cracking or warping it.
- Choose galvanized nails or screws to prevent rust.
- Space fasteners 6 to 8 inches apart along edges.
- Place fasteners 12 inches apart in the field (middle area) of the sheathing.
- Drive fasteners flush with the surface but avoid overdriving.
Start fastening from one corner and work your way across the panel. Check that the sheathing lies flat and aligns with the wall studs. Use a level or straight board to spot any bumps or uneven spots. Correct these before continuing.
Here is a quick guide to fastener spacing:
| Sheathing Area | Fastener Spacing |
| Edges | 6-8 inches apart |
| Field (center) | 12 inches apart |
Sealing And Weatherproofing
Sealing new sheathing protects your home from water damage and air leaks. Use weather-resistant barriers and sealants to create a tight, waterproof layer before installing siding.
- Apply house wrap or a water-resistant barrier over the sheathing.
- Seal all seams with waterproof tape or flashing tape.
- Use caulk around windows, doors, and any penetrations in the wall.
- Install flashing at bottom edges and corners to direct water away.
Check that the house wrap is smooth and secure, with no tears or gaps. Overlap seams by at least 6 inches for better protection. Choose sealants and tapes rated for outdoor use and temperature changes.
Proper sealing prevents mold and rot inside walls. It also improves energy efficiency by stopping drafts. Take time to inspect and fix any weak spots in the weatherproof layer before moving on to siding installation.
Reinstalling Siding
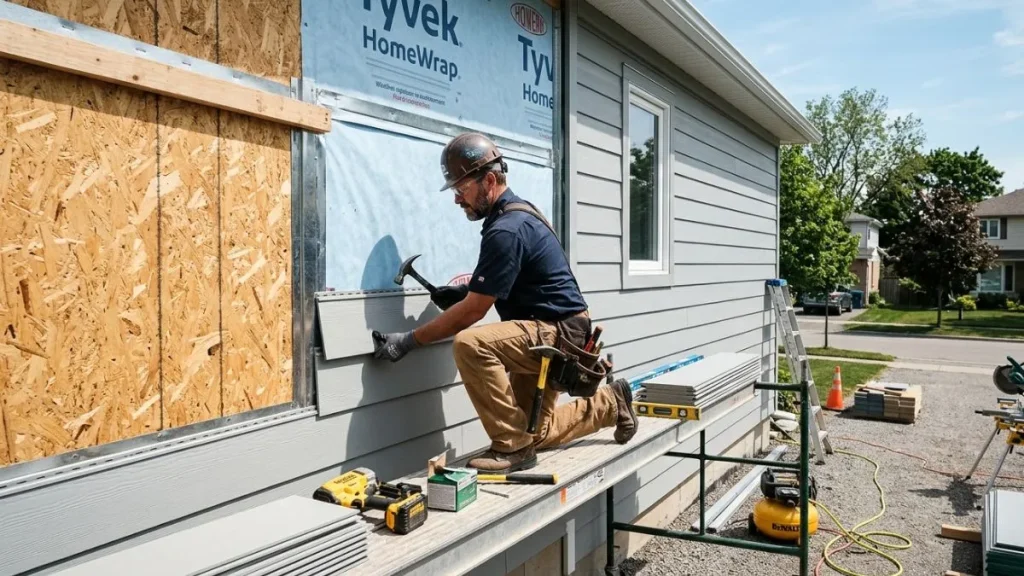
Replacing rotted sheathing under siding is a vital repair to keep your home safe and dry. After removing damaged materials, reinstalling siding restores your home’s look and protects it from weather. Proper siding installation improves energy efficiency and prevents future damage. Reinstalling siding requires care to align panels, use correct fastening, and perform a thorough inspection. Each step ensures a secure, long-lasting finish that keeps moisture out and maintains curb appeal.
Aligning Panels Correctly
Correct panel alignment is key to a smooth and weather-tight siding surface. Begin by laying out the siding panels on the ground. Check each piece for damage or warping before installation. Start at the bottom of the wall and work upward. Panels should overlap properly to shed water and avoid gaps.
- Use a level: Keep panels straight horizontally and vertically.
- Maintain spacing: Leave a small gap (about 1/8 inch) for expansion and contraction.
- Stagger seams: Avoid lining up vertical seams on adjacent rows to increase strength.
- Check corners: Panels must fit tightly around corners and trim pieces.
Following these steps prevents warping and water intrusion. Proper alignment also improves siding appearance. Use chalk lines or laser levels to guide placement. Adjust panels as needed before fastening. Well-aligned siding lasts longer and protects sheathing underneath.
Fastening Techniques
Choosing the right fastening method secures siding firmly while allowing slight movement. Use corrosion-resistant nails or screws designed for siding materials. Fasteners must penetrate the sheathing or framing by at least 1 inch for a strong hold.
Keep these tips in mind:
- Fasten in the center of the nailing slot: Allows siding to expand and contract without buckling.
- Do not overdrive fasteners: Nails or screws should be flush or slightly below the siding surface.
- Use the correct fastener length: Too short fasteners will loosen; too long may damage sheathing.
- Space fasteners evenly: Usually every 16 inches along each panel.
Table below shows common fastener types and uses:
| Fastener Type | Material | Recommended Use |
| Galvanized Nails | Steel | Wood siding and fiber cement |
| Stainless Steel Screws | Steel | Vinyl and metal siding |
| Ring Shank Nails | Steel | High-wind areas for extra grip |
Following proper fastening techniques ensures siding stays secure and flexible under weather changes.
Final Inspection
Performing a detailed final inspection confirms siding installation is complete and reliable. Walk around the entire house and check for gaps, loose panels, or misaligned pieces. Use a flashlight to look closely at seams and corners.
- Check for gaps: All panels should fit tightly to prevent water entry.
- Verify fasteners: No nails or screws should be missing or overdriven.
- Look for damage: Replace cracked or dented siding immediately.
- Inspect trim and flashing: These must be sealed and properly fitted.
Document any issues found for quick fixes. Proper final inspection avoids costly repairs later. This step ensures your siding protects the new sheathing and keeps your home strong for years.
You May Read Also: Repair Roof Sheathing from Inside
Conclusion
Replacing rotted sheathing under siding keeps your home safe and dry. It stops water damage and mold from spreading inside walls. Use proper tools and materials for best results. Take your time to remove damaged parts carefully. Check for hidden damage before installing new sheathing.
A solid base helps siding last longer and look better. Fix problems early to save money on big repairs. This job protects your home’s structure and value. Simple steps make a big difference in home care.