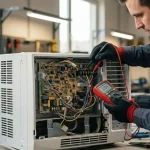
Wiring an air handler with heat strips might sound complicated, but with the right steps, you can do it yourself and save money. If you want your heating system to work efficiently and keep your home warm during cold months, knowing how to connect these parts correctly is crucial.
This guide will walk you through the process in simple terms, so you won’t feel overwhelmed or confused. Keep reading, and you’ll gain the confidence to handle the wiring safely and effectively.
Air Handler Basics
An air handler is a key part of many heating and cooling systems. It moves air through your home’s ductwork. Knowing the basics of an air handler helps with wiring heat strips safely and correctly. Heat strips add extra warmth, especially in cold weather.
Components Overview
An air handler has several important parts that work as a team. Each part plays a role in moving and conditioning the air inside your home. Here are the main components:
- Blower Motor: Pushes air through the ducts.
- Fan: Works with the blower to move air.
- Evaporator Coil: Cools air during summer.
- Heat Strips: Provide extra heat when needed.
- Filter: Cleans air before it enters your home.
- Control Board: Manages electrical signals and system functions.
Each part has a clear job. The blower motor and fan move air. The evaporator coil cools it. Heat strips add warmth. Filters keep the air clean. The control board keeps everything running safely.
Role Of Heat Strips
Heat strips are electric heating elements inside an air handler. They turn on when the system needs extra heat. This happens during very cold days or when the main heat source cannot keep up. Heat strips warm the air quickly and send it through your home.
Here are key points about heat strips:
- Electric Powered: They use electricity to generate heat.
- Fast Heating: Heat strips warm air faster than some other methods.
- Supplemental Heat: They support the main heating system.
- Safety Features: Many have built-in limits to prevent overheating.
Heat strips work with the air handler’s blower to spread warm air. When wiring heat strips, it is important to follow the correct electrical connections. This prevents damage and keeps the system safe. Heat strips increase your home’s comfort during very cold weather.
Safety Precautions
Wiring an air handler with heat strips requires careful attention to safety. Electricity and heating elements can be dangerous if handled incorrectly. Taking the right safety precautions protects both you and your equipment. Always prepare your workspace and follow safety steps closely before starting any wiring work.

Power Shutoff
Before starting the wiring process, turn off the power at the main circuit breaker. This stops any electric current from flowing to the air handler and heat strips. Working with live wires can cause serious electric shocks or short circuits.
Follow these steps to ensure power is safely shut off:
- Locate the main breaker panel in your home.
- Identify the breaker that controls the air handler and heat strips.
- Switch off the breaker to cut power supply.
- Use a voltage tester to confirm no electricity is present in the wires.
Use a voltage tester properly by touching the tester’s probe to the wire terminals. If the tester shows no voltage, it is safe to proceed. Never skip this step, even after turning off the breaker. This simple check prevents accidental shocks.
Never trust assumptions about power status. Always check with tools. Safety starts with power shutoff.
Proper Tools
Using the right tools makes wiring safer and easier. Poor tools can slip, causing injury or damage. Prepare all necessary tools before beginning. Organize them in a clean, well-lit area to avoid mistakes.
Essential tools for wiring an air handler with heat strips include:
- Wire strippers: For removing insulation without damaging wires.
- Screwdrivers: Both flathead and Phillips for securing terminals.
- Voltage tester: To verify power is off before touching wires.
- Multimeter: Measures electrical values for proper connections.
- Needle-nose pliers: For bending and positioning wires.
- Electrical tape: Insulates wire connections safely.
- Wire nuts: Secure wire splices.
Keep tools in good condition. Dull or broken tools increase risks. Use insulated handles to protect against shocks. Wear safety gloves and glasses to protect hands and eyes.
| Tool | Purpose | Safety Tip |
| Wire strippers | Remove insulation cleanly | Use correct size for wire gauge |
| Voltage tester | Check if wires are live | Test on a known live wire first |
| Multimeter | Measure voltage and resistance | Set to correct mode before use |
Proper tools reduce mistakes. They protect both the installer and the air handler system. Prepare well to work safely and efficiently.
Preparing The Air Handler

Preparing the air handler is the first step in wiring your air handler with heat strips. This phase ensures safety and makes wiring easier. You need to open the unit carefully and find the right wiring points. Proper preparation prevents mistakes and helps the system work well.
Accessing The Unit
Start by turning off the power to the air handler at the circuit breaker. This step is essential to avoid electric shocks. Next, locate the air handler, usually found in a closet, attic, or basement. Remove the access panel. The panel is held by screws or clips, so keep a screwdriver handy.
Once the panel is off, you see the inside parts of the air handler. Clean the area if dusty. Good visibility helps you work safely and accurately. Use a flashlight if needed.
- Turn off power at the breaker.
- Find the air handler location.
- Remove screws or clips holding the access panel.
- Take off the panel carefully.
- Clean and check the inside.
Keep the screws safe to close the panel later. Do not touch any wires yet. Wait until you identify the wiring terminals.
Identifying Wiring Terminals
Inside the air handler, find the wiring terminal block. This block connects wires from different parts. Look for labels on the terminals. Common labels include:
| Terminal Label | Description |
| R | Power supply from the transformer |
| W | Heating control |
| C | Common wire for completing the circuit |
| G | Fan control |
Heat strips usually connect to the W terminal or a dedicated terminal marked for heat strips. Use a multimeter to check for voltage to confirm. Carefully note each terminal’s position and label before disconnecting wires.
Label wires with tape and a marker for easy reassembly. This step avoids confusion during wiring. Double-check the air handler’s manual for specific terminal details. Manuals often show wiring diagrams and terminal functions.
Identifying wiring terminals correctly prevents damage and ensures the heat strips work properly. Take your time with this step.
Wiring Heat Strips
Wiring heat strips in an air handler requires careful attention to safety and detail. Heat strips provide extra warmth by using electric heating elements inside the air handler. Proper wiring ensures the system works efficiently and safely.
Connecting Power Supply
The power supply for heat strips must be connected correctly to deliver the needed voltage and current. Heat strips usually operate on 240 volts and require a dedicated circuit breaker. Follow these steps to connect the power supply safely:
- Turn off the main power before starting any wiring work.
- Use a properly rated circuit breaker according to the heat strip’s amperage.
- Run a double-pole breaker from the main panel to the air handler’s disconnect box.
- Use wires with the correct gauge size for the heat strip’s current load.
- Connect the two hot wires (usually black and red) from the breaker to the heat strip’s power terminals.
Double-check all wire connections and secure them tightly to prevent loose contacts. Use wire nuts or terminal screws as required. Proper power wiring keeps the heat strips running safely and efficiently.
Thermostat Wiring
The thermostat controls when the heat strips turn on and off. Correct thermostat wiring is critical for proper operation and energy savings. Most thermostats use low-voltage wiring to communicate with the air handler and heat strips. Here are key points for wiring the thermostat:
- Identify the thermostat terminals for heating, usually labeled W1 or W2.
- Connect the thermostat’s heating wires to the corresponding terminals on the air handler control board.
- Use the R terminal for the 24V power supply from the thermostat transformer.
- The C terminal (common) may be required to complete the circuit in some thermostats.
- Verify the wiring diagram from the heat strip and air handler manuals for exact terminal connections.
Test the thermostat functions after wiring by setting the temperature higher than room temperature. The heat strips should activate, and the air handler should blow warm air.
Grounding Requirements
Grounding is vital for safety when wiring heat strips. It protects against electrical shock and prevents damage to the system. Follow these grounding rules:
- Connect all metal parts of the air handler and heat strips to the building’s grounding system.
- Use a green or bare copper grounding wire sized according to local electrical codes.
- Attach the grounding wire to the air handler’s grounding screw or grounding bus bar.
- Ensure the power supply circuit includes a grounding conductor connected to the main panel ground.
- Check that all grounding connections are tight and free of corrosion or paint.
Here is a checklist for grounding the heat strip wiring:
- Use the correct grounding wire size.
- Connect ground wire to air handler frame.
- Connect ground wire to heat strip terminals if provided.
- Verify grounding continuity with a multimeter.
- Consult local electrical code requirements.
Proper grounding reduces fire risks and protects both the equipment and people from electrical faults. It is a critical step in wiring heat strips safely.
Testing The System

After wiring the air handler with heat strips, testing the system ensures everything works safely and correctly. This step confirms that the wiring is done properly and the heat strips provide the needed warmth. Testing avoids potential damage and keeps your home comfortable during cold days. Follow these steps carefully to check your system.
Powering On
Start by turning on the power to your air handler and heat strips. This activates the system so you can test its functions. Follow this simple process:
- Check the circuit breaker: Make sure the breaker for the air handler and heat strips is in the ON position.
- Turn on the thermostat: Set the thermostat to a temperature higher than the room temperature to trigger heating.
- Listen and watch: The air handler fan should start running first to circulate air.
- Confirm power indicators: Look for any lights or signals on the control board that show the system is powered.
Verifying Heat Strip Operation
Once the system powers on, check the heat strips to confirm they heat up properly. This step ensures the strips are wired and functioning as they should.
Follow these guidelines to verify heat strip operation:
- Feel for warmth: Carefully place your hand near the air handler’s heat strip area. You should sense warm air blowing out.
- Use a non-contact thermometer: Measure the temperature of the heated air to confirm it meets expected levels.
- Check for unusual sounds or smells: Burning smells or loud noises may indicate wiring problems or damaged strips.
- Monitor current draw: Use a clamp meter to measure the electrical current through the heat strips. Compare with manufacturer specs.
Here is a quick guide to heat strip current values:
| Heat Strip Size | Expected Current Draw (Amps) |
| 5 kW | ~21 A |
| 10 kW | ~42 A |
| 15 kW | ~63 A |
Do not touch the strips directly. They get very hot and can cause burns. Use tools and safety gear.
If the heat strips do not warm up or the current is too low or high, turn off the power immediately. Inspect wiring and connections for faults. Correct any issues before testing again.
You May Also Like: Dryer Heating Element Wire Melted
Conclusion
Wiring an air handler with heat strips can feel tricky at first. Take your time and follow each step carefully. Double-check all connections for safety and proper function. Always turn off power before starting any wiring work. Use the right tools and parts to avoid issues later.
This simple guide helps you stay on track and avoid mistakes. With patience, you can complete the job correctly and keep your home warm. Stay safe and trust your ability to handle the wiring task.