Thinking about installing a microwave above your stove but don’t have a cabinet to support it? You’re not alone.
Many people face this challenge and wonder if it’s even possible to do it safely and securely. The good news is—you can! With the right tools and simple steps, you can mount your microwave above the stove without a cabinet, saving space and keeping your kitchen organized.
Choosing The Right Microwave
Installing a microwave above the stove without a cabinet needs careful planning. Choosing the right microwave is key to a safe and functional setup. This choice affects installation ease, kitchen look, and cooking performance. Focus on size, weight, features, and power to find a microwave that fits well and works efficiently in this unique space.
Size And Weight Considerations
Size and weight play a big role in installing a microwave above the stove without a cabinet. The microwave must fit the space and be supported safely by the wall or a mounting bracket.
Measure the area carefully before buying. Consider these points:
- Width: The microwave should not block stove controls or stove hood area.
- Height: Leave enough space between stove and microwave for safe cooking.
- Depth: The microwave should not stick out too far, to avoid hitting your head or crowding the stove.
Weight affects what kind of mounting hardware you need. Microwaves above stoves are usually heavier than countertop models. Use strong wall anchors or studs to hold the weight.
| Microwave Size | Typical Weight | Recommended Support |
| Small (up to 20 inches wide) | 20-30 lbs | Standard wall bracket or studs |
| Medium (20-24 inches wide) | 30-40 lbs | Heavy-duty wall anchors or studs |
| Large (24+ inches wide) | 40+ lbs | Reinforced wall studs and metal brackets |
Check the microwave’s manual for its weight and size. Plan the mounting method based on these details. Proper support prevents accidents and keeps the microwave stable during use.
Features For Over-the-stove Use
Choose a microwave designed for over-the-stove placement. These models have features that make cooking safer and easier.
Important features include:
- Built-in Ventilation: Removes smoke, steam, and odors from cooking.
- Heat-Resistant Controls: Buttons or touchpads that work well despite heat from the stove.
- Easy-to-Clean Surfaces: Smooth finishes that wipe clean quickly.
- Bright Interior Light: Helps check food without opening the door.
- Child Lock: Prevents accidental use by kids.
Many microwaves for this use come with a vent fan and filter system. This replaces or supplements a range hood. Check if the microwave has a recirculating filter or can be vented outside.
Other features to look for:
- Auto-cook programs for common foods.
- Turntable for even cooking.
- Quiet operation to reduce noise.
Choosing a microwave with these features improves safety and makes cooking above the stove hassle-free.
Power And Venting Options
Microwave power affects cooking speed and efficiency. Venting options affect air quality and kitchen comfort.
Power levels usually range from 600 to 1200 watts. Higher wattage cooks faster but uses more electricity. For over-the-stove use, 900-1000 watts is a good balance.
Venting is critical. Cooking on the stove creates smoke and steam. The microwave’s vent must handle this well.
Types of venting:
- External Venting: Air is pushed outside through ductwork. This is best for removing smoke and odors.
- Recirculating Venting: Air passes through filters and back into the kitchen. Filters need regular cleaning or replacement.
Check your kitchen setup before choosing venting type. Without a cabinet, ductwork installation might be easier or harder depending on wall structure.
Preparing The Installation Area
Installing a microwave above a stove without a cabinet requires careful preparation of the installation area. This step ensures the microwave fits securely and functions safely. Preparing the space involves precise measuring, finding the right wall support, and confirming proper ventilation. These tasks help avoid damage to your walls and kitchen while making the microwave easy to use.
Measuring Wall Space And Height
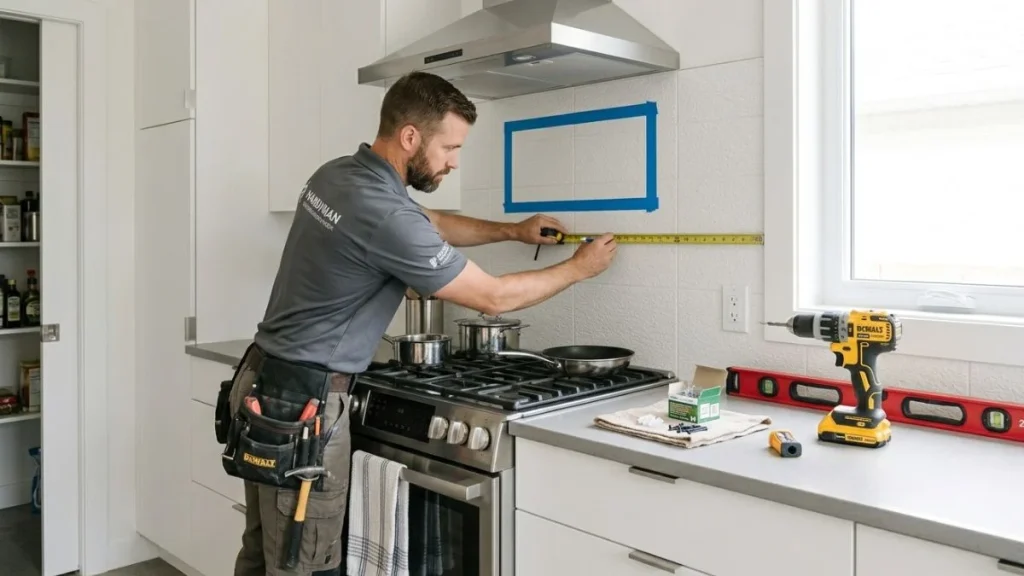
Start by measuring the wall space where the microwave will go. Use a tape measure and write down the width and height available. Make sure the space is at least a few inches wider and taller than the microwave itself. This extra room helps with airflow and installation.
Check the height from the stove surface to the bottom of the microwave. This distance should be between 13 and 18 inches to allow safe cooking and easy access. Too low might block your view or cause heat damage. Too high can make it hard to reach.
Use the table below to compare standard microwave sizes and suggested wall space dimensions:
| Microwave Width | Recommended Wall Width | Microwave Height | Recommended Wall Height |
| 24 inches | 26-28 inches | 14 inches | 16-18 inches |
| 30 inches | 32-34 inches | 17 inches | 19-21 inches |
Mark the space on the wall with a pencil. Check for any obstacles like switches or shelves. Clear the area to make installation easier. Accurate measuring helps ensure the microwave fits well and stays safe.
Locating Studs And Electrical Outlets
Finding wall studs is crucial for supporting the microwave’s weight. Use a stud finder to locate studs within your marked installation area. Mark the stud positions clearly with a pencil. The microwave must attach firmly to these studs to avoid falling.
Studs usually appear every 16 or 24 inches in most walls. If you cannot find studs where needed, consider using a strong mounting bracket or reinforcement board.
Next, find the electrical outlet for the microwave. It should be within reach of the microwave’s power cord. If there is no outlet nearby, you may need an electrician to install one. Avoid using extension cords for safety reasons.
- Use a stud finder to locate wooden or metal studs.
- Mark all stud edges and center points.
- Check outlet locations and measure distance to microwave spot.
- Confirm the outlet is grounded and rated for microwave power.
Properly locating studs and outlets ensures a stable, safe installation. It also prevents electrical hazards and damage to your wall.
Ensuring Proper Ventilation
Microwaves need good ventilation to avoid overheating. This is especially important when installed above a stove without a cabinet. Check if your microwave has a built-in vent or a duct vent option.
Plan for enough space around the microwave to allow air to flow freely. The vent should not be blocked by walls or shelves. If your microwave vents outside, make sure the ducting is clear and properly installed.
Consider these ventilation points:
- Leave at least 3 inches of clearance above the microwave.
- Do not cover vents with foil or plastic.
- Keep ducts clean and free of grease buildup.
- Use a vent hood if possible for better airflow.
Poor ventilation can cause the microwave to overheat and reduce its life span. It also helps keep your kitchen air fresh and free of cooking smells. Check your microwave’s manual for specific ventilation instructions.
Mounting The Microwave
Installing a microwave above a stove without a cabinet requires careful mounting to ensure safety and stability. This step is critical because the microwave must hold steady during use. Proper mounting protects the wall and keeps the unit secure. Follow clear, simple steps to mount the microwave correctly.
Marking And Drilling Anchor Points
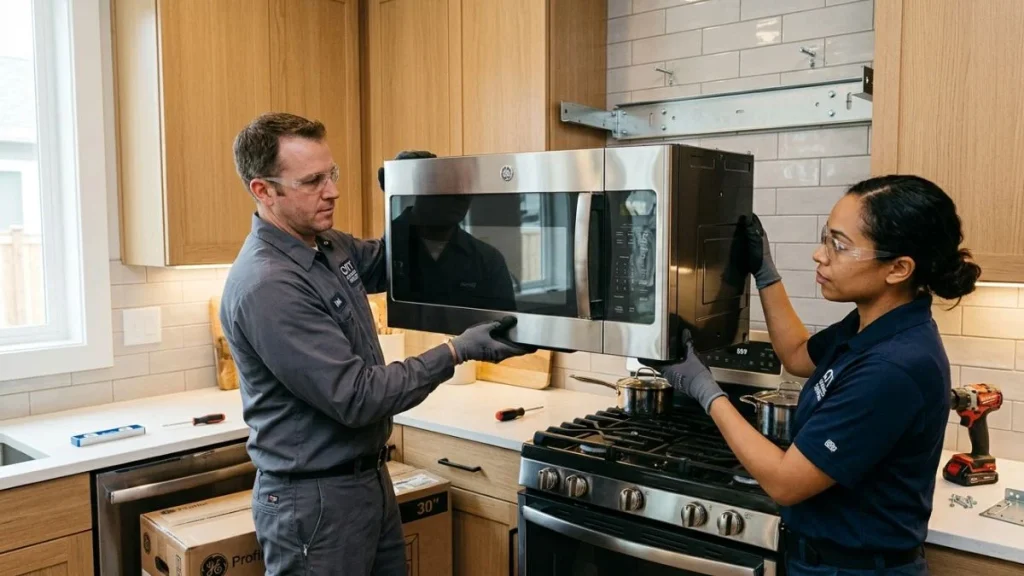
Start by measuring the exact spot where the microwave will hang. Use a pencil to mark the wall at the points for the anchors. These points must align with the microwave’s mounting holes.
- Use a level to keep marks straight and even.
- Locate wall studs with a stud finder. Anchors must go into studs for strength.
- If studs are not in the right place, use heavy-duty wall anchors designed for your wall type.
After marking, prepare to drill the holes. Choose a drill bit that fits the size of your anchors. Drill slowly and carefully to avoid damaging the wall.
| Drill Bit Size | Anchor Type | Wall Type |
| 1/4 inch | Toggle bolt | Drywall |
| 3/16 inch | Masonry anchor | Brick or concrete |
| 1/8 inch | Plastic anchor | Plaster |
Wear safety glasses and clear dust from holes before inserting anchors. Properly drilled anchor points provide a solid base for mounting.
Installing Support Brackets
Support brackets carry the microwave’s weight. Install them firmly on the drilled anchor points. Follow these steps:
- Align the bracket holes with the drilled anchor points.
- Use screws that fit the anchors and brackets snugly.
- Tighten screws with a screwdriver, ensuring no wobble.
Check the bracket alignment with a level. Brackets must be perfectly horizontal to hold the microwave evenly.
Choose brackets rated for the microwave’s weight. Many microwaves weigh between 30-50 pounds, so brackets must support at least that much.
Securing The Microwave To The Wall
With brackets installed, attach the microwave to the wall. Follow these guidelines:
- Lift the microwave carefully onto the brackets.
- Make sure it fits snugly and evenly on both sides.
- Use screws to secure the microwave to the brackets through the mounting holes.
Many microwaves come with a mounting plate or hardware kit. Use the supplied screws and parts for best results.
After securing, test the microwave’s stability by gently pushing it. It should not move or tilt.
Keep the microwave’s power cord accessible and away from heat sources. Route the cord safely to the nearest outlet.
Safety check list before finishing:
- All screws are tight and secure.
- Microwave is level and stable.
- Clearance around the microwave for ventilation.
- No loose wiring or exposed cords.
Following these steps ensures the microwave stays safe and functional above your stove without a cabinet.
Electrical Connections
Installing a microwave above a stove without a cabinet requires careful attention to electrical connections. Proper wiring ensures safety and optimal performance. Follow these guidelines to avoid risks and keep your kitchen safe.
Checking Power Supply Compatibility
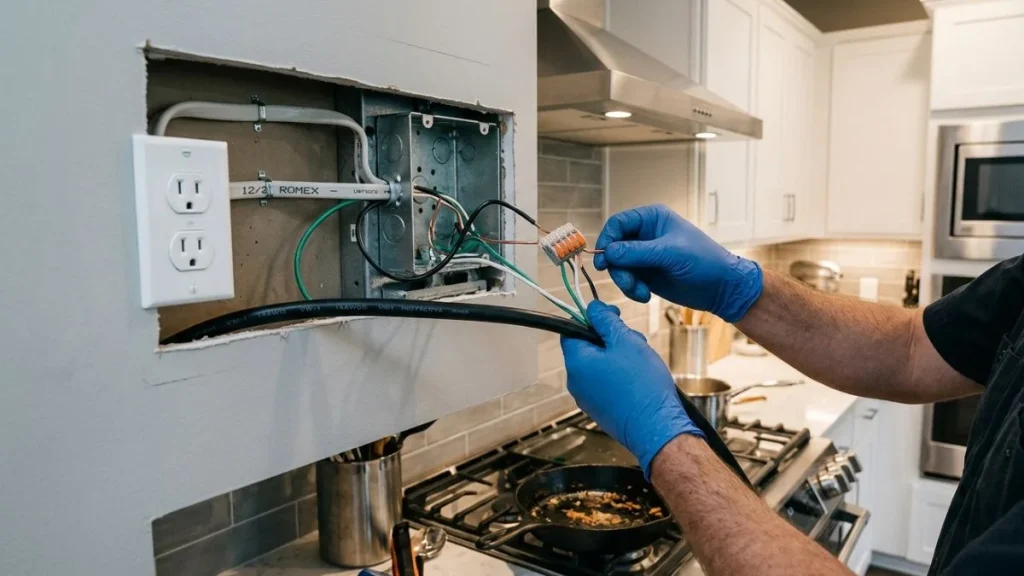
Start by verifying the power supply matches the microwave’s requirements. Most microwaves need a 120-volt, 60 Hz electrical source. Check the microwave’s label or manual for exact voltage and amperage.
Consider these points:
- Voltage: Confirm your kitchen outlet provides the correct voltage.
- Amperage: The microwave usually requires 15 to 20 amps.
- Outlet Type: Use a grounded three-prong outlet (NEMA 5-15R or 5-20R).
- Distance: Make sure the power source is close enough to avoid extension cords.
Check your circuit breaker panel to see if it can support the microwave’s power needs. Use the table below to compare common microwave power ratings with their electrical needs:
| Microwave Wattage | Typical Current Draw (Amps) | Recommended Circuit Breaker |
| 700 – 900 W | 6 – 8 A | 15 A |
| 900 – 1200 W | 8 – 10 A | 15 A |
| 1200 – 1500 W | 10 – 12.5 A | 20 A |
Use a voltage tester to confirm the outlet works correctly before installing the microwave. Avoid using damaged or loose outlets.
Using A Dedicated Circuit
A dedicated circuit is essential for microwaves above the stove. It prevents overloads and electrical hazards. This circuit only powers the microwave and nothing else.
Benefits of a dedicated circuit:
- Reduces risk of tripped breakers during cooking.
- Maintains steady power supply for microwave function.
- Improves safety by isolating microwave wiring.
Check the existing kitchen wiring. Many kitchens have shared circuits for outlets and lights. Shared circuits can cause power drops or breaker trips.
Steps to install a dedicated circuit:
- Turn off the main power at the breaker panel.
- Run a new 12- or 14-gauge wire from the breaker to the microwave location.
- Install a 15- or 20-amp breaker matching the microwave’s power needs.
- Connect the wiring securely to the breaker and outlet.
- Use a properly rated outlet with grounding.
Consult local electrical codes to follow safety rules. Hiring a licensed electrician is recommended if unsure about wiring.
Connecting The Microwave Safely
After confirming power compatibility and installing a dedicated circuit, connect the microwave securely. Use these tips for safe electrical connections:
- Power Cord: Use the microwave’s original power cord. Avoid extensions or adapters.
- Grounding: Ensure the outlet and microwave are properly grounded to prevent shocks.
- Secure Connections: Tighten all wire nuts and terminal screws firmly.
- Proper Outlet Height: Position the outlet so the cord fits without strain or bending.
- Check Polarity: Connect hot, neutral, and ground wires correctly (black to hot, white to neutral, green/bare to ground).
Use a voltage tester after connection to confirm power flows correctly. Plug the microwave in and test all functions before final mounting.
Final Adjustments And Testing
Installing a microwave above the stove without a cabinet requires careful final steps to ensure safety and functionality. The last phase, Final Adjustments and Testing, guarantees the unit works well and stays secure. This part covers leveling the microwave, checking all its functions, and making sure ventilation works properly. Taking time here helps avoid problems later and keeps your kitchen safe.
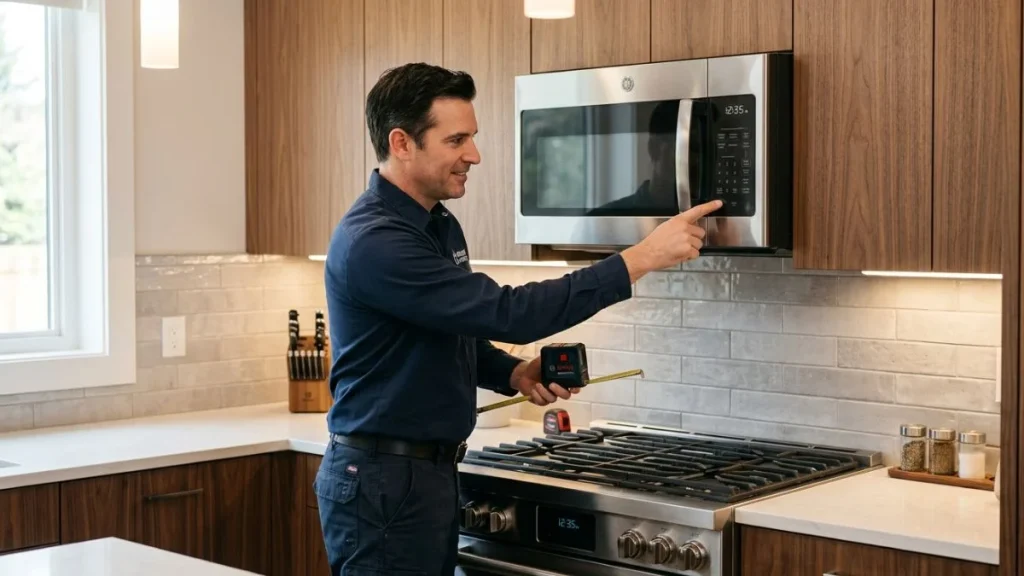
Leveling And Securing The Unit
After mounting the microwave, check that it is perfectly level. A tilted microwave can cause door issues and uneven cooking. Use a carpenter’s level on the top and sides of the microwave. Adjust the mounting brackets or shims to correct any tilt.
- Check horizontal level: Place the level on the microwave’s top surface.
- Check vertical level: Place the level along the sides to ensure upright alignment.
- Tighten all screws: Secure brackets firmly to the wall and underside of the cabinet or hood.
Use a wrench or screwdriver to tighten all mounting bolts. Loose bolts can cause the microwave to shift or fall. For extra security, add metal support brackets if needed. These brackets reduce strain on drywall or wall studs.
| Step | Tool Needed | Purpose |
| Check level | Carpenter’s level | Ensure microwave is flat and upright |
| Tighten bolts | Screwdriver, wrench | Secure microwave to wall brackets |
| Install support brackets | Drill, screws | Increase stability and load support |
Finally, gently shake the microwave to confirm it does not move. The unit must feel solid and fixed for safe use.
Testing Microwave Functions
Test all microwave functions to ensure proper operation before regular use. Start with basic tasks such as heating and using the timer. Follow these steps:
- Power on the microwave: Confirm the display and lights work.
- Heat water: Place a microwave-safe cup of water inside and heat for 1-2 minutes.
- Test timer and buttons: Use different timer settings and cooking modes.
- Check door: Open and close to ensure it seals properly and stops operation when opened.
Watch for any unusual noises, sparks, or error codes. These indicate electrical or installation issues. Heating unevenly or not heating at all means a problem exists.
Ensuring Ventilation Efficiency
Proper ventilation prevents heat buildup and removes cooking odors. Check the vent system installed with your microwave above the stove.
Steps to ensure ventilation works well:
- Turn on the vent fan: Run it at low and high speeds.
- Listen for noise: The fan should run smoothly without rattling or grinding sounds.
- Check airflow: Place your hand near the vent exhaust to feel air movement.
- Inspect vent path: Ensure the duct is clear from blockages or kinks.
Read Also: Over the Range Microwave Without Cabinet
Conclusion
Installing a microwave above the stove without a cabinet is simple with the right steps. Measure carefully and use strong wall anchors for safety. Secure the microwave firmly to avoid accidents. Double-check all connections and test the microwave before use.
This setup saves space and keeps your kitchen organized. With patience and care, you can complete this project yourself. Enjoy the extra counter space and a neat cooking area. Small changes make a big difference. Give your kitchen a fresh, functional look today.