If you’re planning to install vinyl plank flooring, one question probably has you scratching your head: how flat does your subfloor need to be? Getting this right is crucial.
A subfloor that’s not flat enough can cause your beautiful new floor to look uneven, feel uncomfortable, or even get damaged over time. But don’t worry—this article will guide you step-by-step on exactly how smooth and level your subfloor should be.
By the end, you’ll know how to prepare your space so your vinyl planks lay perfectly, giving you a floor that looks great and lasts for years. Keep reading to avoid costly mistakes and get your floor installation just right!
Flatness Requirements For Vinyl Plank
Ensuring the subfloor is flat is crucial before installing vinyl plank flooring. Uneven surfaces can cause planks to separate, flex, or wear unevenly. Flatness requirements for vinyl plank flooring help maintain durability and a smooth finish. This section explains what flatness means and how to achieve it.
Industry Standards For Flatness
Industry standards set clear rules for the flatness of subfloors under vinyl plank floors. These rules aim to prevent issues like gaps, cracks, and uneven wear. Most standards focus on how much deviation from flatness is allowed over a certain distance.
The most common standard says the floor must not have more than:
- 3/16 inch (4.8 mm) deviation over a 10-foot (3-meter) span
- 1/8 inch (3.2 mm) deviation over a 6-foot (1.8-meter) span
Manufacturer Guidelines
Vinyl plank manufacturers often provide their own flatness requirements. These guidelines may be stricter than industry standards. Always check the product manual before installation.
Common manufacturer rules include:
- Subfloor flatness within 1/8 inch over 6 feet
- Remove any bumps or dips greater than 1/16 inch
- Use self-leveling compounds if needed to fix uneven areas
These rules ensure the vinyl plank locks tightly and sits evenly. Ignoring them can void warranties and cause floor problems.
Here is a simple checklist for manufacturer guidelines:
- Check subfloor for bumps or dips.
- Measure flatness in multiple spots.
- Use patching materials to level the surface.
- Confirm flatness before installing vinyl planks.
- Keep records of measurements for warranty claims.
Measuring Flatness
Measuring subfloor flatness requires the right tools and method. Common tools include a straightedge, level, or laser level. The goal is to find any high or low spots on the floor.
Steps to measure flatness:
- Place a 6- or 10-foot straightedge on the floor.
- Look for gaps between the floor and straightedge.
- Use a feeler gauge to measure gap size.
- Mark areas where gaps exceed allowed limits.
- Repeat measurements across the entire floor.
Common Subfloor Materials
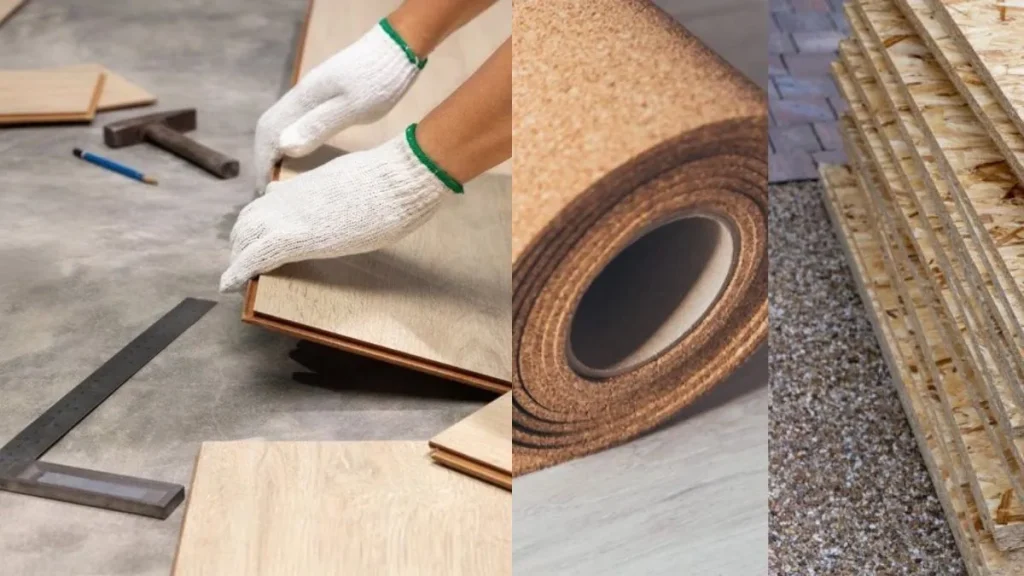
The subfloor provides the base for vinyl plank flooring. Its flatness affects the floor’s look and durability. Different materials serve as subfloors, each needing specific care for vinyl plank installation. Knowing common subfloor materials helps prepare the surface properly and avoid future problems.
Plywood And OSB
Plywood and Oriented Strand Board (OSB) are popular wood-based subfloor materials. Both offer a strong, smooth surface but differ slightly in composition and moisture resistance.
Plywood is made from thin layers of wood glued together, giving it strength in multiple directions. OSB consists of wood strands compressed with adhesives, creating a dense, flat panel.
Flatness Requirements:
- The subfloor must be flat within 3/16 inch over 10 feet.
- Minor bumps or dips can cause vinyl planks to flex or separate.
- Use a leveling compound to fix uneven spots.
Preparation Tips:
- Check for loose or squeaky boards and secure them.
- Fill gaps and cracks with wood filler.
- Sand high spots to create an even surface.
- Ensure the subfloor is clean, dry, and free of dust.
| Material | Strength | Moisture Resistance | Cost |
| Plywood | High | Moderate | Medium |
| OSB | High | Lower than plywood | Lower |
Both materials work well for vinyl plank floors if properly prepared. Avoid water exposure to protect OSB and plywood from swelling.
Concrete
Concrete is a common subfloor in basements and ground-level rooms. It is very strong but can have surface issues that affect vinyl plank installation.
Flatness Standards:
- Concrete should be flat within 1/8 inch over 6 feet.
- Large dips or bumps can cause planks to separate or wear unevenly.
- Use a self-leveling compound to correct uneven areas.
Important Considerations:
- Check moisture levels with a moisture meter before installation.
- Install a moisture barrier if needed to prevent damage.
- Clean the concrete thoroughly, removing dust, grease, and debris.
Concrete subfloors may have cracks or rough patches. Grind down high spots and fill low areas for a smooth surface.
| Step | Purpose | Tools/Materials |
| Moisture Test | Check for dampness | Moisture meter |
| Clean Surface | Remove dust and dirt | Broom, vacuum |
| Level Surface | Fix uneven areas | Self-leveling compound, trowel |
Preparing concrete correctly ensures vinyl planks stay flat and last longer.
Existing Vinyl Or Tile
Installing vinyl planks over existing vinyl or tile saves time but requires careful surface checks. The old floor must be flat and stable.
Flatness Guidelines:
- Surface should be flat within 1/8 inch over 6 feet.
- Remove any loose or cracked tiles before installing.
- Fill grout lines or holes with a floor patching compound.
Preparation Steps:
- Clean the floor thoroughly to remove dirt and wax.
- Sand glossy surfaces to help vinyl plank glue stick.
- Make sure the floor is dry and free from mold or mildew.
Advantages:
- Less demolition work.
- Lower installation cost.
- Faster project completion.
Potential Issues:
- Uneven old floors can telegraph through new vinyl.
- Old adhesive residues may affect bonding.
- Height differences at doorways might need adjustment.
Proper preparation of existing vinyl or tile ensures a smooth, durable vinyl plank floor.
Preparing The Subfloor
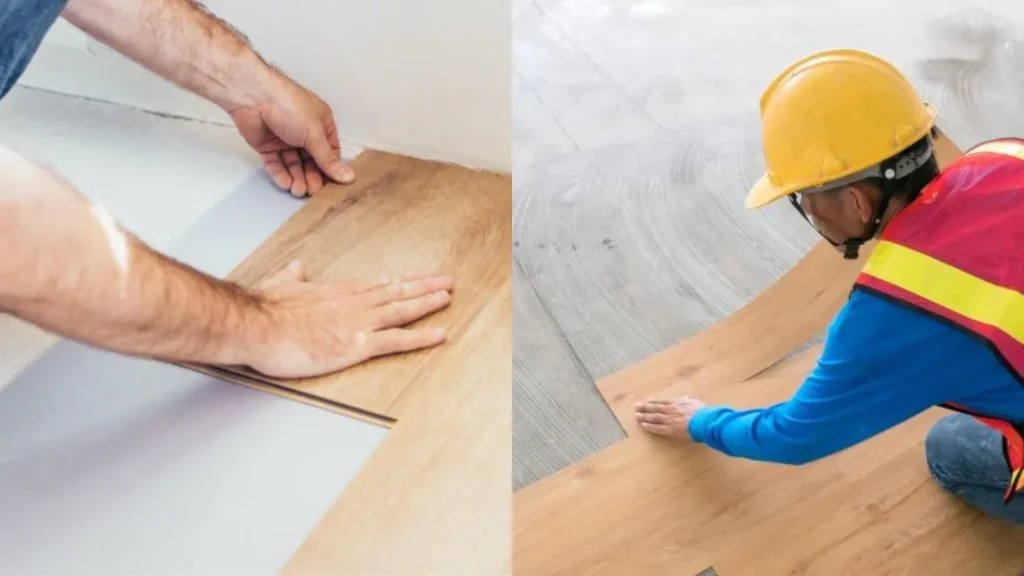
Preparing the subfloor is a critical step before installing vinyl plank flooring. The subfloor must be flat, clean, and stable to ensure the vinyl planks lay smoothly and last long. An uneven subfloor can cause gaps, buckling, or damage to the vinyl over time.
Proper preparation involves cleaning, repairing damages, sanding high spots, and filling low spots. These tasks help create a flat surface that meets the recommended tolerance for vinyl plank floors, typically within 3/16 inch over 10 feet.
Cleaning And Repairing
Start by thoroughly cleaning the subfloor. Remove all dust, dirt, grease, and debris. Even small particles can prevent the vinyl planks from sticking properly. Use a broom and vacuum to clean the entire area. For sticky or greasy spots, apply a mild detergent and scrub with a brush, then let dry completely.
Next, check the subfloor for damage such as cracks, holes, or loose boards. Repair these issues before moving forward. Here are some common repairs:
- Cracks: Fill small cracks with a suitable wood filler or patching compound.
- Holes: Use a patch or filler to cover holes larger than 1/4 inch.
- Loose Boards: Secure loose boards with screws to prevent movement.
- Water Damage: Replace any sections that show signs of mold or rot.
Proper cleaning and repair ensure a stable base for vinyl planks. Without this step, the flooring may shift or develop imperfections soon after installation.
Sanding And Grinding High Spots
High spots on the subfloor create uneven surfaces that cause vinyl planks to flex or gap. These raised areas must be smoothed out. Use a floor sander or grinder for large areas. For smaller spots, a hand sander or sanding block works well.
Follow these tips when sanding or grinding:
- Mark high spots by running a straightedge or level across the floor.
- Use coarse grit sandpaper (40-60 grit) to remove high points quickly.
- Switch to finer grit (80-120 grit) to smooth the surface after initial sanding.
- Wear protective gear such as goggles and a mask to avoid dust inhalation.
Check the surface often with a straightedge during sanding. The goal is to achieve a flat surface within the acceptable tolerance for vinyl planks. This process prevents bumps that could damage the flooring or cause uneven wear.
Filling Low Spots
Low spots or depressions in the subfloor can cause vinyl planks to bend or break. Filling these areas creates a level surface and supports the flooring properly. Use a self-leveling compound or patching product designed for subfloors.
Steps to fill low spots:
- Clean the low areas of dust and debris before application.
- Mix the leveling compound according to the instructions.
- Pour or spread the compound into the low spots using a trowel.
- Smooth the surface to blend with the surrounding subfloor.
- Allow the compound to dry fully before installing vinyl planks.
Tools For Flatness Assessment
Ensuring the subfloor is flat is crucial before installing vinyl plank flooring. Uneven surfaces can cause the planks to warp, separate, or even crack over time. Accurate flatness assessment helps create a smooth, durable floor that looks great and lasts long.
Several tools exist to check how flat the subfloor is. These tools range from simple manual devices to advanced electronic instruments. Choosing the right tool depends on the size of the area and the precision needed. Below are three common tools used for flatness assessment and how they help in preparing the subfloor for vinyl plank installation.
Straightedge
The straightedge is the simplest and most common tool for checking subfloor flatness. It is usually a long, rigid bar made from metal or wood. The straightedge helps find high and low spots on the floor. Place it directly on the subfloor and look for gaps underneath. These gaps show uneven areas that need fixing.
Key features of a straightedge:
- Length usually ranges from 3 to 6 feet
- Easy to use without special skills
- Inexpensive and widely available
- Works best for small to medium-sized rooms
To check flatness with a straightedge:
- Lay the straightedge flat on the subfloor in different directions.
- Look for any gaps between the straightedge and the floor.
- Measure the size of the gap with a ruler or tape measure.
- Mark areas where the gap exceeds the vinyl plank manufacturer’s flatness tolerance.
Typical flatness standard: Most vinyl plank flooring requires the subfloor to be flat within 3/16 inch over 10 feet. The straightedge helps identify areas that need sanding or leveling compounds.
Level
A level is a tool designed to measure how horizontal or vertical a surface is. It contains a liquid-filled vial with an air bubble. When the bubble is centered, the surface is level. This tool helps detect slopes or dips on the subfloor, which could cause problems for vinyl plank installation.
Types of levels:
- Carpenter’s level: Usually 2 to 4 feet long, good for quick checks.
- Torpedo level: Smaller, about 9 inches, useful in tight spaces.
- Digital level: Provides exact angle readings with a digital display.
Using a level for flatness check:
- Place the level flat on the subfloor.
- Check if the bubble is centered.
- Move the level around the room in various directions.
- Note areas where the bubble moves off-center, indicating uneven surfaces.
Advantages of a level:
- Simple and quick to use
- Helps find slopes that cause drainage or installation issues
- Digital levels offer precise measurements
Levels help ensure the subfloor is not only flat but also properly aligned horizontally.
Laser Level
A laser level is an advanced tool that projects a straight laser beam across the floor. It offers highly accurate flatness readings over large areas. The laser beam creates a visible reference line, making it easier to spot uneven spots on the subfloor quickly.
Benefits of using a laser level:
- High precision for large rooms or complex layouts
- Projects level lines on walls and floors for reference
- Can be used with laser detectors for hidden or dim areas
- Reduces human error compared to manual tools
Steps to use a laser level for subfloor flatness:
- Set up the laser level in the center of the room or on a tripod.
- Turn it on and allow it to self-level if automatic.
- Observe the laser line projected on the subfloor.
- Use a measuring rod or gauge to check the distance from the laser line to the floor surface.
- Identify areas where the gap is greater than the allowed tolerance.
Impact Of Subfloor Flatness On Installation
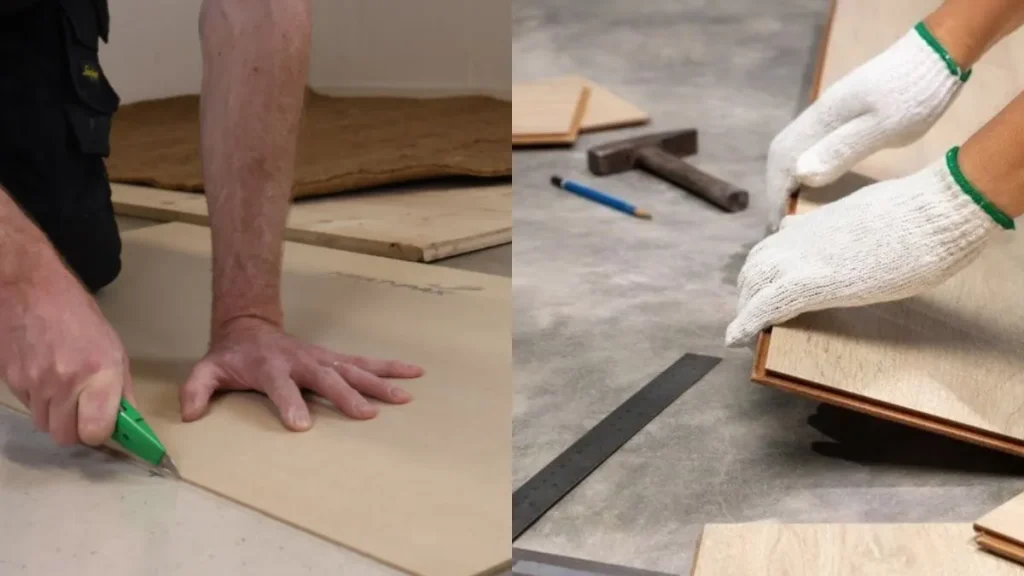
The flatness of the subfloor plays a crucial role in the successful installation of vinyl plank flooring. A subfloor that is not flat enough can cause many problems during and after installation.
Ensuring the subfloor is properly leveled helps the vinyl planks fit tightly and look smooth across the floor. This creates a professional finish and prevents future issues. Understanding the impact of subfloor flatness on installation is essential for anyone planning to install vinyl planks.
Preventing Gaps And Uneven Seams
A flat subfloor keeps vinyl planks aligned perfectly, preventing gaps and uneven seams. When the subfloor is uneven, planks may not sit flush, leading to visible lines and spaces. These gaps allow dirt and moisture to enter, damaging the floor over time.
Common problems caused by an uneven subfloor include:
- Planks separating at the edges
- Uneven or raised seams
- Visible gaps that spoil the floor’s appearance
Check the subfloor flatness with a straightedge or level. Most vinyl plank manufacturers recommend a flatness tolerance of 3/16 inch over 10 feet or 1/8 inch over 6 feet. This means the surface should not dip or rise more than these measurements. Fixing low spots or high points before installation helps create a smooth, gap-free floor.
| Flatness Tolerance | Measurement |
| Over 10 feet | 3/16 inch (4.76 mm) |
| Over 6 feet | 1/8 inch (3.18 mm) |
Avoiding Plank Damage
Uneven subfloors can cause damage to vinyl planks during and after installation. Pressure points form where the plank does not sit evenly, leading to cracks or bends. This weakens the plank and shortens its lifespan.
Common types of damage caused by an uneven subfloor include:
- Cracking of vinyl planks
- Curling or warping edges
- Indentations in soft spots
Installing on a flat surface helps distribute weight evenly across all planks. This prevents stress on individual boards. Use leveling compounds or sanding to smooth rough areas. Avoid installing vinyl planks over subfloors with large dips or bumps. This approach protects the flooring investment and keeps the surface safe for walking.
Ensuring Long-term Durability
A flat subfloor contributes to the long-term durability of vinyl plank flooring. When the floor is smooth and even, planks lock together tightly. This prevents movement that can cause wear or damage over time.
Benefits of a flat subfloor for durability include:
- Stable floor surface: Reduces plank shifting and loosening.
- Improved wear resistance: Even weight distribution lowers stress points.
- Moisture protection: Tighter seams reduce water infiltration risks.
Ignoring subfloor flatness leads to early floor problems such as squeaking, buckling, or uneven wear. Regularly checking and preparing the subfloor before installation ensures vinyl plank flooring lasts longer and looks better. Flatness is a key factor in maintaining a strong and attractive floor.
Tips For Achieving Optimal Flatness
Achieving a perfectly flat subfloor is crucial for installing vinyl plank flooring correctly. Uneven surfaces can cause gaps, bumps, or damage to the vinyl over time. Tips for achieving optimal flatness help create a smooth base, ensuring the flooring looks great and lasts longer. This section covers key methods to flatten your subfloor, making the installation process easier and the results better.
Using Self-leveling Compounds
Self-leveling compounds are a popular choice for fixing uneven subfloors. These compounds are liquid mixtures that spread easily and harden into a flat, smooth surface. They fill low spots and cracks, creating an even base for vinyl planks.
Steps to use self-leveling compounds:
- Clean the subfloor thoroughly. Remove dust, dirt, and loose debris.
- Prime the surface to help the compound stick better.
- Mix the compound according to the instructions.
- Pour the compound onto the subfloor and spread it using a trowel or gauge rake.
- Allow it to dry completely, usually 24 hours.
Benefits of self-leveling compounds:
- Quick and easy to apply.
- Creates a smooth, flat surface.
- Can fix minor to moderate unevenness.
- Compatible with most subfloor types.
| Aspect | Details |
| Drying Time | Usually 24 hours |
| Thickness | Can be applied from 1/8 inch to several inches |
| Cost | Moderate, depends on area size |
Using self-leveling compounds ensures a flat subfloor ready for vinyl plank installation.
Professional Vs DIY Approaches
Deciding between professional help and DIY work depends on skill, budget, and subfloor condition. Both have pros and cons to consider.
DIY Approach:
- Lower cost overall.
- Requires time, effort, and basic tools.
- Good for small to moderate unevenness.
- Risk of mistakes affecting floor quality.
Professional Approach:
- Expert assessment and precise leveling.
- Faster completion with proper tools.
- Higher upfront cost.
- Better warranty and reliability.
| Factor | DIY | Professional |
| Cost | Lower | Higher |
| Time | Longer | Shorter |
| Skill Level | Basic to moderate | Expert |
| Quality | Variable | Consistent |
Choose the method that fits your needs and ensures the subfloor meets the flatness requirements for vinyl plank flooring.
Regular Maintenance Checks
Maintaining a flat subfloor after installation helps extend the life of vinyl planks. Regular checks catch problems early before they cause damage.
Key maintenance tips:
- Inspect the floor surface for bumps, dips, or separation.
- Check for moisture issues under the floor that can cause warping.
- Keep the area clean and dry to prevent damage.
- Fix small issues like loose planks or minor unevenness quickly.
Use simple tools for checks:
- Level or straightedge to test flatness.
- Moisture meter to detect dampness.
- Visual inspection for cracks or gaps.
Regular maintenance reduces costly repairs and keeps the vinyl plank floor smooth and safe.
You May Also Like: How to Install Vinyl Plank Flooring on Stairs
Conclusion
A flat subfloor is key for vinyl plank flooring success. Small bumps or dips can cause gaps or damage over time. Aim for a flatness of about 3/16 inch over 10 feet. Use a level and straightedge to check the surface.
Fix uneven areas with a leveling compound before installation. This helps the vinyl lay smooth and last longer. Taking time to prepare your subfloor saves effort later. A smooth base means a better look and stronger floor. Simple steps lead to great results.