

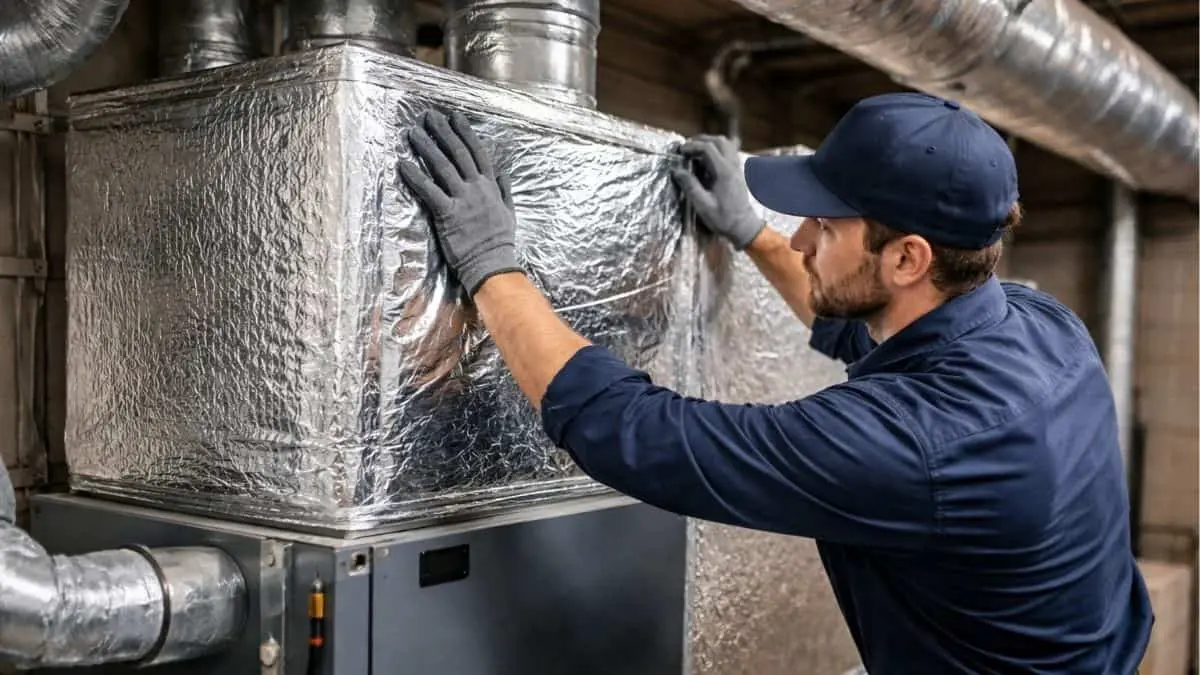
Is your air handler not working as efficiently as it used to? You might be overlooking a simple fix: air handler insulation replacement.
When insulation wears out or gets damaged, your system has to work harder, driving up your energy bills and making your home less comfortable. Imagine a quick upgrade that saves you money, improves air quality, and extends the life of your HVAC system.
You’ll discover exactly how replacing your air handler insulation can make a big difference—and how easy it is to get started. Keep reading to learn the signs to watch for and the best steps to take for a cooler, more efficient home.
Signs Of Worn Air Handler Insulation
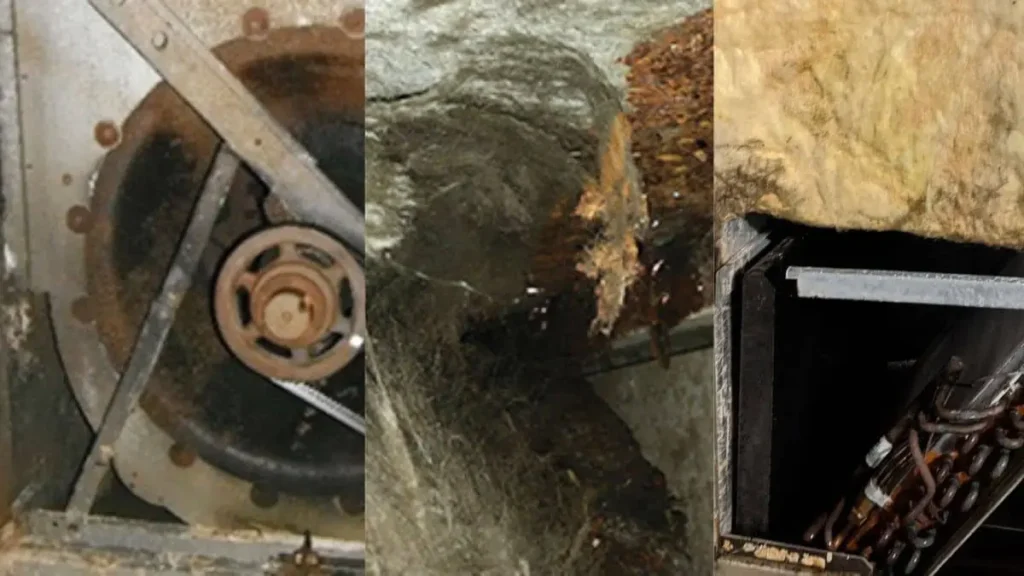
Below are common indicators that your air handler insulation needs replacement.
Visible Damage And Wear
One of the easiest ways to spot worn air handler insulation is by looking for visible damage. Check the insulation around the air handler carefully. Signs of wear include:
- Cracks or tears in the insulation material
- Peeling or flaking surfaces
- Discoloration or stains caused by moisture
- Missing sections where insulation has fallen off
Damaged insulation loses its ability to trap heat or cold air properly. Moisture buildup can cause mold or mildew, which harms the insulation and your indoor air quality. Use a flashlight to inspect darker or hard-to-see spots. Feel the insulation surface; it should be firm, not crumbly or brittle.
| Type of Damage | Effect on Insulation | What to Do |
| Cracks and Tears | Heat loss and air leaks | Replace damaged sections |
| Moisture Stains | Reduced insulation effectiveness | Check for leaks; dry and replace |
| Missing Pieces | Exposed surfaces lose energy | Install new insulation |
Reduced Energy Efficiency
Worn air handler insulation reduces your HVAC system’s energy efficiency. The system works harder to keep your home comfortable. This leads to:
- Higher energy bills
- Uneven temperatures in rooms
- Frequent cycling of heating or cooling
Insulation helps keep the air temperature consistent as it moves through the system. When insulation breaks down, cold or warm air escapes. This forces the air handler to run longer to reach desired temperatures.
Unusual Noises And Condensation
Worn air handler insulation often causes strange noises and moisture problems. Insulation cushions the air handler and reduces noise from airflow and vibrations. When it wears out, you might notice:
- Rattling or buzzing sounds near the unit
- Hissing or whistling noises from air leaks
- Condensation buildup on or around the air handler
Condensation happens because insulation no longer prevents temperature differences. Moist air touches cold surfaces and turns to water. This moisture can drip, causing damage and rust.
Choosing The Right Insulation Material

Replacing air handler insulation improves energy efficiency and indoor comfort. Choosing the right insulation material plays a key role in this process. The correct material reduces heat loss, prevents condensation, and limits noise. It also protects the air handler from damage and helps maintain good air quality. Many insulation types exist, each with unique benefits. Selecting the best one depends on system needs, budget, and environment.
Common Types Of Insulation
Several insulation materials suit air handler replacement. Each type offers different properties for thermal resistance and moisture control. Some popular options include:
- Fiberglass: Made from fine glass fibers, it is lightweight and affordable.
- Foam Board: Rigid panels that provide high insulation with low thickness.
- Spray Foam: Expands to fill gaps, creating a tight seal and strong thermal barrier.
- Foil-faced Insulation: Combines foam or fiberglass with reflective foil to reduce heat transfer.
Each type has benefits and drawbacks. Fiberglass is easy to install but can trap moisture. Foam board offers good durability but may be costlier. Spray foam seals well but requires professional application. Foil-faced insulation adds a vapor barrier, ideal in humid climates.
| Insulation Type | Thermal Performance | Moisture Resistance | Installation Ease | Cost Level |
| Fiberglass | Moderate | Low | Easy | Low |
| Foam Board | High | Moderate | Moderate | Medium |
| Spray Foam | Very High | High | Professional | High |
| Foil-faced | High | High | Moderate | Medium |
Factors Affecting Material Selection
Several factors influence the choice of insulation for air handlers. These include:
- Climate: Insulation must resist moisture in humid areas and provide strong thermal barriers in cold regions.
- Air handler type: Different systems require varied insulation thickness and flexibility.
- Space constraints: Limited space demands thinner, high-performance insulation.
- Fire safety: Materials must meet safety codes and resist ignition.
- Noise reduction: Some materials reduce sound better, important for quiet indoor environments.
Choosing insulation requires balancing these factors. For example, spray foam suits tight spaces and high moisture areas. Fiberglass works well in dry climates with ample space. Always check local building codes to ensure compliance.
Cost And Durability Considerations
Cost and durability are crucial when selecting air handler insulation. Materials must last long and protect the system without frequent replacement. Here are key points:
- Initial cost: Budget affects material choice. Fiberglass is cheapest. Spray foam costs more upfront.
- Maintenance: Durable materials reduce repair and replacement expenses.
- Longevity: Foam boards and spray foams often last longer than fiberglass.
- Energy savings: Better insulation lowers energy bills, offsetting higher initial costs.
Consider total cost over the material’s life. Sometimes spending more initially saves money later. Durability also depends on installation quality and environment. Proper sealing extends insulation life and system efficiency.
Step-by-step Replacement Process

Replacing the insulation on an air handler improves energy efficiency and system performance. A clear, step-by-step process makes this task manageable. Each phase ensures the new insulation fits well and lasts long. Follow these steps carefully to get the best results.
Removing Old Insulation
Start by turning off the HVAC system to avoid accidents or damage. Wear protective gloves and a mask to guard against dust and debris. Carefully peel away the old insulation, which may be fiberglass, foam, or another material. Dispose of it properly, following local regulations for insulation waste.
Use a utility knife or scissors to cut stubborn sections. Remove any adhesive or tape residues to prepare the surface for new insulation. Check for mold or damage under the insulation. If you find any, clean and treat the area before moving on.
- Switch off the system for safety.
- Wear gloves and a mask.
- Peel off insulation gently.
- Cut tough spots with a sharp knife.
- Clear old adhesive and debris.
- Inspect for mold or damage.
Careful removal prevents damage to the air handler’s metal surface. This step sets the foundation for effective insulation replacement.
Preparing The Air Handler Surface
After removing the old insulation, clean the air handler’s surface thoroughly. Use a damp cloth or mild cleaner to remove dust, dirt, and grease. Let the surface dry completely. Moisture can reduce insulation adhesion and cause mold growth.
Repair any dents or rust spots. Sand down rough areas to create a smooth base. If rust is severe, apply a rust inhibitor or primer. A smooth, clean surface helps the new insulation stick firmly and last longer.
| Preparation Step | Purpose | Tools Needed |
| Cleaning | Remove dirt and grease | Damp cloth, mild cleaner |
| Drying | Prevent moisture damage | Air dry or clean cloth |
| Repairing | Fix dents and rust | Sandpaper, rust inhibitor |
Proper preparation reduces future problems and improves insulation performance. Take time on this step for the best outcome.
Installing New Insulation
Measure the air handler’s surface to cut insulation pieces accurately. Use insulation material suited for HVAC systems, such as foam board or fiberglass wrap. Cut pieces slightly larger than the surface to ensure full coverage.
Place insulation carefully, pressing it firmly against the surface. Avoid gaps or folds that reduce effectiveness. Use mechanical fasteners or adhesive recommended by the insulation manufacturer to secure the material.
Follow these tips:
- Measure twice, cut once.
- Choose insulation with proper R-value.
- Ensure full surface coverage.
- Secure with fasteners or adhesive.
- Work in sections for neat installation.
Good installation maximizes energy savings and keeps the air handler protected from temperature changes and moisture.
Sealing And Finishing Touches
Seal all edges and joints with HVAC foil tape or mastic sealant. This step prevents air leaks and moisture from entering the insulation. Smooth out tape or sealant to avoid gaps. Check every corner and seam carefully.
Inspect the insulation for any loose spots or damage. Fix these immediately. Add a protective cover or jacket if the manufacturer recommends it. This cover shields insulation from physical damage and dirt.
You May Also Like: How to Stop Cold Air From Vents
Conclusion
Replacing air handler insulation saves energy and lowers bills. It keeps your home comfortable all year. Old insulation can cause leaks and waste power. New insulation stops cold or hot air from escaping. It also reduces noise from the air handler.
Regular checks help catch damage early. Choose the right materials for your climate. Simple steps make your system work better and last longer. Small changes bring big benefits for your home. Don’t wait until problems grow. Act now to keep your air handler efficient.


