If you’ve been living with dark, stuffy rooms because of old glass block windows, you’re not alone. Thousands of homeowners across the country deal with the same frustration — windows that let in almost no fresh air, look completely outdated, and make a room feel more like a bunker than a living space.
Glass block windows were incredibly popular from the 1930s through the 1990s. Builders loved them for basements, bathrooms, and garages because they offered privacy while still allowing some light to pass through. They were also considered fairly secure. But times have changed, and what was once a smart building choice has become one of the most common remodeling headaches for today’s homeowners.
The good news? Removing glass block windows is absolutely something you can tackle yourself — as long as you go in prepared. This guide walks you through everything: the tools you’ll need, the step-by-step removal process, how to avoid damaging your walls, and what to replace them with once they’re out.
What Are Glass Block Windows and Why Do Homeowners Remove Them?
A Quick Background on Glass Block Windows
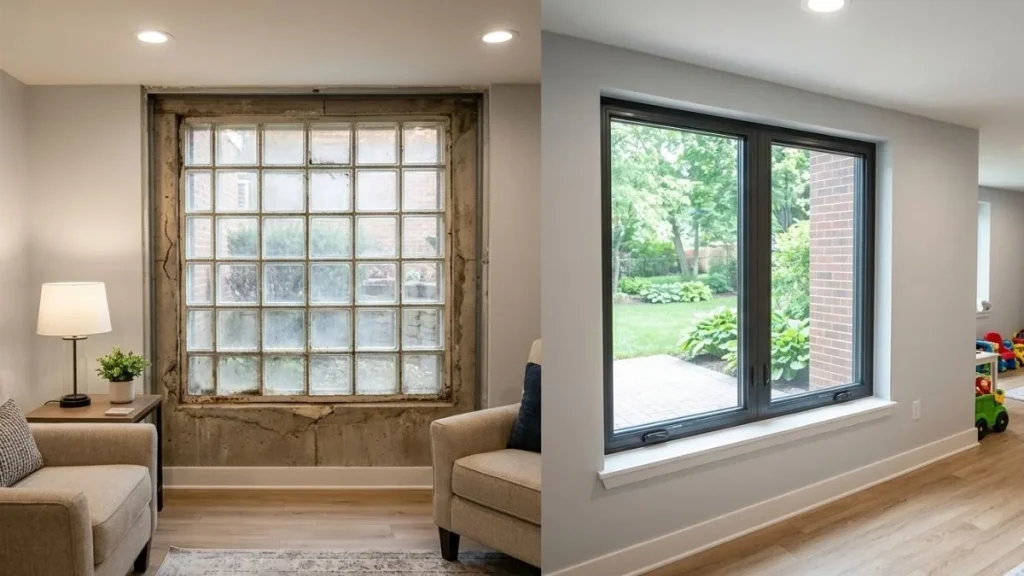
Glass block windows are exactly what they sound like — windows made from individual thick glass blocks that are mortared together like bricks. They were a go-to material for builders for decades because they offered a combination of light diffusion, privacy, and structural durability. You’ll find them most commonly in basements, bathrooms, garages, and stairwells.
They were typically installed one of two ways: set in mortar (the traditional method) or mounted in a vinyl panel system (a newer, easier installation). The type of installation you’re dealing with will significantly affect how difficult your removal project will be.
Top Reasons Homeowners Want Them Gone
- They can’t be opened, so there’s zero ventilation or fresh airflow
- The look is dated and hurts curb appeal and interior aesthetics
- They’re extremely difficult to clean properly
- A single cracked block often requires removing the entire panel to fix
- Modern energy-efficient windows are a far superior upgrade
- Basement bedrooms now require egress windows by code in most areas
Before You Start — What You Need to Know
Is Removing Glass Block Windows a DIY Job or a Pro Job?
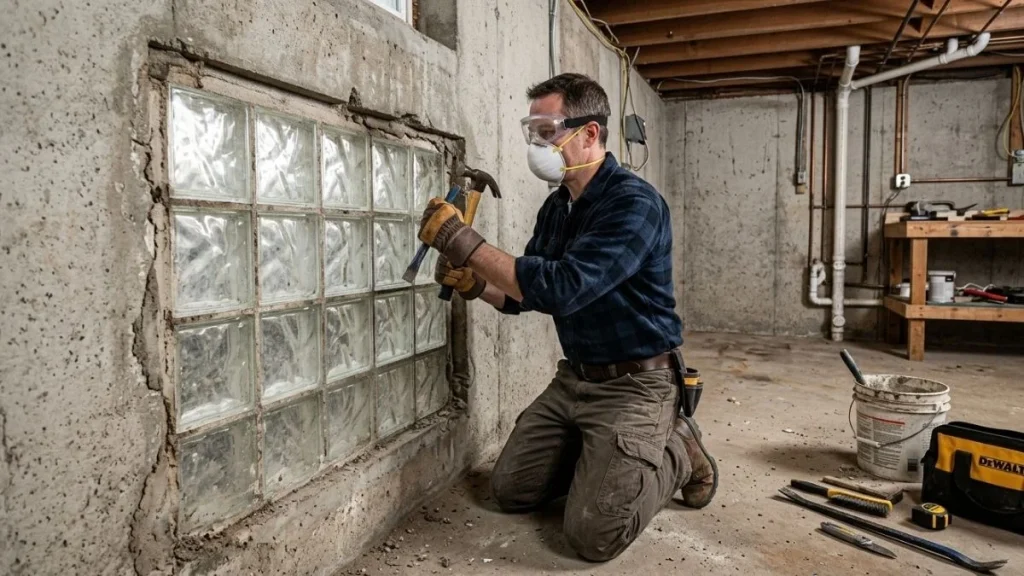
For most homeowners, this is a manageable DIY project — but that answer comes with some important conditions. The difficulty level depends on three main factors: the size of the window opening, whether the surrounding wall is load-bearing, and the type of installation (mortar-set vs. silicone/panel system).
If your glass block window sits in a non-load-bearing wall and the opening size isn’t changing, you’re in good shape to do this yourself. If you’re working in a basement with a poured concrete or concrete block wall, the removal process takes more effort but is still doable with the right tools.
However, if there’s any chance the wall around the window is load-bearing — meaning it supports the weight of the structure above it — stop and call a licensed contractor before touching anything. Compromising a load-bearing wall without proper shoring can cause serious structural damage.
| Situation | DIY or Pro? |
| Non-load-bearing wall, same opening size | DIY-friendly |
| Basement concrete block wall | DIY with proper tools |
| Load-bearing wall | Hire a pro |
| Opening needs to be enlarged | Hire a pro |
| Home built before 1980 | Test for asbestos/lead first |
Permits and Local Building Codes
Many homeowners skip this step and later regret it. If you’re replacing the window with the exact same size opening, a permit may not be required in your area. But if you’re enlarging the opening — which is common when switching from glass blocks to a full egress window — a permit is almost certainly required.
Check with your local building department before starting. It’s a quick call or website lookup, and it can save you from costly fines or problems when you eventually sell your home.
Safety Precautions to Take Before You Begin
Safety isn’t optional here. Glass block windows are heavy, and the removal process creates a lot of dust and sharp debris.
- Always wear safety glasses, heavy-duty cut-resistant gloves, and a dust mask (N95 or better)
- Each glass block weighs approximately 5–8 pounds — never try to handle large panels alone
- If your home was built before 1980, have the surrounding materials tested for asbestos or lead paint before disturbing them
- Check for any electrical outlets, wiring, or plumbing near the window opening and disconnect or reroute as needed before starting
Tools and Materials You’ll Need
Essential Tools for Glass Block Window Removal
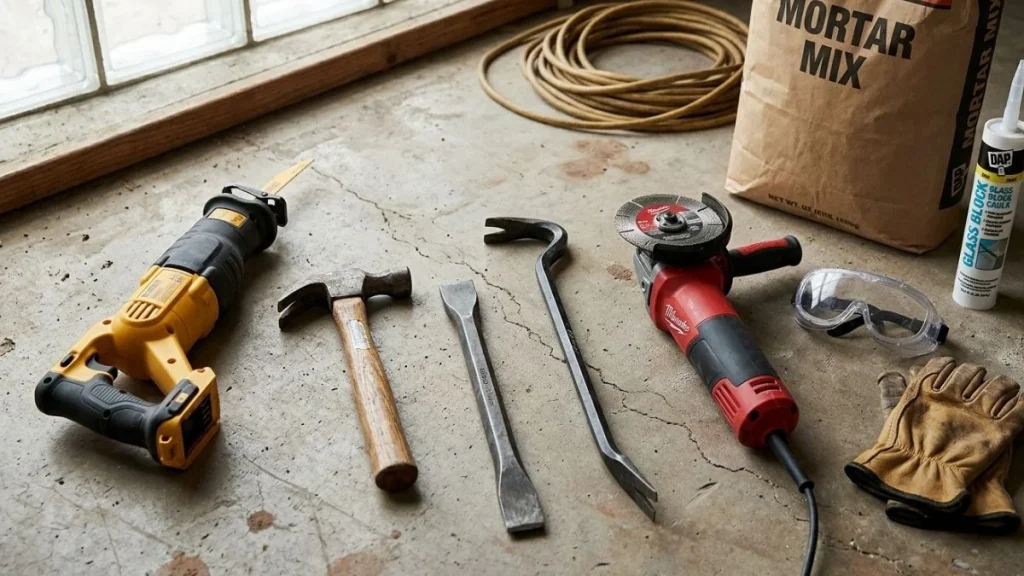
Having the right tools before you start makes the difference between a smooth project and a frustrating one.
- Reciprocating saw with a masonry or bi-metal blade
- Cold chisel and hammer
- Angle grinder with a masonry disc (optional but speeds things up)
- Pry bar
- Shop vacuum
- Utility knife or caulk remover tool
- Safety goggles, heavy-duty gloves, and a dust mask
Materials You’ll Need for Repair and Replacement
- Your replacement window (measure the rough opening before ordering)
- Mortar mix or hydraulic cement for patching
- Backer rod and exterior-grade caulk
- Wood shims
- Spray foam insulation
- Flashing tape or waterproofing membrane (essential for basement windows)
How to Remove Glass Block Windows Step by Step
This is the core of the project. Work carefully and methodically — rushing is the most common cause of wall damage during glass block removal.
Measure and Assess the Window Opening
Before you touch anything, measure the rough opening carefully. You’ll need these measurements to order your replacement window. Write down the width and height from the inside of the opening, not the outside.
Also take note of what type of installation you’re dealing with. Run your hand along the edges of the glass block panel. If you feel hard mortar, you have a traditional mortar-set installation. If the panel sits inside a vinyl frame, it’s a panel system — which is significantly easier to remove.
Finally, identify your wall material. Concrete block, poured concrete, brick, and wood-framed walls each require slightly different approaches when cleaning up the opening.
Score and Cut the Mortar Joints
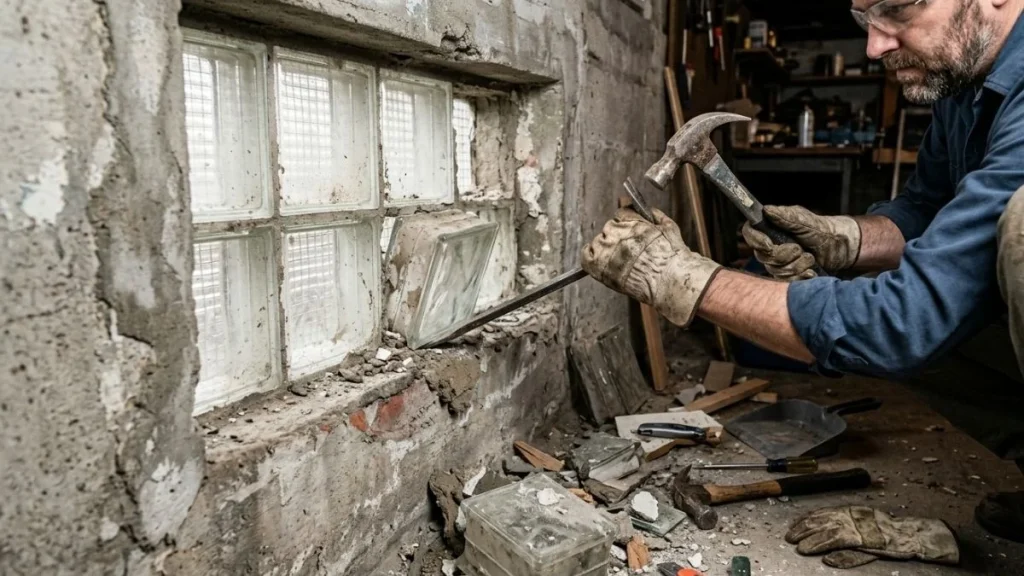
For mortar-set installations, this is the most labor-intensive part of the job. Use a cold chisel and hammer or a reciprocating saw with a masonry blade to score along all four sides of the glass block panel — top, bottom, and both sides.
Work from the outside whenever possible. This gives you better control and reduces the risk of accidentally cracking the surrounding wall material. Take slow, deliberate cuts. The goal is to fully separate the mortar bond between the glass block panel and the wall, not to cut all the way through the wall itself.
For panel system installations, simply cut the caulk or sealant around the vinyl frame with a utility knife, then unscrew or pry out the frame. This process takes a fraction of the time.
Remove the Glass Blocks Safely
Once the mortar joints are scored, it’s time to remove the blocks. Always start from the top row and work your way down — this is important for stability and safety.
Wiggle each block gently from side to side while applying light outward pressure. Don’t force it. If a block isn’t coming loose, go back and score the mortar joint a little more. Forcing a block almost always results in cracking — either the block itself or the surrounding wall.
Have a second person on hand. Not only does this make the work faster, but it’s genuinely important for safety. A full panel of glass blocks can weigh well over 100 pounds, and a loose block can shift unexpectedly.
Place removed blocks on a padded surface (an old blanket works fine) to prevent breakage. If you plan to sell or reuse the blocks, handle them with extra care.
What to Do If a Block Cracks or Breaks
Stop work immediately and clear the immediate area. Small glass fragments from a broken glass block can scatter several feet. Put on your cut-resistant gloves if you haven’t already, and use your shop vacuum — not a broom — to collect all glass debris. A broom scatters small shards further. Once the area is clean, continue removal from a different section.
Clean Up the Opening
With all the blocks removed, you’ll have rough mortar, debris, and potentially some damaged masonry around the opening. Use a cold chisel and hammer to knock off any mortar that’s still attached to the edges of the opening. Follow up with an angle grinder to smooth rough spots.
Before moving forward, carefully inspect the window sill — the horizontal surface at the bottom of the opening. This area is the most vulnerable to water intrusion, and it’s extremely common to find water damage, rot, or mold here, especially in basement windows. If you find significant damage, address it now before installing the new window. Ignoring it will only make the problem worse.
Repair and Prep the Wall Opening
If you found any cracks or damaged areas in the surrounding masonry during cleanup, now is the time to fix them. Use hydraulic cement for active leaks or mortar mix for standard crack repairs. Allow the repair material to fully cure before moving on — don’t rush this step.
For basement windows especially, apply a waterproofing membrane to the sill and lower portion of the opening. This is one of the most important things you can do to protect your new window and prevent future moisture problems. Flashing tape installed at the sill is another excellent layer of protection.
Install Your Replacement Window
Set the new window into the opening and check immediately for level (side to side) and plumb (top to bottom) using a spirit level. Adjust the position using wood shims until it’s perfectly square in the opening.
Secure the window according to the manufacturer’s installation instructions — this varies by window type. Once it’s secured, fill any gaps between the window frame and the wall with expanding spray foam insulation. This seals drafts and improves energy efficiency.
Finish with a bead of exterior-grade caulk around the entire perimeter of the window on both the inside and outside. Step back and check from both sides for any light gaps, which indicate air leaks that need to be sealed.
What to Replace Glass Block Windows With
Choosing the right replacement window depends on the location, your ventilation needs, and your budget. Here are the most popular options:
- Single or double-hung windows — the most versatile choice, great for any room, easy to clean and operate
- Casement windows — crank open outward and are ideal for basement spaces or areas where you need maximum airflow
- Hopper windows — tilt inward from the top, a popular choice for basement replacement windows because they’re compact and weathertight
- Egress windows — required by building code in basement bedrooms; must meet minimum size requirements for emergency exit
When it comes to frame material, vinyl is the most popular choice for replacement windows because it’s affordable, low-maintenance, and energy-efficient. Fiberglass frames are more durable and perform better in extreme climates but cost more. Wood frames offer the best aesthetics but require regular maintenance.
Look for windows with an ENERGY STAR certification regardless of which style you choose. These windows meet strict energy efficiency guidelines set by the U.S. Environmental Protection Agency and can noticeably reduce your heating and cooling costs.
How Much Does It Cost to Remove Glass Block Windows?
DIY Cost Breakdown
| Item | Estimated Cost |
| Tool purchase or rental | $50 – $150 |
| Replacement window | $150 – $600 |
| Mortar, caulk, and materials | $30 – $80 |
| Total DIY Estimate | $230 – $830 |
Professional Removal and Replacement Cost
Hiring a contractor typically costs between $200 and $500 in labor per window. When you factor in the cost of the replacement window itself, a full professional replacement usually runs between $400 and $1,200 or more depending on window size, wall type, and whether permits are required.
Read Also: How to Replace Metal around Basement Windows
Common Mistakes to Avoid When Removing Glass Block Windows
Even experienced DIYers make avoidable mistakes on this project. Here’s what to watch out for:
- Skipping the permit process and running into legal issues later
- Not checking whether the wall is load-bearing before starting work
- Rushing mortar removal and cracking the surrounding blocks or wall
- Forgetting to waterproof basement window openings before installing the new window
- Ordering the replacement window before accurately measuring the rough opening
- Trying to handle heavy glass block panels without a second person
- Ignoring signs of water damage or mold on the window sill
Conclusion
Removing glass block windows is more straightforward than most homeowners expect. With the right tools, careful mortar scoring, and proper waterproofing at the sill, you can get this done over a single weekend and walk away with a brighter, better-ventilated space that actually looks modern.
Just remember — if your wall is load-bearing or you need to enlarge the opening for an egress window, bring in a licensed contractor for that portion of the work. It’s a smart call, not a setback.
Once the old blocks are out and a proper replacement window is in, you’ll wonder why you waited this long. Start by measuring your rough opening today, and the rest of the project will fall into place from there.