If you have pine trees near your home, you already know the drill — needles everywhere. On your driveway, in your garden, and yes, all over your roof. Most homeowners sweep the driveway and call it a day. But what’s sitting on your roof? That’s a different problem entirely.
Pine needles on a roof are not just an eyesore. Left unchecked, they can trap moisture, clog gutters, invite pests, and quietly rot the structure beneath your shingles. The damage builds slowly — which is exactly why so many homeowners miss it until it’s expensive to fix.
This guide walks you through everything you need to know — why pine needles are harmful, how to remove them safely, the right tools to use, and how to prevent the buildup from coming back.
Why Pine Needles on Your Roof Are a Bigger Problem Than You Think
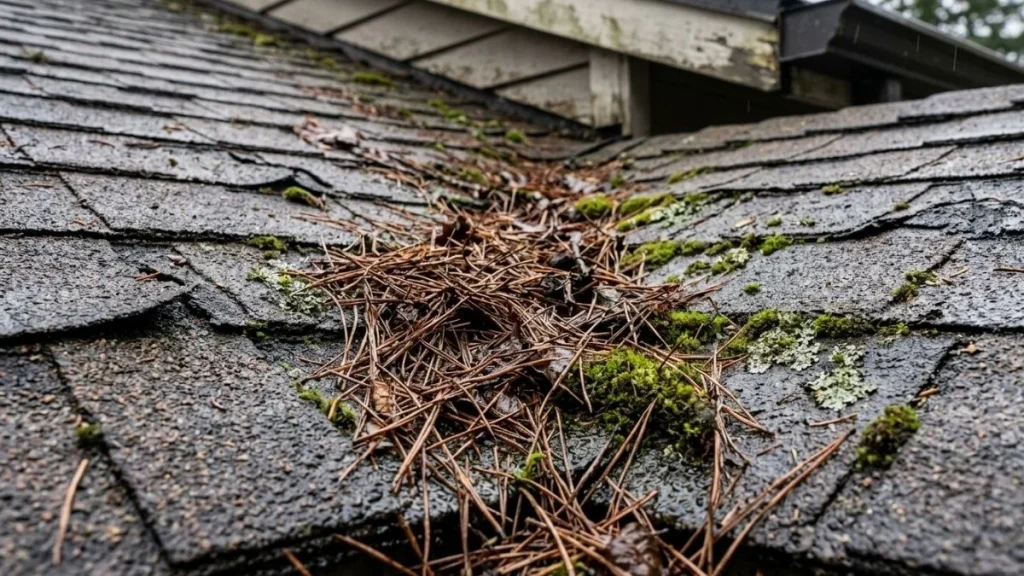
At first glance, a few pine needles on the roof seem harmless. They’re light, they’re small, and they don’t look threatening. But here’s the thing — pine needles don’t behave like leaves. They’re dense, they mat together when wet, and they take a long time to break down. That combination is what makes them so damaging to roofing material over time.
They Hold Moisture Against Your Shingles
This is the number one problem. When pine needles pile up in the valleys and edges of your roof, they create a damp layer that sits directly against the shingles. After it rains, leaves and debris can dry out relatively quickly — but a mat of pine needles stays wet for hours, sometimes days.
That prolonged moisture contact is what breaks down the asphalt coating on your shingles, accelerates wood rot in the decking underneath, and creates the perfect environment for moss, algae, and mold to take hold.
Once moss gets a foothold, it works its way under the shingles and lifts them from the surface. At that point, you’re not looking at a cleaning job — you’re looking at a roof repair bill.
They Clog Your Gutters and Downspouts
Pine needles are thin enough to slip past most basic gutter covers, and once they’re inside the gutter channel, they pack tightly together. A blocked gutter can’t do its job — water backs up, spills over the edge, and runs down your fascia boards and foundation walls. In colder climates, blocked gutters are one of the main causes of ice dams, which can cause significant interior water damage when the ice thaws.
Even a partially blocked downspout can redirect water in ways that damage landscaping, erode soil near the foundation, or lead to basement flooding. Gutter cleaning is often an afterthought, but it’s just as important as cleaning the roof surface itself.
They Create a Fire Hazard
Dry pine needles are among the most flammable natural materials around. If you live in a region that experiences hot, dry summers — especially areas prone to wildfires — a thick layer of dried needles on your roof is a genuine safety risk. Embers from a nearby fire can land on a roof covered in dry pine needles and ignite quickly. Even a spark from a chimney can be enough. Homes in fire-prone zones should treat pine needle removal as a safety priority, not just routine maintenance.
They Attract Pests
Decomposing pine needles create a moist, sheltered layer that insects find highly attractive. Carpenter ants, termites, and various wood-boring beetles are drawn to damp organic matter sitting close to wood. Once pests establish themselves in the debris on your roof, it’s a short path to the fascia boards, soffits, and the structural framing beneath. A routine cleaning job can quickly escalate into a pest control and structural repair situation if left too long.
How Often Should You Remove Pine Needles from Your Roof?

There’s no single rule that fits every home, but a general cleaning schedule based on your surroundings is a good starting point. Homes surrounded by several mature pine trees will accumulate needles far faster than homes with just one or two trees nearby.
As a baseline, most roofing professionals recommend inspecting and cleaning your roof at least two to three times per year — typically in late fall after the heaviest shedding, in early spring, and once during summer if you’re in a high-shedding zone. After any major windstorm, it’s worth doing a visual check from the ground to assess the buildup.
Signs that your roof needs immediate attention:
- Visible clumps of needles sitting in roof valleys or along the edges
- Gutters overflowing or sagging during rain
- Dark streaks or green patches appearing on shingles (moss and algae)
- A musty smell coming from the attic
- Water stains on interior ceilings after rainfall
Tools You Need — And What to Avoid

Using the wrong tool on your roof can cause more damage than the pine needles themselves. Asphalt shingles are coated with granules that protect against UV and moisture — and those granules are easy to strip off with the wrong equipment.
| Tool | Best For | Notes |
| Telescoping roof rake | One-story homes, ground-level cleaning | Safest option — no ladder needed |
| Leaf blower | Dry needles, large surface areas | Fast and effective; use extension attachments |
| Soft-bristle broom | Light buildup on accessible sections | Always sweep downward, never upward |
| Garden hose (low pressure) | Rinsing fine debris after dry removal | Keep nozzle on gentle setting |
| Gutter scoop or wand | Clearing needles from gutters | Follow up with a hose flush |
Never use these on your roof:
- Pressure washers — strips granules from shingles and can void your roof warranty
- Metal rakes or wire brushes — scratch and gouge roofing material
- Sharp tools near flashing — can dislodge or puncture the metal seals around vents and chimneys
How to Remove Pine Needles from Your Roof

Once you have your tools ready and your safety gear on, here’s how to do the job properly from start to finish.
Assess Before You Start
Walk around the perimeter of your house and look up at the roof from multiple angles. Identify where the heaviest accumulation is — usually in the valleys between roof sections, along the lower edges, and around the chimney. Check whether the roof surface is dry. Working on a wet roof dramatically increases your fall risk and makes debris harder to move cleanly.
Choose the Right Method for Your Roof Type
Not all roofs are cleaned the same way. The material matters.
Asphalt shingles: Use a leaf blower or soft-bristle broom. Always work downward — moving a brush upward against the shingle tabs loosens the granules and shortens the life of your roof significantly.
Metal roofs: A leaf blower works exceptionally well here. Metal surfaces are smooth and needles come off easily. Be cautious with ladder placement to avoid scratching the finish.
Tile or slate roofs: These are fragile underfoot. Avoid walking on them if at all possible. Use a roof rake or an extended blower attachment from the edge. For heavy buildup on tile, a professional is worth calling — cracked tiles are expensive to replace.
Work from the Ridge Down to the Eaves
Always start at the highest point and work your way down. This ensures that loosened debris falls away from areas you’ve already cleaned rather than back onto them. Use overlapping strokes and push or blow needles off the sides of the roof rather than directing them toward the gutters — that just creates a second problem.
Clear the Gutters and Downspouts
After the roof surface is clear, shift your attention to the gutters. Use a gutter scoop to remove packed needles and debris by hand. Once the bulk of it is out, run a garden hose through the gutter channel from one end to the other to flush out the fine material. Check that water is flowing freely out of the downspout. If it’s slow or backing up, the downspout may be blocked — a plumber’s snake or a hose jet can clear most blockages.
Inspect While You’re Up There
Use this opportunity to check the condition of your roof. Look for shingles that are curling, cracking, or missing entirely. Check the flashing around the chimney, vents, and skylights — any gaps or rust spots there are entry points for water. If you spot moss or algae growth, treat it now before it spreads further. Catching these issues early is what separates a $200 maintenance job from a $5,000 repair.
How to Prevent Pine Needles from Building Up Again

Removing pine needles is only half the battle. If you don’t put preventive measures in place, you’ll be back on the roof in a few months doing the same job. A little upfront investment in prevention saves a lot of time and money over the years.
Trim Overhanging Branches
The single most effective thing you can do is reduce how many needles land on your roof in the first place. Have an arborist trim back pine branches that hang over the roofline. This doesn’t mean removing the tree — just keeping a clear gap between the canopy and the roof surface. As a bonus, better airflow across the roof helps it dry faster after rain, which reduces moss and algae growth.
Install Micro-Mesh Gutter Guards
Standard gutter guards often aren’t fine enough to block pine needles — the needles slip right through the openings. Micro-mesh guards use a much finer screen that blocks needles while still allowing rainwater to flow through. They’re a worthwhile investment for any home surrounded by pine trees and significantly reduce how often you need to clean the gutters.
Apply Moss and Algae Prevention Treatments
After a thorough cleaning, apply a moss and algae preventative. Zinc or copper strips installed at the roof ridge are a popular low-maintenance option — when it rains, trace amounts of metal wash down and inhibit biological growth. Liquid treatments are also available and can be applied with a pump sprayer. These won’t stop pine needles from falling, but they prevent the secondary damage that comes with them.
You May Read Also: How To Patch A Metal Roof
Conclusion
Pine needles on your roof are one of those problems that’s easy to ignore — until it becomes expensive. The good news is that with the right tools and a consistent cleaning schedule, keeping your roof clear is manageable and well within DIY reach for most homeowners.
The key is consistency. A roof that gets cleaned twice a year and inspected regularly will last significantly longer than one that only gets attention when something goes wrong. Take an hour this weekend to walk around your home and look up. If you see buildup, start there.