


Have you ever faced a leak under your bathroom sink and realized there’s no shut off valve to stop the water? It’s a frustrating situation that can quickly turn into a costly mess.
Without this simple but essential part, fixing leaks or doing repairs becomes much harder and riskier. If you want to avoid water damage and save yourself stress, understanding why a shut off valve matters—and what to do if yours is missing—is crucial.
Keep reading to learn how you can protect your bathroom and take control of your plumbing before a small drip turns into a big problem.
Importance Of Shut Off Valves
Many bathroom sinks do not have a shut off valve installed underneath. This missing valve is a common issue that can lead to serious problems. Shut off valves are important because they control the water supply to your sink. They allow you to stop water flow during repairs or emergencies. Without these valves, fixing leaks or replacing parts becomes difficult and risky.
Role In Plumbing Safety
Shut off valves play a critical role in plumbing safety. They give you control over water flow in your bathroom sink. In case of a leak or pipe burst, you can quickly stop the water to prevent flooding.
- Emergency control: Shut off valves allow fast action during plumbing emergencies.
- Safe maintenance: They make it safe to repair or replace fixtures without turning off water for the whole house.
- Prevent contamination: Valves help stop backflow and keep water clean.
Here is a simple comparison of homes with and without shut off valves:
| Feature | With Shut Off Valve | Without Shut Off Valve |
| Control over water supply | Immediate and local | Requires main water shut off |
| Ease of repairs | Simple and safe | Complex and risky |
| Risk of water damage | Low | High |
In summary, shut off valves improve safety by allowing quick response and safer plumbing work.
Preventing Water Damage
Water damage is a serious problem in homes without shut off valves under bathroom sinks. A leak can cause damage to cabinets, floors, and walls. Shut off valves prevent this damage by stopping water flow immediately.
Without a valve, water will keep flowing until the main water supply is turned off. This delay can cause:
- Flooding under the sink.
- Damage to wooden cabinets and floors.
- Growth of mold and mildew.
- Costly repairs for water damage.
Installing shut off valves allows quick action to limit water damage. Here are key benefits:
- Fast response: Turn off water right at the source.
- Less damage: Stops leaks before they spread.
- Lower repair costs: Reduces the need for major repairs.
Common Reasons For Missing Valves
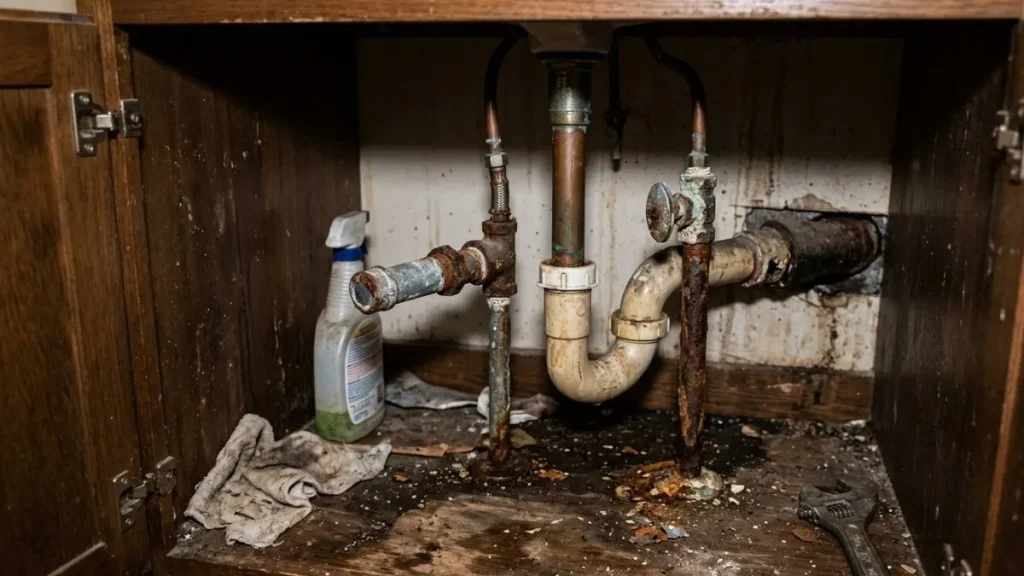
Many bathroom sinks lack a shut off valve, causing frustration during repairs or leaks. Missing valves make it hard to stop water flow quickly. Two main causes stand out: older home plumbing and DIY installation mistakes. These factors explain why some sinks don’t have proper shut off valves.
Older Home Plumbing Designs
Older homes often have plumbing systems without individual shut off valves under the bathroom sink. Builders then focused on main water control valves rather than local shut offs. This design choice saves money but limits control during repairs or leaks.
Key reasons for missing valves in older homes:
- Centralized water control: Main valves control water flow for the entire house, not individual fixtures.
- Minimal plumbing codes: Past building codes did not require shut off valves under every sink.
- Simple pipe layouts: Pipes often run directly from the main line to fixtures without additional valves.
Here is a comparison of older versus modern plumbing valve setups:
| Feature | Older Homes | Modern Homes |
| Shut off valves under sink | Often missing | Usually present |
| Control type | Main valve for whole house | Individual valves for each fixture |
| Repair ease | More difficult | Simple and fast |
Older homes require extra care during plumbing work. Homeowners must shut off the main water supply before fixing sink issues. This can interrupt water use throughout the house.
DIY Installation Mistakes
DIY plumbing projects sometimes omit shut off valves under bathroom sinks. Homeowners may not know the importance of these valves or how to install them correctly. This leads to missing or faulty valves.
Common DIY errors include:
- Skipping valves: Some skip valves to save time or money.
- Incorrect valve type: Using valves not suited for bathroom sink plumbing.
- Poor installation: Loose fittings cause leaks or valves that don’t close fully.
- Wrong pipe size: Valves that don’t fit pipes properly.
Simple tips to avoid these mistakes:
- Always install shut off valves for each fixture.
- Use valves designed for bathroom sinks.
- Check pipe sizes before buying valves.
- Tighten fittings firmly but avoid overtightening.
Identifying Valve Absence

Many bathroom sinks have shut off valves under the sink to control water flow. These valves help stop water during repairs or emergencies. Sometimes, a bathroom sink may have no shut off valve. Identifying this absence is important for maintenance and quick fixes. Without a valve, turning off water to the whole house might be necessary. Knowing how to spot missing valves saves time and prevents water damage.
Signs To Look For
First, open the cabinet under the bathroom sink. Look for small valves on the water pipes. These valves usually have a round handle or a lever. They connect to the pipes coming from the wall or floor.
- No visible valve handles: Pipes run directly from the wall to the faucet without any valve.
- Only main water line valves: If you see valves only at the main water supply, under the sink valves may be missing.
- Pipe type and layout: Some older homes have direct copper or PVC pipes without shut off valves.
Use this table to compare common valve types and their appearance:
| Valve Type | Description | Appearance |
| Angle Stop Valve | Controls water to a single fixture | Small, round handle or lever near pipe bend |
| Gate Valve | Used in older homes, controls water flow | Round wheel handle |
| No Valve | Direct pipe connection without water control | No handle, straight pipe connection |
Checking for these signs helps confirm if a shut off valve is missing. This knowledge guides the next steps in plumbing work or emergencies.
Testing Water Flow Control
Testing water flow control reveals if you can stop water under the sink. Begin by turning the faucet on. Then, try to find and turn any valve handles under the sink clockwise to close.
- Valve turns and water stops: The valve is working and present.
- Valve turns but water keeps flowing: Valve may be broken or stuck.
- No valve to turn: Water flow cannot be controlled locally.
Use this simple step-by-step test:
- Open the faucet fully.
- Locate valves under the sink.
- Turn valve handles clockwise slowly.
- Observe water flow changes.
- Turn valves back counterclockwise to open.
Document results for future reference. Knowing if valves work helps plan repairs and avoid water leaks. Without shut off valves, consider installing them or plan to use the main house valve in emergencies.
Risks Without Shut Off Valves
Many bathroom sinks lack a shut off valve directly beneath them. This absence brings several risks that homeowners should know. Without a shut off valve, stopping water flow during leaks or repairs becomes difficult. This can cause water damage, increase repair time, and lead to higher costs.
Emergency Water Shut Off Challenges
Without a shut off valve under the bathroom sink, stopping water flow quickly in emergencies is hard. The main water supply must be turned off to stop the leak. This cuts water to the whole house, not just the sink. It wastes water and causes inconvenience.
Common problems faced without a shut off valve:
- Delay in stopping water leaks
- Water damage spreads before control
- Interrupts water supply to entire home
- Requires knowing main water valve location
- Increased risk of flooding during repairs
Here is a simple comparison of water shut off options:
| Feature | Shut Off Valve Under Sink | No Shut Off Valve Under Sink |
| Stop Water Quickly | Yes, local control | No, only main shut off |
| Water Supply Interruption | Only sink affected | Whole house affected |
| Ease of Access | Easy, near sink | Often in basement or outside |
Potential For Costly Repairs
Without shut off valves, water leaks may cause serious damage before being stopped. This damage raises repair costs. Walls, cabinets, and floors can get soaked. Mold growth is common in damp areas, leading to health risks and extra cleanup expenses.
Repair costs may include:
- Replacing damaged drywall and paint
- Fixing or replacing wooden cabinets
- Repairing or replacing flooring
- Mold remediation services
- Possible plumbing system repairs
Below is a rough estimate of costs caused by leaks under the sink:
| Repair Type | Estimated Cost |
| Drywall Replacement and Paint | $500 – $1,200 |
| Cabinet Repair or Replacement | $800 – $2,000 |
| Flooring Repair | $700 – $2,500 |
| Mold Removal | $1,000 – $3,500 |
| Plumbing Repairs | $150 – $600 |
Having a shut off valve helps prevent these costs. It limits water damage by stopping leaks fast. It saves time and money on repairs. Simple plumbing upgrades can avoid big expenses later.
Options For Adding Valves
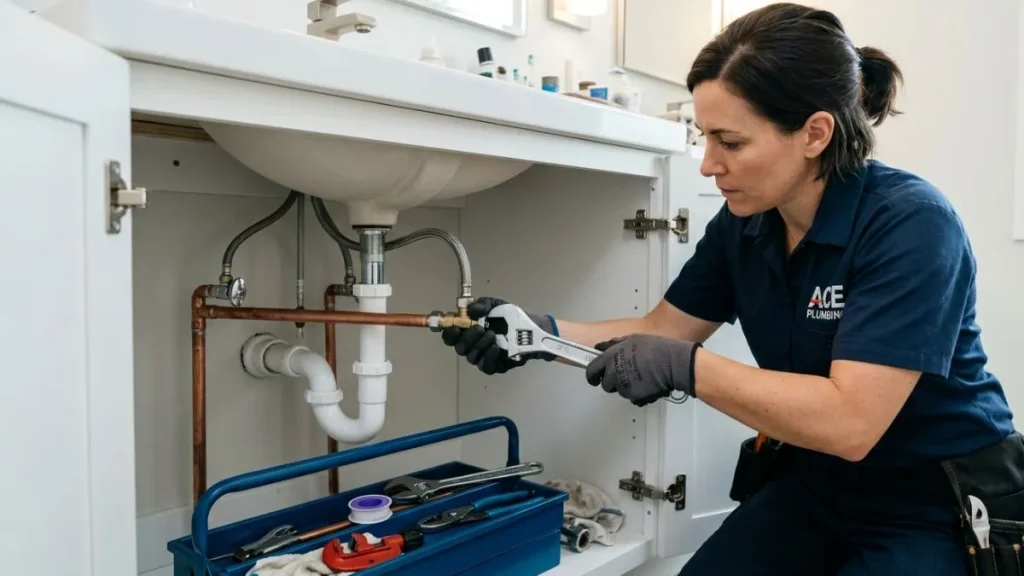
Many bathroom sinks lack a shut off valve beneath them. This can cause trouble during repairs or emergencies. Adding a shut off valve gives control over water flow to that sink alone. It stops water without affecting the entire house. Several options exist for installing these valves. Choosing the right type and installing it properly ensures easy future maintenance.
Types Of Shut Off Valves
There are several common types of shut off valves to add under a bathroom sink. Each type fits different plumbing setups and skill levels.
- Compression Valves: These are easy to install and work well with copper or plastic pipes. They use a compression nut to seal the valve.
- Push-to-Connect Valves: These valves connect quickly without soldering. They fit copper, PEX, and CPVC pipes.
- Ball Valves: Known for durability, ball valves allow quick water shut off with a simple lever turn. They fit various pipe materials.
- Angle Valves: Common under sinks, angle valves connect at a 90-degree angle to fit tight spaces.
- Gate Valves: These valves use a wheel to open or close water flow slowly. Less common but still effective.
Step-by-step Installation Guide
Installing a shut off valve requires basic tools and careful steps. Follow this guide to add a valve under your bathroom sink.
- Turn off the main water supply. This stops water flow during installation.
- Open the faucet
- Locate the pipe
- Cut the pipe
- Deburr the edges
- Attach the valve
- For compression valves, slide the compression nut and ring onto the pipe, then fit the valve and tighten.
- For push-to-connect valves, push the pipe firmly into the valve until it clicks.
- For ball or gate valves, use appropriate fittings and tighten securely.
- Secure the valve
- Turn on the main water supply
- Test the valve
Keep a small bucket and towels nearby during installation to catch any water drips. Safety glasses and gloves protect you from sharp edges and debris.
You May Read Also: Air Volume Control Valve Leaking Water
Conclusion
No shut off valve under the bathroom sink can cause trouble fast. Fixing or adding one saves water and avoids big leaks. It also makes repairs easier and safer. Check your sink area today to see what you have. Small steps help prevent costly damage later.
Keep your bathroom plumbing simple and secure. A working shut off valve gives peace of mind. Take action now to protect your home and save money.


