If you’re planning to upgrade your mobile home’s flooring, laying plywood over the subfloor is a smart and affordable way to create a strong, smooth base. But you might be wondering how to do it right without causing damage or wasting materials.
This guide will walk you through simple steps to make sure your new floor lasts longer and feels sturdy underfoot. By the time you finish reading, you’ll have the confidence to tackle this project yourself and avoid common mistakes that can cost you time and money.
Choosing The Right Plywood
Laying plywood over the subfloor in a mobile home improves floor strength and comfort. Choosing the right plywood is key. The wrong plywood can cause squeaks, uneven floors, or damage over time. Good plywood offers stability, resists moisture, and lasts longer.
Plywood Types For Mobile Homes
Not all plywood suits mobile homes. The floor needs plywood that handles movement and moisture well. Here are common plywood types:
- Softwood Plywood: Made from pine or fir, it is affordable but less strong.
- Hardwood Plywood: Made from oak or maple, stronger but more expensive.
- Exterior Grade Plywood: Treated to resist water, good for moisture-prone areas.
- Pressure-Treated Plywood: Chemically treated to prevent rot and insects.
For mobile homes, exterior grade or pressure-treated plywood works best. These types resist moisture and last longer under changing temperatures. Softwood plywood is less reliable for floors due to its tendency to warp.
Thickness And Grade Selection
Thickness and grade matter for floor strength and smoothness. Thicker plywood offers better support and less bounce. The grade shows plywood quality, affecting appearance and strength.
For mobile home floors, use:
- Thickness:3/4 inch plywood is standard. It supports weight well and limits flexing.
- Grade: Choose at least B/C grade. The “B” side is smooth and strong for visible floors. The “C” side faces down.
Grades range from A (best) to D (lowest):
| Grade | Description | Use Case |
| A | Very smooth, few defects | Visible surfaces |
| B | Good surface, minor defects | Flooring, subfloor |
| C | Knots and patches allowed | Subfloor only |
| D | Lowest quality, many defects | Not recommended for floors |
Use CDX plywood for subflooring. It is exterior grade with “C” and “D” faces, treated for moisture. Avoid thinner plywood under heavy furniture. Add layers for extra strength if needed.
Preparing The Subfloor
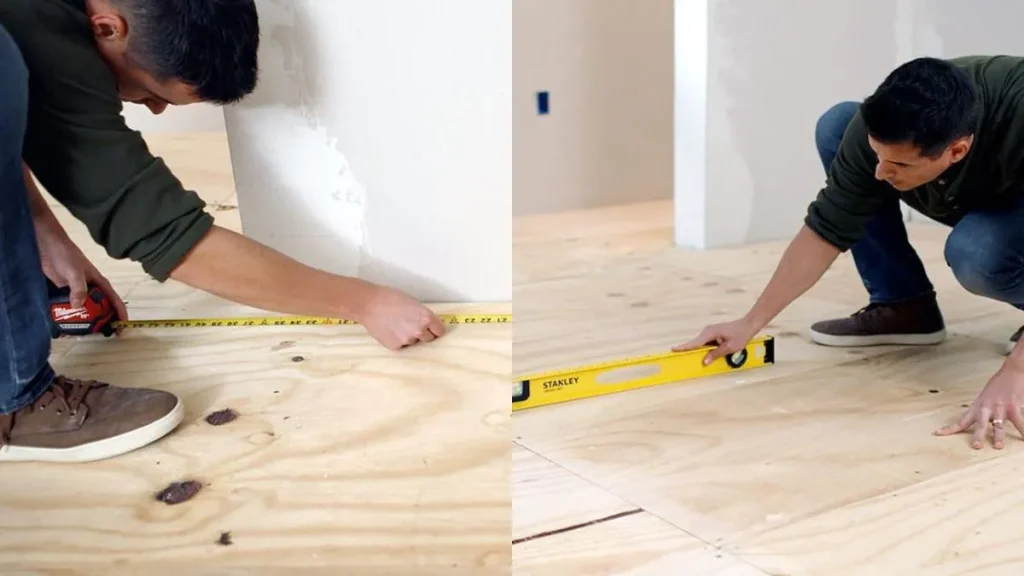
Preparing the subfloor is a crucial step before laying plywood in a mobile home. A properly prepared subfloor ensures the plywood lies flat, stays secure, and lasts longer. Taking time to inspect and clean the subfloor helps avoid future problems like squeaks, uneven floors, or damage. This stage sets the foundation for a smooth, durable floor surface.
Inspecting For Damage
Start by carefully examining the subfloor for any signs of damage. Look for:
- Rotten or soft spots: These areas weaken the floor and should be replaced.
- Water damage: Check for stains, warping, or mold, which indicate moisture problems.
- Loose or missing fasteners: Nails or screws that have popped out reduce floor stability.
- Cracks and gaps: Large gaps can cause movement or noise under the plywood.
Use a screwdriver or a sharp tool to press on suspicious spots. Soft wood will give way easily. Mark all damaged areas clearly.
Cleaning And Leveling
After inspecting and repairing, clean the subfloor thoroughly. Remove all dirt, dust, and debris using a broom or vacuum. A clean surface helps the plywood adhere better.
Check for uneven spots that could cause bumps under the plywood. Use a level tool to find high and low areas. Mark problem spots clearly.
Steps to level the subfloor:
- Sand down high spots using a floor sander or hand plane.
- Fill low spots with a floor leveling compound or wood filler.
- Allow filler to dry completely before moving on.
- Recheck the level and repeat if needed.
Here is a quick comparison table of common leveling methods:
| Method | Best For | Time to Complete | Durability |
| Sanding | Small high spots | 1-2 hours | Long-lasting |
| Leveling Compound | Low spots or dips | Several hours to dry | Strong and smooth |
| Wood Filler | Minor cracks and gaps | 1-2 hours drying | Moderate |
Cleaning and leveling the subfloor ensures the plywood fits tight and stays flat. This step reduces squeaks and creates a stable base for your flooring.
Measuring And Cutting Plywood
Laying plywood over the subfloor in a mobile home requires precise measuring and cutting. These steps ensure the plywood fits perfectly, providing a smooth, stable base for your flooring. Measuring and cutting plywood correctly helps avoid gaps, uneven surfaces, and wasted materials. Taking time during this stage saves effort and cost later.

Accurate Measurements
Accurate measurements are the foundation of a successful plywood installation. Start by measuring the length and width of the subfloor area carefully. Use a tape measure that is easy to read and long enough to cover the entire space. Write down each measurement clearly to avoid confusion.
Follow these steps for precise measurements:
- Measure along the walls and any obstacles like pipes or vents.
- Double-check measurements before marking the plywood.
- Mark the plywood with a pencil and use a straight edge or ruler for straight lines.
- Account for any irregular shapes by breaking them down into smaller rectangles or squares.
Remember: Small errors in measuring can cause big problems. Take your time and measure carefully.
Safe Cutting Techniques
Cutting plywood safely is essential for a clean job and personal safety. Use the right tools, such as a circular saw or handsaw, with sharp blades. Dull blades increase the risk of accidents and create rough cuts.
Follow these safety tips when cutting plywood:
- Wear safety goggles to protect your eyes from dust and debris.
- Use ear protection if using loud power tools.
- Cut on a stable surface, such as sawhorses or a workbench.
- Secure plywood with clamps to prevent movement during cutting.
- Keep hands away from the blade path at all times.
- Cut slowly and steadily to maintain control.
Here is a simple checklist for safe cutting:
| Safety Step | Description |
| Wear Protective Gear | Use goggles and ear plugs |
| Use Sharp Blades | Ensure blades are clean and sharp |
| Secure Workpiece | Clamp plywood firmly before cutting |
| Stable Cutting Surface | Use sawhorses or a flat bench |
| Maintain Blade Awareness | Keep hands clear and focus on cut |
Tip: Practice on scrap plywood to get comfortable with your saw before making final cuts. This reduces mistakes and improves safety.
Laying Plywood Panels
Laying plywood panels over the subfloor in a mobile home creates a strong and level base for your flooring. This step improves durability and prevents damage from moisture or movement. Proper installation of plywood panels ensures the floor feels solid and safe underfoot. The process requires careful planning and attention to detail for best results.
Panel Placement Strategies
Start by choosing the right plywood thickness, typically 3/4 inch for mobile home floors. Lay panels perpendicular to the floor joists. This adds strength and distributes weight evenly. Use full sheets as much as possible to reduce seams and weak points.
- Begin at one corner of the room and work outward.
- Stagger joints between rows, like bricks in a wall.
- Avoid lining up seams on adjacent rows.
- Cut panels to fit around obstacles like pipes or vents.
Maintain a clean workspace to keep dust and debris away from the panels. This helps panels lay flat and adhere properly to the subfloor. Use construction adhesive for extra hold before screwing panels down. Secure panels with screws every 6 to 8 inches along joists to prevent movement and squeaks.
Spacing And Alignment
Leave a small gap between plywood panels to allow for expansion and contraction. Mobile homes experience temperature and humidity changes, causing wood to swell or shrink. Without proper spacing, panels may buckle or warp over time.
- Leave a 1/8-inch gap between each panel edge.
- Use spacers or thin shims to maintain consistent gaps.
- Check alignment frequently with a straight edge or level.
Proper alignment keeps the floor smooth and prevents uneven spots. Ensure panels sit flush with no raised edges. Fasten panels firmly but avoid over-tightening screws, which can damage the plywood or cause dimples.
Securing The Plywood
Securing the plywood properly is essential when laying it over a subfloor in a mobile home. It ensures the floor stays stable, prevents squeaks, and extends the life of the flooring. Using the right fastening techniques helps the plywood stay tightly fixed to the subfloor frame. This step is crucial to avoid movement or gaps between the layers, which can cause damage or discomfort later. Properly secured plywood creates a solid base for any flooring material you plan to install on top.

Fastening Methods
Choosing the correct fastening method affects the strength and durability of the plywood installation. Two main options exist: nails and screws. Each method has pros and cons depending on the mobile home’s structure and the plywood thickness.
- Nailing: Nails are faster to install and cost less. They hold plywood firmly but may loosen over time with movement.
- Screwing: Screws provide a stronger hold and reduce the chance of the plywood lifting or squeaking.
Using a combination of both can balance speed and strength. For example, nails might secure most of the plywood, with screws added at key points for extra grip.
Spacing is vital for fasteners. Follow this guide for best results:
| Location | Fastener Spacing |
| Edges of Plywood Sheets | 6 inches apart |
| Field (Center Area) | 12 inches apart |
Fasteners should be driven flush with the plywood surface to avoid uneven flooring. Countersinking tools can help achieve a smooth finish. Avoid overdriving fasteners, which can weaken the hold.
Screw And Nail Types
Selecting the right screw or nail type is critical for a secure plywood installation. Mobile homes often face movement and vibrations, so fasteners must resist loosening.
Recommended Fastener Types:
- Ring-Shank Nails: These nails have ridges that grip the wood tightly, reducing pull-out risk.
- Coated Screws: Screws with corrosion-resistant coatings prevent rust and last longer.
- Deck Screws: Designed for outdoor use, these screws are strong and durable for subfloor applications.
Here is a comparison table of common screw and nail types:
| Fastener | Material | Advantages | Best Use |
| Ring-Shank Nails | Steel, coated | Strong grip, resists pull-out | General plywood fastening |
| Coated Screws | Steel, corrosion-resistant | Long-lasting, strong hold | Areas with moisture or movement |
| Deck Screws | Stainless or coated steel | Durable, rust-resistant | Subfloor in mobile homes |
Use screws or nails at least 1-1/4 inch long for standard 3/4 inch plywood. Shorter fasteners may not hold well. Pre-drilling screw holes can prevent plywood splitting, especially near edges.
Addressing Moisture Issues
Laying plywood over the subfloor in a mobile home requires careful attention to moisture issues. Moisture can cause wood to warp, rot, or grow mold. These problems weaken the floor and create unhealthy living conditions. Proper steps help protect the plywood and extend its life. Addressing moisture before installation is key to a strong, durable floor.
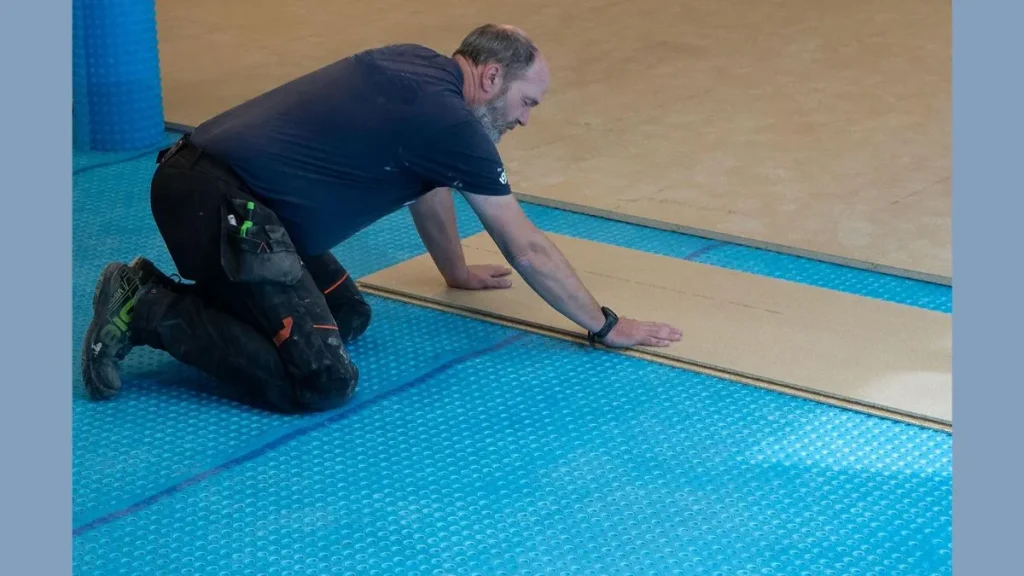
Moisture Barriers
Using moisture barriers is essential when laying plywood over the subfloor. These barriers stop water from reaching the wood, preventing damage and mold growth.
Common moisture barriers include:
- Plastic sheeting (polyethylene film): A thin, waterproof layer placed between the subfloor and plywood.
- Foam underlayment: Adds moisture protection and cushions the plywood.
- Asphalt-saturated felt paper: A traditional barrier that absorbs some moisture but mostly blocks water.
Choose a moisture barrier based on your climate and floor type. A plastic sheet works best for high-moisture areas.
| Type | Benefits | Best Use |
| Plastic Sheeting | Waterproof, inexpensive, easy to install | High moisture zones like bathrooms and kitchens |
| Foam Underlayment | Moisture resistance, sound dampening | Living areas with moderate moisture |
| Felt Paper | Absorbs moisture, blocks water | Dry areas or added moisture protection |
Lay the barrier flat and cover the entire subfloor. Overlap seams to prevent gaps. Tape the edges for a tight seal. This simple step stops moisture from damaging plywood.
Ventilation Tips
Good ventilation reduces moisture buildup under the floor. Airflow helps dry out damp areas and stops mold growth.
Follow these tips to improve ventilation in your mobile home:
- Open crawl space vents: Keep vents clear and open to allow fresh air in.
- Use vent fans: Install fans in crawl spaces or under floors to boost airflow.
- Seal gaps: Prevent moisture from outside by sealing cracks around the floor perimeter.
- Install a vapor barrier: Place a plastic sheet on the ground under the home to reduce ground moisture.
Proper ventilation keeps the subfloor dry and protects plywood. It lowers the risk of costly repairs and improves indoor air quality.
Finishing Touches
After laying plywood over the subfloor in a mobile home, the final steps are crucial for a smooth and durable finish. These finishing touches improve the floor’s look and protect it from damage. Proper sanding and sealing make the plywood ready for any flooring you want to install. Taking time on these steps helps the floor last longer and look better.
Sanding Edges
Sanding the edges of plywood sheets is important to create a flat and even surface. Rough edges can cause problems when laying flooring on top. Sanding also removes splinters and small bumps, making the floor safe to walk on.
Follow these steps for sanding edges:
- Choose the right sandpaper: Use medium-grit (80-120) sandpaper for rough edges.
- Use a sanding block or electric sander: This keeps pressure even and avoids uneven spots.
- Sand along the edges: Move the sander smoothly along the plywood seams and edges.
- Check for smoothness: Run your hand over the edges to feel any rough areas.
- Clean the dust: Use a vacuum or brush to remove dust before sealing.
Sealing And Protection
Sealing plywood is a key step to protect it from moisture and wear. Mobile homes can face humidity and temperature changes. A good seal prevents water damage and wood swelling.
Steps to seal plywood properly:
- Choose the right sealant: Use a water-based polyurethane or wood sealer made for floors.
- Apply with a brush or roller: Cover edges and surface evenly.
- Let it dry: Follow the sealant’s drying time instructions, usually a few hours.
- Apply a second coat: This adds extra protection and durability.
- Ventilate the area: Keep windows open to help drying and reduce fumes.
Use this table to compare common sealant types:
| Sealant Type | Advantages | Best For |
| Water-Based Polyurethane | Low odor, quick drying | Indoor floors in mobile homes |
| Oil-Based Polyurethane | More durable, longer drying | High-traffic areas |
| Wood Sealer | Penetrates wood, moisture barrier | Subfloors before flooring |
Sealing your plywood subfloor ensures it stays strong and moisture-resistant. This step prepares the floor for lasting performance in your mobile home.
Read Also: Adding 1/4 Plywood to Subfloor for Extra Strength
Conclusion
Laying plywood over a subfloor in a mobile home improves stability and comfort. It protects the floor from damage and helps keep the home warmer. Choosing the right plywood thickness and securing it well is important. Take your time to measure and cut carefully.
This simple step makes a big difference in your home’s feel. A strong, even floor lasts longer and looks better. Now, you can enjoy a safer and more comfortable living space.