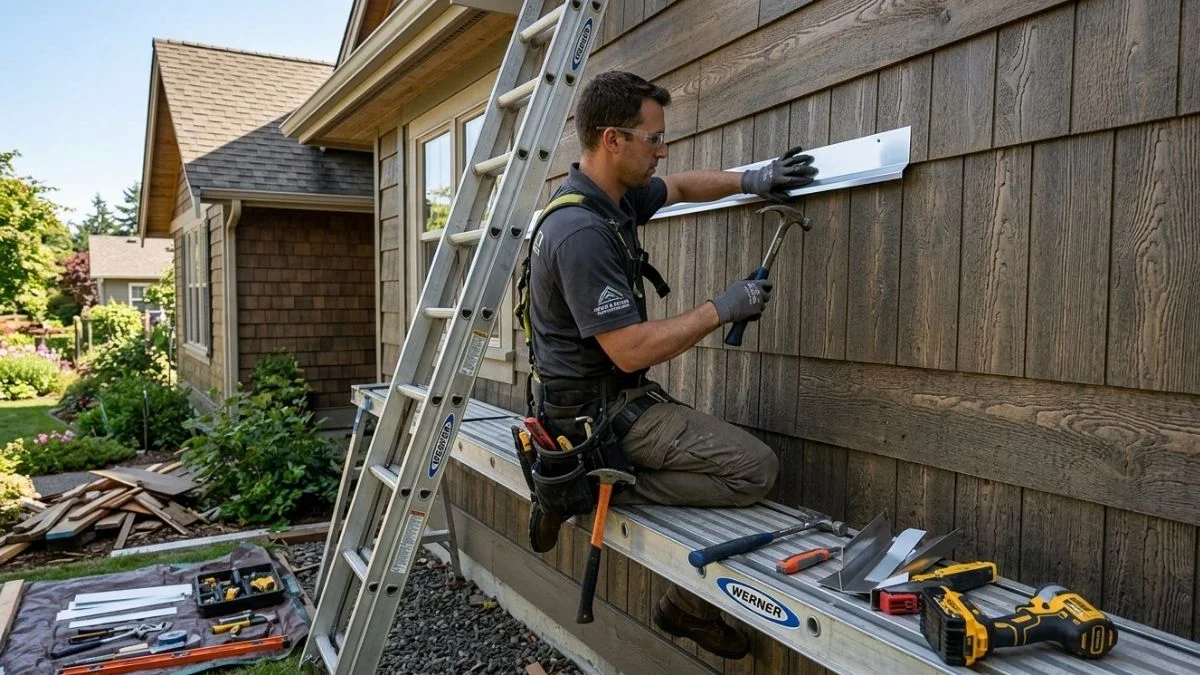
If you have T1-11 siding on your home, shed, or garage, water is your biggest enemy — and the horizontal seams between panels are where it sneaks in first. Z flashing is the simple, affordable solution that keeps moisture out and your siding looking solid for decades. The problem is, most homeowners either skip it entirely or install it the wrong way, and by the time they notice the damage, they’re looking at rotted wood, mold, and expensive repairs.
This guide walks you through exactly how to install Z flashing on T1-11 siding the right way — from picking the right materials to the final inspection. No fluff, no guesswork.
What Is Z Flashing and Why Does T1-11 Siding Need It?

Z flashing is a thin strip of metal or vinyl bent into a Z-shape. That shape is the whole secret — one leg tucks behind the upper siding panel, the flat middle covers the seam, and the lower leg laps over the top edge of the bottom panel. When rain hits the wall, water runs down the face of the siding, hits the flashing, and sheds outward and away from the wall instead of seeping into the joint.
T1-11 siding is a popular choice for outbuildings, sheds, garages, and even full homes because it’s durable, affordable, and has a clean appearance. But it comes in panels — typically 4×8 or 4×9 feet — and whenever you have stacked panels, you have a horizontal seam. Without flashing, that seam is an open invitation for water to work its way behind the siding, sit against the sheathing and framing, and start the slow process of rot and mold.
It’s not a question of whether water will get in — it’s when. Homes without properly flashed seams often show water damage within just two to three years, especially in regions with heavy rainfall or freeze-thaw cycles.
Z flashing comes in aluminum, galvanized steel, and vinyl. Aluminum is lightweight, rust-proof, and the most common choice for residential projects. Galvanized steel is slightly heavier and more rigid, which makes it easier to handle in longer runs. Vinyl is the easiest to cut but has the shortest lifespan of the three. For most homeowners tackling a DIY project, aluminum Z flashing in a 1-inch or 1.5-inch width is the go-to option.
Tools and Materials You’ll Need Before You Start

Getting your materials together before you climb the ladder saves time and prevents mistakes. Here’s a complete list of what you’ll need:
Tools:
- Tape measure and pencil
- Tin snips or aviation snips (for cutting metal flashing)
- Caulking gun
- Hammer or nail gun
- Pry bar (if removing existing panels)
- 4-foot level
- Safety gloves and eye protection
Materials:
- Z flashing strips (correct width for your panel thickness)
- Exterior-grade polyurethane or silicone caulk
- Galvanized roofing nails or corrosion-resistant screws
- House wrap or building paper (if re-flashing over bare sheathing)
- Exterior touch-up paint or stain
One thing worth spending extra time on is choosing the right flashing width. The flashing needs to cover the full thickness of your T1-11 panel — typically 19/32 inch — plus enough to lap over the bottom panel by at least 1 inch. When in doubt, go a size wider. A flashing that’s too narrow won’t shed water effectively, no matter how perfectly it’s installed.
How to Install Z Flashing on T1-11 Siding — Step by Step

Prepare the Work Area
Before you touch the flashing, inspect the seam area carefully. Look for soft spots in the wood, discoloration, or existing mold. If you find rot, you need to address that first — installing new flashing over rotted wood just traps the problem underneath.
If you’re replacing old flashing, use a pry bar to carefully remove the upper panel, pull out the old flashing, and scrape away any dried caulk or debris from the seam. Give the area time to dry completely before moving forward. Installing flashing over damp wood is one of the most common reasons DIY flashing jobs fail within a few seasons.
Measure and Cut Your Z Flashing
Measure the full width of the wall section you’re flashing, wall-to-wall or corner-to-corner. Cut your flashing to match, using tin snips for clean cuts. Always cut with the Z flashing face-up so the lower leg doesn’t buckle.
When you have a long wall that needs more than one piece of flashing, plan your overlaps in advance. Each piece should overlap the next by a minimum of 2 inches, and the overlap should always run in the direction that water flows — meaning the uphill or upstream piece goes on top. This is the same principle roofers use with shingles.
At corners, cut a small notch in the lower leg of the flashing so it bends neatly without bunching. A clean corner is the difference between a professional-looking job and one that leaks.
Apply House Wrap If Needed
If you’re working on a new installation or the old house wrap is damaged, this is the time to address it. Roll the house wrap horizontally, overlapping each course by at least 6 inches, with the upper course always lapping over the lower course. Staple it every 12 to 16 inches along the top edge. This layer adds an extra line of defense even if water gets past the flashing.
If the existing house wrap is in good condition, leave it in place. No need to tear out what’s working.
Position and Secure the Z Flashing
This step is where most DIYers make their biggest mistake, so pay close attention to the positioning.
The upper leg of the Z flashing goes behind the upper siding panel — tucked between the panel and the house wrap or sheathing. The flat middle section covers the horizontal seam. The lower leg laps over the top face of the bottom panel by at least 1 inch.
Once positioned, nail or screw through the upper leg into the sheathing. Space your fasteners every 12 to 16 inches across the full run. Use galvanized or stainless fasteners to prevent rust staining. Be careful not to over-drive the nails — if you dent the flashing, you create low spots where water can pond instead of drain.
Check with a level as you go. Flashing that dips even slightly in one spot can channel water sideways toward a corner instead of off the wall.
Seal the Top Edge Only
Here’s the rule that catches a lot of homeowners off guard: seal the top edge of the Z flashing, but never the bottom.
Run a clean bead of exterior-grade caulk along the top edge where the flashing meets the upper siding panel. This prevents water from sneaking in behind the flashing from above. But the bottom edge — where the flashing laps over the lower panel — must stay open. That open gap is how water exits the system. If you caulk it shut, you trap any moisture that does get behind the flashing, and now you’ve created a worse problem than you started with.
Use a silicone or polyurethane exterior caulk, not an interior latex product. Exterior caulk stays flexible through temperature swings, which means it won’t crack and gap over time the way interior products do.
Reinstall the Upper Siding Panel
Fit the upper T1-11 panel back into position, making sure its bottom edge overlaps the front face of the flashing by at least half an inch. Nail it into the studs following the manufacturer’s nailing pattern — typically every 6 to 8 inches along the edges and 12 inches in the field.
Check for alignment and level before driving every nail. Once the panel is fully nailed, there’s no easy way to shift it without causing damage.
Final Inspection and Touch-Up
Stand back and look at the full run of flashing. The bottom leg should be visible, consistent, and angled slightly outward so water runs off rather than sitting on top. There should be no visible gaps at the overlaps or corners.
Do a simple water test — run a garden hose along the seam for a few minutes and then check inside the wall cavity for any signs of moisture. It’s much easier to catch a problem now than after the siding is painted and the scaffolding is down.
Touch up any exposed wood edges at the seam with exterior paint or stain to seal the grain and protect against moisture absorption.
Common Mistakes to Avoid

| Mistake | Why It’s a Problem | The Fix |
| Caulking the bottom edge | Traps water behind flashing | Leave the bottom open always |
| Undersized flashing | Doesn’t cover the full seam | Measure panel thickness first |
| No overlap at joints | Water enters at the gap | Minimum 2-inch overlap, upper piece on top |
| Using interior caulk | Cracks and gaps within one season | Use exterior-grade silicone or polyurethane |
| Skipping the level check | Creates low spots that pond water | Check level every few feet across the run |
How Long Does Z Flashing Last?
The lifespan of your Z flashing depends almost entirely on the material you choose. Aluminum lasts 20 to 30 years and is the best value for most homeowners. Galvanized steel runs 15 to 25 years but can rust at cut edges if not painted. Vinyl is the easiest to install but typically needs replacement after 10 to 20 years, especially in climates with UV exposure or extreme temperature swings.
Annual inspection is the best way to extend the life of any flashing. Each spring, walk the perimeter of your home and look for signs of separation, rust streaks, or paint bubbling near the siding seams. Catching a small caulk crack early costs you 10 minutes and a tube of caulk. Missing it can cost you several thousand dollars in rot repair.
DIY vs. Hiring a Pro — Cost Breakdown

For a single-story home or shed, Z flashing installation is a manageable DIY project for anyone comfortable with basic carpentry. The material costs are low — typically $1 to $3 per linear foot for aluminum flashing, plus caulk and fasteners. A full 40-foot wall might run $60 to $120 in materials.
If you hire a contractor, expect to pay $3 to $8 per linear foot in labor, depending on your region and the complexity of the job. For multi-story homes or cases where significant rot repair is involved, professional help is often worth every dollar. Working at height with flashing, caulk, and siding panels is a job where an extra set of hands and proper staging equipment makes a real difference in both safety and quality.
Conclusion
Installing Z flashing on T1-11 siding isn’t a complicated job, but it’s one of the most important things you can do to protect your home’s exterior from water damage. The key points are simple: use the right size flashing, overlap joints correctly, seal only the top edge, and never leave a horizontal seam unflashed.
Take an afternoon to walk your siding and check every seam. If you spot a gap, a rusted strip, or dried-out caulk, get it addressed before the next rainy season. The cost of prevention is always a fraction of the cost of repair.